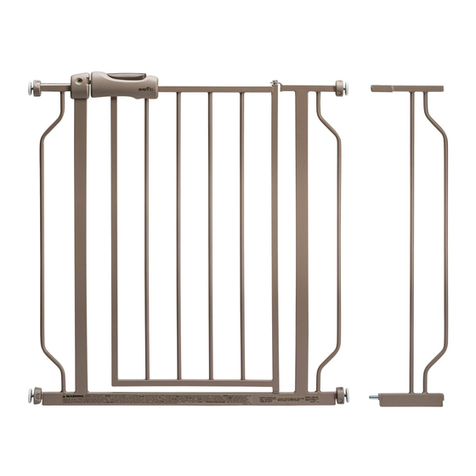
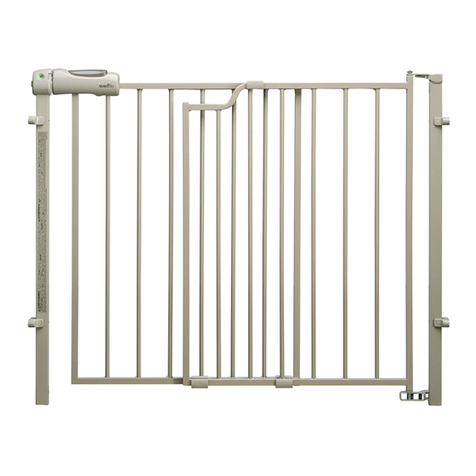
Evenflo Top-of-Stairs Gate User manual

25701362 3/17© 2017 EVENFLO COMPANY, INC.
Read all instructions BEFORE assembly and USE of product.
KEEP INSTRUCTIONS FOR FUTURE USE.
Lire les instructions AVANT l’assemblage et L’ UTILISATION du produit.
CONSERVER CES INSTRUCTIONS POUR RÉFÉRENCE ULTÉRIOR.
Lea las instrucciones ANTES de armar y USAR el producto.
GUARDE ESTAS INSTRUCCIONES PARA REFERENCIA FUTURA.
PASSAGE
Barrière de passage pour
le haut d’un escalier
REJA DE ACCESO
Reja para la parte superior de
las escaleras
Fits openings between
30 inches (76 cm) and 48 inches (122 cm) wide
Convient aux ouvertures de
76 à 122 cm (30 à 48 po) de largeur
Para aberturas entre
76 cm (30 pulg) y 122 cm (48 pulg) de ancho
To p-of-Stairs Gate
TM
Walk-Thru

1
IMPORTANT:
• DO NOT attempt to mount the brackets into uneven molding or wall base board trim, as the
gate will not function properly.
• DO NOT mount the gate less than 2” (5 cm) or more than 3” (7.62 cm) above the floor.
Make sure the mounting template is in a straight
vertical position.
1. Using adhesive tape, attach the mounting template on the solid wood surface that you
have chosen for the hinged side of the gate.
2. Drill four 1/8” (3 mm) diameter starter holes into the mounting surface at the crosshatch
marks on the template.
3. Remove the template from the wall.
4. Drill each hole to a depth of 2” (5 cm).
5. Using hinge screws, screw the two hinge brackets Ainto the mounting surface with
the tabbed edge down. Tighten the screws until the hinge brackets are securely
fastened to the mounting surface.
An electric drill with 1/8” drill bit, Phillips screwdriver, pencil, and adhesive tape. Use a handheld Phillips screwdriver when
installing screws. Note: If you are missing parts, visit us at www.evenflo.com or call ParentLink at 1-800-233-5921.
Contents of Hardware Bag
(8) Long Hinge Screws
(1) Paper Mounting Template
(2) Hinge Plates
(2) Latch Housings
(1) Swing Stop
(2) #10 x 1/2” Screws
A
A
B
D
C
TOO low! Less than 2” (5 cm). TOO HIGH! More than 3” (7.62 cm).
Latch Mechanism
Gate Panels
Latch
Housings
Hinge
Brackets
WARNING IMPORTANT:
1. Inspect both gate panels to be certain that the slats are securely attached to the rails. If any slats are loose or damaged, call
Evenflo Parentlink at 1-800-233-5921.
2. You can use this gate at the top or bottom of stairs ONLY if:
• The gate is mounted over the floor at the top or bottom of a stairwell.
• The gate is mounted into a solid wood structure, e.g. wooden doorway jamb, solid wood banister post, or wall stud behind
drywall.
• The gate is installed according to these instructions, using the screws and hardware provided.
• The stairwell allows the gate to be mounted less than 3” (7.62 cm) above the floor.
To prevent serious injury or death, securely install gate and use according to
manufacturer’s instructions and warnings, including the following:
Before You Start
Installation
6. Slide the hinge side of the gate Bdown through both hinges Auntil it is securely
seated.
7. Squeeze the latch mechanism Cand slide the upper latch housing Dover the latch
mechanism until it snaps into place.
Tools Required
Top Rail
Bottom Rail
Slats
Know Your Gate
Gate Panel Installed Gate
• NEVER use with a child or pet able to climb over, dislodge, or open the gate.
• NEVER leave child unattended.
• NEVER use to keep child away from pool.
• Intended for use ONLY with children from 6 months through 24 months.
• To ensure proper fit, use ONLY in openings between 30” (76 cm) and 48” (122 cm) wide.
• To help prevent entrapment, DO NOT allow space between bottom of gate and floor to exceed 3” (7.62 cm).
• Use ONLY with locking/latching mechanism securely engaged to help prevent dislodging.
• Use in doorways with wooden frames. When installing against drywall, make sure mounting surface is reinforced with
a wall stud to help prevent damage.
• To help prevent falls, DO NOT attempt to step over gate.
• STOP using gate if any parts are missing or damaged to help ensure proper gate function.
• Periodically check all fasteners to be sure they are tight and secure to help prevent gate from dislodging.
• This gate will NOT necessarily prevent all accidents.
• PET STRANGULATION HAZARD – Pets can force themselves into very small openings. Use this gate only with pets
whose head or body WILL NOT fit into openings in the gate, between the gate and the floor, or between the gate
and the wall.
• www.evenflo.com • USA: 1-800-233-5921, 8 AM – 5 PM E.T.
• Canada: 1-937-773-3971 • México: 01-800-706-12-00
WARNING WARNING

32
D
C
A
E
To open gate:
• Squeeze the latch Aupward to unlock;
• Slide the gate in the direction of the arrow to disengage from
the upper latch housing Band lower latch housing C;
• Swing gate open.
IMPORTANT: The end of the bottom rail Eis slightly longer than
the top rail D. Before attempting to swing the gate open, make sure
the bottom rail is disengaged.
8. Swing the gate into the closed position and slide the gate panels until the gate contacts
the latch side of the mounting surface.
9. Making sure that the top of the gate is level with the floor, using a pencil E, carefully
mark the position for the holes for the latch housing D.
10. Swing the gate out of the way, and remove the latch housing.
Installation
11. Drill holes as in Step 4. Using the correct screws (see Step 5), secure the upper latch
housing to the mounting surface.
12. Slide the lower latch housing over the lower gate rail.
13. Using a pencil, carefully mark the position for the holes of the lower latch housing.
14. Open and swing the gate out of the way. Remove the lower latch housing from the rail.
15. Drill holes as in Step 4. Using the correct screws (see Step 5), secure the lower latch
housing to the mounting surface.
16. To close gate, place the lower rail into the lower latch housing, while squeezing the
latch C, insert it into the upper latch housing D.
17. Test the gate:
• Check that each slat is securely attached to the top and bottom rails.
• Shake the gate assembly at the top rail to be certain it is securely installed. •Wash gate with mild soap and warm water and dry thoroughly before using.
•Metal and plastic parts can be wiped clean with a soft, damp cloth and dried with a soft cloth. DO NOT use abrasive cleaners
or solvents.
•An occasional drop of vegetable oil may reduce wear and tear on moving parts.
Care and Maintenance
Limited Warranty
For a period of 90 days from the original purchase of this Product, Evenflo warrants to the original end user (“Purchaser”) this
Product (including any accessories) against defects in material or workmanship. Evenflo’s sole obligation under this express
limited warranty shall be, at Evenflo’s option, to repair or replace any Product that is determined to be defective by Evenflo and
determined to be covered by this warranty.
Repair or replacement as provided under this warranty is the exclusive remedy of the Purchaser. Proof of purchase in the form of
a receipted invoice or bill of sale evidencing that the Product is within the warranty period must be presented to obtain warranty
service. This express limited warranty is extended by Evenflo ONLY to the original Purchaser of the Product and is not assignable
or transferable to subsequent purchasers or end users of the Product. For warranty service, contact Evenflo’s ParentLink Consumer
Resource Center at (800) 233- 5921 or www.evenflo.com.
EXCEPT TO THE EXTENT PROHIBITED BY APPLICABLE LAW, ANY IMPLIED WARRANTY OF MERCHANTABILITY OR FITNESS FOR
A PARTICULAR PURPOSE ON THIS PRODUCT IS HEREBY DISCLAIMED. EVENFLO SHALL NOT BE LIABLE FOR ANY INCIDENTAL,
CONSEQUENTIAL, SPECIAL OR PUNITIVE DAMAGES OF ANY KIND FOR BREACH OF THE EXPRESS LIMITED WARRANTY ON THIS
PRODUCT, OR ANY WARRANTY IMPLIED BY OPERATION OF LAW. OTHER THAN THE EXPRESS LIMITED WARRANTY SET FORTH
ABOVE, THERE ARE NO OTHER WARRANTIES THAT ACCOMPANY THIS PRODUCT AND ANY ORAL, WRITTEN OR ANY OTHER
EXPRESS REPRESENTATION OF ANY KIND IS HEREBY DISCLAIMED.
Gate Operation
#10 x 1/2” Screws
The optional swing control mechanism provides extra security.
We recommend the swing control mechanism be used to prevent
the gate from swinging into a hazard such as over stairs or into a
heavy traffic area.
1. Mount the gate according to instructions.
2. Determine the direction you want to prevent the gate from
swinging.
3. Attach the swing stop Ato the top rail Bwith the solid
surface of the swing stop toward the direction of the hazard,
i.e. the direction you want to prevent the gate from swinging.
4. The optional swing control mechanism should not be used in
place of the latching mechanisms. It is not intended to latch or
close the gate.
Always keep the latching mechanism securely engaged when
using the gate. Remove the gate from opening when not in use.
A
B
Optional Swing Control
B
C
D
E
• www.evenflo.com • USA: 1-800-233-5921, 8 AM – 5 PM E.T.
• Canada: 1-937-773-3971 • México: 01-800-706-12-00

Contenu du sac de quincaillerie :
(8) Vis à charnière, longues
(1) modèle de montage en papier
(2) Plaques de charnière
(2) Bo
î
tier du verrou
(1) Contrôle d’arrêt
(2) Vis #10 x 1/2 po
5
4
IMPORTANT :
• NE PAS tenter d’installer sel supports dans des moulures ou plinthes murales irrégulières, car la
barrière ne fonctionnera pas correctement.
• NE PAS installer la barrière à moins de 5 cm (2 po) ou à plus de 7,62 cm (3 po) au-dessus du
plancher. Assurez-vous que le modèle d’assemblage est en position verticale droite.
1. A l’aide de ruban adhésif, fixer le modèle d’assemblage à la surface de bois massif que
vous avez choisi pour y placer le côté monté sur charnières de la barrière.
2. Percer quatre trous d’amorce de 3 cm (1/8 po) de diamètre dans la surface de montage,
au centre des marques sur le modèle.
3. Retirer le modèle du mur.
4. Percer chaque trou à une profondeur de 5 cm (2 po).
5. En utilisant les vis de charnière, visser les deux (2) supports de charnière Adans la
surface de montage en mettant le côté à rebord vers le bas. Serrer les vis jusqu’à ce
que les supports de charnière soient bien attachés à la surface de montage.
IMPORTANT :
1. Inspecter les deux panneaux de la barrière pour s’assurer que les barreaux sont bien fixés aux barres. Si un barreau n’est pas
bien fixé ou s’il est endommagé, appeler le « ParentLink » d’Evenflo au 1-937-773-3971.
2. Vous pouvez utiliser votre barrière dans le haut ou le bas d’un escalier, UNIQUEMENT si:
• La barrière est installée sur le plancher du haut ou du bas d’une cage d’escalier.
• La barrière est fixée à une structure en bois massif. Par exemple: une embrasure de porte en bois, un poteau de rampe
d’escalier en bois massif ou, un montand de mur derrière un panneau de gypse.
• La barrière est installée selon ces instructions, à l’aide des vis et de la quincasillerie qui sont fournis.
• La cage d’escalier permet d’installer la barrière à moins de 7,62 cm (3 po) au-duss du plancher.
Avant de Commencer
Installation
6. Faire glisser le côté à charnière de la barrière Bdans les charnières jusqu’à ce
qu’il soit bien logé.
7. Presser le mécanisme de verrouillage Cet faire glisser le logement du verrouillage D
supérieur par-dessus le mécanisme de verrouillage jusqu’à ce qu’il s’enclenche.
AVERTISSEMENT
TROP bas ! Plus de 5 cm (2 po). TROP HAUT ! Plus de 7,62 cm (3 po).
Une perceuse électrique avec une mèche de 3 mm (1/8 po), tournevis cruciforme (Phillips), crayon et ruban adhésif. Utilisez un
tournevis cruciforme, tenu dans la main en installant les vis. Remarque : Si des pièces manquent,
visitez à www.evenflo.com, ou
appeler le « ParentLink » au 1-937-773-3971.
Outils Necessaires
A
A
B
D
C
Mécanisme de verrouillage
Panneaux de barrière
Bo
î
tier du
verrou
Supports de
charnière
Barre supérieure
Barre inférieure
Barreaux
Panneau de barrière Barrière montée
Familiarisation avec la barrière
Pour éviter des blessures graves voire mortelles, bien installer la barrière et l’utiliser conformément aux
instructions et avertissements du fabricant y compris ce qui suit :
• NE JAMAIS utiliser pour un enfant ou un animal de compagnie capable de grimper par-dessus la barrière, de la déloger ou de
l’ouvrir.
• NE JAMAIS laisser l’enfant sans surveillance.
• NE JAMAIS utiliser pour garder l’enfant à l’écart de la piscine.
• Destinée être utilisée UNIQUEMENT avec des enfants âgés de 6 à 24 mois.
• Afin d’assurer un réglage correct, l’installer UNIQUEMENT dans des ouvertures de 76 cm (30 po) à 122 cm (48 po) de large.
• Pour éviter le coincement, l’espace entre la partie inférieure de la barrière et le sol NE DOIT PAS être supérieur à 7,62 cm (3 po).
• Pour empêcher son déverrouillage, l’installer afin que le mécanisme de verrouillage soit du côté opposé à l’enfant.
• Utiliser dans des chambranles de porte en bois. Lorsqu’elle est montée contre des cloisons sèches, veiller à ce que la surface de
montage soit renforcée par un montant mural.
• Pour éviter les chutes, NE PAS essayer d’enjamber la barrière.
• CESSER d’utiliser la barrière si des pièces manquent ou sont endommagées afin d’assurer son fonctionnement correct.
• Examiner périodiquement toutes les attaches afin de s’assurer qu’elles sont bien serrées et fixées et empêcher que la barrière ne se
déloge.
• Cette barrière N’empêche PAS nécessairement tous les accidents
•DANGER DE STRANGULATION POUR LES ANIMAUX DOMESTIQUES –
Les animaux domestiques peuvent se faufiler par de très petites ouvertures. Utiliser exclusivement cette barrière pour des animaux
domestiques dont la tête ou le corps NE PASSENT PAS par les ouvertures de la barrière, entre la barrière et le sol ou entre la
barrière et le mur.
• www.evenflo.com • Canada: 1-937-773-3971 8 h à 17 h, heure normale de l’Est
• USA: 1-800-233-5921
AVERTISSEMENT AVERTISSEMENT

D
C
E
76
Vis #10 x 1/2 po
Le mécanisme optionnel contrôle d’ourverture fournit une sécurité
supplémentaire. Nous recommandons que le mécanisme se contrôle
d’ouverture soit utilisé afin d’empêcher la barrière de s’ouvrir
dangereusement, soit vers un escalier ou vers une zone à circulation
intense.
1. Installer la barrière selon les instructions.
2. Déterminer dans quel sens vous souhaitez empêcher la barrière
de s’ouvrir.
3. Fixer le contrôle d’arrêt Aau guide supérieur B, avec l’aplat du
contrôle d’arrêt orienté du côté ou se situe le dange (le sens dans
lequel vous souhaitez empêcher la barrière se s’ouvrir).
4. Le mécanisme optionnel de contrôle d’ouverture ne devrait pas
être utilisé en remplacement du mécanisme de verrouillage. Non
conçu pour verrouiller ou fermer la barrière.
Garder toujours le mécanisme de verrouillage solidement engagé
lorsque la barrière est utilisée. Retirer la barrière de l’ouverture
lorsqu’elle n’est pas utilisée.
A
B
8. Amener la barrière en position fermée et glisser les panneaux de barrière, jusqu’a ce
que la barrière touche le côté verrou de la surface de montage.
9. Assurez-vous que le haut de la barrière est de niveau avec le plancher, utiliser un crayon E
pour marquer soigneusement l’emplacement des trous pour le bo
î
tier du verrou D.
10. Déplacer la barrière pour qu’elle n’obstrue pas et enlever le bo
î
tier du verrou.
Installation
11. Percer les trous tel qu’indiqué a l’étape 4. A l’aide des bonnes vis (voir Étape 5), fixer
solidement le boîtier du verrou supérieur à la surface de montage.
12. Glisser le boîtier du verrou inférieur par-dessus le guide inférieur de la barrière.
13. A l’aide d’un crayon, marque soigneusement l’emplacement des trous pour boîtier du
verrou inférieur.
14. Ouvrir et déplacer la barrière pour qu’elle n’obstrue pas. Enlever le boîtier du verrou
inférieur du guide.
15. Percer les trous tel qu’indiqué a l’étape 4. A l’aide des bonnes vis (voir Étape 5), fixer
solidement le boîtier du verrou inférieur à la surface de montage.
16. Pour fermer la barrière, placer le guide inférieur dans le boîtier du verrou inférieur.
Tout en pressant le verrou C, insérez-le dans le boîtier du verrou supérieur D.
17. Tester la barrière :
•Vérifier que chaque barreau est bien fixé aux barres supérieure et inférieure.
•Secouer la barre supérieure de la barrière assemblée pour vérifier que celle-ci est
montée en toute sécurité.
• Laver la barrière àl’eau tiède et au savon neutre. La sécher complètement avant l’usage.
• Les pièces en métal et en plastique peuvent être nettoyées avec un chiffon doux humide et séchées avec un chiffon doux. NE PAS
utiliser de détergents abrasifs ou de solvants.
• Àl’occasion, une goutte d’huile végétale peut réduire l’usure des pièces mobiles.
Entretien et nettoyage
Garantie Limitée
Evenflo garantit ce Produit (y compris les accessoires) à l’utilisateur final d’origine (« Acheteur ») contre tout défaut de matériau
ou de fabrication pour une période de quatre-vingt-dix (90) jours à partir de la date de l’achat initial de ce produit. La seule
responsabilité d’Evenflo sous les termes de cette garantie explicite limitée est de réparer ou de remplacer, à sa discrétion, tout
Produit qu’il jugera être défectueux et qui sera déterminé par Evenflo être couvert sous les termes de cette garantie.
La réparation ou le remplacement sous les termes de cette garantie est le seul recours de l’Acheteur. La preuve d’achat sous la
forme d’une facture ou d’un contrat de vente, prouvant que le produit est toujours sous la période de garantie, doit être fournie
pour obtenir le service de garantie. Cette garantie explicite limitée est accordée EXCLUSIVEMENT par Evenflo à l’Acheteur initial de
ce Produit et ne peut être attribuée, ni transférée aux acheteurs ou utilisateurs ultérieurs de ce Produit. Pour le service de garantie,
veuillez contacter le centre « ParentLink Consumer Resource Center » d’Evenflo au 937-773-3971 ou www.evenflo.com.
À L’EXCEPTION DE CE QUI EST INTERDIT PAR LA LOI APPLICABLE, TOUTE GARANTIE IMPLICITE DE VALEUR COMMERCIALE OU
D’ADAPTATION À UN USAGE PARTICULIER DE CE PRODUIT EST EXCLUE. EVENFLO NE SERA PAS TENU POUR RESPONSABLE
POUR TOUS DOMMAGES ACCESSOIRES, INDIRECTS, SPÉCIAUX OU DOMMAGES-INTÉRÊTS DE QUELQUE SORTE QUE CE SOIT
POUR MANQUEMENT À TOUTE GARANTIE EXPLICITE LIMITÉE DE CE PRODUIT OU TOUTE GARANTIE IMPLICITE SOUS-ENTENDUE
PAR LA LOI. AUCUNE AUTRE GARANTIE NE COUVRE CE PRODUIT. À L’EXCEPTION DE LA GARANTIE EXPLICITE LIMITÉE
CI-PRÉSENTÉE, AUCUNE AUTRE GARANTIE NE COUVRE CE PRODUIT ET TOUTE REPRÉSENTATION ORALE, ÉCRITE OU EXPLICITE
DE QUELQUE SORTE QUE CE SOIT EST EXCLUE PAR LA PRÉSENTE.
Mécanisme optionnel de contrôle d’ouverture
Pour ouvrir la barrière :
• Presser le verrou Avers le haut pour le débloquer;
• Faire coulisser la barrière en direction de la flèche pour la
dégager du boîtier du verrou supérieur Bet du boîtier du
verrou inférieur C;
• Faire pivoter la barrière pour l’ouvrir.
IMPORTANT : L’extrémité de la barre inférieure Eest légèrement
plus longue que celle de la barre supérieure D. Avant d’essayer
d’ouvrir la barrière, s’assurer que la barre inférieure a bien été libérée.
Fonctionnement de la barrière
B
C
D
E• www.evenflo.com • Canada: 1-937-773-3971 8 h à 17 h, heure normale de l’Est
• USA: 1-800-233-5921
A
Table of contents
Languages:
Other Evenflo Indoor Furnishing manuals
Popular Indoor Furnishing manuals by other brands

Regency
Regency LWMS3015 Assembly instructions

Furniture of America
Furniture of America CM7751C Assembly instructions

Safavieh Furniture
Safavieh Furniture Estella CNS5731 manual

PLACES OF STYLE
PLACES OF STYLE Ovalfuss Assembly instruction

Trasman
Trasman 1138 Bo1 Assembly manual

Costway
Costway JV10856 manual