EVGA Z370 FTW (134-KS-E377)
- 16 -
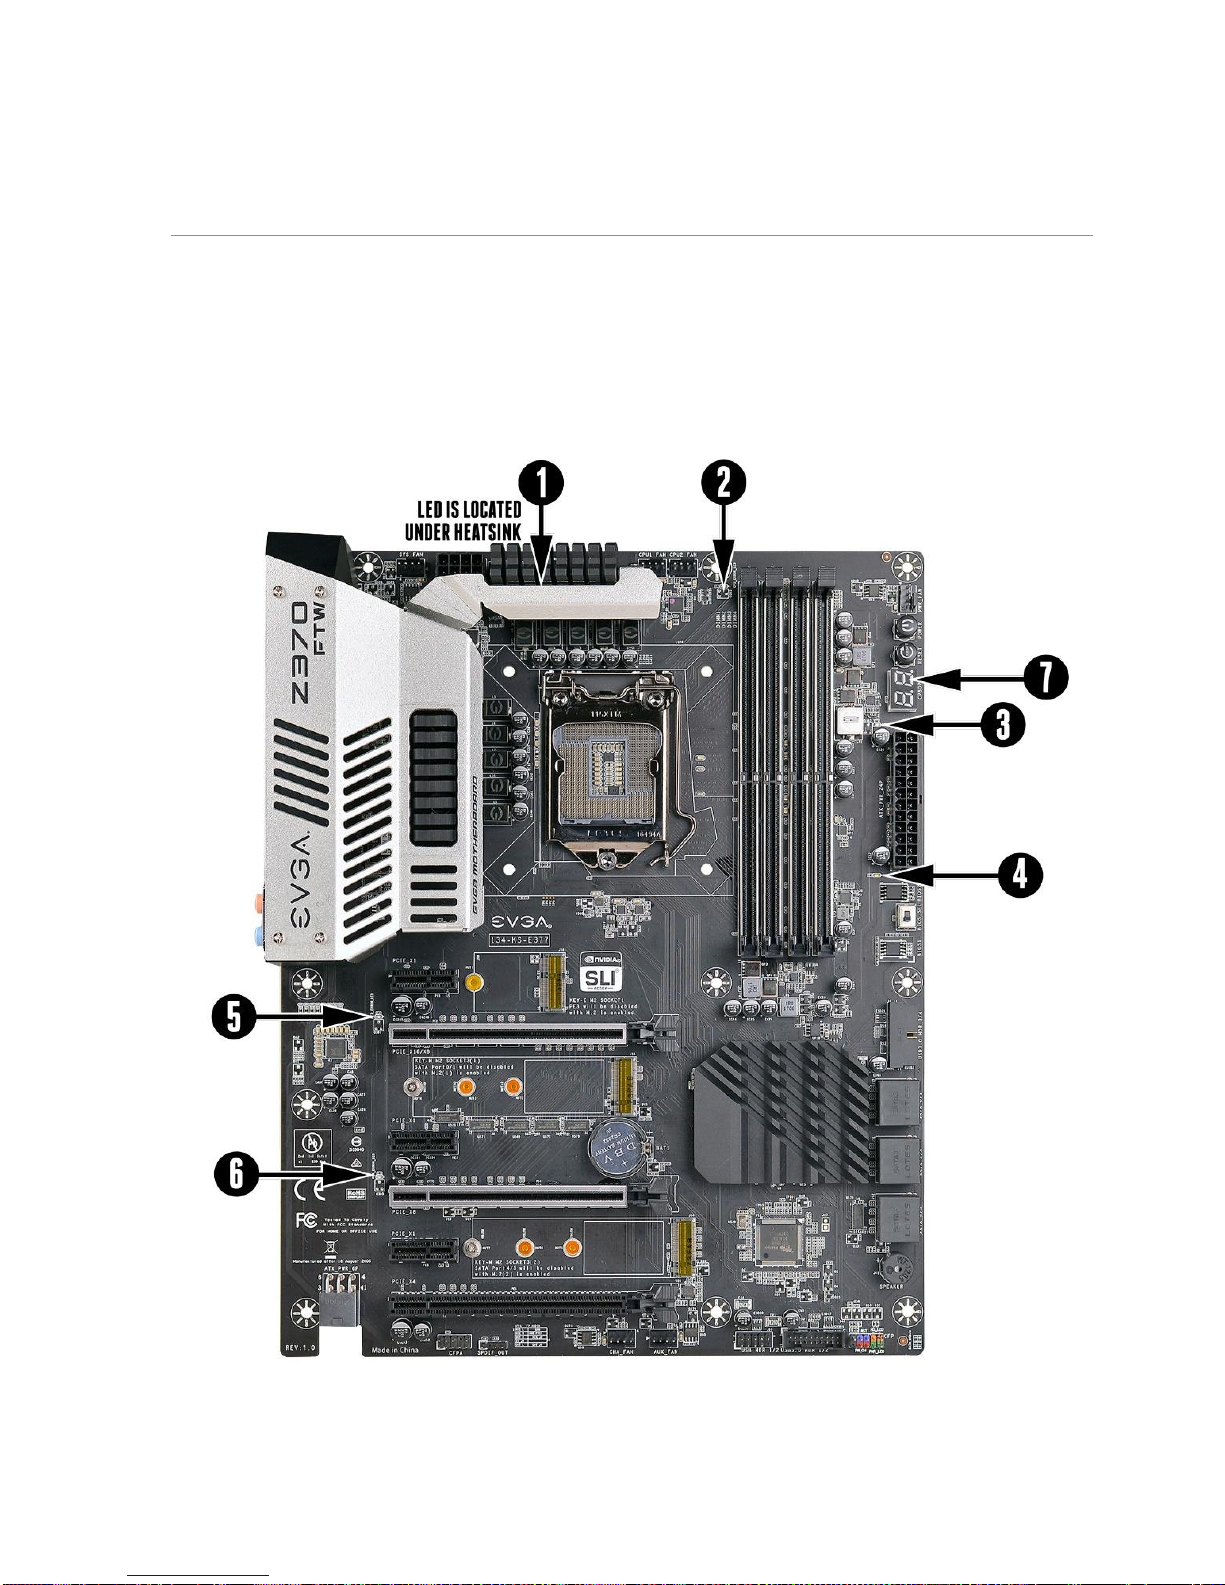
5. 24-pin ATX power connector
The main power for the motherboard is located on the right side of the board
and perpendicular to the PCB; this is also described as a “Vertical” connector
(See Page 36 for more specifics to the connector itself, and associated
wiring/pinouts). The 24-pin connector IS directional and the connector needs
the tab on the socket to line up with the release clip located on the 24-pin
connector from the power supply. This connector pulls the bulk of the power
for all components; other connectors, such as EPS, PCIe (video card AND
motherboard sides), have been added to reduce the load and increase longevity
due to wiring and trace limitations.
6. 8-pin EPS Connector
The EPS is dedicated power for the CPU (See Page 37 for more specifics to the
connector itself, and associated wiring/pinouts). Carefully choose the correct
power cable by consulting with the installation manual for your power supply.
This connector is designed to only work with an EPS or CPU cable. System
builders sometimes make the mistake of plugging in a PCIe 8-pin or 6+2-pin
connector, which will prevent the board from completing POST and possibly
short or damage the board. Although PCIe and EPS cables appear similar, they
are wired differently and attaching the wrong connector may cause damage to
the motherboard.
Alternatively, if no power cable is connected or detected, the system will not
POST and will hang at POST code “C.”
7. Supplemental PCIe 6-pin Power Connector
There is a 6-pin PCIe connector at the bottom of the motherboard (See Page 44
for more specifics to the connector itself, and associated wiring/pinouts). This
connector provides dedicated power to the PCIe x16 slots, augmenting the
power provided by the 24-pin and the GPU directly.
This is optional for a single card solution, but is recommended for SLI, CFX,
and dual-processor video cards.
8. Intel®SATA 6G Ports
The Intel®Z370 PCH has a 6-port SATA 3/6G controller (See Page 45 for
specifics on the connectors). This controller is backwards compatible with
SATA and SATA 2 devices, and supports SSDs, HDDs and various types of
optical devices (CDROM, DVDROM, BD-ROM, etc.). The controller also