EVPassport Howard 19kW User manual
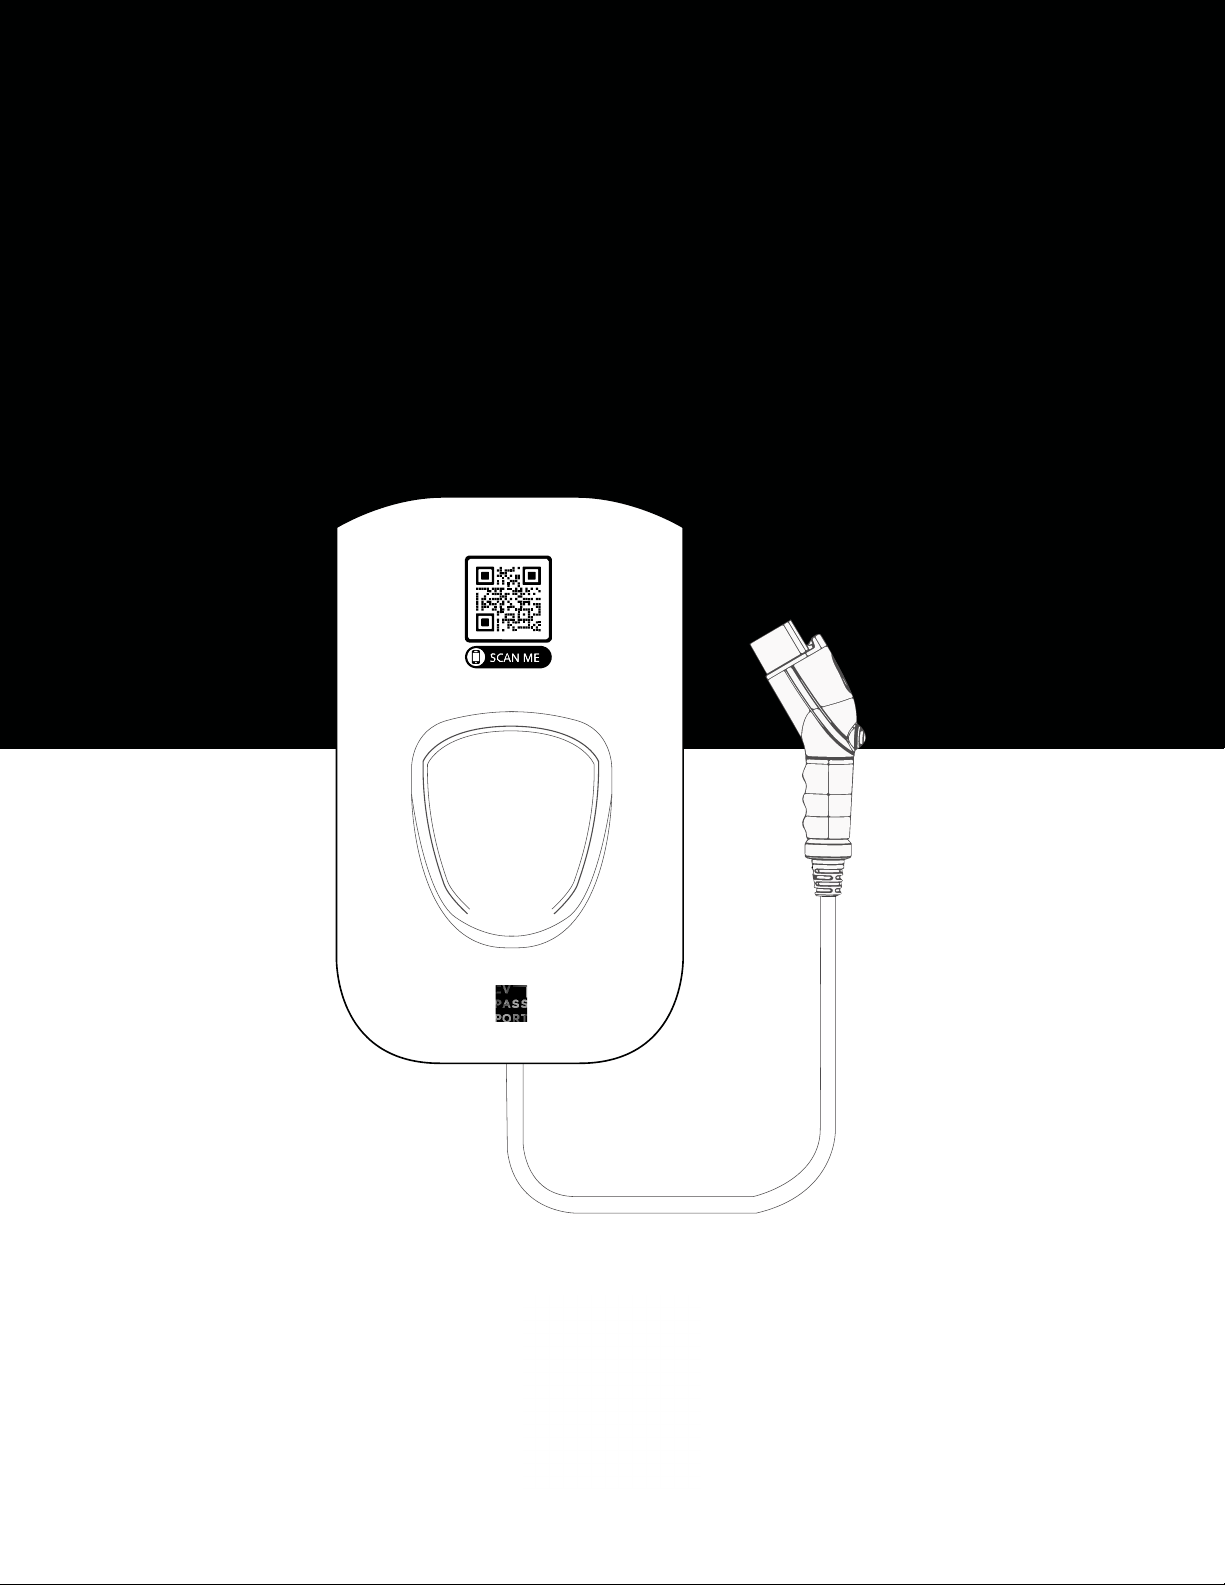
Howard 19kW
EV Charger
Installation Guide
COPYRIGHT © 2021 EVPassport, Inc.

Howard Installation Guide
2
Contents
Important Safety Instructions
Specication
Introduction
Unpacking
Preparation
Installation
3
9
11
12
12
15

Howard Installation Guide
3
Important Safety
Instructions
• Read this manual thoroughly and make sure you understand the
procedures before you attempt to install or operate this equipment.
• This product is intended for charging vehicles only.
• This product shall be installed, adjusted, and serviced by qualied
electrica personnel.
• Isolate the product from any electrical source before wiring or servic-
ing it. Failure to follow this may lead to severe bodily injury or death.
• This product shall be installed by at least two qualied electricians,
and installation must be in accordance with all applicable local and
national electrical codes and standards. Failure to observe this
warning could result in death or severe injury.

Howard Installation Guide
4
Electric Shock
Prevention Measures
Electric Fire
Prevention Measures
• Do not expose the live part of this product and its cables.
• This product must be grounded through a permanent wiring system or an equipment
gronding conductor.
• Install circuit breakers to reduce the severity of electric shock accidents.
• Limit the authorized personnel respomsible for handling switches on electrical appliances.
• Do not touch this product with wet hands.
• Be sure to use standard regulation fuses for switches and do not use copper/steel wire.
• Do not use faulty or malfunctioning cables or breakers on this product.
• The cables and wires used to install this product must satisfy local laws and regulations
• Do not share the power source of this product with other appliances.
• Keep combustible material away from the installation area of this product.
• Keep sufcient distance from any other the heat source.
• Take care not to damage or overheat the wire coating of this product and its connections.
• Install an automatic power off device in case of abnormal rises in temperature within this
product.

Howard Installation Guide
5
Warning
• The instructions and warnings contained in this manual must be followed when installing,
using, and maintaining this product.
• This device should be supervised when used around children.
• Do not put nders into the electric vehicle connector.
• Do not use this product if the exible power cord or EV cable are frayed, have broken insu-
lation, or any other signs of damage.
• Do not use this product if the enclosure or the EV connector is broken, cracked, open, or
shows any other indication of damage.
• Do not install or use the product in any environment full of ammable, explosive, harsh, or
combustible materials, chemicals, or vapors.
• Isolate the product from any power source before installing or servicing it.
• Do not use the product if it is found defective, cracked, frayed, broken or otherwise dam-
aged, or fails to operate.
• Do not attempt to open, disassemble, repair, tamper with, or modify the product. The prod-
uct is not user serviceable.
• Do not use the product when either you, the vehicle, or the product is exposed to severe
rain, snow, electrical storm or other severe weather conditions.
• When transporting the product, handle with care. Do not drag it or step on it or subject it to
any strong force.
• Do not touch the product’s terminals with sharp metallic objects.
• Do not forcefully pull the charge cable.
• Do not insert foreign objects into any part of the product.

Howard Installation Guide
6
Caution
• Incorrect installation of and testing on this product could potentially damage either the
vehicle’s battery and/or this product. Any resulting damage hereof invalids the warranty for
the product.
• Operate the product in the temperature range specied in the specication.
• Ensure that the charge cable is positioned so it will not be stepped on, tripped over, or
subjected to damage or stress.
• This product shall be connected to and form a dedicated circuit with a proper circuit
breaker that satises the local electrical requirements.
• Do not use this product if the EV Cable shows any sign of damaged insulation.
• Do not use this product if the enclosure or the EV connector shows any indication of
damage.
• The power wires connecting to this product from the circuit panel shall be routed through
an approved conduit or jacket.

Howard Installation Guide
7
FCC Declaration of
Conformity – Class A
This device complies with Part 15 of the FCC Rules. Operation is subject to the fol-
lowing two conditions: (1) This device may not cause harmful interference, and (2) this
device must accept any interference received, including interference that may cause
undesired operation.
This equipment has been tested and found to comply with the limits for a Class A digital
device, pursuant to Part 15 of the FCC Rules. These limits are designed to provide
reasonable protection against harmful interference when the equipment is operated in
a commercial environment. This equipment generates, uses, and can radiate radio fre-
quency energy and, if not installed and used in accordance with the instruction manual,
may cause harmful interference to radio communications.
Operation of this equipment in a residential area is likely to cause harmful interference
in which case users will be required to correct the interference at their own expense.
Connections between the Harmonic equipment and other equipment must be made
in a manner that is consistent with maintaining compliance with FCC radio frequency
emission limits. Modications to this equipment not expressly approved by Harmonic
may void the authority granted to the user by the FCC to operate this equipment and
you may be required to correct any interference to radio or television communications at
your own expense.

Howard Installation Guide
8
Return for Service
Save These Instructions
If you encounter operational or other problems with the charger that cannot easily be
xed, contact your local dealer. If the problem requires return for service, please follow
the dealer’s instructions for return of the product.
The purpose of this manual is to provide you with information necessary to safely install,
operate and maintain this equipment. Keep this manual for future reference.

Howard Installation Guide
9
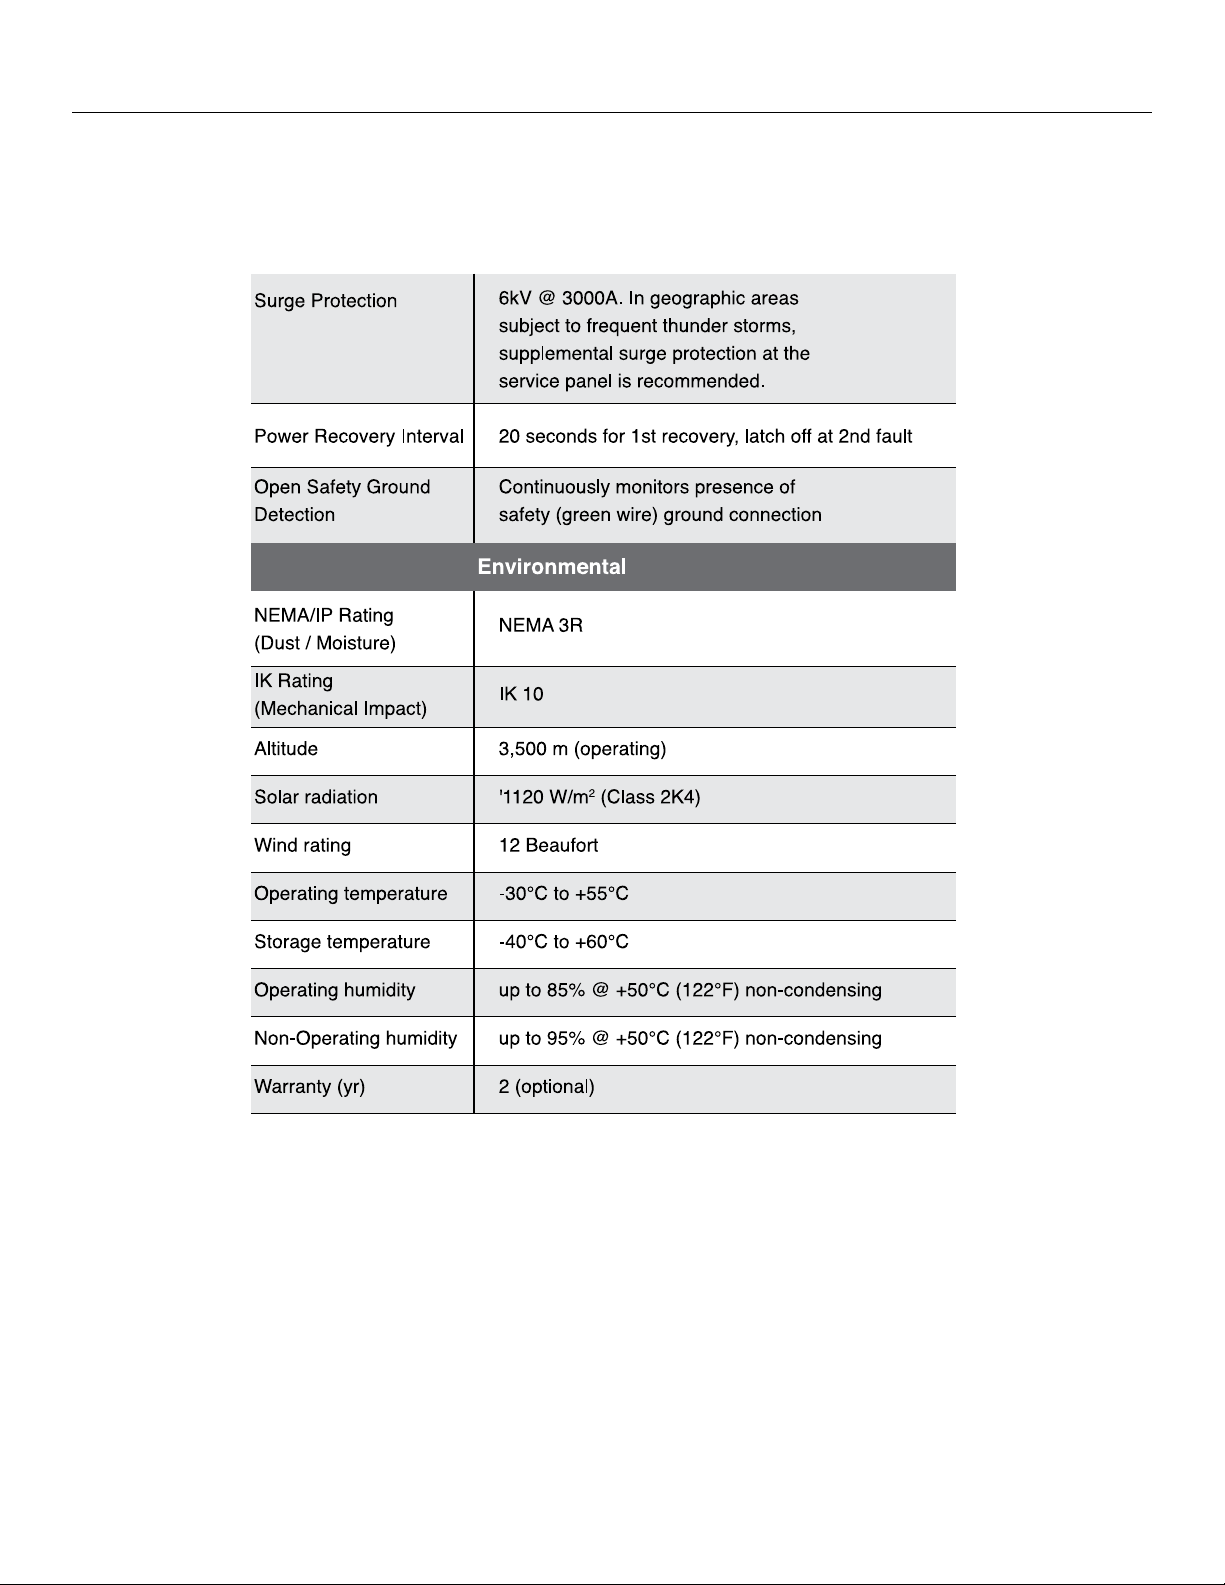
Specication
Howard Installation Guide
10
Specication

Howard Installation Guide
11
Introduction
(1) For single phase 120/240 -
Utilizing 240V (L-L)
Single phase 120/240 is a common source for AC
power to household clothes driers. It may also be
called Split Phase 240. This configuration consists of
2 voltage legs that are 180 degrees apart. The volt-
age between the two legs (called phase to phase or
line to line) is 240V and the phase to neutral voltage
is 120V. Some list the phase to phase voltage first so
it may also be called 240/120 single phase.
(2) For 3 Phase WYE Configurations:
Utilizing any of L-L
In the USA the most common configuration is
208Y/120. This indicates that line to line (L-L)
voltage is 208Vac in a WYE configuration and the line
to neutral (L-N) voltage is 120Vac. It is also some-
times designated 120/208Vac, 120/208WYE, 208/120
WYE, 4 wire WYE or 120/208Y.
Howard Installation Guide
12
LED DISPLAY
Simple, easy to understand LED indicators
show charger status.
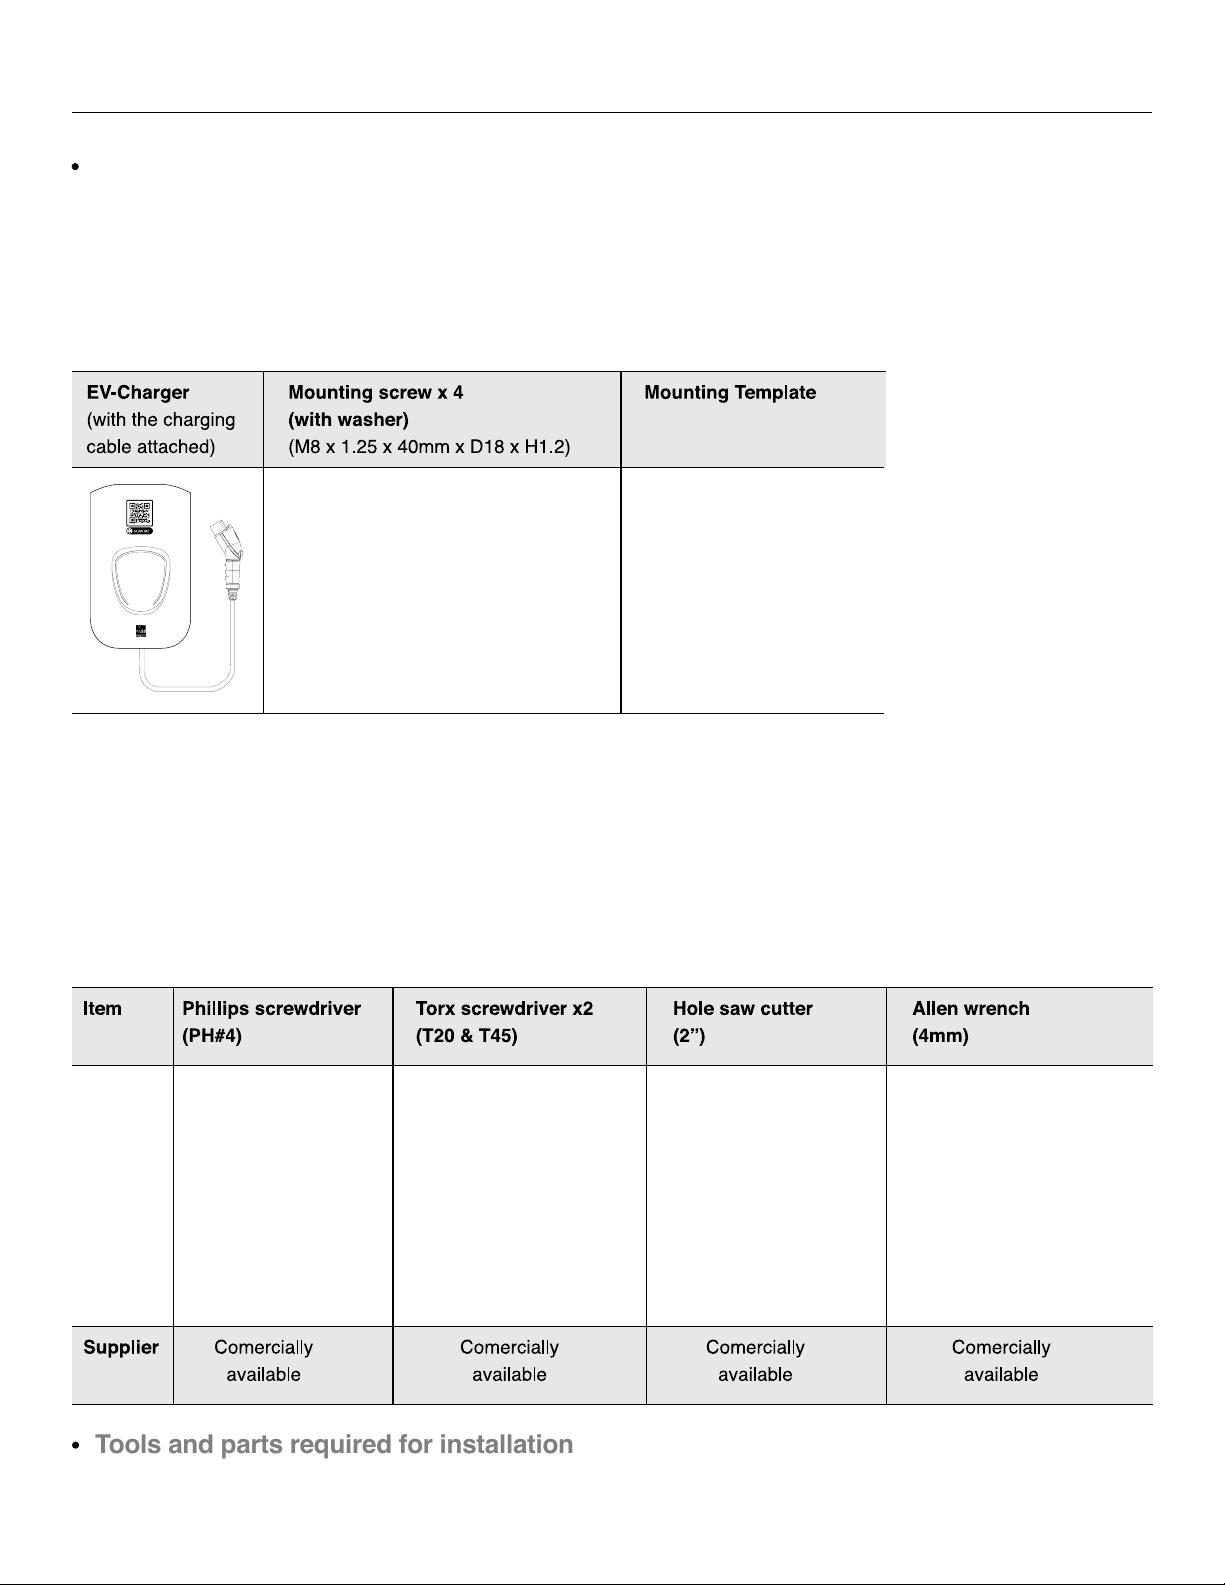
Unpacking
Preparation
Tools and parts required for installation
1. Verify the components according to the following list.
2. Keep the packaging material for possible future transportation or storage.
Howard Installation Guide
13
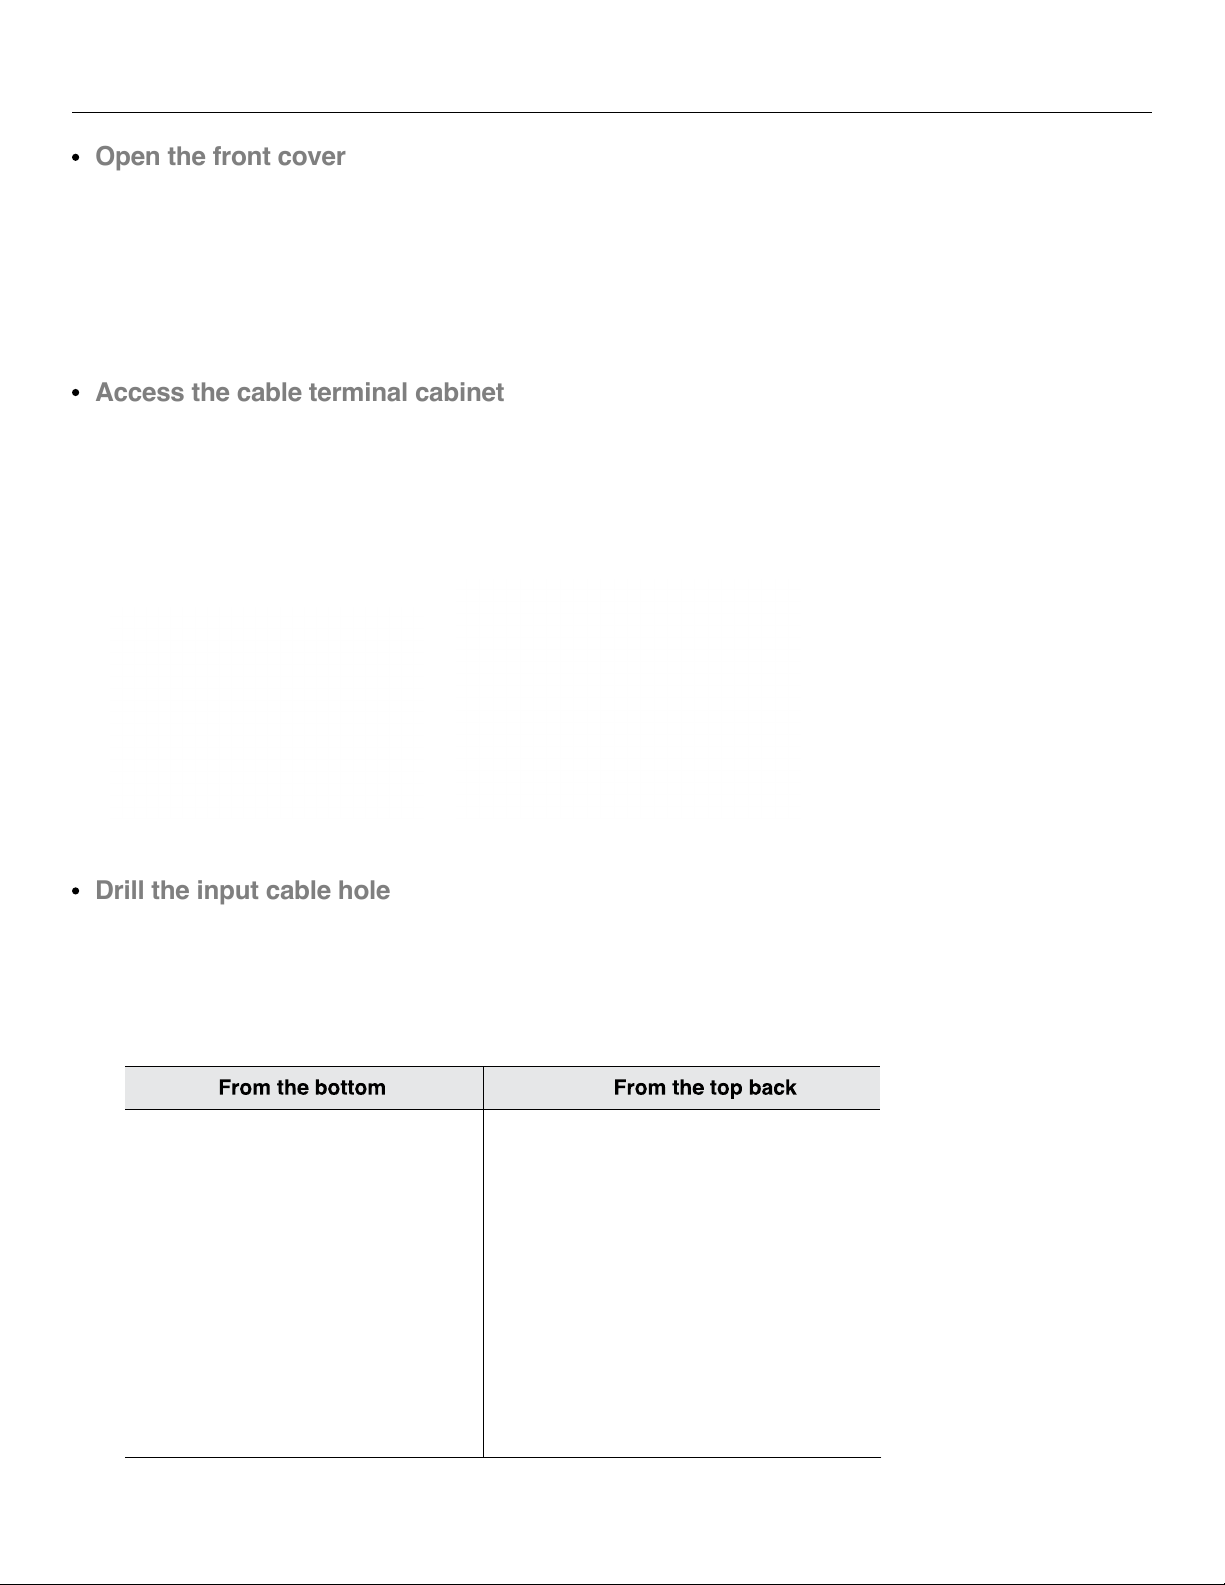
Open the front cover
Access the cable terminal cabinet
Drill the input cable hole
1. Locate the xing torx screw on the bottom side of the cover. Using
a T20 torx screwdriver, unscrew the xing screw of the cover.
2. Hold and lift the cover from the bottom end.
3. Keep the cover and screw in a safe place.
1. Locate the ve xing screws of the cover as shown below. Use a
M4 Philips screwdriver to unscrew them.
2. Take the cabinet cover off.
3. Keep the ve screws and the cover together in a safe place.
There are two ways to insert the input cables: from the back and
from the bottom. Choose either method and drill the corresponding
hole as shown below.
Hole diameter: 2-inch (5cm) Hole diameter: 2-inch (5cm)

Howard Installation Guide
14
Drill the mounting holes
How to access to the back panel from inside
(NOTE: For how to access to the back panel area, please see page 20)
1. There are 4 holes which need to be drilled to mount your EV Charger
to the wall.
The 4 holes can be found as shown on the right.
2. Drill the holes to t M8 mounting screws.
3. Drill the holes at corresponding locations on the wall or backplane.
1

Howard Installation Guide
15
Installation
Wall mounting
(The practice recommended here may vary from the actual installation and
is subjected to proper adjustment depending on the circumstances, local
building codes, or state regulations.)
WARNING: If you hit something metallic when drilling, stop
immediately and contact an electrician
1. Make sure you have:
- Drill the input cable hole and the mounting holes on
your charger.
- The installation height is at least 60cm as shown on the left.
2. Use the mounting layout template provided to drill the holes on the wall.
- Tape the layout template on the wall to the position where you
plan to install the charger.
- Mark the mounting holes (which are marked as circles on the
template) onto the wall.
- Remove the template
- Drill the 4 mounting holes of size M8
3. Mount and screw the charger to the wall, as shown below.
4. Seal the screws by applying some water resistant protection.
Howard Installation Guide
16
Cable Connection
and Wiring
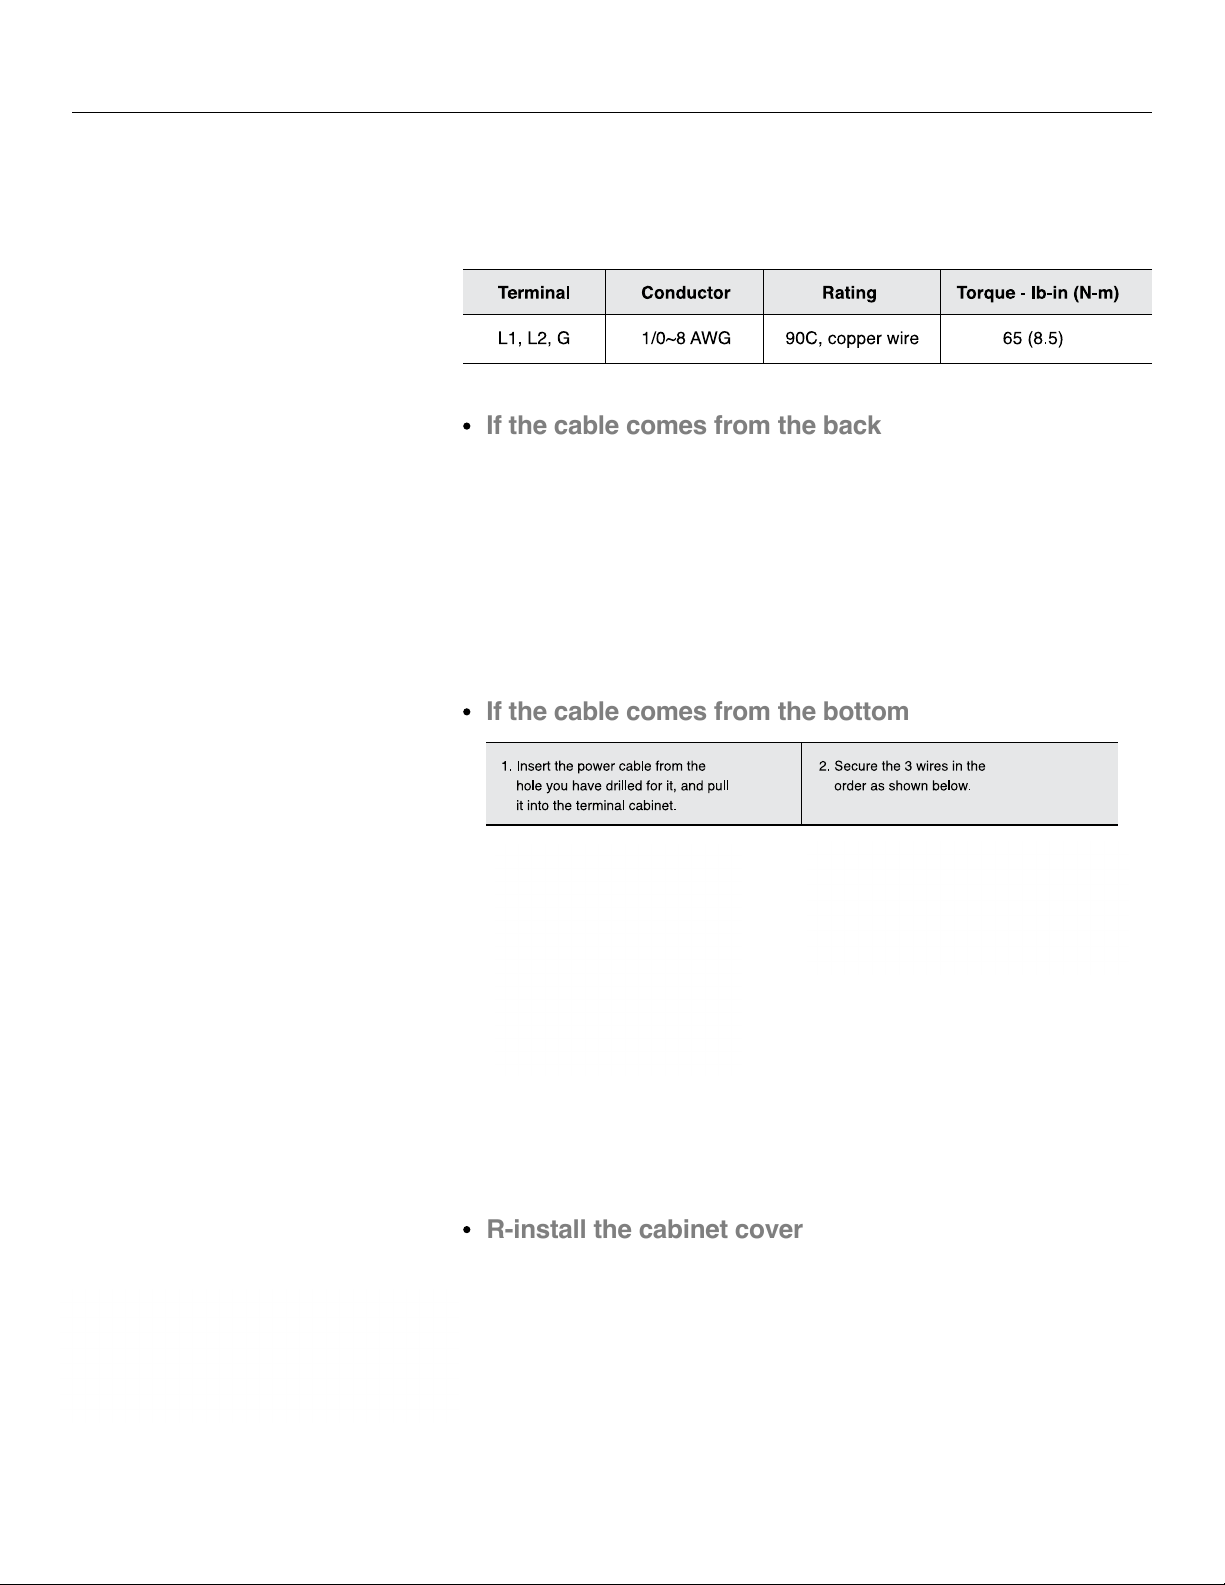
Use following wire and torque force when connecting to the input terminal
block, using conductor type other than RHH, RHW and RHW-2 with outer
covering.
1. If the cable comes in from the back, just put the cover back on
and screw it closed.
2. If the cable comes in from the bottom, cut the plate off the cover
as shown to the left before you replace the cover.
Caution: To reduce the risk of the re, connect only to a circuit provided with 100 amperes maximum
branch circuit overcurrent protection in accordance with the National Electrical Code, ANSI/NFPA 70,
and the Canadian Electrical Code, Part 1, C22.2.
NOTE: If necessary, apply proper cable ties
or clamps to secure the cables and to relieve
cable strain added on the terminals.
If the cable comes from the back
If the cable comes from the bottom
R-install the cabinet cover
The cable will enter straight into the cable terminal cabinet. Secure
the 3 wires to the corresponding terminals as shown on the left.
NOTE: The cable hole needs to be sealed properly to keep the
terminal cabinet watertight.

Howard Installation Guide
17
RJ45 cable Installation
(If necessary)
Access to the cable gland
1. Using a Torx screwdriver, unscrew the
eight philips screws as shown below.
3. Using a M4 philips screwdriver, unscrew the four philips screws as shown below to release
the electrical box. Raise the bottom side for the box and you can nd the cable gland.
2. Take off the box cover.

Howard Installation Guide
18
Insert a RJ45 cable

Howard Installation Guide
19
7. Screw the outer cap back to its place.
8. Plug the RJ45 head to the RJ45 port.
9. Install the elctrical box and its cover back into their places.
NOTE: You will need to drill a hole to let the cable go into the unit. For example:

Howard Installation Guide
20
19 Morris Avenue
Brooklyn Navy Yard, Building 128
Brooklyn, NY 11205
This manual suits for next models
1
Table of contents


