GELFREE 8100 Fractionation System (10 of 30)
Operating Procedures
Installation and Power Up
To power on the instrument, insert the provided power cord into the
socket on the back of the instrument, move the instrument to its
final position, and plug the cord into a suitable power supply (100-
240 VAC, 50-60 Hz). Power on the unit using the switch located on
the back of the instrument above the power cord.
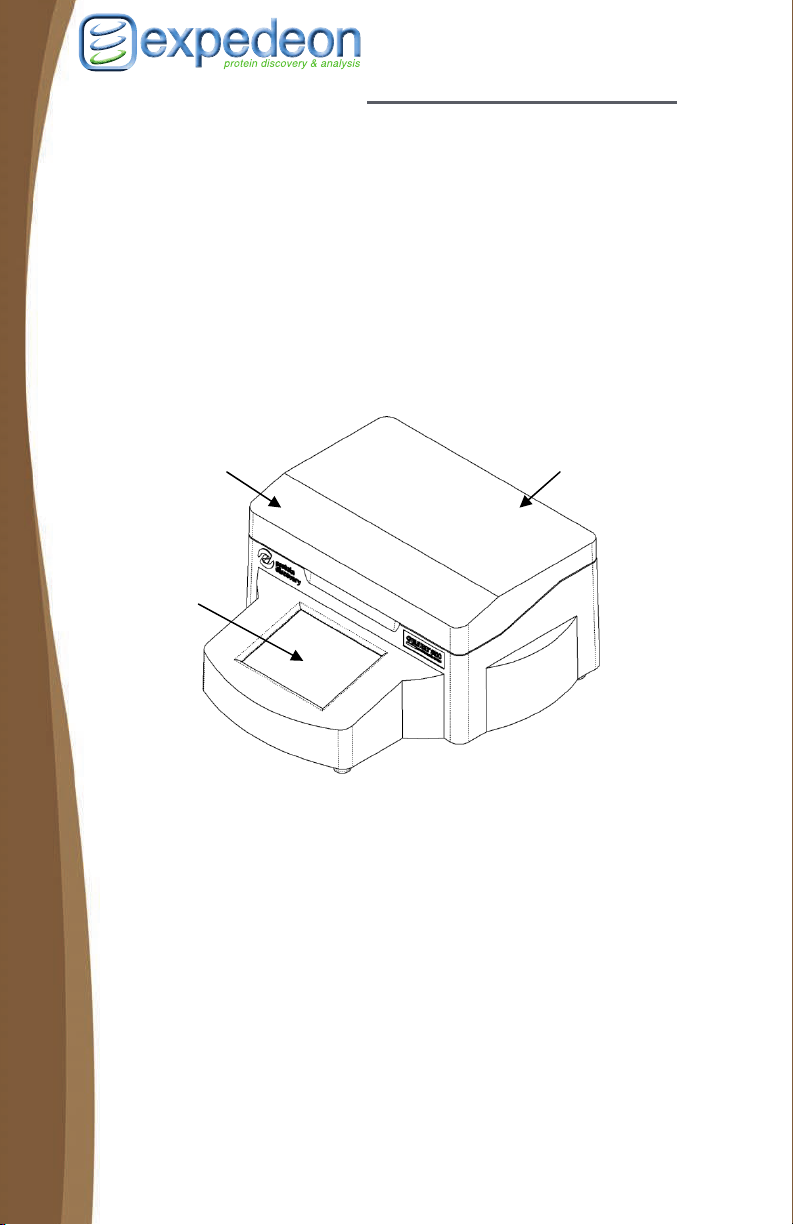
During the power up procedure, the Protein Discovery logo will be
isplayed on the touch screen. Once powered up, the main control
screen fo ill be displ peration
of the high vo r interlock by o osing the lid of
the instrument. In the lower right corner of the main screen, the ‘Lid
State’ indicator will switch from green (closed) to red (open) to
indicate engagement of the interlock.
Loading the Cartridge and Electrode Placement
Opening the access to the c partment for
loading and unloading the cartridg cting fractions
during the experiment. The cartridge is loaded such that the well
numbers imprinted on the cartridge can be read by the operator and
the arrows imprinted on the cartridge point to the right. The
cartridge positioning key (Figure 3) prevents the user from loading
the cartridge in ntatio rtridge shou d
rest fully on the bottom of the cartridge compartment. With th
cartridg by the
user. Th n of the
et when raising
and lowering the electrodes into position.
d
r the instrument w
ltage powe
ayed. Verify proper o
pening and cl
lid allows artridge com
e and for colle
the wrong orie n. The loaded ca l
e
e in place, the electrode arrays are lowered in place
e arrows in Figures 5 and 6 indicate the directio
applied force when raising and lowering the electrodes. Do not
force the electrodes into position – this can permanently damage
the mechanism. Very little resistance should be m
© 2013 Expedeon, Inc. All Rights Reserved.