manuals.online logo
Brands
  1. Home
  2. •
  3. Brands
  4. •
  5. Extech Instruments
  6. •
  7. Measuring Instrument
  8. •
  9. Extech Instruments 380560 User manual

Extech Instruments 380560 User manual

User Manual
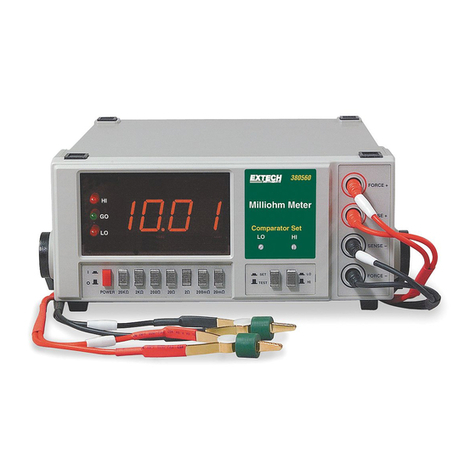
High Resolution Benchtop MilliOhm Meter
Models 380560 and 380562
www.GlobalTestSupply.com
Find Quality Products Online at: sales@GlobalTestSupply.com
380560-en-GB_V1.9 2/17
2
Introduction
Congratulations on your purchase of the Extech 380560 (117V) or 380562 (220V) High Resolution
MilliOhm Meter. This device offers seven resistance ranges with resolution as low as 0.01mΩ.
The 4-wire Kelvin clip connection ensures optimum accuracy. The built-in comparator feature
offers HI-LO-GO testing. Typical applications include transformer, motor coil, and PC Board
resistance measurements. Careful use of this meter will provide years of reliable service.
Meter Description
1. LED Display
2. HI/LO/GO Status Indicators
3. Power and Range pushbuttons
4. Kelvin clip leads
5. SET/TEST and HI/LO pushbuttons
6. Comparator adjustment screws
7. Kelvin clip lead input terminals
Note: The power cable input and audible alert button are on the rear of the instrument.
Measurement Precautions
Ensure that the meter is connected to the correct power source
(110V for model 380560 or 220V for model 380562).
Do not apply voltage to the meter input terminals. Meter damage may result.
1
2
3
4
5 6 7
www.GlobalTestSupply.com
Find Quality Products Online at: sales@GlobalTestSupply.com
380560-en-GB_V1.9 2/17
3
F+
F-
F+
F+F+F+F+F+F+F+
F+
F+
F+F+F+F+F+F+F+
F+
F+
F+F+F+F+F+F+F+
F+
F+
F+F+F+F+F+F+F+
F+
F+
F+F+F+F+F+F+F+
F+
F+
F+F+F+F+F+F+F+
F+
F+
F+F+F+F+F+F+F+
F+
F+
F+F+F+F+F+F+F+
F+
S+
F-
F-
F-
F-
F-
F-
F-
F-
F-
F-
F-F-F-F-F-F-F-
F-
F-
F-F-F-F-F-F-F-
F-
F-
F-F-F-F-F-F-F-
F-
F-
F-F-F-F-F-F-F-
F-
F-
F-F-F-F-F-F-F-
F-
F-
F-F-F-F-F-F-F-
F-
F-
F-F-F-F-F-F-F-
F-
F-
F-
F-
F-
F-
F-
F-
F-
F-
S-
S+
S+
S+
S+
S+
S+
S+
S+
S+
S+
S+S+S+S+S+S+S+
S+
S+
S+S+S+S+S+S+S+
S+
S+
S+S+S+S+S+S+S+
S+
S+
S+S+S+S+S+S+S+
S+
S+
S+S+S+S+S+S+S+
S+
S+
S+S+S+S+S+S+S+
S+
S+
S+S+S+S+S+S+S+
S+
S+
S+
S+
S+
S+
S+
S+
S+
S+
Current
V
Current
Current
Current
Current
Current
Current
Current
Current
Current
Current
CurrentCurrentCurrentCurrentCurrentCurrentCurrent
Current
Current
CurrentCurrentCurrentCurrentCurrentCurrentCurrent
Current
Current
CurrentCurrentCurrentCurrentCurrentCurrentCurrent
Current
Current
CurrentCurrentCurrentCurrentCurrentCurrentCurrent
Current
Current
CurrentCurrentCurrentCurrentCurrentCurrentCurrent
Current
Current
CurrentCurrentCurrentCurrentCurrentCurrentCurrent
Current
Current
CurrentCurrentCurrentCurrentCurrentCurrentCurrent
Current
Current
Current
Current
Current
Current
Current
Current
Current
Current
o
Current
Current
Current
Current
Current
Current
Current
Current
Current
Current
CurrentCurrentCurrentCurrentCurrentCurrentCurrent
Current
Current
CurrentCurrentCurrentCurrentCurrentCurrentCurrent
Current
Current
CurrentCurrentCurrentCurrentCurrentCurrentCurrent
Current
Current
CurrentCurrentCurrentCurrentCurrentCurrentCurrent
Current
Current
CurrentCurrentCurrentCurrentCurrentCurrentCurrent
Current
Current
CurrentCurrentCurrentCurrentCurrentCurrentCurrent
Current
Current
CurrentCurrentCurrentCurrentCurrentCurrentCurrent
Current
Current
Current
Current
Current
Current
Current
Current
Current
Current
lts
Current
Current
Current
Current
Current
Current
Current
Current
Current
Current
CurrentCurrentCurrentCurrentCurrentCurrentCurrent
Current
Current
CurrentCurrentCurrentCurrentCurrentCurrentCurrent
Current
Current
CurrentCurrentCurrentCurrentCurrentCurrentCurrent
Current
Current
CurrentCurrentCurrentCurrentCurrentCurrentCurrent
Current
Current
CurrentCurrentCurrentCurrentCurrentCurrentCurrent
Current
Current
CurrentCurrentCurrentCurrentCurrentCurrentCurrent
Current
Current
CurrentCurrentCurrentCurrentCurrentCurrentCurrent
Current
Current
Current
Current
Current
Current
Current
Current
Current
Current
o ts
F+
S+
F-
S-
White Bands
Measurement Procedure
1. Connect the Kelvin test leads to the meter.
2. Press the POWER pushbutton to turn power on.
3. Position the SET/TEST pushbutton to the TEST position.
4. To check the meter zero, clip the test leads
together as shown at right.
5. Select the desired measuring range using the
labeled black pushbuttons. When the resistance of
the device is unknown, start with the highest range
and work downward.
6. Clip the leads onto the device under test as shown below.
7. Observe the reading on the LED display.
Comparator Operation (HI-LO-GO)
The meter is equipped with a Comparator function
allowing the user to sort resistance measurements against
programmable HIGH and LOW limits. To program the
comparator:
1. Position the SET/TEST pushbutton to SET.
2. Position the LO/HI pushbutton to LO.
3. Adjust the LO comparator screw to the desired low
limit (shown on the LED display).
4. Position the LO/HI pushbutton to HI.
5. Adjust the HI comparator screw to the desired high limit.
6. Position the SET/TEST pushbutton to TEST.
7. Set the rear buzzer switch ON or OFF. When ON, the meter will sound an audible tone for each
GO measurement.
Each time a measurement is taken, the appropriate Comparator status LED will light. If the
measurement is lower than the LO setting, the LO LED will light. If the measurement is higher than
the HI setting, the HI LED will light. If the reading is between the HI and LO settings, the green GO
LED will light. If the rear beeper pushbutton is set ON, an audible tone will sound each time a GO
reading is detected.
Measurement Principles
The test current flows through the resistance from the FORCE+ (F+) terminal to the FORCE- (F-)
terminal. The S+ and S- (SENSE) terminals measure the voltage drop across the device under test
only, thus eliminating the lead and contact resistances. The meter displays the resistance based on
the test current and the measured voltage; refer to the equation below:
Rx = Vx / Is
Where:
Vx is the voltage drop across the device under test;
Is is the test current;
Rx is the resistance of the device under test.
Rx
F + S+ S -F -
www.GlobalTestSupply.com
Find Quality Products Online at: sales@GlobalTestSupply.com
380560-en-GB_V1.9 2/17
4
Specifications
General Specifications
Circuit
Custom one-chip LSI microprocessor circuit
Display
20 mm (0.8") 2000 Count LED Display
Connection type
4-Terminal Kelvin
Measurement ranges
Seven ranges (see listing below)
Test voltage
5V DC
Comparator
Built-in HI/LO/GO testing with audible beeper
Measurement speed
Resistance 1 second, comparator mode 0.5 seconds
Zero adjust
Automatic (no adjustment necessary)
Over-range indication
Display reads "1____" when the reading is out of range
Operating Temperature
0°C to 50°C (32°F to 122°F)
Operating Humidity
Max. 80% RH
Power Supply
110V (380560) or 220V (380562) ±15%, 50/60Hz
Weight
2.2kg (4.85 lbs)
Dimensions
280 x 210 x 90mm (11 x 8.3 x 3.5")
Replacement Kelvin leads
380465
Range Specifications
Range
Resolution
Test Current
Accuracy (%rdg)
Test Voltage
20 mΩ
0.01mΩ
1A
± (0.2% + 6 digits)
2.7V DC
200 mΩ
0.1mΩ
1A
± (0.2% + 4 digits)
3.3V DC
2 Ω
.001Ω
0.1A
3.5V DC
20 Ω
.01Ω
10mA
4.1V DC
200 Ω
0.1 Ω
1mA
4.5V DC
2K Ω
.001kΩ
0.1mA
20K Ω
.01kΩ
10uA
Note: Specifications based on RF Field Strength <3V/m and frequency <30MHz
International Symbols
www.GlobalTestSupply.com
Find Quality Products Online at: sales@GlobalTestSupply.com
This manual suits for next models

1

Other Extech Instruments Measuring Instrument manuals

Extech Instruments 401025 User manual

Extech Instruments

Extech Instruments 401025 User manual

Extech Instruments SDL700 User manual

Extech Instruments

Extech Instruments SDL700 User manual

Extech Instruments MA260 User manual

Extech Instruments

Extech Instruments MA260 User manual

Extech Instruments EX810 User manual

Extech Instruments

Extech Instruments EX810 User manual

Extech Instruments AN310 User manual

Extech Instruments

Extech Instruments AN310 User manual

Extech Instruments HT30 User manual

Extech Instruments

Extech Instruments HT30 User manual

Extech Instruments 480823 User manual

Extech Instruments

Extech Instruments 480823 User manual

Extech Instruments CO100 User manual

Extech Instruments

Extech Instruments CO100 User manual

Extech Instruments PQ3450 User manual

Extech Instruments

Extech Instruments PQ3450 User manual

Extech Instruments 461880 User manual

Extech Instruments

Extech Instruments 461880 User manual

Extech Instruments HD450 User manual

Extech Instruments

Extech Instruments HD450 User manual

Extech Instruments DC400 User manual

Extech Instruments

Extech Instruments DC400 User manual

Extech Instruments 407750 User manual

Extech Instruments

Extech Instruments 407750 User manual

Extech Instruments HD750 User manual

Extech Instruments

Extech Instruments HD750 User manual

Extech Instruments PS101 User manual

Extech Instruments

Extech Instruments PS101 User manual

Extech Instruments RH300 User manual

Extech Instruments

Extech Instruments RH300 User manual

Extech Instruments MO290 User manual

Extech Instruments

Extech Instruments MO290 User manual

Extech Instruments AM600 User manual

Extech Instruments

Extech Instruments AM600 User manual

Extech Instruments CO200 User manual

Extech Instruments

Extech Instruments CO200 User manual

Extech Instruments 407860 User manual

Extech Instruments

Extech Instruments 407860 User manual

Extech Instruments 461920 User manual

Extech Instruments

Extech Instruments 461920 User manual

Extech Instruments 461825 User manual

Extech Instruments

Extech Instruments 461825 User manual

Extech Instruments AN320 User manual

Extech Instruments

Extech Instruments AN320 User manual

Extech Instruments EN510 User manual

Extech Instruments

Extech Instruments EN510 User manual

Popular Measuring Instrument manuals by other brands

Eurochron WS4003 instruction manual

Eurochron

Eurochron WS4003 instruction manual

Spectro Scientific InfraCal 2 ATR-SP user guide

Spectro Scientific

Spectro Scientific InfraCal 2 ATR-SP user guide

Terdens 2093 user manual

Terdens

Terdens 2093 user manual

PEWA QUESTemp 32 Operator's manual

PEWA

PEWA QUESTemp 32 Operator's manual

TVC ColcheK 2 instruction manual

TVC

TVC ColcheK 2 instruction manual

Radiodetection S6 Microsonde user guide

Radiodetection

Radiodetection S6 Microsonde user guide

SONBEST SM2130B-C2H2 user manual

SONBEST

SONBEST SM2130B-C2H2 user manual

UEi DT15A instruction manual

UEi

UEi DT15A instruction manual

WIKA 1500 Series instruction manual

WIKA

WIKA 1500 Series instruction manual

PKP PMR06 instruction manual

PKP

PKP PMR06 instruction manual

Lambrecht 16131.5 Series manual

Lambrecht

Lambrecht 16131.5 Series manual

Fluke 1653B manual

Fluke

Fluke 1653B manual

Hilti PD 5 operating instructions

Hilti

Hilti PD 5 operating instructions

Magnaflux 133033 operating manual

Magnaflux

Magnaflux 133033 operating manual

Magnet-physik FH 55 operating instructions

Magnet-physik

Magnet-physik FH 55 operating instructions

Apogee 21054010 instruction manual

Apogee

Apogee 21054010 instruction manual

Vaisala WAV252 Quick reference guide

Vaisala

Vaisala WAV252 Quick reference guide

FlowLine DataLoop LI23 Series quick start

FlowLine

FlowLine DataLoop LI23 Series quick start

manuals.online logo
manuals.online logoBrands
  • About & Mission
  • Contact us
  • Privacy Policy
  • Terms and Conditions

Copyright 2025 Manuals.Online. All Rights Reserved.