Book# 52090701 Page 3
INTRODUCTION
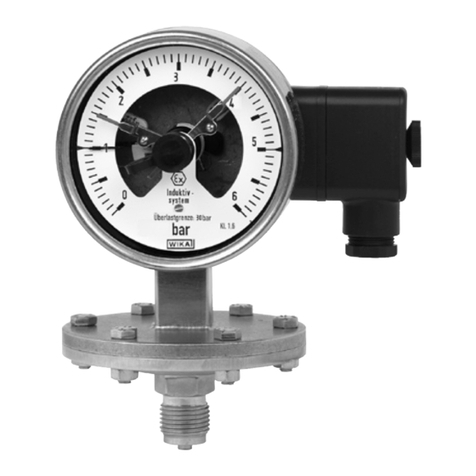
This instruction book provides installation, operation and maintenance instructions for the WIKA Pressure Indicators Series 1500, Series 1000 and Series
300.
WARNING: TO AVOID POSSIBLE SEVERE PERSONAL INJURY OR DAMAGE TO THE EQUIPMENT, THIS EQUIPMENT SHOULD BE INSTALLED,
OPERATED AND SERVICED ONLY BY TRAINED, QUALIFIED PERSONNEL WHO ARE THOROUGHLY FAMILIAR WITH THE ENTIRE CONTENTS OF
THIS INSTRUCTION BOOK. IMPROPER USE OF THIS GAUGE MAY CAUSE EXPLOSION AND PERSONAL INJURY. READ INSTRUCTION BOOK
BEFORE USING THIS EQUIPMENT.
General and Safety related information on the installation and use of pressure gauges should be followed. ASME B40.100 latest standards should be
referenced as a guideline. A complete standard may be obtained from the AMERICAN SOCIETY OF MECHANICAL ENGINEERS; ASME, Three Park Avenue,
New York, NY 10016-5990,800-843-2763 (US/Canada), 973-882-1170 (outside North America), website: www.asme.org.
INSTALLATION
Protect the instrument from shock and vibration. In some cases, it may be necessary to provide shock mounted panels. Select a location to provide a
minimum change in temperature. Avoid locations adjacent to heating units or otherwise subject to temperature changes. Access to pressure
connections is required if the filter is to be removed for cleaning (see SERVICE NOTES).
CAUTION: Install external pressure relief valves as required to protect the mechanism from damage due to overpressure.
Dimension drawings are in the back of this book.
A note on a decal indicates when a Bourdon tube gauge has been calibrated for liquid service. Opening the bleed tube at the back or bottom of the case
permits purging air to other gases in the system.
OPERATION
Over-Pressure Precautions For best performance, do not subject instruments to pressures above their range. Pressure in excess of 110% of range may
distort the mechanism.
All instrument cases have plastic blow-out plugs in the back. If the pressure element should accidently rupture, these plugs will blowout at less than 5
psig and vent the case to atmosphere.
Exercising Before the instrument is used for precise measurements, exercise it by alternately increasing and decreasing the applied pressure over the
entire range of the instrument at least three times. Hold maximum and minimum pressures for two-minute periods.
Reading Unless otherwise noted, the instrument is calibrated to be read with the dial in the vertical position. When the instrument has a mirror on the
dial, the pointer and its image should coincide so that only the pointer may be seen. On two-revolution instruments, an indicator shows the portion of
the scale to be read.
All WIKA instruments are calibrated on increasing pressure. To avoid any effect of hysteresis, take readings on increasing pressure. Instruments are
calibrated at 23°C. Unless wide temperature changes are experienced, the effect of temperature may be neglected. For further discussion, see
CALIBRATION CHECK.
CALIBRATION CHECK
Although great care has been taken to stabilize the instrument during manufacturing, a small zero shift could occur before the instrument is put into
service.
Optimum accuracy over the entire scale may be produced when the pointer is not exactly on zero at true zero pressure. A label affixed to the
instrument case indicates what, if any, the zero offset is. This figure was obtained after the instrument was exercised as described under OPERATIONS.
It should be noted that the accuracy tolerance is the same at all points on the scale, zero included. However, the deviation is never outside the
guaranteed accuracy as shown in the table, PERFORMANCE CAPABILITY.
If, after the instrument has been exercised, the pointer deviation is as specified, no adjustment is necessary. A slight discrepancy may be corrected by
adjusting the pointer as described below.
A complete check of calibration of an instrument requires that it be exercised (see OPERATION-Exercising) and compared with a standard having a
verified accuracy several times greater and a scale comparable in length to the instrument being checked. The standard must be corrected for all its
inherent errors and must be corrected to standard conditions of gravity (980.665 cm/sec²) and temperature (O⁰C for mercury columns or 20⁰C water
columns) where applicable.
