3
Front Panel Connections and Configuration
0dB
45
5
10 15
20
25dB
30
35
40
0dB
45
5
10 15
20
25dB
30
35
40
1
48V
48V
2
R
AA
B
B
C
C
D
D
E
E
F
F
G
G
H
H
H
H
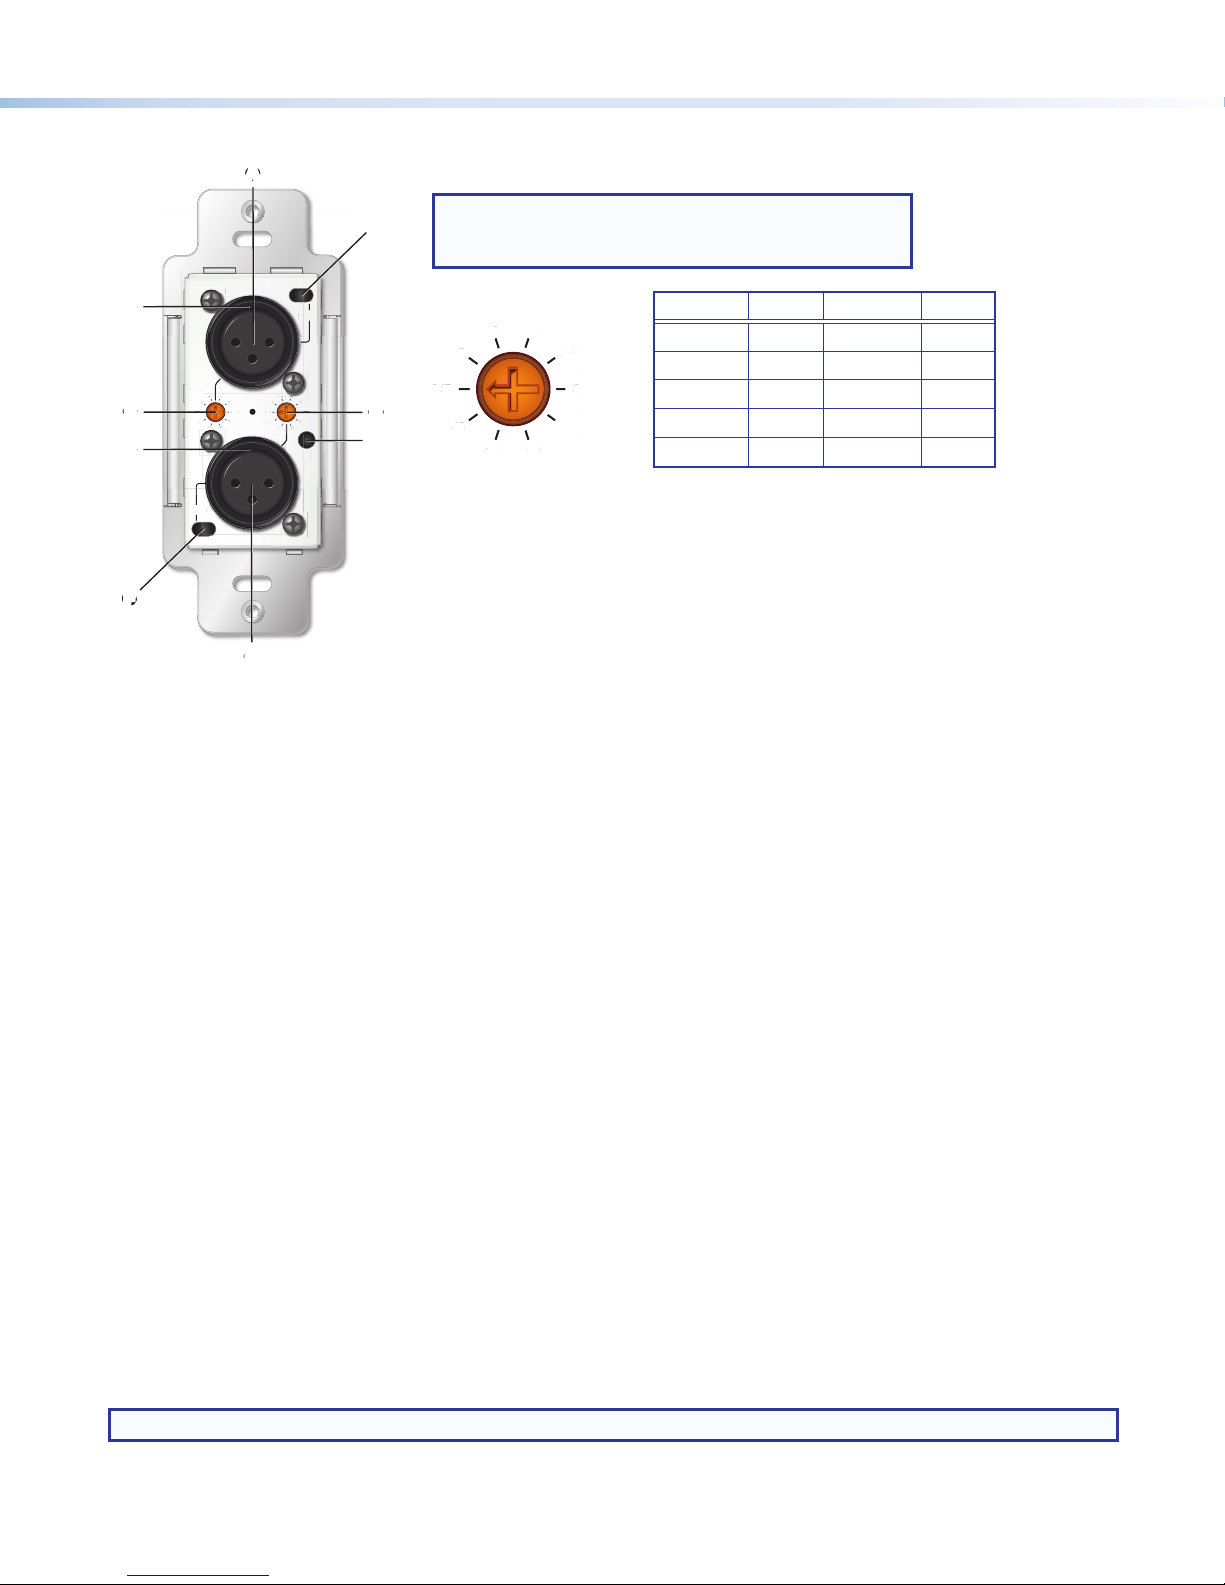
Figure 3. AXI 22AT DAT Front Panel Controls and Gain Rotary Knob
AMic/Line Input 1 —One female XLR for balanced or unbalanced mic/line audio input.
BInput 1 Gain Control — This 10-position rotary knob sets input 1 gain between 0 dB (default) and +45 dB in 5 dB steps.
CInput 1 Phantom Power Switch — A recessed, two-position toggle switch sets +48 V phantom power on (right) and off
(left) for input 1. To enable or disable phantom power, insert a small flat-headed screwdriver into the opening for the switch
(near the upper-right corner of the faceplate) and slide the switch right or left. A green LED behind input 1 lights when
phantom power is applied (the LED is visible through the top of input 1).
DMic/Line Input 2 —One female XLR for balanced or unbalanced mic/line audio input.
EInput 2 Gain Control — This 10-position rotary knob sets input 2 gain between 0 dB (default) and +45 dB in 5 dB steps.
FInput 2 Phantom Power Switch —A recessed, two-position toggle switch sets +48 V phantom power on (left) and off
(right) for input 2. To enable or disable phantom power, insert a small flat-headed screwdriver into the opening for the switch
(near the lower-left corner of the faceplate) and slide the switch right or left. A green LED behind input 2 lights when phantom
power is applied (the LED is visible through the top of input 2).
GReset Button — Using a stylus or small screwdriver, press this button for 10 seconds and release to reset the unit to factory
defaults. Dante settings such as device name, IP address, channel names, and sample rates are reset to defaults. Gain
values and phantom power settings are not affected.
HPower LEDs — These orange LEDs are located behind the front panel and light when power is applied to the unit (visible
through the top of the XLR inputs). The LEDs light while the AXI 22 AT D is booting up and turn off when boot-up is complete.
They light steadily if no network connection is detected.
Downloading and Installing Dante Controller Software
Dante Controller from Audinate is required to select and route audio across the Dante network and for limited conguration of the
device. Install Dante Controller on a PC running Microsoft®Windows®7 or newer. For full details about computer requirements,
see the Dante Controller product page at www.extron.com.
1. From the Extron home page (www.extron.com), click the Download tab to open the Download page.
2. Under Software, on the left side of the page, select Dante Controller. The Dante Controller product page opens.
3. Click the Download button and follow the on-screen instructions to complete the Dante Controller installation process.
NOTE: An Extron Insider account is required to download Dante Controller.
0dB
45
5
10 15
20
30
35
40
Position Value Position Value
0 0 dB 5 25 dB
1 5 dB 6 30 dB
2 10 dB 7 35 dB
3 15 dB 8 40 dB
4 20 dB 9 45 dB
NOTE: Remove the screw in the middle of the front
panel to lift off the faceplate and expose the
controls.
AMic/Line Input 1 EInput 2 Gain Control
BInput 1 Gain Control FInput 2 Phantom Power Switch
CInput 1 Phantom Power Switch GReset Button
DMic/Line Input 2 HPower LEDs