14 15
Device Name
Create a new device name or use the
default name (EZfetch Digital Media
Player) that will be used and seen on the
network by other devices, such as your
PC. Use the alphanumeric keys on the
remote control or press the Keyboard key
to bring a keyboard on-screen that you
can use with the navigation buttons.
IP Address
Choose either Automatic IP or Fixed IP
(static) that matches your home network
set-up.
Connection Type
Choose Wired or Wireless, based on the
conguration of your home network.
If your connection type is Wireless,
complete the following:
Network name
Enter your wireless network name (SSID)
or scan for available networks. Then
choose a network to be on. This could be a
wireless router, wireless access point or an
Ad-Hoc (computer to computer) network.
Encryption Type
Enter the encryption type that matches
the encryption of your home network,
then select Edit. If you don’t use
encryption in your home network, select
None. If you have WEP encryption, select
the appropriate encryption type and
select Edit. Then either enter the Password
or the Key. The Password and Key are what
you established on your home network.
If necessary, refer back to Encryption Type
Tips in the section Understanding Your
Home Network.
Network Status
Once you have entered the settings with
the Apply button on the bottom of the
screen, EZfetch will request that you
reboot. After EZfetch has rebooted, your
wireless network connection will be listed
in this area.
Display
For Video Output, chose the setting
that’s right for your television. For TV
Standard, choose the screen resolution
that is appropriate for your TV. PAL
and PAL-Widescreen apply to the
European television standard; NTSC and
NTSC-Widescreen apply to the American
television standard; and HD-720p and
HD-1080i apply to the global high-
denition standard.
Audio
The audio settings allow you to congure
the digital audio output (SP/DIF). If you
do not have digital audio, select O.
Otherwise, select between RAW, PCM
48KHz or PCM 96KHz based on the
required settings for your audio system. In
most cases, the RAW setting will work.
General
In Slideshow delay, you can set the time
photos in a slideshow appear.
The section, USB upgrade, is for
upgrading EZfetch to the latest version.
As firmware upgrades become available,
they can be obtained on the EZ4Media
website at www.ez4media.com.
When it’s time to install an upgrade,
download the upgrade (filename.mbu)
onto your computer and then copy it onto
the supplied USB Flash Drive. Insert the
USB Flash Drive into EZfetch’s USB port
and in the USB upgrade section, click
APPLY. EZfetch will look for any file with
an .mbu extension and start the upgrade
process. When the upgrade is complete,
EZfetch will automatically re-start with
the new upgraded firmware.
When installing an upgrade, make sure
there is only one upgrade file (the latest
version) on your USB Flash Drive. Remove
any previous upgrade file.
Congratulations! Your setup is complete.
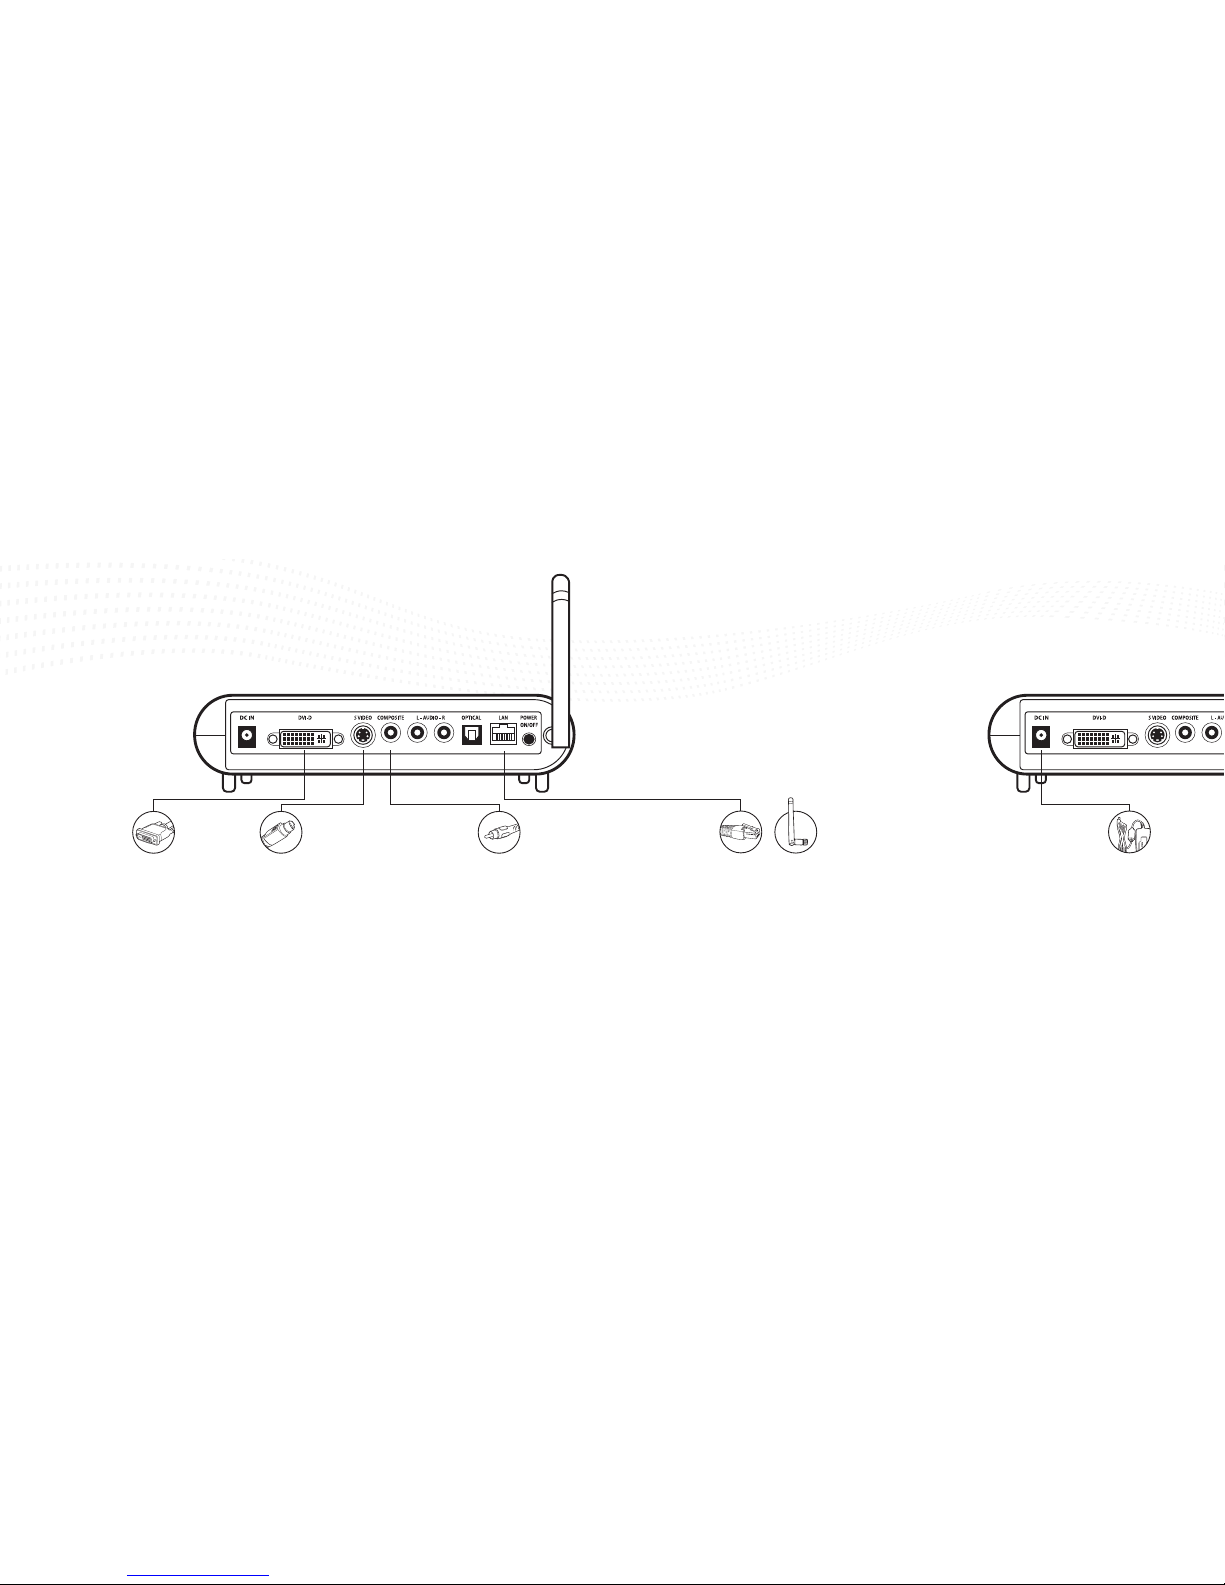
Initial Start-Up
Press the black POWER ON/OFF button
located on the back panel. The system will
start up automatically.
Important: EZfetch comes with a default
analog video setting (Composite or
S-Video). If you are using the DVI-D/HDMI
(digital) setting instead of the analog
video setting, you must press the VIDEO
OUT button on the remote control for
10 seconds during start-up to switch
EZfetch from analog video output to
DVI-D/HDMI output.
Configure EZfetch
Upon the initial startup, you need
to congure EZfetch for your home
entertainment system and home network.
From the main menu, use the remote
control to select Settings by using the
navigation keys or by pressing the blue
SETTINGS key.
You can quickly move to
the Settings sub-categories
by using the Color-Coded
Fast Keys. After you make
your entries in each of the
sub-categories, click the
Apply button to activate your
settings.
Network
Congure EZfetch by using
information about your
home network. You may have
determined this information in
the Understanding Your Home
Network Settings section.
!