EZReader T760MID User manual

1
eBook Mobile Internet Device
Setup & Quick Start Guide
Thank you for purchasing the EZREADER T760MID. The operational guidelines below are a quick
and convenient guide to its main functions providing the user with trouble free use for business and
pleasure. This guide has been designed to help setup your unit, but is not designed as a complete
Android reference manual. Please read the instructions carefully before use.
Spotbuy cannot support the Google Android Operating System or any of the programs the user
may download or install. For Android support, we suggest you visit the Android forums on-line or
visit www.android.com.

2

3
Opening Note
•
This product is a high precision electronic product, do not disassemble.
•
Avoid strong impact or any collision with the product.
•
Avoid using this product the following conditions: high and low temperature, moisture, dust,
magnetic fields strong and long-term exposure to sunlight.
•
Please use a wet cotton cloth wrung gently wipe the product shell, do not use any other
chemical cleaning solution.
•
This product should not be placed near any liquid in case of accidental spillage onto or into
the
product.
•
Excess use of the headphone at high volume may cause permanent hearing impairment.
•
Please only use permitted batteries, chargers and accessories, use any other type of prod-
ucts will violate the warranty regulations and may be dangerous.
•
Please follow the relevant local environmental regulations to deal with obsolete machines and
accessories.
•
Where the product may become faulty, Spotbuy assumes no responsibility for any loss of
data / music / video or any other files. Please follow the user manual for standard operation,
and timely backups.
Company Statement
•
Specifications are subject to change without notice.
•
Always copy your important data. We assume no responsibility for the data loss.
•
This manual has been carefully checked, however, we assume no responsibility for any
errors.
•
Please read the operating instructions carefully and only the accessories supplied with the
unit to avoid any unexpected damage. No warranty can be executed if you connect with
incompatible accessories.
•
Although the latest version of Android available at the time of manufacture that is compatible
with this unit’s hardware specifications has been installed, Spotbuy assumes no responsibility
for the performance of the Android operating system supplied by Google, or for any errors /
software bugs and/or software failures.
•
Any discrepancy between the data and/or pictures in this manual with the actual product here-
inafter, the actual product prevails.
•
We cannot be responsible for any act of downloading illegal software or any content that is
illegal.
•
Spotbuy cannot support the Android Operating System or offer any support for any Android
based software that the user may download, install or purchase.
•
The Android version installed on this unit is the authorized compatible version. Any non
authorized Android upgrade performed by the user will void warranty and support.

4
EZREADER T760MID
Processor A13 Cortex – A8 1.2Ghz
Memory DDRIII RAM: 512MB, speed up to 1333MHz
Storage Built-in flash memory 4GB. Support for SD card, max capacity of 32GB
Networking IEE802.11B/G wireless network
USB 1 x USB2.0 OTG high speed interface port
Other Ports 1 each TF card, Headphone Port, Microphone
Audio 3.5mm headphone jack; Stereo speakers
Screen
Size: 7.0 inch; WVGA 800 x 80; 16 million colors
Type: Capacitive—5 x Point Touch
Battery Built-in lithium polymer battery 2000mAH
User Interface Touch Screen—Capacitive Touch
OS Google Android 4.04
Music Files Supports: MPEG / MP3 / WMA / AAC / WAV
Video Files Supports: MPEG1/2/4,XViD,DiVX4,H264,MJPEG 1080P
Formats: MKV / WMV / MPG / DAT / VOB / AVI / MOV / ISO / MP4 / FLV
Photo Files Formats: JPEG / BMP / GIF / PNG
Contents EZREADER device / USB Cable / OTG Cable / Earphones / User Manual
GETTING TO KNOW THE EZREADER HARDWARE
Product Specifications
IMPORTANT INFORMATION:
BEFORE USE, MAKE SURE YOU
REMOVE ANY PROTECTIVE FILM FROM THE SCREEN IF FITTED

5
View of unit and controls

6
Battery Charging
The unit has an internal charging battery which charges from the USB port similar to a mobile phone.
We suggest to charge up the battery overnight before first use. This will help keep the battery
integrity. You can also use a wall USB charger if you have one, providing the output is no more than
5V / 1000Mah. These can be purchased by emailing service@spotbuy.com.au
CHARGING THE BATTERY
Plug in the Micro USB cable (Supplied) into the unit, then into the USB port of your PC. You will
notice a large battery symbol appear on the screen. and the battery will start to charge. If you turn the
unit on, you will notice the battery charge icon on the bottom right of the screen.
Note: During Battery Charging, you can operate the unit. The charging time will be longer when
operating and charging at the same time.
Note: This model can also charge through the USB port. If you connect the unit to a USB port for files
transfer etc, it will charge the unit at the same time. USB charging is convenient if you are near your
computer, however, it takes longer than using the wall charger.
Startup / Shutdown / Sleep / Reset
STARTUP: Press and hold the power button for 2-5 seconds until you see the screen startup, then
release. The system will begin the startup process, and then enters the Android Operating System at
the default home interface. To Unlock the unit , slide the Lock icon to the right.
SHUTDOWN: Press and hold the power button for 3-4 seconds until this screen will appear:
To Power off, tap OK.. To cancel the Power Down, select Cancel.
STANDBY MODE ON/OFF: To enter Standby mode, press the power button quickly and you will the
unit’s screen turn off. Standby mode puts the unit to “sleep” without complete power down. This helps
extend battery life by turning off the screen. To exit Standby Mode and operate the unit once more,
press and hold the power button for approx. 2-3 seconds, then release.. The screen re-appear in
locked mode.
To Unlock the unit , slide the Lock icon to the right.
You can adjust the time elapsed for the unit to automatically enter Standby mode in the settings
menu – Select Settings / Display / Sleep. Then choose between 15 seconds and 30 minutes from
the menu. Standby mode is used in order to conserve battery consumption.

7
RESET BUTTON: If Android stops un-expectantly, press the reset button to reset the device. Reset
will erase all user data currently in memory on the device. (Note: Using the RESET function will not
erase any Applications or Android itself etc)
You can connect the unit directly to your computer using the OTG USB port.
The purpose of connecting the unit is either copying files to and from your PC to the unit, or to
an SD card which you may have in the unit at that time.
Using the USB cable supplied, connect the unit to a USB port of your PC. Make sure you DO
NOT use a USB Hub, or else, it may not connect.
The unit is a “generic USB Device” and does not need any extra software drivers to connect to
your PC. After your PC has recognized the unit, you will see a message on the bottom of your
PC screen informing you. (If your PC warns: Drivers not installed, ignore this)
To complete the connection, you need to reveal the Notifications Screen on the unit. To do this,
select the bottom right portion of the screen .. Or slide the screen down from the top:
Now you will see a menu similar to this:-
Select USB connected.
You will then see this screen:
Select Turn on USB storage.

8
☆
☆ ☆
☆ The device supports up to a maximum 32GB micro SD card.
☆
☆ ☆
☆ DO NOT insert and remove the micro SD Card repeatedly in a short me as this may cause
damage to the card and or to any data on the card.
☆
☆ ☆
☆ We recommend using major brands of memory cards to avoid incompability.. If your TF card
is not recognized format it using your PC and try again. If its is sll not recognized replace the
TF card
.

9
Touch-Screen Navigation
Use your fingers to manipulate icons, buttons, menus, the onscreen keyboard, and other items on
the touchscreen. You can also change the screen's orientation.
To select or activate something, touch it.
To type something, such as a name, password, or search terms, just touch where you want to type.
A keyboard pops up that lets you type into the field.
Other common gestures include:
♦
: Touch & hold an item on the screen by touching it and not lifting your finger until
an action occurs.
♦
: Touch & hold an item for a moment and then, without lifting your finger, move your finger
on the screen until you reach the target position. For example, you can drag to reposition
shortcuts on the Home screen.
♦
: Quickly move your finger across the surface of the screen, without pausing
when you first touch (so you don't drag something instead). For example, you can slide a
Home screen left or right to view the other Home screens.
♦
: In some apps (such as Maps, Browser, and Gallery), you can zoom in and out by plac-
ing two fingers on the screen at once and pinching them together (to zoom out) or spreading
them apart (to zoom in).
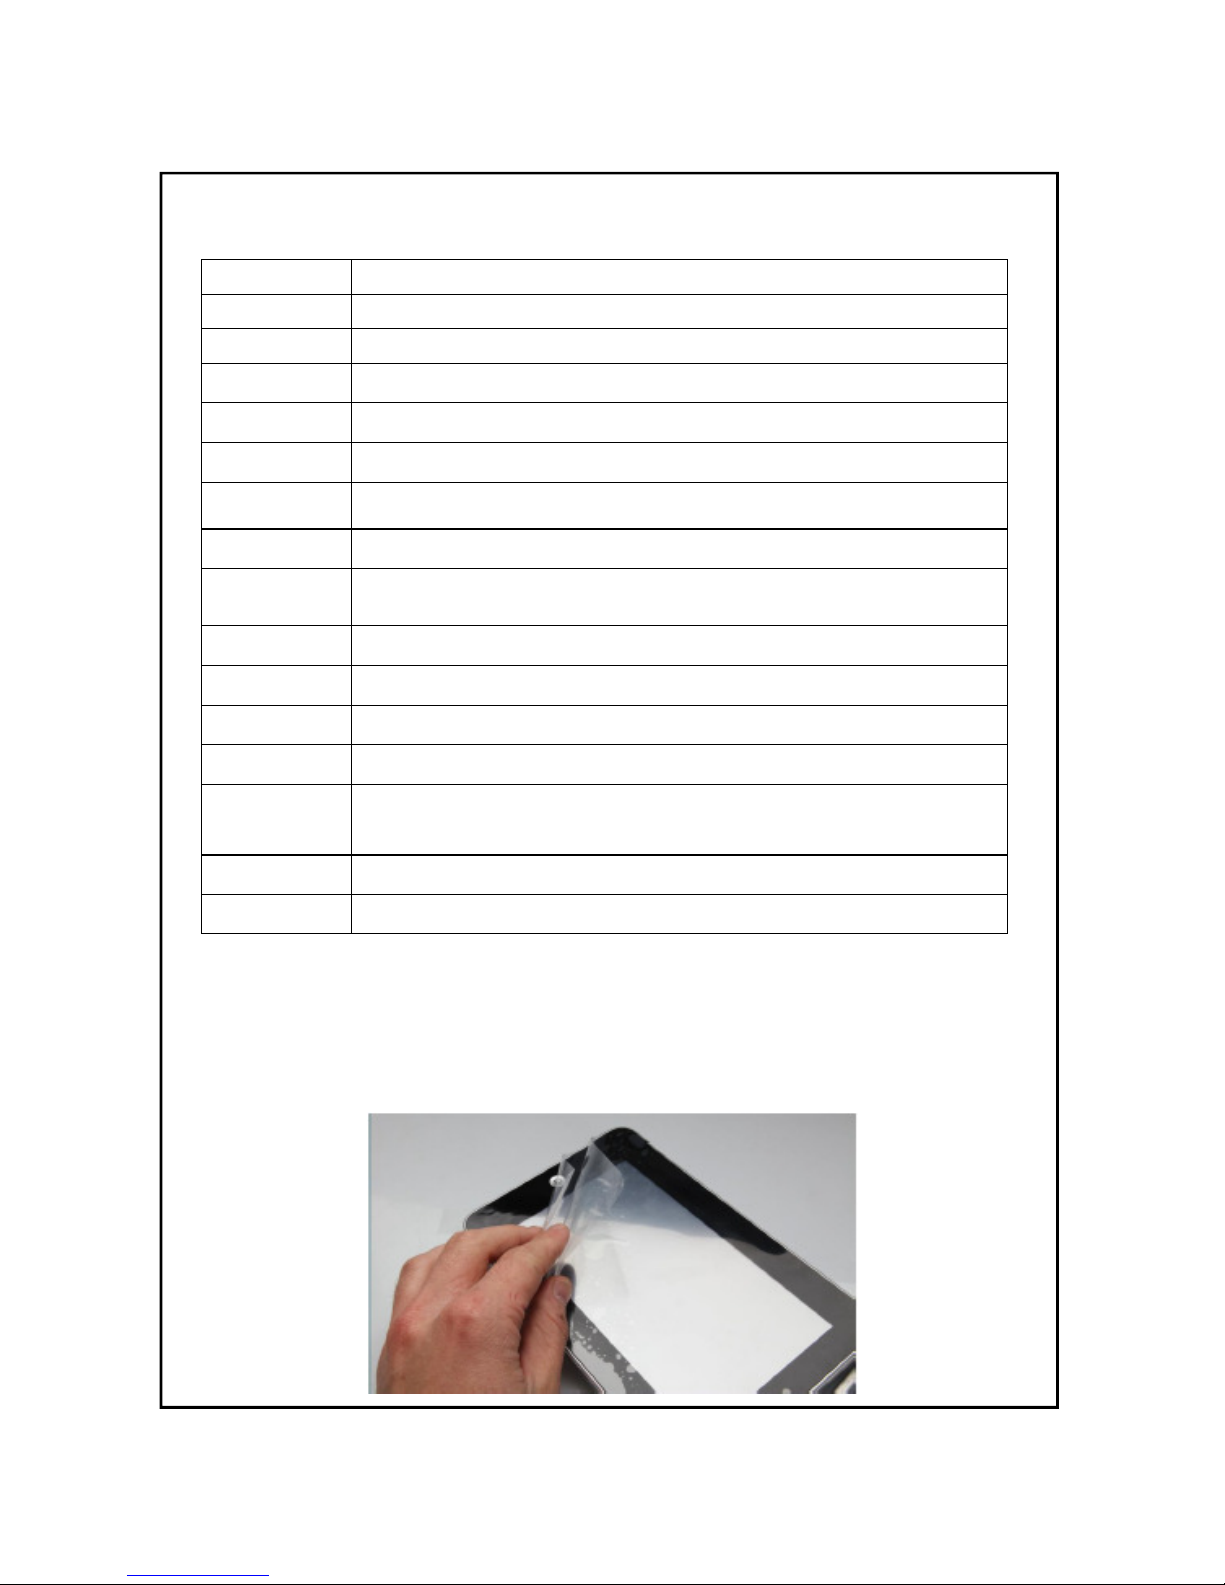
To avoid scratching or crushing, do not place objects on the touch screen surface.
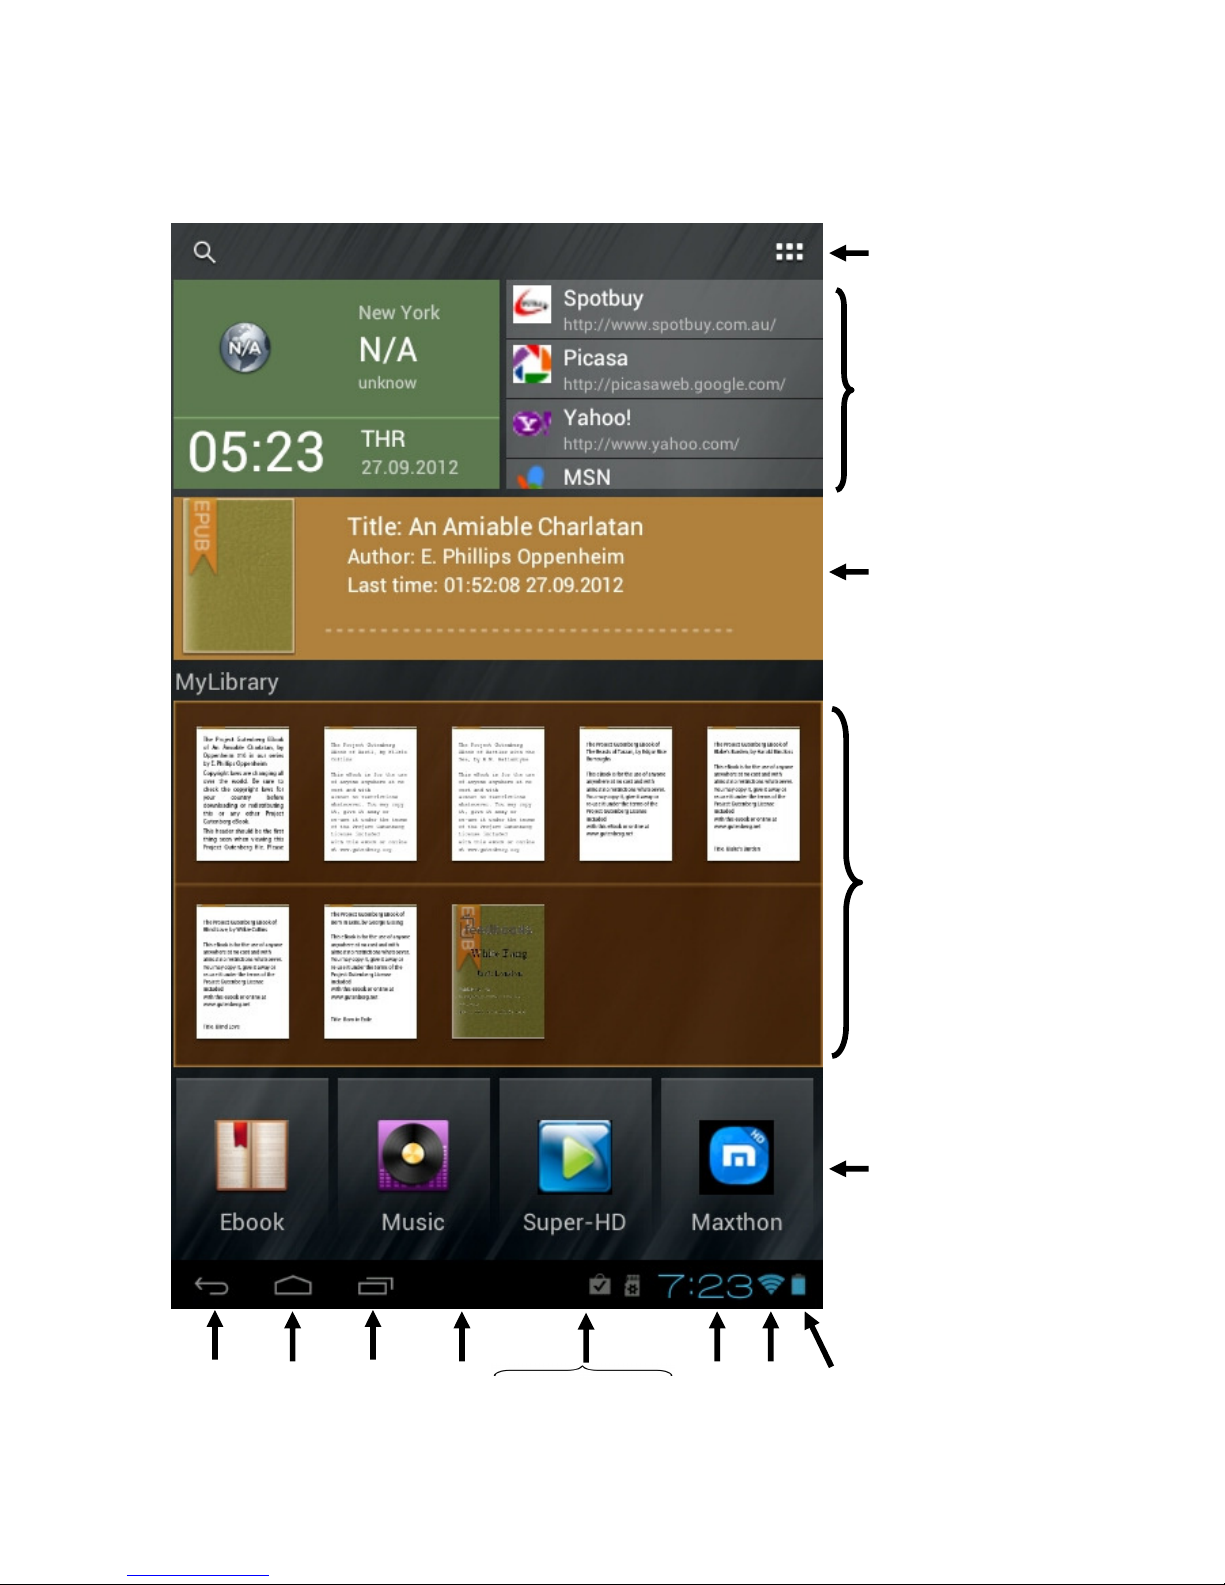
GETTING AROUND THE SCREEN
Menu: For ALL Android applications and screens, pressing the MENU icon (depending on what
screen you are on, it will be on the bottom left portion or the extreme top right corner of the unit) or
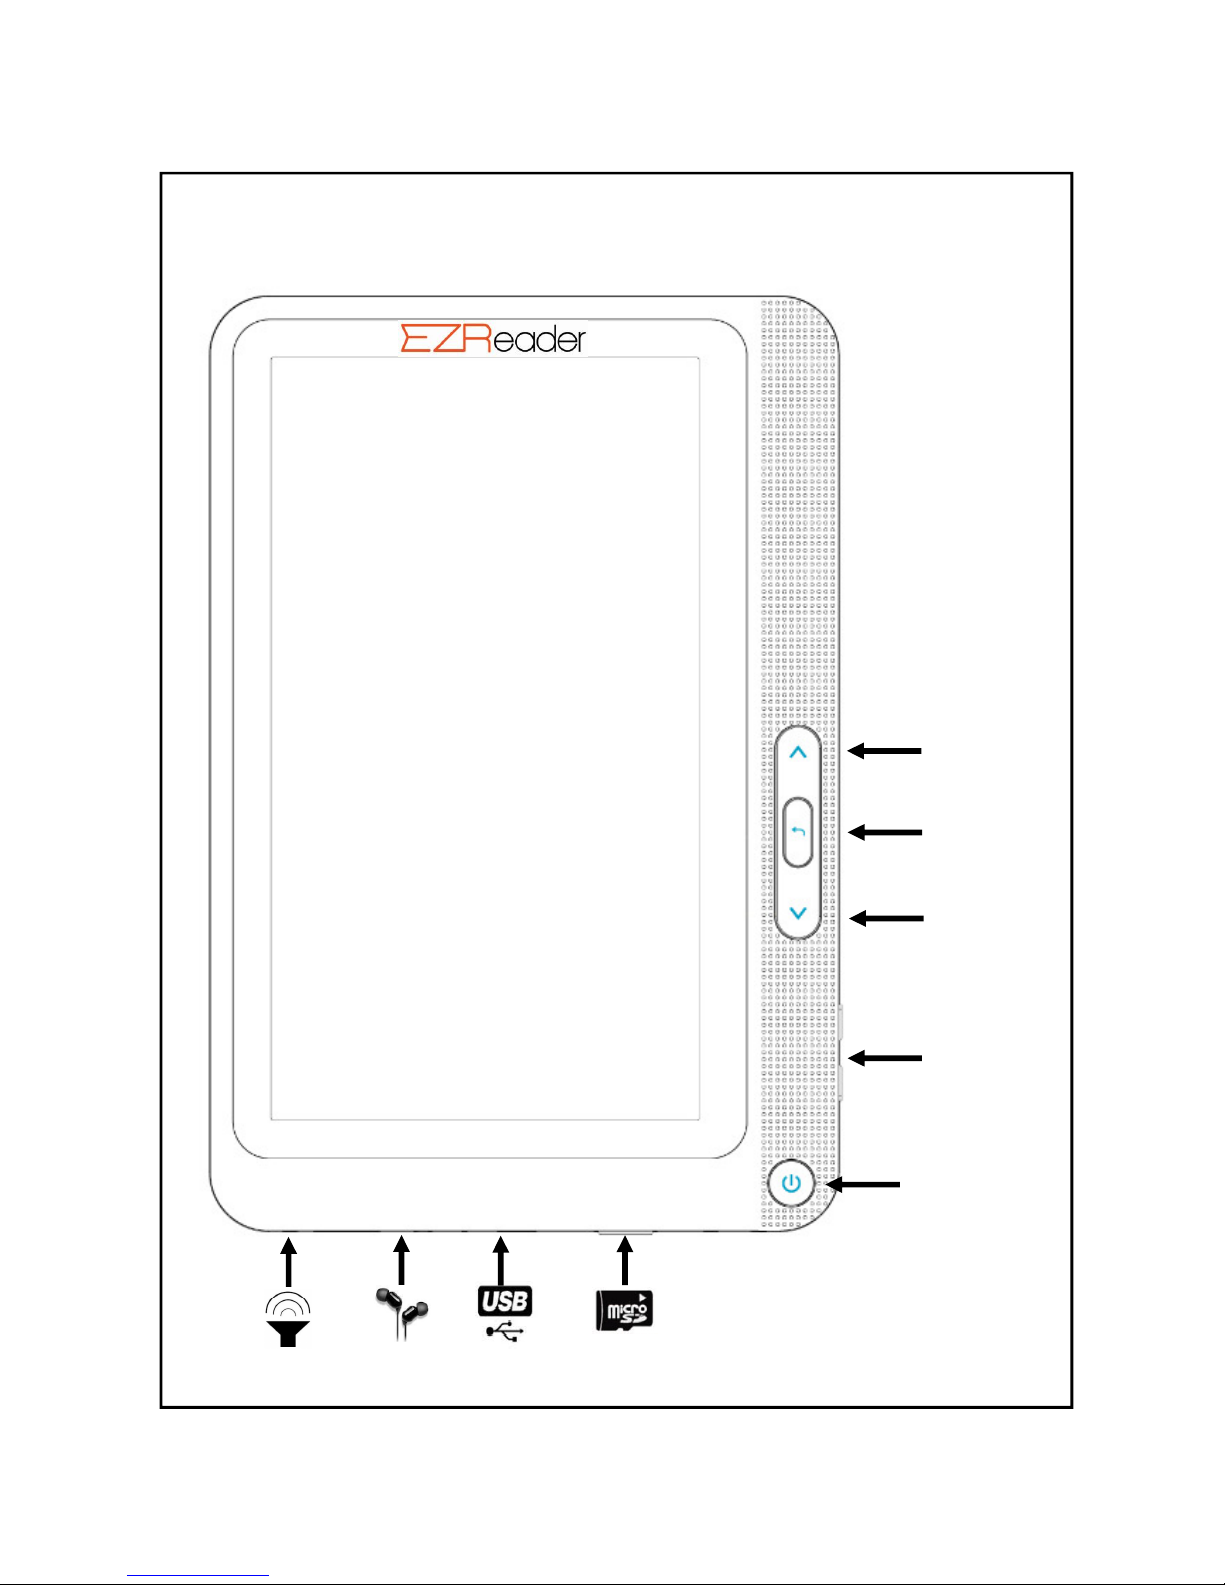
the Menu Button (right hand side on front of unit) will reveal the menu items and
options available at that time of operation.

10
OPENING SCREEN (DESKTOP) – Overview:

11
EZREADER T760MID INTRODUCTION
Understanding Adobe Digital Editions (ADE)
Transferring DRM eBooks in PDF format

12
USING THE DEVICE AS AN ANDROID TABLET
Press on the top right corner icon to go to the Android Applications screen:
Tap once on any applicaon icon to launch it.
TAP THIS TO DISPLAY THIS

13

14

15

16

17

18
From the menu, tap →“Email” icon to enter the e-mail client. See screen below:
ple). Press Return, type in your password and press Next. Then you will see this
screen:

19
The first time you do this, it will ask to configure the account information as shown
below:
To use E-mail, you will need to have an email account already setup with an email pro-
vider such as Hotmail or Yahoo etc. To set your email account, you will need to be net-
work connected before you can proceed.
Then press Next to complete. You will see this screen pop up:
To set up a GMAIL account, it is very similar. Select Google from the menu to see this
screen:

20
Select Sign in (if you already have a Gmail account) .. See screen below:
or select Create to open a new account. Then, follow the Google screens to create it.
SETTING THE TIME AND DATE
Tap Date and Time menu option.to set all your preferred parameters.
Table of contents