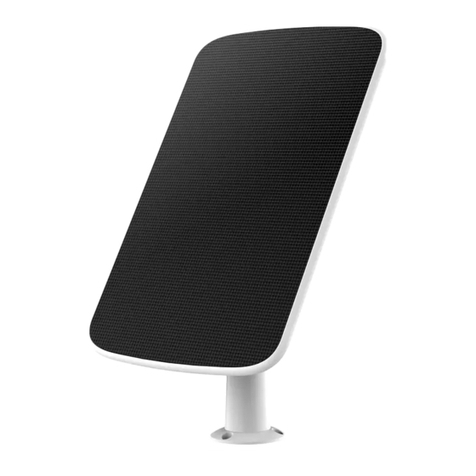
Ezviz CS-CMT-Solar Panel User manual


COPYRIGHT © 2019 Hangzhou EZVIZ Software Co., Ltd.. ALL RIGHTS RESERVED.
Any and all information, including, among others, wordings, pictures, graphs are the properties of Hangzhou EZVIZ
Software Co., Ltd. (hereinafter referred to as “EZVIZ”). This user manual (hereinafter referred to as “the Manual”)
cannot be reproduced, changed, translated, or distributed, partially or wholly, by any means, without the prior
written permission of EZVIZ. Unless otherwise stipulated, EZVIZ does not make any warranties, guarantees or
representations, express or implied, regarding to the Manual.
About this Manual
The Manual includes instructions for using and managing the product. Pictures, charts, images and all other
information hereinafter are for description and explanation only. The information contained in the Manual is
subject to change, without notice, due to firmware updates or other reasons. Please find the latest version in the
™ website (http://www.ezvizlife.com).
Revision Record
New release – January, 2019
Trademarks Acknowledgement
™, ™, and other EZVIZ’s trademarks and logos are the properties of EZVIZ in various
jurisdictions. Other trademarks and logos mentioned below are the properties of their respective owners.
Legal Disclaimer
TO THE MAXIMUM EXTENT PERMITTED BY APPLICABLE LAW, THE PRODUCT DESCRIBED, WITH ITS HARDWARE,
SOFTWARE AND FIRMWARE, IS PROVIDED “AS IS”, WITH ALL FAULTS AND ERRORS, AND EZVIZ MAKES NO
WARRANTIES, EXPRESS OR IMPLIED, INCLUDING WITHOUT LIMITATION, MERCHANTABILITY, SATISFACTORY QUALITY,
FITNESS FOR A PARTICULAR PURPOSE, AND NON-INFRINGEMENT OF THIRD PARTY. IN NO EVENT WILL EZVIZ,
ITS DIRECTORS, OFFICERS, EMPLOYEES, OR AGENTS BE LIABLE TO YOU FOR ANY SPECIAL, CONSEQUENTIAL,
INCIDENTAL, OR INDIRECT DAMAGES, INCLUDING, AMONG OTHERS, DAMAGES FOR LOSS OF BUSINESS PROFITS,
BUSINESS INTERRUPTION, OR LOSS OF DATA OR DOCUMENTATION, IN CONNECTION WITH THE USE OF THIS
PRODUCT, EVEN IF EZVIZ HAS BEEN ADVISED OF THE POSSIBILITY OF SUCH DAMAGES.
TO THE MAXIMUM EXTENT PERMITTED BY APPLICABLE LAW, IN NO EVENT SHALL EZVIZ’S TOTAL LIABILITY FOR ALL
DAMAGES EXCEED THE ORIGINAL PURCHASE PRICE OF THE PRODUCT.
EZVIZ DOES NOT UNDERTAKE ANY LIABILITY FOR PERSONAL INJURY OR PROPERTY DAMAGE AS THE RESULT OF
PRODUCT INTERRUPTION OR SERVICE TERMINATION CAUSED BY: A) IMPROPER INSTALLATION OR USAGE OTHER
THAN AS REQUESTED; B) THE PROTECTION OF NATIONAL OR PUBLIC INTERESTS; C) FORCE MAJEURE; D) YOURSELF
OR THE THIRD PARTY, INCLUDING WITHOUT LIMITATION, USING ANY THIRD PARTY’S PRODUCTS, SOFTWARE,
APPLICATIONS, AND AMONG OTHERS.
REGARDING TO THE PRODUCT WITH INTERNET ACCESS, THE USE OF PRODUCT SHALL BE WHOLLY AT YOUR OWN
RISKS. EZVIZ SHALL NOT TAKE ANY RESPONSIBILITES FOR ABNORMAL OPERATION, PRIVACY LEAKAGE OR OTHER
DAMAGES RESULTING FROM CYBER ATTACK, HACKER ATTACK, VIRUS INSPECTION, OR OTHER INTERNET SECURITY
RISKS; HOWEVER, EZVIZ WILL PROVIDE TIMELY TECHNICAL SUPPORT IF REQUIRED.

SURVEILLANCE LAWS AND DATA PROTECTION LAWS VARY BY JURISDICTION. PLEASE CHECK ALL RELEVANT
LAWS IN YOUR JURISDICTION BEFORE USING THIS PRODUCT IN ORDER TO ENSURE THAT YOUR USE CONFORMS
TO THE APPLICABLE LAW. EZVIZ SHALL NOT BE LIABLE IN THE EVENT THAT THIS PRODUCT IS USED WITH
ILLEGITIMATE PURPOSES.
IN THE EVENT OF ANY CONFLICTS BETWEEN THE ABOVE AND THE APPLICABLE LAW, THE LATTER PREVAILS.
Regulatory Information
FCC Information
This device complies with Part 15 of the FCC Rules. Operation is subject to the following two conditions:
(1) This device may not cause harmful interference, and
(2) This device must accept any interference received, including interference that may cause undesired
operation.
Note: This product has been tested and found to comply with the limits for a Class B digital device, pursuant
to Part 15 of the FCC Rules. These limits are designed to provide reasonable protection against harmful
interference in a residential installation. This product generates, uses, and can radiate radio frequency energy
and, if not installed and used in accordance with the instructions, may cause harmful interference to radio
communications. However, there is no guarantee that interference will not occur in a particular installation.
If this product does cause harmful interference to radio or television reception, which can be determined by
turning the equipment off and on, the user is encouraged to try to correct the interference by one or more of
the following measures:
—Reorient or relocate the receiving antenna.
—Increase the separation between the equipment and receiver.
—Connect the equipment into an outlet on a circuit different from that to which the receiver is connected.
—Consult the dealer or an experienced radio/TV technician for help.
Please take attention that changes or modification not expressly approved by the party responsible for
compliance could void the user’s authority to operate the equipment.
This equipment should be installed and operated with a minimum distance 20cm between the radiator and
your body.
This device complies with Industry Canada licence-exempt RSS standard(s). Operation is subject to the
following two conditions:
(1) this device may not cause interference, and
(2) this device must accept any interference, including interference that may cause undesired operation of the
device.
Under Industry Canada regulations, this radio transmitter may only operate using an antenna of a type
and maximum (or lesser) gain approved for the transmitter by Industry Canada. To reduce potential radio
interference to other users, the antenna type and its gain should be so chosen that the equivalent isotropically
radiated power (e.i.r.p.) is not more than that necessary for successful communication.

SAVE THIS MANUAL FOR FUTURE REFERENCE
EU Conformity Statement
This product and - if applicable - the supplied accessories too are marked with "CE" and
comply therefore with the applicable harmonized European standards listed under the
Radio Equipment Directive 2014/53/EU, the EMC Directive 2014/30/EU, the RoHS Directive
2011/65/EU.
2012/19/EU (WEEE directive): Products marked with this symbol cannot be disposed of as
unsorted municipal waste in the European Union. For proper recycling, return this product
to your local supplier upon the purchase of equivalent new equipment, or dispose of it at
designated collection points. For more information see: www.recyclethis.info.
2006/66/EC and its amendment 2013/56/EU (battery directive): This product contains a
battery that cannot be disposed of as unsorted municipal waste in the European Union.
See the product documentation for specific battery information. The battery is marked
with this symbol, which may include lettering to indicate cadmium (Cd), lead (Pb), or
mercury (Hg). For proper recycling, return the battery to your supplier or to a designated
collection point. For more information see: www.recyclethis.info.
Industry Canada ICES-003 Compliance
This device meets the CAN ICES-3 (B)/NMB-3(B) standards requirements.
EC DECLARATION OF CONFORMITY
Hereby, Hangzhou EZVIZ Software Co., Ltd . declares that the radio equipment type [CS-CMT-Solar Panel] is in
compliance with Directive 2014/53/EU.
The full text of the EC DECLARATION OF CONFORMITY is available at the following web link:
http://www.ezvizlife.com/declaration-of-conformity.
Safety Instruction
Due to the product shape and dimension, the name and address of the importer/
manufacturer are printed on the package.
Customer Service
For more information, please visit www.ezvizlife.com.
Need help? Please visit “www.ezvizlife.com/inter/page/contact-us” for our local contact details.

1
Box Content
Solar Panel (x1) Adjustable Mounting Bracket (x1)
Screw Kit (x1) Quick Start Guide (x1)
The solar panel appearance is subject to the actual one you have bought.

2
Installation
You can install the solar panel on the wall or ceiling.
CAUTION: As an alternative charging equipment, the power amount generated by
this solar panel may be affected by its actual surrounding environment, mainly
the intensity of sunlight and the time length of illumination. If the battery
camera is running out of power soon, please bear it in mind that this solar panel
alone cannot ensure the camera remains in working status.
1Install the bracket
-(For the cement wall/ceiling only) Drill screw holes, and insert three anchors.
-Use three screws to fix the bracket.
Screw
Anchor

3
2Install the Solar Panel
-Mount the solar panel on the bracket.
-Tighten the fixing screw.
Fixing ScrewAdjusting Screw
3Adjust the Angle
-Loosen the adjusting screw.
-Adjust the solar panel angle as your desired place.
-Tighten the adjusting screw when you have the solar panel in the position you
want.
Make sure that the solar panel receives maximum solar radiation.

4
4Charge the Battery Camera
-Connect it with battery camera.
Waterproof Design Interface
For detailed information, please visit www.ezvizlife.com.

5
박스 내용물
태양광 패널 (x1) 조정 가능한 설치용 브래킷 (x1)
나사 세트 (x1) 빠른 시작 가이드 (x1)
태양광 패널 외관은 구매한 실제 제품에 따라 다를 수있
습니다 .

6
설치
태양광 패널을 벽면 또는 천장에 설치할 수있습니다 .
주의 사항 : 대체에너지 충전 장비이므로 , 이태양광 패널
이생성한 전력량은 실제 주위 환경 , 주로 햇빛의 강도와
빛을 받는 시간에 영향을 받을 수있습니다 . 카메라의 전
원이 배터리 부족으로 곧꺼지게 되는 경우 이태양광 패
널만 단독으로 사용하여 카메라의 작동 상태를 유지할 수
없다는 것을 유의해 주십시오 .
1브래킷 설치하기
-(시멘트 벽/천장만 해당)드릴로 나사 구멍을 뚫고 3개의
앵커를 삽입합니다.
-3개의 앵커를 사용하여 브래킷을 고정합니다.
나사
앵커

7
2태양광 패널 설치하기
-브래킷에 태양광 패널을 장착합니다.
-고정 나사를 조입니다.
고정 나사조절 나사
3각도 조정하기
-조절 나사를 풉니다.
-태양광 패널을 원하는 위치에 맞게 조정합니다.
-태양광 패널을 원하는 위치에 놓고 조절 나사를
조입니다.
태양광 패널이 태양광 복사를 최대로 받을 수있게 하십시오 .

8
4카메라 배터리 충전하기
-태양광 패널을 카메라 배터리와 연결합니다.
방수 설계 인터페이스
자세한 정보를 알아보시려면 www.ezvizlife.com 을방문해 주십
시오 .

9
Thành phần trong hộp
Pin mặt trời (x1) Giá gắn có thể điều chỉnh (x1)
Bộ vít nở (x1) Hướng dẫn sử dụng nhanh (x1)
Hình thức của tấm pin mặt trời chính là loại pin thực tế
bạn đã mua.

10
Lắp đặt
Bạn có thể lắp pin mặt trời trên tường hoặc trần nhà.
THẬN TRỌNG: Là thiết bị sạc thay thế, lượng điện
năng tạo ra từ tấm pin mặt trời này có thể chịu ảnh
hưởng bởi môi trường thực xung quanh, chủ yếu là do
cường độ của ánh sáng mặt trời và thời gian chiếu sáng.
Nếu pin camera sắp sửa hết, hãy nhớ rằng chỉ tấm pin mặt
trời này sẽ không thể đảm bảo camera luôn ở trạng thái
hoạt động.
1Lắp đặt giá
- (Chỉ dành cho tường/trần xi-măng) Khoan các lỗ vít và
chèm ba nở vít.
- Sử dụng ba ốc vít để cố định giá.
Ốc vít
Nở vít

11
2Lắp đặt pin mặt trời
- Cố định pin mặt trời trên giá.
- Vặn chặt vít cố định.
Vít cố địnhVít điều chỉnh
3Điều chỉnh góc
- Nới lỏng vít điều chỉnh.
- Điều chỉnh góc của pin mặt trời theo địa điểm mong
muốn của bạn.
- Vặn chặt vít điều chỉnh khi bạn đặt pin mặt trời vào vị trí
bạn mong muốn.
Hãy chắc rằng pin mặt trời nhận được lượng bức xạ mặt
trời tối đa.

12
4Sạc pin camera
- Kết nối với pin camera.
Giao diện thiết kế chống
thấm nước
Để biết thông tin chi tiết, vui lòng truy cập www.ezvizlife.
com.

13
อุปกรณ์การติดตั้ง

14
การติดตั้ง
1

15
2
3
Table of contents
Other Ezviz Solar Panel manuals
Popular Solar Panel manuals by other brands

IBC SOLAR
IBC SOLAR AeroFix Series installation instructions

LEJ LINE
LEJ LINE LSK-JC-2V Installation and maintenance manual

SOLE
SOLE S150 installation manual

SolarWorld
SolarWorld SunCarport Planning and implementation guide

YOODA
YOODA 3W SOLAR PANEL quick start guide

Solarbayer
Solarbayer NANOSOL 135 Product information