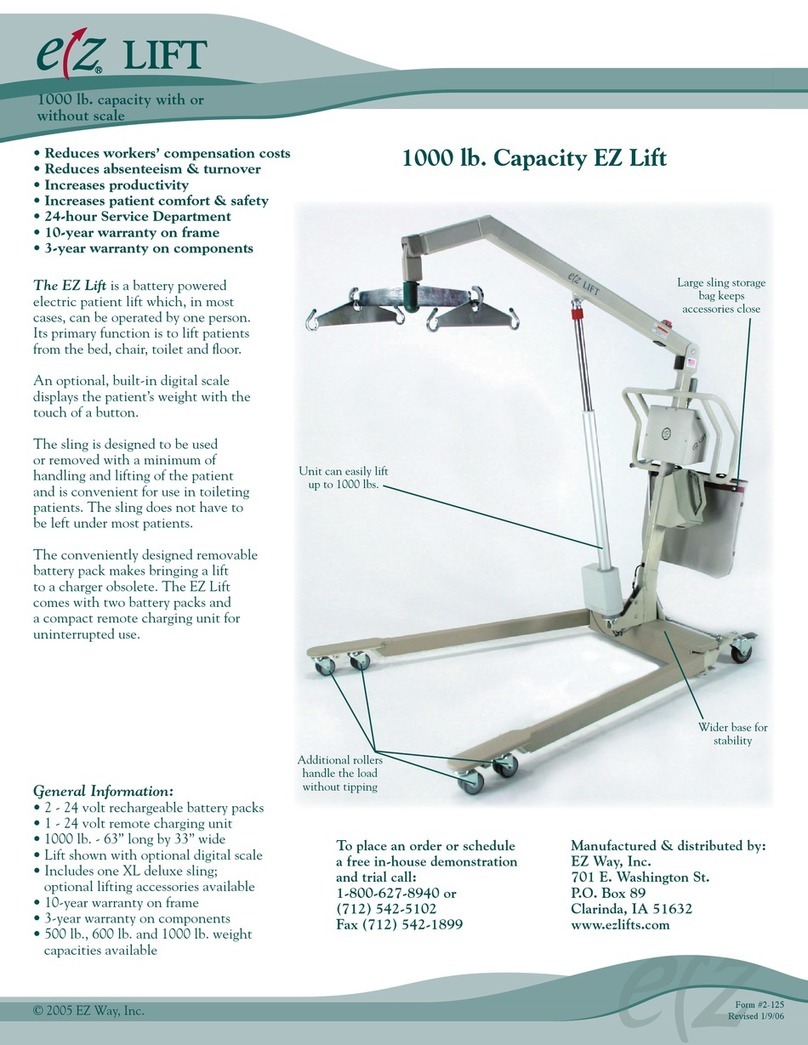
eZway EZ Light Lift Specifications

WARNING: Cancer and Reproductive Harm - www.P65Warnings.ca.gov.
EZ Light Lift
300 lb. Capacity
Form 2-182
Rev. 7/24/18
Operator’s Instructions
EZ Way, Inc.
PO Box 89
Clarinda, IA 51632
1-800-627-8940
www.ezlifts.com

2
Boom
Legs
Sling Hanger
Hand
Control
Battery/
Control Box
Mast
Actuator
Emergency
Stop Button
Locking Pins

WARNING: Cancer and Reproductive Harm - www.P65Warnings.ca.gov.
The EZ Light Lift is a versatile patient lift which allows you to perform transfers into and out of a car as well as
most common lifting situations.
The EZ Light Lift is lightweight, compact, and foldable. It allows for easy storage when not in use, and can be
stored in the trunk of a car for transfers away from home. It has a 300 lb. weight capacity and weighs just 58 lbs.
Safety Notes
The patient’s condition must be considered when determining the safest method for transferring the patient and
common sense must be utilized to determine if an individual is combative or has certain contraindications that
may deem them inappropriate for transfer with a lift.
When using the EZ Light Lift for extraction from a vehicle, great care should be taken when operating the lift
outdoors. The lift should not be operated on a steep incline and the area should be clear of debris. The lift is not
for use as a transporting device, but for point to point transfers.
EZ Way designs slings specifically for use with the EZ Light Lift. For the safety of the patient, do not use any
other type or brand of sling with the EZ Light Lift.
The EZ Light Lift has special locking casters on the front of the lift. Follow all instructions for locking and
unlocking the casters. See page 7 for instructions.
Do not push, pull, or use the actuator (motor)
as a handle for maneuvering the lift.
WARNING:
Operators must read this operators’ manual and
complete the EZ Light Lift Training Checklist prior
to using the lift. It is also recommended that
operators practice operating the lift prior to using
with patients.
WARNING:
Keep the area clear between the actuator and
the mast.
WARNING:
3

EZ Light Lift Assembly
1) Lock rear casters.
2) Hold handle on mast
assembly and remove locking
pin from mast assembly.
(See Figure 1)
3) Pivot mast/boom assembly
upward and insert locking
pin through base and mast
assembly. (See Figure 2)
4) Line up mounting posts on
battery controller with slots
on mast. Slide the mounting
posts into slots and push
down. (See Figure 3)
5) Locate cord from actuator
and plug it into the cord
coming from the bottom of
the controller. (See
Figure 4)
6) Make sure plug is fully seated
in control.
7) Grasp lift handle on boom to
stabilize the mast.
8) Remove lower pin. (See
Figure 6)
9) Fold unit closed and re-
insert pin into hole. (See
Figure 7)
The controller may be
removed to reduce the unit’s
weight. Unplug the actuator
cord from the controller. Stand
at the back of the unit and lift
slightly on the controller and
slide it to the right.
To further reduce the weight,
the unit can be broken down
into two pieces. Hold the mast/
boom assembly and remove
both locking pins from the
base assembly. The mast/boom
assembly can then be removed.
Insert both pins in their holes
for storage.
Figure 1
Figure 2
Figure 3
Figure 4
Boom
Legs
Figure 5
Figure 6
Sling Hanger
Locking Pins
Hand
Control
Battery/
Control Box
Mast
Actuator
Emergency
Stop Button
Figure 7 - Easily fits in a standard vehicle
trunk
4

5
Operating the EZ Light Lift
Pre-operation check
Before operating the lift, complete a safety check
for loose nuts, bolts, pins or damaged parts. Also,
ensure the sling is not ripped, frayed or showing
signs of wear. EZ Way recommends all slings be
replaced at the first sign of wear or after one year of
usage.
Make sure the Emergency Stop Switch is released by
turning the Emergency Stop Switch knob clockwise.
(See Figure 11)
To raise and lower the lift, use the buttons marked
and on the hand control to operate the lift in the
up and down directions. (See Figure 12)
There is an additional down button on the control
box. (See Figure 13)
Figure 13 - Down button on control box
Figure 11 - Emergency Stop button
Figure 12 - Raise and lower the lift
Folding the EZ Light Lift
The EZ Light Lift is designed to fold to a compact
profile for storage when not in use and can be stored
in the trunk of most vehicles.
1) To fold the lift, lock the
rear casters.
2) Lower the boom to the
lowest position.
(See Figure 8)
3) Grasp lift handle on boom
to stabilize the mast.
4) Remove lower pin.
(See Figure 9)
5) Fold unit closed and re-
insert pin into hole.
(See Figure 10)
The controller may be removed to reduce the unit’s
weight. Unplug the actuator cord from the controller.
Stand at the back of the unit and lift slightly on the
controller and slide it to the right.
To further reduce the weight, the unit can be broken
down into two pieces. Hold the mast/boom assembly
and remove both locking pins from the base assembly.
The mast/boom assembly can then be removed.
Insert both pins in their holes for storage.
Figure 8
Figure 9
Figure 10
→
→

Sling information and diagram
The EZ Light Lift uses a specially designed sling. Do not use slings that are not designed for use with the EZ
Light Lift.
As patients vary in size, shape, and weight, these conditions must be taken into consideration when deciding
which size EZ Way sling is suitable for each patient’s needs. The slings are available in various sizes. Please
contact EZ Way with any questions regarding sling dimensions and sizes.
To order slings call 1-800-627-8940.
Figure 14
Removable Plastic
Head Support Stay
(Hidden)
Torso Strap
Thigh Strap
Leg Strap
Base of the Sling
Head Support Strap
6

Transferring in and out of a vehicle
The EZ Light Lift can be used for transfers into and
out of a vehicle. Transfers are easiest to accomplish
from the front seat.
The lift should not be used on steep inclines. When
the lift is being used on moderate inclines, the
front casters should be locked to prevent swiveling.
These casters should be unlocked for all other lifting
situations. To transfer into or out of a vehicle,
follow the instructions for transfers from a seated
position.
Transferring patient from a seated
position
Step 1
Apply the sling
1) Lean the patient forward a few inches to place
the sling behind the patient.
2) Slide the sling down between the patient and
the back of the chair, making sure the washing
labels face the chair and the handle on the
sling faces outward and is in the middle of the
patient’s back. The base of the sling should
touch the chair and the head support strap
should be above the patient’s shoulders.
(See Figure 15)
3) Lean the patient back in the chair.
4) Pull each leg strap of the sling along the side
of each of the patient’s legs. To set the sling
properly and remove any slack in the material,
push the sling down towards the seat of the
chair near the patient’s hip and give the sling
leg a tug. Repeat this process on the opposite
side.
5) Lift the patient’s knee and pull the thigh strap
under the patient’s thigh and wrap it around to
the top of the leg. Choose a loop on the thigh
strap that will provide the tightest fit around the
leg and pull the leg strap through the loop on
the thigh strap. Repeat process on opposite leg.
(See Figure 16)
Step 2
Position the lift
1) Position the lift so the tip of the boom is directly
in front of the patient’s torso. Make sure the
wheels of the EZ Light Lift are unlocked.
2) Use the hand control to lower the lift so the
hanger bar is approximately at the same level as
the patient’s chest.
3) Hook the left leg strap to the hanger bar hook
on the left side and the right leg strap to the
hanger bar hook on the right side.
(See Figure 17)
Figure 15 - Slide sling behind patient
Figure 16 - Pull leg strap through thigh loop
Figure 17 - Hook leg strap to hanger bar
7

Note: There are several loops to choose which
will adjust the recline angle when lifted. For a
more upright posture, choose the longest straps.
For a more reclined posture, choose the shortest
straps. When lifting from a car, use the shortest
straps possible. Always use the same length of
strap on each side.
4) Hook the left torso strap to the hanger bar hook
on the left side and the right torso strap to the
hanger bar hook on the right side.
(See Figure 18)
5) Loosen the head support strap and attach it to
the center post at the end of the boom. Tighten
the head support strap to control recline angle.
(See Figure 19)
6) Use the hand control to carefully raise the lift
and raise the patient from the seat. After the
patient is clear of the seat, grasp the handles
of the lift and move the patient to the desired
transfer location. (See Figure 20)
Transferring patient from a supine
position
Step 1
Apply the sling
1) Log roll the patient on his/her side away from
you.
2) Position the sling so the handles on the back of
the sling are facing the mattress. Tuck half of
sling underneath patient.
3) Using the handle as a guide, center the sling
on the patient’s spine with the base of the sling
approximately two inches below the base of the
tailbone. (See Figure 21)
4) Log roll patient towards you in and pull the rest
of the sling out the other side.
5) Lay patient on their back. Make sure the sling is
centered underneath the patient.
Figure 18 - Hook torso straps to
hanger bar hook
Figure 21 - Position sling appropriately
Figure 19 - Attach head support strap to
center post on boom
Figure 20 - Position patient directly over
seating surface
Transferring patient from a seated
position - continued
8

6) Lift the patient’s knee and pull the thigh strap
under the patient’s thigh and wrap it around to
the top of the leg. Choose a loop on the thigh
strap that will provide the tightest fit around the
leg and pull the leg strap through the loop on
the thigh strap. Repeat process on opposite leg.
(See Figure 22)
Step 2
Position the lift
1) Position the lift so the tip of the boom is directly
above the patient’s torso. Use the hand control
to lower the lift so the hanger bar is just above
the patient’s navel. Make sure all EZ Light Lift
wheels are unlocked.
2) Hook the left leg strap to the hanger bar hook
on the left side and the right leg strap to the
hanger bar hook on the right side. Note: There
are several loops to choose which will adjust the
recline angle when lifted. For a more upright
posture, choose the longest straps. For a more
reclined posture, choose the shortest straps.
Always use the same length of strap on each
side.
3) Hook the left torso strap to the hanger bar hook
on the left side and the right torso strap to the
hanger bar hook on the right side.
4) Loosen the head support strap and attach it to
the center post at the end of the boom. Tighten
the head support strap to control recline angle.
5) Use the hand control to carefully raise the
lift and raise the patient. After the patient is
clear of the bed, grasp the handles of the lift
and move the patient to the desired transfer
location. (See Figure 23)
Figure 22 - Pull leg strap through loop on
thigh strap
Figure 23 - Transferring the patient
Transferring patient from floor
EZ Way strongly recommends two caregivers
complete the transfer when picking a patient up
from the floor. Follow same procedure used when
lifting patient from a supine position (See page 7).
Step 1
Position lift
If possible, lift and bend the patient’s legs, pushing
lift forward. Keep both legs together, laying the
patient’s legs over either side of the base of the EZ
Light Lift. (See Figure 24)
Figure 24 - Lifting a patient from floor
Transferring patient from a supine
position - continued
9

2) After the patient has been lowered, unhook all
straps from the lift and move the lift away from
the patient.
3) Remove the leg straps from the thigh straps.
Lift knee and remove thigh strap from under leg.
Repeat for other leg.
4) Lean patient forward a few inches and grasp the
sling. Remove sling by pulling upward.
Transfer to supine position
1) Position patient over bed or gurney. Make sure
all EZ Light Lift wheels are unlocked. Lower
the patient using the hand control.
2) After the patient has been lowered, unhook all
straps from the lift and move the lift away from
the patient.
3) Remove the leg straps from the thigh straps.
Lift knee and remove thigh strap from under leg.
Repeat for other leg.
4) To remove the sling from under the patient,
gently log roll the patient away from you,
folding and tucking the sling under the patient.
Log roll the patient toward you, allowing you to
free the sling from beneath the patient.
(See Figure 26)
Transfer to sitting position
1) Position the patient over a chair or wheelchair.
Make sure all lift wheels are unlocked. The
wheelchair wheels should be locked. Lower the
lift using the hand control. Grasp the sling
handle as the patient is being lowered. Use the
sling handle to position the patient properly in
the seat. (See Figure 25)
Figure 25 - Positioning patient in chair
Figure 26 - Remove sling
Step 2
Attach sling
Follow same procedure used when lifting patient
from a supine position (See pages 8 & 9). You
will, however, have to use the longest loops at the
patient’s torso and the legs as well as lengthen the
head support strap.
Step 3
Lift patient
Follow same procedure used when lifting patient
from bed (See page 9).
Important: Before lifting, make sure the sling is
not snagged on any objects or beneath the casters
or legs of the lift. The sling should be free from
obstruction.
Step 4
Follow same procedure used when lowering patient
to bed, chair or wheelchair.
Step 5
Follow same procedure used for removing sling.
Transferring patient from floor -
continued
10

Sling laundering instructions
EZ Way slings are designed and manufactured to
the highest possible performance specifications.
They are constructed of high quality, durable,
100% synthetic fabrics and have been individually
inspected before shipping to ensure the safety of
the product. However, water washing temperature,
detergents and disinfectants, patient incontinence,
frequency of use, types and weights of patients, etc.,
all have an impact on the life expectancy of each
product. Because of these factors, the continued
integrity of the product is not guaranteed. The user
must therefore examine the product to ensure its
integrity before each use.
EZ Way offers a 6-month warranty on slings and
harnesses and recommends replacement after one
year or if the sling or harness shows any sign of
damage or wear. EZ Light slings must only be used to
hold the amount of weight dictated by the EZ Light
Lift capacity.
Users must accept full responsibility for checking
the condition of all slings before each and every use
on a patient.
EZ Sling and Harness Laundering Instructions
To get the longest life out of your product:
1) Remove Plastic Head Support Stay prior to
laundering.
2) Do not bleach.
3) To prevent stains from setting, rinse 5 minutes
in 80° – 100° F. Stains will set when
temperature is over 105° F.
4) Washing temp. 160° F. maximum.
5) RINSE THOROUGHLY in 100° F. If high
alkaline detergent (with pH greater than 11.0)
is used, rinse twice.
6) Tumble dry, temperature 100° F. maximum.
High heat will weaken the fabric.
7) If available, use a laundry bag to wash and dry
the harness.
Charging the EZ Light Lift
The EZ Light Lift is equipped with an on-board
charger. To charge the battery, plug the transformer/
power cord into the control box. Plug the
transformer into the wall. A yellow LED will light
when charging is taking place. The lift will not
operate while charging. Do not charge the lift in
the patient care area. (See Figure 27)
Figure 27 - Charging the EZ Light Lift
11

Emergency Lowering
In the event the lift will not lower using the hand
control, locate the down switch on the face of
the control box. Hold this button to activate the
electric emergency down control. (See Figure 28)
The patient must be positioned over a bed or chair.
If the unit still does not go down, there is a manual
emergency down release on the actuator. To use this
feature, make sure patient is over a bed or chair.
1) Pull up and hold the red emergency release
handle. (See Figure 29)
2) Patient will slowly lower (if movement does not
happen, release handle and repeat). To stop
movement, release handle.
Figure 29 - Emergency release handle
Figure 28 - Hold for electric emergency down
12

EZ Light Lift Maintenance
The EZ Light Lift requires a minimum of service to keep it in good working order. Nevertheless, it is
important that certain basic checks be periodically are done to ensure on-going safety throughout the
life of the device.
The manufacturer suggests that the following components and operating points be scheduled for
inspection at intervals not greater than one month. Any detected deficiency must be rectified before
the lift is put back into service.
1) Check all bolts, nuts and pins to ensure they are tight.
2) Check for wear at all pivot points and hanger bar connection point.
3) Check boom to mast pivot bolt to assure nut is tight.
4) Check mounting bolts at top and bottom of actuator. Pay particular attention to top bolt hole for elongation
Check the actuator for the following:
1. Inspect the plastic housing for any dents or cracks
2. Inspect the cables to see if they have been pinched or cut
3. See if the actuator appears deflected when fully extended at full load
4. Verify that the mounting points do not have any cracks or other defects
5. Apply a heavy grease to the actuator mounting pins as needed
6. Verify that the inner and outer tubes do not have any dents, dings or large scratches
in them
TOP OF
ACTUATOR
BOOM TO MAST
LOCKING PINS ALL WHEELS
HANGER BAR
CONNECTION
ELONGATED
BOTTOM OF
ACTUATOR
13
Contact EZ Way’s Service Department at 1-800-627-8940 if the actuator shows any signs of the issues
listed above.

**IMPORTANT NOTICE**
It is the responsibility of the purchaser to ensure that regular maintenance inspection is conducted
on this device by competent staff.
6) At six month intervals, attach a load equivalent to the rated capacity of the lift to the unit. Raise
and lower the load with the lift. Listen for any unusual noises while operating the unit. With the
test load applied to the lift, check all structural welds for any signs of stress or fatigue cracks. If any
unusual noises or cracks are found, stop using the lift and call the EZ Way Service Department
immediately!
7) Test the Emergency Stop Switch. If the switch does not stop the lift when activated, call the EZ
Way Service Department immediately!
8) Perform a functional test of the emergency lowering feature of the lift actuator if it is so equipped.
9) Perform a functional test of the anti-pinch feature of the lift actuator. This feature turns the
actuator off when lowering the lift boom if an obstruction is encountered.
10) Check all the wheels and brakes to make sure they are functioning properly. Hair that gets picked
up and wrapped in between wheels should be cleaned out so that the lift will roll easily.
11) Do a visual check for any damaged, missing or loose parts. Repair as necessary.
12) Check the entire sling for damage or wear, including the loops and stitching. If damage or wear is
present, discard the sling and order a new one. It is recommended that slings be replaced after one
year or if the sling shows any sign of damage or wear.
13) Cleaning the lift: To clean the body of the lift, use standard hospital-grade germicidal cleaning
products.
14

ANSWERS: 1a) Charge batteries when low battery indicator on control box is illuminated. 1b) Stop button is located on control box. It is used to stop
the lift in an emergency situation. 1c) Look for intact stitching and seams, look for fraying or ripped loops and/or material, inspect material for excessive
wear by holding up to light. 1d) Lower boom fully, grasp boom and remove lower pin. Fold unit and re-insert locking pin. 2a) Never lock the wheels
of the EZ Light Lift when lifting or transferring a patient. The unit will self adjust to the center of gravity, wheels need to be unlocked to allow for this
adjustment. The locks on the front wheels do not lock the wheels from turning, they are used when on an uneven surface and should be unlocked when
on flat surfaces. 2b) At a minimum, top of sling to top of “horseshoe” portion of sling should run from patient’s neckline to at least 2-inches below the
tailbone, respectively. 2c) Refer to operator’s instructions. 2d) Leg loops: Shorter loops recline patient further; longer loops place body in upright sitting
position. Torso loops: Longer loops recline patient; shorter loops place in upright sitting position. You may also use head support strap to adjust recline
angle. 2e) Once sling is applied underneath a patient, thread leg strap through thigh strap and attach left strap to hanger bar hook on the left side of lift,
repeat on right side. Attach left torso strap to hanger bar hook on left side of lift, repeat on right side. Attach head support strap to post on end of boom.
Ensure all loops securely fastened to hooks before lifting. 2f) Strap is for guiding patient and rotating patient while suspended; Also helps with upright
seated positioning when the strap is held stationary, just prior to seating patient. 2g) Press down button on control box to lower the lift. The manual down
lever is located at base of actuator. Pull up and hold on handle to lower lift (lift must have weight on it to lower). 3a) If supine, log roll patient to one side
folding half of sling and tuck under patient. Roll patient in other direction and remove entire sling from under patient. If seated, gently pull legs of sling
from under patient’s legs placing sling legs to side of patient. Grasp middle handle and gently pull upward, removing sling from behind patient.
EZ Light Lift Competency Checklist
Purpose: To assist in the proper training of operating the EZ Light Lift.
Staff Name: Date: Observed by:
Yes No
1. EZ Light Lift Pre-Operation Check
a) Demonstrate how and when to charge batteries.
b) Locate emergency stop button and its purpose.
c) Check to ensure sling is in good condition, with no excessive wear (loops, etc.). Identify
what to look for that indicates wear.
d) Demonstrate how to fold and unfold the unit.
2. EZ Light Lift Operation
a) Do you lock the wheels? Why or why not?
b) Demonstrate proper fitting of sling to the resident/patient.
c) Demonstrate the different methods to raise/lower the resident/patient from a chair/
wheelchair, vehicle and from the floor.
d) Explain the different loops and their usage for positioning.
e) Demonstrate proper attachment of sling to lift.
f) What is the strap on the back of the sling for?
g) Demonstrate the use of the emergency lowering features.
3. EZ Light Lift - Sling Removal
a) Demonstrate proper removal of sling from resident/patient.
For any questions or concerns, please refer to the operator’s instructions.
15

• Local safe patient handling specialists
• 24-hour Service Department
• FREE equipment training, demonstrations,
trials, inservicing and facility assessments
• Outstanding warranties
• Highest bariatric weight capacities in the
industry
- Up to 1,000 lb. capacity floor and
ceiling lifts
- Up to 800 lb. capacity sit-to-stand
• Local inventory
Contact us today to set up a free in-house
demonstration and trial. 800-627-8940
Visit www.ezlifts.com to download a
FULL CATALOG
Why Choose EZ Way?
EZ Way is a privately-owned company with
manufacturing operations headquartered in
Clarinda, Iowa. Since 1994 EZ Way has had
one mission: develop, market and service the
highest quality and most functional patient
transferring equipment in the industry.
To place an order or schedule a free
in-house demonstration and trial call:
1-800-627-8940 or (712) 542-5102
Fax (712) 542-1899
PO Box 89, 710 E. Main • Clarinda, IA 51632 • 1-800-627-8940
EZ Way, Inc.
“Your Total Patient
Lift Solution”
400, 500 & 800 lb. capacities available with or
without scale. Assists with patient transfers from
a chair, wheelchair, toilet or bed; or for use as a
standing or ambulation aid.
EZ WAY SMART STAND®
500, 600 & 1000 lb. capacities available with or
without scale. Easily lifts patients from a bed, chair,
toilet or floor.
EZ WAY SMART LIFT®
Air assisted, low friction feature transfers patients
laterally with ease. Available in bariatric size.
TRANSFER MATTRESS
BATHING & HYGIENE
Full line of shower chairs, trolley, & tubs.
EZ WAY CEILING LIFT
Fixed motor capacities of 650 & 1000 lb. and
portable motor capacity of 650 lb.
SLIDE SHEET
The EZ Way Slide Sheet is a low friction device
used to aid in repositioning and laterally
transferring patients in bed.
800 lb. stand and 1000 lb. Lift are built to last
with wider bases for stability.
BARIATRICS
Other manuals for EZ Light Lift
1
Table of contents
Other eZway Lifting System manuals
Popular Lifting System manuals by other brands

BVA Hydraulics
BVA Hydraulics H0500 instruction manual

Kesseböhmer
Kesseböhmer DR!VE Mini Assembly instructions

KITO
KITO RY Series Assemble, Disassemble & Troubleshooting Instructions

ATH-Heinl
ATH-Heinl ATH Comfort Lift 2.35 user manual

Pride Mobility
Pride Mobility SILVER BOOM 250 owner's manual

Parkside
Parkside P-SA 1200 Operation and safety notes