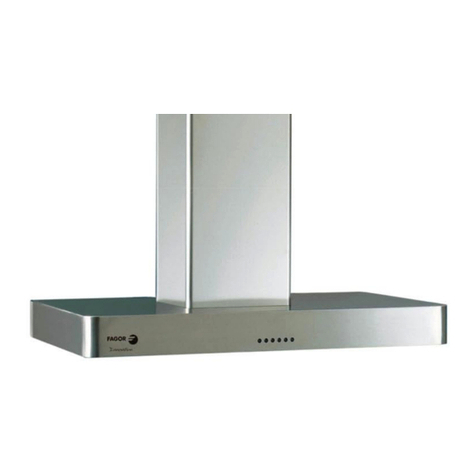
Fagor 60CFP-36IX Instruction Manual


2
FR
EN
FR
ES
PT 38
26
3
14

3
TABLE OF CONTENTS EN
1/ NOTICES TO THE USER ............................................................................. 4
WARNING..................................................................................................... 5
CAUTION...................................................................................................... 6
WARNING FOR INSTALLING THE HOOD................................................... 6
2/ INSTALLING YOUR APPLIANCE ................................................................. 7
INSTALLING MOUNTING PLATE................................................................. 7
INSTALLING THE DUCTWORK ................................................................... 7
INSTALLING THE CHIMNEYS ..................................................................... 8
RECIRCULATION FILTER INSTALLATION.................................................. 8
PREPARING THE HOOD ............................................................................. 9
INSTALLING THE HOOD.............................................................................. 9
3/ USING YOUR APPLIANCE......................................................................... 10
OPERATION............................................................................................... 10
4/ CARING FOR AND CLEANING YOUR APPLIANCE...................................11
MAINTENANCE...........................................................................................11
5/ TROUBLESHOOTING................................................................................ 12
6/ AFTER-SALES SERVICE........................................................................... 13

4
1/ NOTICES TO THE USER
EN

5
1/ NOTICES TO THE USER
TO REDUCE THE RISK OF FIRE, ELECTRIC SHOCK, OR INJURY TO PERSONS,
OBSERVE THE FOLLOWING:
1. Use this unit only in the manner intended by the manufacturer. If you have questions,
contact the manufacturer at the address or telephone number listed in the warranty.
2. Before servicing or cleaning unit, switch power off at service panel and lock service
panel to prevent power from being switched on accidentally. When the service
disconnecting means cannot be locked, securely fasten a prominent warning device,
such as a tag, to the service panel.
3. Installation work and electrical wiring must be done by a qualified person(s) in accor-
dance with all applicable codes and standards, including fire-rated construction codes
and standards.
4. Sufficient air is needed for proper combustion and exhausting of gases through the
flue (chimney) of fuel burning equipment to prevent back drafting. Follow the heating
equipment manufacturer’s guidelines and safety standards such as those published by
the National Fire Protection Association (NFPA), and the American Society for Heating,
Refrigeration and Air Conditioning Engineers (ASHRAE), and the local code
authorities.
5. When cutting or drilling into wall or ceiling, do not damage electrical wiring and other
hidden utilities.
6. Ducted fans must always be vented to the outdoors.
7. Do not use this unit with any separate solid-state speed control device.
8. To reduce the risk of fire, use only metal ductwork.
9. This unit must be grounded.
TO REDUCE THE RISK OF A RANGE TOP GREASE FIRE:
A. Never leave surface units unattended at high settings. Boil overs cause smoking and
greasy spillovers that may ignite. Heat oils slowly on low or medium settings.
B. Always turn hood ON when cooking at high heat or when flam being food (i.e. Crepes
Suzette, Cherries Jubilee, Peppercorn Beef Flambe).
C. Clean ventilating fans frequently. Grease should not be allowed to accumulate on fan
or filter.
D. Use proper pan size. Always use cookware appropriate for the size of the surface
element.
WARNING
TO REDUCE THE RISK OF INJURY TO PERSONS IN THE EVENT OF A RANGE
TOP GREASE FIRE, OBSERVE THE FOLLOWING:*
1. SMOTHER FLAMES with a close-fitting lid, cookie sheet, or metal tray, then turn off
the burner. BE CAREFUL TO PREVENT BURNS. If the flames do not go out
immediately, EVACUATE AND CALL THE FIRE DEPARTMENT.
2. NEVER PICK UP A FLAMING PAN - You may be burned.
3. DO NOT USE WATER, including wet dishcloths or towels - violent steam explosion will
result.
4. Use an extinguisher ONLY if:
A. You know you have a Class ABC extinguisher and you already know how to operate it.
B. The fire is small and contained in the area where it started.
C. The fire department is being called.
D. You can fight the fire with your back to an exit.
EN
EN


6
1/ NOTICES TO THE USER
CAUTION
1. To reduce risk of fire and to properly exhaust air, be sure to duct air outside. Do not
vent exhaust air into spaces within walls or ceilings or into attics, crawl spaces, or
garages.
2. Take care when using cleaning agents or detergents.
3. Avoid using food products that produce flames under the Range Hood.
4. For general ventilating use only. Do not use to exhaust hazardous or explosive
materials and vapors.
5. To avoid motor bearing damage and noisy and/or unbalanced impellers, keep
drywall spray, construction dust, etc. off power unit.
6. Your hood motor has a thermal safety which will automatically shut off the motor if it
becomes overheated. The motor will restart when it cools down. If the motor
continues to shut off and restart, have the hood serviced.
7. For best capture of cooking impurities, the bottom of the hood should be a minimum
of 26" (66CM) and a maximum of
31" (78CM) above the cooking
surface.
8. Two installers are recommended
because of the large size and
weight of this hood.
9. This product is equipped with a
thermostat which may start blower
automatically. To reduce the risk of
injury and to prevent power from
being switched on accidentally,
switch power off at service panel
and lock or tag service panel.
10. Use with approved cord-connection
kit only.
11. Please read specification label on
product for further information and
requirements.
WARNING FOR INSTALLING THE
HOOD
Note: This range hood must be
properly grounded. The unit should
be installed by a qualified
electrician in accordance with all
applicable national and local electrical codes.
The minimum hood distance above cook top must not be less than 26” (66CM). A
maximum of 31” (78CM) above cook top is highly recommended for best capture of
cooking impurities. Distances over 31” (78CM) are at the installer and users discretion
EN

7
2/ INSTALLING YOUR APPLIANCE
INSTALLING MOUNTING PLATE
1. Place the template paper onto the ceiling. Drill holes as shown on the paper.
2. Put the drywall anchors into the holes, take out the mounting plate and use 12 pcs
mounting screws to secure the plate onto
the ceiling. For concrete ceilings, please use
the 8 pcs of the expanding screws).
3. Take out the 8 pcs of angle iron, use 8 pcs
of mounting screws(4*14mm) with washers
and nuts to fix 4 pcs of angle iron onto the
mounting plate
4. Adjust the height X of the chimney (as
shown on the picture 1), use 16 pcs of
mounting screws (4*14mm) with washers
and nuts to fix the other 4 pcs angle iron
onto the angle irons which have been
installed.
INSTALLING THE DUCTWORK
NOTE: To reduce the risk of fire, use only metal ductwork.
1 Design the ductwork to vent between the hood and the outside.
2 A straight, short duct run will allow the hood to perform most
efficiently.
3 Let one side of the duct go outside through the hole of 6.7’’ (17 cm)
as shown.
EN

8
2/ INSTALLING YOUR APPLIANCE
INSTALLING THE CHIMNEYS
1 Remove the chimneys from the packaging, put the inside
chimney through the angle irons and up to the ceiling, use 4
pcs of mounting screws(4*8mm) to fix the chimney onto the
mounting plate. See picture shown.
2 Put the outside chimney onto the inside chimney and use the
S hook to fix on the angle iron. See picture shown.
NONE-DUCTED RECIRCULATION FILTER INSTALLATION
1 Purchase a non-ducted recirculation filter from your dealer.(The non-duct
recirculation filter is optional, and bought separately
2 Install the filter by rotating it onto the brackets which are on both sides of the motor.
EN

9
2/ INSTALLING YOUR APPLIANCE
PREPARING THE HOOD
Note: On stainless steel hoods, carefully
remove the plastic protective film from all
exterior surfaces of the hood and decorative
flues, prior to final installation.
1 Remove the hood from the carton.
2 Install the vent into the duct connector of the
hood with 4 pcs mounting screws (4*8mm).
INSTALLING THE HOOD
Note: at least two people will be required to mount the
hood.
1 Raise the hood into its mounting position.
2 Fix the hood onto the angle irons with 16 pcs of mounting
screws (4*14mm). See picture as shown.
3 Pull the duct as the direction showed on the picture, and
make it attach onto the vent.
4 Loosen the slide, and pull the outside chimney as shown.
EN

10
3/ USING YOUR APPLIANCE
OPERATION
Controls
Electronic Button
Control Panel Layout and Buttons Configurations:
Electronic Controls with Time Delay
•Lights:
oPress the light button to turn halogen lights on and off.
• Power settings:
oPress the button once and the motor starts to operate at Low speed
oPress the button again and the motor will reach Medium speed.
oPress the button once more and the motor wilI reach High speed.
oPress the button to lower speeds in succession until the motor stops
working (power off).
•Timer function:
oThe control system provides the option to run the motor for a predetermined
time period in order to evacuate remaining vapors from me kitchen,
oPress the timer button while the motor is running. The motor will shut off
automatically after 10 minutes
EN

11
4/ CARING FOR AND CLEANING YOUR APPLIANCE
MAINTENANCE
Proper maintenance of the Range Hood will
assure proper performance of the unit.
Filters
The filters must be cleaned approximately once
every 30 hours of operation.
Use a warm detergent solution. Grease filters are
dishwasher safe.
Remove filter by pushing filter towards the back
of hood and rotating filter downward.
Duct free (Carbon) Filters
The duct free filters should be changed every 6 months. Rotate the filters to remove and
replace.
Cleaning the Hood
Stainless steel is one of the easiest materials
to keep clean. Occasional care will help preserve its fine appearance.
Cleaning tips:
Hot water with soap or detergent is all that is usually needed.
Follow all cleaning by rinsing with clear water. Wipe dry with a clean, soft cloth to avoid
water marks.
For discolorations or deposits that persist, use a non-scratching household cleanser or
stainless steel polishing powder with a little water and a soft cloth.
For stubborn cases, use a plastic scouring pad or soft bristle brush together with
cleaner and water. Rub lightly in direction of polishing lines or "grain" of the stainless
finish. Avoid using too much pressure which may mar the surface.
DO NOT allow deposits to remain for long periods of time.
DO NOT use ordinary steel wool or steel brushes. Small bits of steel may adhere to the
surface causing rust.
DO NOT allow salt solutions, disinfectants, bleaches, or cleaning compounds to
remain in contact with stainless steel for extended periods. Many of these compounds
contain chemicals which may be harmful. Rinse with water after exposure and wipe
dry with a clean cloth.
Painted surfaces should be cleaned with warm water and mild detergent only.
HALOGEN BULBS
To change bulbs:
1 Use a screwdriver to pull out the lampshade and get off the glass. CAUTION: BULB
MAY BE HOT, PLEASE ROTATE WHEN
THE BULB IS COOL!
2 Replace with a Type JC, 12Volt, 20Watt
Max, G-4 Base bulb. Do not touch
replacement bulb with bare hands!
3 Fix the glass and lampshade back the light
after replacing the bulb.
EN

12
5/ TROUBLESHOOTING
Fault Cause Solution
Lights on, but motor
does not work
The vent is blocked Remove the blockage
The capacitor is damaged Replace capacitor
The motor jammed causing
bearing damaged Replace motor
A bad smell from the motor
which suddenly stops working Replace motor
Light does not work,
motor does not work
Beside the above mentioned, check the following:
Light damaged Replace lights
Power cord is loose Connect the wires as per
the electric diagram
Oil leakage
Damper and the air ventilation
entrance are not tightly sealed Take down the Damper and
seal with glue
Leakage from the connection of
U-shaped section and cover Take U-shaped section
down and seal
The hood is shaking
The vent is damaged and
causes shaking Replace the vent
The motor is not tightly attached Lock the motor tightly
The chimney is not tightly
hanged Attach the chimney tightly
Insufficient suction
The distance between the hood
and the gas top is too much Readjust the distance
Too much ventilation from open
doors or windows Choose a new place and re
assemble the machine
The machine inclines to
one side
The fixing screw not tight enough Tighten the fixing screw
and make it horizontal
The mounting screw is not tight
enough Tighten the mounting screw
and make it horizontal
EN

13
6/ AFTER-SALES SERVICE
Any maintenance on your equipment should be undertaken by:
— either your dealer,
— or another qualified mechanic who is an authorized agent for the brand appliances.
When making an appointment, state the full reference of your equipment (model, type and
serial number) This information appears on the manufacturer's nameplate attached to
your equipment.
EN

14
FR 14

15
TABLE DES MATIÈRES FR
1/ AVIS AUX UTILISATEURS................................................................... 16
AVERTISSEMENT...................................................................................... 17
ATTENTION................................................................................................ 18
AVERTISSEMENT POUR L'INSTALLATION DE LA HOTTE...................... 18
2/ INSTALLATION DE VOTRE APPAREIL...................................................... 19
INSTALLATION DE LA PLAQUE DE MONTAGE ET DE LA CORNIÈRE ... 19
INSTALLATION DES CONDUITS............................................................... 19
INSTALLATION DES CHEMINÉES ............................................................ 20
INSTALLATION DU FILTRE DE RECIRCULATION SANS CONDUIT........ 20
PRÉPARATION DE LA HOTTE................................................................... 21
INSTALLATION DE LA HOTTE................................................................... 21
3/ UTILISATION DE VOTRE APPAREIL......................................................... 22
FONCTIONNEMENT.................................................................................. 22
4/ ENTRETIEN ET NETTOYAGE DE VOTRE APPAREIL .............................. 23
ENTRETIEN................................................................................................ 23
5/ DÉPANNAGE.............................................................................................. 24
6/ SERVICE APRÈS-VENTE .......................................................................... 25

16
1/ AVIS AUX UTILISATEURS
FR

17
1/ AVIS AUX UTILISATEURS
POUR RÉDUIRE LE RISQUE D'INCENDIE, CHOC ÉLECTRIQUE OU DE
BLESSURES, RESPECTER CE QUI SUIT :
1. N’utilisez cet appareil que de la manière prévue par le fabricant. Si vous avez des
questions, contactez le fabricant à l'adresse ou au numéro de téléphone indiqués dans la
garantie.
2. Avant de réparer ou de nettoyer l'appareil, coupez le courant au niveau du panneau de
service et verrouillez le panneau de service pour éviter la mise en marche accidentelle. Si
les dispositifs de sectionnement ne peuvent être bloqués, apposez une note
d'avertissement bien visible sur le panneau de service.
3. Les travaux d'installation et le câblage électrique doivent être effectués par une/des
personne(s) qualifiée(s) en conformité avec tous les codes et normes applicables, y
compris les codes et normes sur les constructions antidéflagrantes.
4. L'air doit être suffisant pour une bonne combustion et évacuation des gaz par le conduit de
fumée (cheminée) de l’appareil de combustion pour prévenir un refoulement de l’air.
Suivez les directives du fabricant de l'équipement de chauffage et les normes de sécurité
telles que celles publiées par l’Association National Fire Protection (NFPA), et
l'American Society for Heating, Refrigeration and Air Conditioning Engineers (ASHRAE),
et les autorités locales compétentes.
5. Assurez vous de ne pas endommager les fils électriques ou d'autres équipements cachés
lorsque vous percez des trous dans le mur ou le plafond.
6. Les hottes canalisées doivent toujours être éventées à l'extérieur.
7. N'utilisez pas cette hotte avec un dispositif de commande de vitesse à semi-conducteur.
8. Afin de réduire le risque d'incendie, utilisez uniquement des conduits en métal.
9. Cet appareil doit être mis à la terre.
POUR RÉDUIRE LE RISQUE D’INCENDIE DE CUISINIÈRE :
A. Ne laissez jamais les éléments de surface allumés à haute température sans surveillance.
Les débordements provoquent de la fumée et des salissures graisseuses qui peuvent
s’enflammer.. Chauffez les huiles graduellement à feu doux ou moyen.
B. Mettez toujours la hotte en MARCHE lorsque vous cuisinez à feu fort ou lorsque vous faites
flamber des aliments (p. ex. crêpes Suzette, cerises jubilé, bifteck au poivre flambé).
C. Nettoyez fréquemment les ventilateurs de la hotte. La graisse ne devrait jamais s’accumuler
dans les ventilateurs ou les filtres.
D. Utilisez des poêlons aux dimensions adéquates. Utilisez toujours une batterie de cuisine
correspondant aux dimensions de l’élément.
AVERTISSEMENT
POUR RÉDUIRE LES RISQUES DE BLESSURE LORS D’UN INCENDIE SUR LA
SURFACE DE CUISSON, SUIVEZ LES INSTRUCTIONS SUIVANTES :*
1. ÉTOUFFEZ LES FLAMMES à l’aide d’un couvercle étanche, une plaque à biscuits ou un
plateau de métal, puis éteignez le brûleur. PRENEZ GARDE AUX RISQUES DE
BRÛLURE. Si les flammes ne s'éteignent pas immédiatement, ÉVACUEZ LES LIEUX ET
APPELEZ LE SERVICE D’INCENDIE.
2. NE PRENEZ JAMAIS UN POÊLON EN FEU - vous pourriez vous brûler.
3. N’UTILISEZ PAS D'EAU, ou un linge à vaisselle mouillé – une violente explosion de vapeur
s’ensuivra.
4. Utilisez un extincteur SEULEMENT si :
A. Vous savez que vous avez un extincteur de classe ABC et vous savez déjà vous en servir.
B. Le feu est faible et ne s’est pas répandu depuis son point d’origine.
C. Le service d’incendie a été appelé.
D. Vous pouvez sortir facilement de l’endroit où vous combattez le feu.
FR
EN

18
1/ AVIS AUX UTILISATEURS
ATTENTION
1. Pour réduire tout risque d'incendie et pour assurer une évacuation d'air appropriée,
évacuer l'air vers l'extérieur. Ne pas évacuer l'air dans les espaces entre les murs ou
plafonds ou dans le grenier, les vides sanitaires ou les garages.
2. Prenez garde lorsque vous utilisez des agents nettoyants ou des détergents.
3. Évitez d'utiliser des produits alimentaires qui produisent des flammes sous la hotte.
4. Pour ventilation générale seulement. N’utilisez pas cet appareil pour évacuer des vapeurs
et des matériaux explosifs ou dangereux.
5. Pour éviter des dommages aux roulements des moteurs et/ou des hélices bruyantes ou
déséquilibrées, empêcher la poussière de cloison sèche, poussière de construction, etc.,
d’atteindre l’unité de puissance.
6. Le moteur de votre hotte dispose d’une protection thermique qui éteindra automatiquement
le moteur s'il devient surchauffé. Le moteur redémarre quand il se refroidit. Si le moteur
continue de s'arrêter et de redémarrer, faites-le vérifier.
7. Pour une meilleure évacuation des odeurs de cuisson, le fond de la hotte devrait être à un
minimum de 26 po (66cm) et un maximum de 31 po (78cm) au-dessus de la surface de
cuisson.
8. Deux installateurs sont recommandés en raison de la grande taille et le poids de cette hotte.
9. Ce produit est équipé d'un thermostat
pouvant faire démarrer le ventilateur
automatiquement. Pour réduire le
risque de blessure et pour éviter une
mise en marche accidentelle, coupez
le courant au niveau du panneau de
service et verrouillez ou étiquetez le
panneau de service.
10. Utilisez-le seulement avec le cordon
d'alimentation de la trousse
approuvée.
11. Pour plus d'informations et exigences,
veuillez lire les autocollants apposés
sur et à l'intérieur de votre appareil.
AVERTISSEMENT POUR
L'INSTALLATION DE LA HOTTE
Remarque : Cette hotte de
cuisinière doit être correctement
mise à la terre. L'appareil doit être
installé par un électricien qualifié
en conformité avec les codes
électriques nationaux et locaux.
La distance minimale entre le bas de votre
hotte encastrable et le plan de cuisson ne doit pas être inférieure à 26 po (66cm). Un maximum
de 31 po (78cm) au-dessus du plan de cuisson est fortement recommandé pour une meilleure
évacuation des odeurs de cuisine. Les distances plus de 31 po (78cm) sont à la discrétion de
l'installateur et des utilisateurs.
FR

19
2/ INSTALLATION DE VOTRE APPAREIL
INSTALLATION DE LA PLAQUE DE MONTAGE ET DE LA CORNIÈRE
1. Fixez le papier d'instruction sur le
plafond. Percez des trous comment
indique le papier.
2. Mettez les ancrages muraux dans les
trous, choisissez la plaque de montage
et utilisez 12 vis de montage pour fixer la
plaque sur le plafond. (S’il s’agit d’un
plafond en béton, utilisez les 8 vis
d’expansion).
3. Sortez les 8 cornières, utilisez 8 vis de
montage (4*14 mm) avec rondelles et
écrous pour fixer 4 cornières sur la
plaque de montage.
4. Réglez la hauteur X de la cheminée
(comme indiqué sur l’illustration 1),
utilisez 16 vis de montage (4*14 mm)
avec rondelles et écrous pour fixer les
autres 4 cornières sur les cornières qui
ont été déjà installées.
INSTALLATION DES CONDUITS
REMARQUE : Pour réduire le risque d'incendie, n'utilisez que des
conduits en métal.
1. Près du lieu où le conduit passera, entre la hotte et l'extérieur.
2. Un conduit droit et court permettra à votre hotte de fonctionner plus
efficacement.
3. Faire passer une extrémité du conduit dans l’orifice de 6,7 po (17 cm)
comme illustré.
FR

20
2/ INSTALLATION DE VOTRE APPAREIL
INSTALLATION DES CHEMINÉES
1. Prenez les cheminées, mettez la cheminée intérieure à
travers les cornières et jusqu'au plafond et utilisez 4 vis
de montage (4*8 mm) pour fixer la cheminée sur la
plaque de montage. Voir l’illustration.
2. Mettez la cheminée extérieure sur la cheminée
intérieure et utilisez le crochet S pour les fixer sur la
cornière. Voir l’illustration.
INSTALLATION DU FILTRE DE RECIRCULATION
SANS CONDUIT
1. Achetez un filtre de recirculation sans conduit auprès de votre revendeur. (Le filtre de
recirculation sans conduit est facultatif ; vous devez l’acheter séparément)
2. Installez le filtre en le tournant
sur l'équipement qui est situé
sur deux côtés du moteur.
FR
Table of contents
Languages:
Other Fagor Ventilation Hood manuals

Fagor
Fagor 5CFB-36 Manual

Fagor
Fagor 5CFB-48X User manual

Fagor
Fagor SCFB-30X Manual

Fagor
Fagor 3CFT-MINI TILE User manual

Fagor
Fagor 3CFT-DEEP90 X Technical manual

Fagor
Fagor 3CFP-9050X User manual

Fagor
Fagor Range Hood Instruction Manual

Fagor
Fagor 5CFB-90X User manual

Fagor
Fagor 3CFC-450IX User manual

Fagor
Fagor LI3IQA Technical manual

Fagor
Fagor 3CFP-7050X User manual

Fagor
Fagor 3AF3-655X User manual

Fagor
Fagor 3AF3-550N User manual

Fagor
Fagor AF3-607 X User manual

Fagor
Fagor 3CFS-6060X User manual

Fagor
Fagor 3CFT-6051N User manual

Fagor
Fagor AF3 647 X Technical manual

Fagor
Fagor 3CFS-6050N User manual

Fagor
Fagor 3CFB-900N User manual

Fagor
Fagor 3CFB-9000IX User manual