Fakir UMOR JUNIOR User manual

Instruction Manual
Kullan›m K›lavuzu
Dehumidifier
UMOR JUNIOR
Nem alma cihazı


03
Girifl
Uzun yıllar sorunsuz çalıflması için tasarlanan ve üretilen
Fakir Umor Junior Nem Alma Cihazını satın almıfl
oldu¤unuz için teflekkür ederiz.
Benzer ürünleri kullanmaya alıflık olabilirsiniz, ancak
kullanma kılavuzunu okumak için lütfen zaman ayırınız.
Bu kılavuz satın almıfl oldu¤unuz üründen en iyi
performansı almanız için hazırlanmıfltır.
•
•
•
Güvenlik Önemlidir
Kendi güvenli¤iniz ve di¤erlerinin güvenli¤i için ürünü
çal›flt›rmadan önce kullanma k›lavuzunu okuyunuz. Bu
k›lavuzu ilerideki kullan›mlar için güvenli bir yerde
saklay›n›z. E¤er cihaz›n›z› birisine veriyorsan›z, kullanma
k›lavuzunu da veriniz. Bütün paketleri sökünüz, fakat
cihaz›n›z›n çal›flt›¤›ndan emin olana kadar da paketleri
saklay›n›z.
Umor Junior nem alma cihaz› yeni konsept ev tipi
kullan›m için tasarlanm›fl bir cihaz olup, afla¤›daki
ilave özellikleriyle yüksek teknolojiye sahiptir.
Nem alma kapasitesi: 11 Litre / gün.
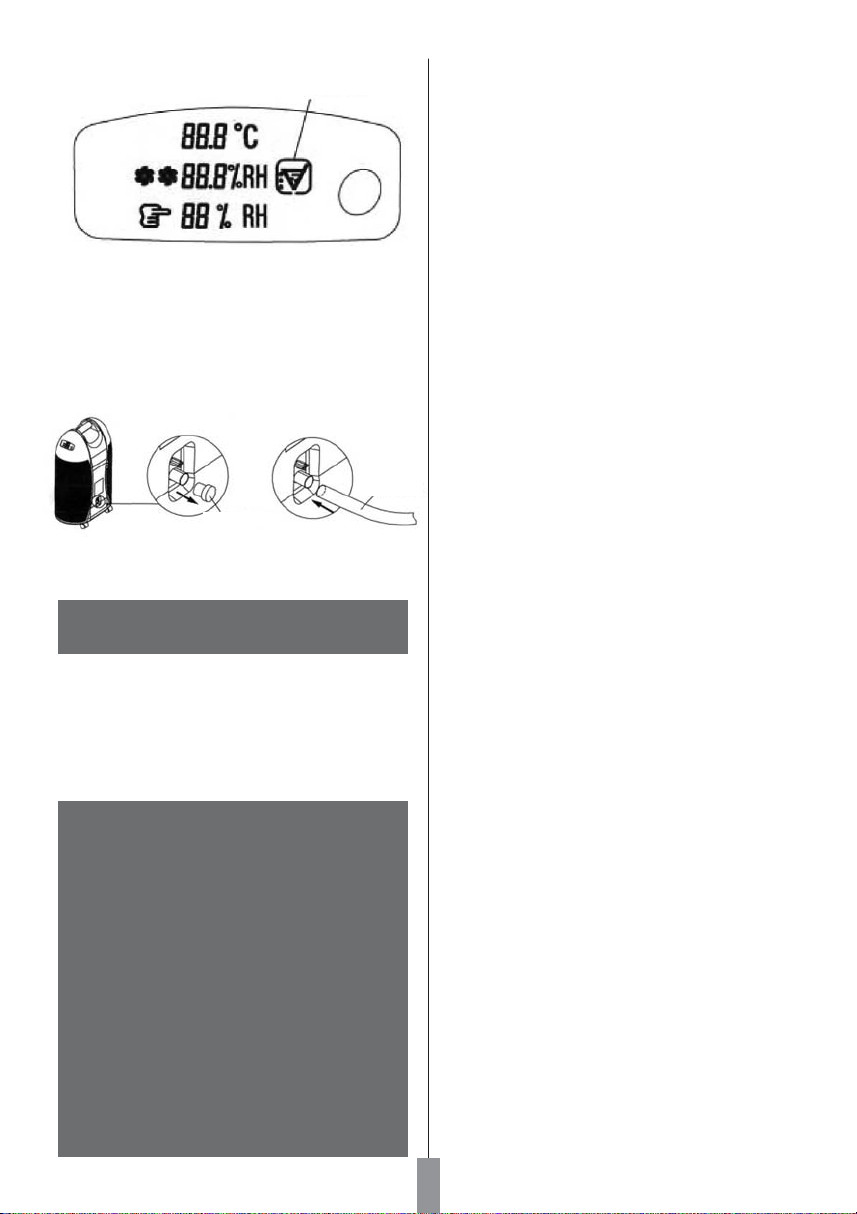
Otomatik alarm & Su tank› dolu göstergesi ve
otomatik kapanma özelli¤i.
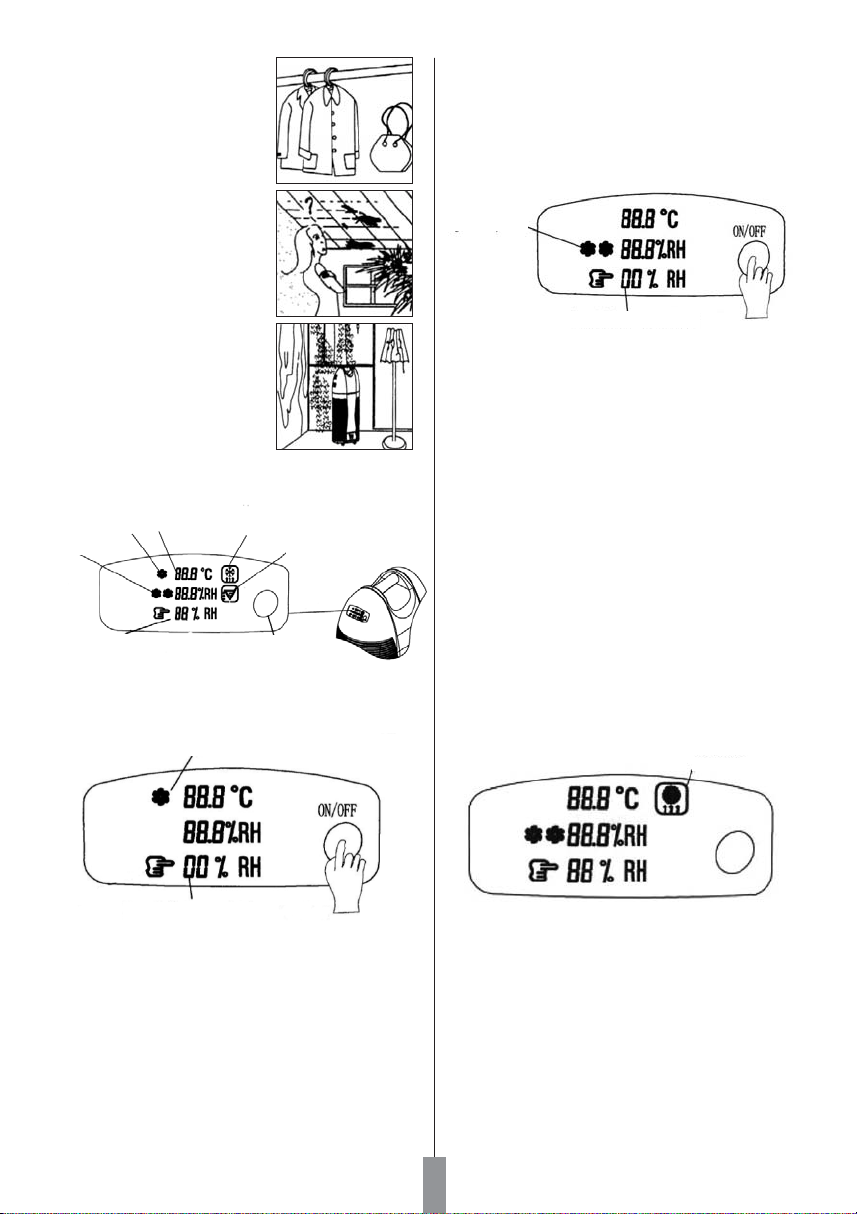
Yüksek / düflük hava h›z ayar› özelli¤i.
Otomatik defrost özelli¤i.
Güvenlik Uyarıları:
Elektrikli bir cihaz kullan›l›rken, afla¤›daki önlemler her
zaman al›nmal›d›r. Yang›n, elektrik çarpmas› ve kiflisel
yaralanmalar› engellemek için;
Cihaz›n üzerinde yazan voltaj ile flebeke voltaj›n›n
uyumlu oldu¤undan emin olunuz.
Cihaz düflürülmüfl veya gözle görünür herhangi bir
ar›zas› var ise, su s›zd›r›yorsa veya anormal olarak
çal›fl›yorsa kesinlikle kullan›lmamal›d›r.
Cihaz üzerinde kullan›c›n›n yapabilece¤i herhangi
bir bak›m yoktur. Bu yüzden cihaz›n herhangi bir
parças›n› sökmeye çal›flmay›n›z. Herhangi bir ar›za
durumunda tamir için Fakir Yetkili Servisi’ne gönderiniz.
1- Cihazın düz ve sa¤lam bir
zemin üzerine yerlefltirildi¤inden
emin olunuz.
• E¤er yerlefltirildi¤i zemin düz
de¤il ise, cihaz kayıp devrilebilir.
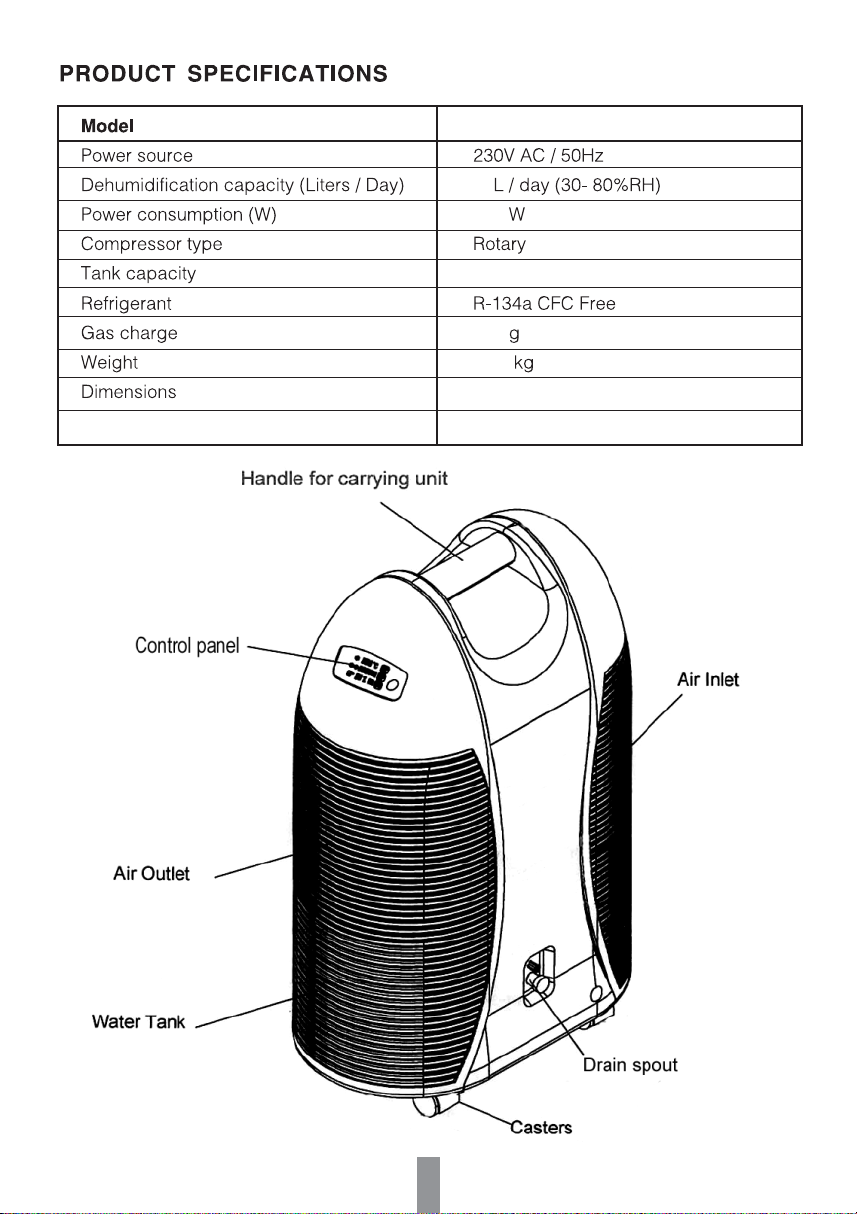
2- Cihazın hava girifl ve
çıkıfllarının önünü tıkamayınız.
• Cihaz, hava girifl ve çıkıflları
tıkanmayacak flekilde çalıflmalıdır.
3- Cihazın hava girifl ve çıkıfllarına
herhangi bir cisim sokmayınız.
• Cihazın hava girifl ve çıkıfllarına
girecek herhangi bir cisim, elektrik
çarpmasına ve kiflisel
yaralanmalara neden olabilir.
4. Cihaza su tutmayınız.
• Bu durum cihazda
onarılamayacak arızalara ve
elektrik çarpmasına neden olur.
5. Cihazı radyatör ve di¤er ısıtıcı
cihazların yakınına
yerlefltirmeyiniz.
• Aynı zamanda cihazı do¤rudan
günefl altında çalıfltırmayınız.
6. Cihazı banyoda veya dufl
yanında kullanmayınız.
7. Cihazın fiflini ıslak ellerle prize
takmayınız.
8. Cihazın devrilmesi durumunda,
cihazı hemen fiflten çekiniz.
• Fifli prizden ıslak eller ile
çekmeyiniz.
• Ürünü tekrar kullanmadan önce
iyice kontrol ediniz. E¤er herhangi
bir problem oldu¤unu
düflünüyorsanız hemen Fakir Yetkili
Servisi’ne baflvurunuz.
9. Cihazı baflka bir yere taflımadan önce hem alt hem
de üst su tanklarını boflaltınız.
• Bu flekilde yere veya elektrikli parçalara herhangi bir
su sızmasını engellemifl olursunuz.
•
•
•
•
10. Bu cihaz akli dengesi yerinde olmayan kiflilerin ya
da bu tip cihazlar› kullanmak için yeterli bilgisi olmayan
kiflilerin kullanmas› için uygun de¤ildir. Bu tip kiflilerin
cihaz› kullanmas›na kesinlikle izin vermeyiniz.

04
12
270
Gaz fiarjı 120 gr
11.2 kg
35x21x54.4 cm
Umor Junior Nem Alma Cihazı
1.4 L
Tutma sapı
Kontrol paneli
Hava çıkıflı
Su Tankı
Tekerlek
Su boflaltma
muslu¤u
Hava girifli
Kullanım Ömrü 10 yıl

4-Kullanım
Nem alma cihazının faydaları:
1. Kıyafetler ve deri ürünler
üzerindeki nemi azaltır.
• Nem alma cihazını
çalıfltırmadan önce gardırop
içindeki askıları çıkartınız.
2.Tavan, duvar ve camlardaki
nemi azaltır.
• Cihazın kullanımı sırasında
en iyi performansı alabilmek
için pencere ve camları
açmaktan kaçınınız.
3. Kitaplık ve dolapların nemini
azaltır.
• Nem alıcının etkin
çalıflabilmesi için dolap
kapaklarını açın ve cihazı
dolabın önüne yerlefltiriniz.
05
a. Nem Alma Cihazının çalıfltırılması
Cihaz›, üzerinde yazan voltaj ile uyumlu bir prize tak›n›z
ve “ON/OFF” dü¤mesine basarak cihaz› çal›flt›r›n›z.
Oda s›cakl›¤› ve ba¤›l nem miktar› dijital ekranda
gözükecektir. ‹lk aç›l›flta görülecek olan ayar %0 ba¤›l
nemdir. Bu ayn› zamanda sürekli nem alma içindir.
Daha sonra
• Nem oran›n› %40’a ayarlamak için “ON/OFF”
dü¤mesine 1 kere bas›n›z.
• Nem oran›n› %50’ye ayarlamak için “ON/OFF”
dü¤mesine 2 kere bas›n›z.
• Nem oran›n› %60’a ayarlamak için “ON/OFF”
dü¤mesine 3 kere bas›n›z.
• Nem oran›n› %70’e ayarlamak için “ON/OFF”
dü¤mesine 4 kere bas›n›z.
b. Nem alma cihaz›n›n yüksek h›zda
çal›flt›r›lmas›:
Arzu edilen hava nem oran› %70 olarak ayarlanm›flsa,
ON/OFF tufluna bir kez daha bas›n›z. Bu durumda cihaz
yüksek h›zda çal›flmaya bafllayacak ve istenilen hava
nem oran› %0 olacakt›r. Bu ayar ayn› zamanda sürekli
nem alma içindir.
Daha sonra
• Nem oran›n› %40’a ayarlamak için “ON/OFF”
dü¤mesine 1 kere bas›n›z.
• Nem oran›n› %50’ye ayarlamak için “ON/OFF”
dü¤mesine 2 kere bas›n›z.
• Nem oran›n› %60’a ayarlamak için “ON/OFF”
dü¤mesine 3 kere bas›n›z.
• Nem oran›n› %70’e ayarlamak için “ON/OFF”
dü¤mesine 4 kere bas›n›z.
c. Yukar›da belirtilen süreci izleyerek istedi¤i-
niz h›z› ve hava nemini ayarlayabilirsiniz.
d. Nem alma cihaz›n›n kapat›lmas›:
Nem alma cihaz›n› kapatmak için ON/OFF dü¤mesine
birkaç saniye bas›l› tutunuz.
e. Defrost özelli¤i:
Nem alma cihaz› optimal olarak 15°C - 35°C aras›nda
çal›flmak üzere tasarlanm›flt›r.
Cihaz›n 15°C alt›nda kullan›lmas› durumunda havadaki
nemin düflmesi ile birlikte, cihaz›n toplayaca¤› nem de
azalacakt›r. Bu durumun sürekli meydana gelmesi
durumunda cihaz otomatik olarak defrost moduna
geçecektir. Defrost modunda defrost ›fl›¤› yanacakt›r.
düflük hız
nem oranı
Defrosting
Nem oranı
yüksek hız
yüksek hız
düflük hız sıcaklık otomatik defrost
su tankı dolu
göstergesi
açma/kapama dü¤mesi
nem ayarı

06
Su tank› doldu¤unda, su tank› dolu göstergesi
yanacakt›r. Cihaz sinyali 10 kez öttükten sonra, cihaz
otomatik olarak çal›flmay› durduracakt›r. Nem alma
cihaz›n›n tekrar çal›flmas› için, su tank› boflat›lmal› ve
yerine tekrar yerlefltirilmelidir.
5- Temizlik ve Bak›m:f. Su tank› dolu:
g. Sürekli Çal›flma / Taban tank›n› boflaltma:
a) Cihaz›n fiflten çekildi¤inden emin olunuz.
b) Su ç›k›fl›n›n ucundaki plastik parçay› ç›kart›n›z.
Not: Plastik parça ç›kart›ld›¤›nda su
akmaya bafllayacakt›r.
c) Sürekli çal›flma için uygun bir hortumu tahliye
borusuna ba¤lay›n›z. Di¤er ucunu da uygun bir yere
ba¤lay›n›z. Bu flekilde nem alma cihaz›n› sürekli
çal›flt›rabilirsiniz.
d) Sürekli çal›flma s›ras›nda su tank› dolu uyar›s›
çal›flmayacakt›r.
NOT:
• Havadaki nem oran› cihaz üzerinde
seçilmifl olan de¤ere ulaflt›¤›nda cihaz
otomatik olarak kapanacakt›r.
• Havadaki nem oran› cihaz üzerinde
seçilmifl olan de¤eri geçti¤i zaman, cihaz
otomatik olarak tekrar çal›flmaya
bafllayacakt›r.
• E¤er cihaz kullan›m esnas›nda kendi
kendine kapan›rsa, 3 dakika boyunca
tekrar çal›flmas› için bekleyiniz.
• E¤er cihaz›n›z çal›flm›yorsa, su tank›n›n
yerine düzgün olarak yerleflip
yerleflmedi¤ini kontrol edip, fiflinin prize
tak›l› oldu¤undan emin olunuz.
• Cihaz› bir yerden bir yere tafl›rken ve ya
kald›r›rken su tank›n›n bofl oldu¤undan
emin olunuz.
Herhangi bir temizlik ya da bak›m yapmadan önce,
mutlaka cihaz›n kapat›ld›¤›ndan ve fiflinin prizden
çekildi¤inden emin olunuz.
Temizlik haricinde cihaz üzerinde kullan›c›n›n
yapabilece¤i herhangi bir bak›m bulunmamaktad›r.
Herhangi bir ar›za ya da problem durumunda Fakir
Yetkili Servisi’ne baflvurunuz.
a. Filtrenin temizlenmesi
• Filtreyi ç›kartmak için hava girifl kasas›n› el ile
sökünüz.
• Filtre üzerindeki iki ç›k›nt›y› bulunuz ve bu noktalardan
filtreyi afla¤›ya çekerek ç›kart›n›z.
• Elektrikli süpürge ile ya da so¤uk suda y›kayarak
filtreyi temizleyiniz.
• Filtrenin tam olarak kurumas›ndan sonra filtreyi
yerine tak›n›z.
b. Cihaz›n d›fl›n›n temizlenmesi
• Cihaz›n kasas›n›n hiçbir afl›nd›r›c› veya solvent ile
temizlemeyiniz.
• Cihaz›n kasas›na su tutmay›n›z.
• Sadece hafif nemli bir bez ile temizleyiniz.
plastik tıpa
su akıtma
hortumu
su tankı dolu
Sevk
Cihaz›n, orijinal ambalaj›nda veya zarar görmesini
önlemek için, iyi ve yumuflakpakette tafl›nmas›
gerekmektedir.

07

08
Introduction
Thank you for purchasing Fakir Umor Junior Dehumidifier
which has been designed and manufactured to give you
many years of trouble-free service.
You may already be familiar with using a similar product,
but do please take time to read these instructions - they
have been written to ensure you get the very best from
your purchase.
Safety is Important
For yours and others safety please read the instructions
before using the appliance. Please keep this instruction
in a safe place for the further use. If you pass the appliance
on, pass on the instructions too. Remove all packaging,
but keep it until you are satisfied that the appliance is
working.
Umor Junior dehumidifier is a new concept domestic
appliance, besides stability dehumidification function,
it also adopts advanced electronic mechanical technology
to achieve the following additional functions.
• Dehumidification: 11 Liter/day.
• Automatic alarm & indication of “ water full” and
automatic turn off unit;
• High / Low air speed switch function.
• Automatic defrosting function.
Safety Instructions
• Any inserted object may
contact hazardous internal live
electrical parts.
4. Do not spray water on unit.
• This may cause irreparable
damage to the unit and the
risk of electric shock.
5. Do not place unit near
radiators or heating
appliances.
• Also do not operate the unit
in the direct sunlight.
6. Do not use the unit in the
bathroom or shower
room.
7. Do not plug unit into a power
socket with wet
hands.
8. If the unit eve tips or falls
over, unplug the power
cord immediately.
• Do not remove plug with wet
hands.
• The unit must be thoroughly
checked by a qualified
engineer before being used
again.
When using an electric appliance, basic precautions
should always be followed, including the following:
To reduce the risk of fire, electric shock, or injury:
• Check the mains voltage stated on the rating plate
corresponds to the local electricity supply.
• The unit is not to be used if it has been dropped,
if there are visible signs of damage or if it is leaking.
• Do not attempt to open the cabinet or dismantle
any parts from the appliance, there is no serviceable
part inside. If there is any damage, please apply to
authorized Fakir Services.
1. Ensure that the unit is placed
on a stable and flat floor surface.
• If the floor surface is not even
there is a risk that the unit may
be unstable and topple over.
Also excessive unit vibration and
noise may be result.
2. Do not block or restrict airflow
around unit.
• The unit must be positioned in
use so that the air inlet and
exhaust grilles are not clocked
or restricted in anyway.
3. Do not push any object in
the unit air inlet and exhaust
grilles.
9. Empty both top and primary tanks before moving
unit.
• This will ensure that any water will not flood on to the
floorand also prevent water contacting any internal live
partsin the unit.
10. This appliance is not designed to be used by persons
(including children) with limited physical, sensory or
mentalcapacities or by persons lacking in experience
and/or knowledge, unless they are supervised by someone
who is responsible for their safety or have received
instructions on how to use the appliance.

09
12
270
120
11.2
35x21x54.5 cm
Umor Junior
1.4 L
Usage life 10 years

Benefits of Dehumidifier
1. Reduces effects of mould
growth on clothes and leather
goods.
• Pull out drawers of the
wardrobe before turning the
dehumidifier ON.
2. Reduces formation of
condensation on ceilings, walls
and windows.
• Refrain from opening
windows and doors to obtain
best performance from the unit.
3. Reduces the dampness from
bookshelves and cupboards.
• Open the door and put the
dehumidifier in front of the
cupboard for it to operate
effectively.
10
• Press “ON/OFF” three times: The required air humidity
is set to 60%.
• Press “ON/OFF” four times: The required air humidity
is set to 70%.
Usage
Connect the unit to a suitable power supply socket and
press the “ON/OFF” button for one second. The current
room temperature and air humidity are shown in the
electronics display. The required air humidity is set to
00% and low air speed mode. This is also the setting for
continued dehumidification.
Then:
• Press “ON/OFF” once: The required air humidity is
set to 40%.
• Press “ON/OFF” twice: The required air humidity is
set to 50%.
a. Turning the dehumidifier ON at Low air
speed mode:
b. High air speed mode
When the required air humidity is set to 70%, press the
“ON/OFF” button again, the air speed will turn to high
air speed mode and the required air humidity becomes
00%. This is also the setting for continued dehumidification.
Then:
• Press “ON/OFF” once: The required air humidity is
set to 40%.
• Press “ON/OFF” twice: The required air humidity is
set to 50%.
• Press “ON/OFF” three times: The required air humidity
is set to 60%.
• Press “ON/OFF” four times: The required air humidity
is set to 70%.
c. Then repeat the process above to select
required air humidity and air speed.
d. Turning the dehumidifier OFF:
To turn the unit off, press and hold down the “ON/OFF”
button for three seconds.
e. Defrost mode:
The dehumidifier is designed to provide an optimum
operating performance above 15°C and up to 35°C.
When operating the unit at low room temperature (less
than 15°C), the surface on the evaporator will accumulate
ice and reduce the dehumidifier efficiency. Periodically
when this happens, the unit will go into automatic defrost
mode. In defrost mode the Defrost indicator will light.
Defrosting
Humidity setting
Humidity setting
High air speed
Low air speed
low air speed
high air speed
humidity setting mode & On/OFF button
water full
automatic defrosting
temperature

11
Apart from cleaning the filter there are no other
user serviceable parts contained in the unit.
a. Cleaning the filter
• Manually remove air intake case molding to
expose filter assembly.
• Locate the two tabs at the top of the filter assembly,
pull down and withdraw filter assembly.
• Use a vacuum cleaner or wash in cool water to
clean filter.
• Allow to dry thoroughly before replacing filter
assembly in the unit.
b. External cleaning of unit
• Do not clean unit with any abrasive cleaning
agents or solvents.
• Do not apply any water directly to the unit for
cleaning.
• Only use a soft clean cloth for all cleaning
purposes.When operating the unit at low room
temperature (less than 15°C), the surface on the
evaporator will accumulate ice and reduce the
dehumidifier efficiency. Periodically when this
happens, the unit will go into automatic defrost
mode. In defrost mode the Yellow indicator will
light.
f. Water Full
When the water tank is full the water full indicator
will light , the buzzer beeps ten times and the unit
will automatically stop operating. The water tank
must be emptied and reinstalled before the
dehumidifier will operate.
g. Continuous operation / Draining primary
water tank
a) Ensure that unit unplugged from power supply.
b) Remove the rubber plug from the water outlet
located at the rear base of the unit. (Note: When
rubber plug is removed water may drain!)
c) For continuous operation connect a suitable
drainpipe to the water outlet. The unit can now be
operated continuously.
d) During continuous operation, the “WATER FULL”
indicator is off.
NOTE:
• The unit will turn itself off when the
moisture in the air reaches the set position
on the humidity setting.
• The unit will automatically turn itself on
when the moisture in the air rises above
the setting.
• If the unit is turned off during its
operation, please leave for 3 minutes
• If the unit does not operate, check the
water tank is correctly located in the unit
and that the power socket is switched on.
• The water tank must be emptied before
transporting or storing the unit.
5- Maintenance and Cleaning:
Before carrying out any maintenance or cleaning
the unit, make sure that the power to the unit is
turned off and the power cord is removed from the
power socket.
Drainaga
Pipe
Water Full
Rubber Stopper
Dispatch
Carry the appliance in the original package or a
similar, well-padded package to prevent damage
to the appliance.

12

13

14

15

‹malatç› / ‹thalatç› Firma: Fakir Elektrikli Ev Aletleri D›fl Tic. A.fi.
Meflrutiyet Cad. No:43 Tepebafl›-‹stanbul TÜRK‹YE
Tel:(212) 249 70 69 (pbx) Fax:(212) 251 51 42
Table of contents
Languages:
Other Fakir Dehumidifier manuals
Popular Dehumidifier manuals by other brands

Philco
Philco PDA20DX user manual

Friedrich
Friedrich D30A Service and parts manual

Heat Controller
Heat Controller WHOLE HOUSE DEHUMIDIFIER Installation and operating manual

Klarstein
Klarstein Jet Set 2500 manual

MSW Motor Technics
MSW Motor Technics MSW-DEH4050H user manual

Whirlpool
Whirlpool TD2500XF0 Operation guide