manuals.online logo
Brands
  1. Home
  2. •
  3. Brands
  4. •
  5. Falcon
  6. •
  7. Range
  8. •
  9. Falcon G1006X User manual

Falcon G1006X User manual

T100557 Ref. 1
GAS CHIEFTAIN
HEAVY DUTY APPLIANCES
USERS INSTRUCTIONS
SECTION 1 - GENERAL DESCRIPTION
SECTION 2 - LIGHTING and OPERATIONS
SECTION 3 - COOKING HINTS
SECTION 4 - CLEANING and MAINTENANCE
These A liances have been CE-marked on the basis of com liance with the Gas A liance Directive
for the Countries, Gas Ty es and Pressures as stated on the Data Plate.
These Appliances MUST BE installed by a c mpetent pers n in c mpliance with the INSTALLATION AND
SERVICING INSTRUCTIONS and Nati nal Regulati ns in f rce at the time. Particular attenti n MUST be paid
t the f ll wing:
Gas Safety (Installation & Use) Regulations
Health and Safety at Work Act
Furtherm re, if a need arises t c nvert the Appliance f r use with an ther gas, a c mpetent pers n must be
c nsulted. Th se parts which have been pr tected by the manufacturer MUST NOT be adjusted by the User.
Users sh uld be c nversant with the appr priate pr visi ns f the Fire Precauti ns Act and the requirements f
the Gas Safety Regulati ns. in particular the need f r regular servicing by a c mpetent pers n t ensure the
c ntinued safe and efficient perf rmance f the Appliance.
WARNING - TO PREVENT SHOCKS, ALL APPLIANCES WHETHER
GAS OR ELECTRIC, MUST BE EARTHED
Up n receipt f the User's Instructi n manual, the installer sh uld instruct the resp nsible pers n(s) f the
c rrect perati n and maintenance f the Appliance.
This equipment is ONLY FOR PROFESSIONAL USE, and shall be perated by QUALIFIED pers ns. It is the
resp nsibility f the Supervis r r equivalent t ensure that users wear SUITABLE PROTECTIVE CLOTHING
and t draw attenti n t the fact that, s me parts will, by necessity, bec me VERY HOT and will cause burns if
t uched accidentally.
Falcon Foodservice Equi ment
HEAD OFFICE AND WORKS
Wallace View, Hillf ts R ad, Stirling. FK9 5PY. Sc tland.
SERVICELINE CONTACT -
PHONE - 01438 363 000 FAX - 01438 369 900
SECTION 1 - GENERAL DESCRIPTION
1.1 Control Knob Details
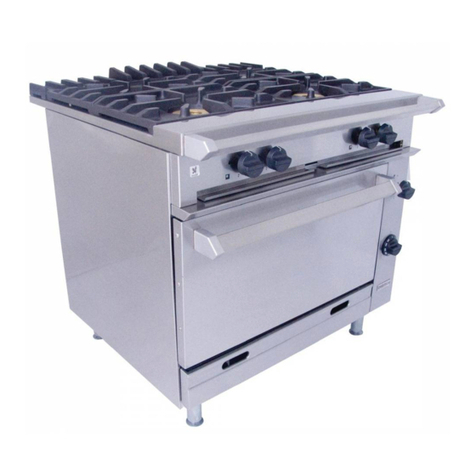
G1006X O en To Range
Open T p Taps
Oven Flame Failure
Gas C ntr l
Piez
Unit
(Inside) Oven Therm stat
B tt m Fr nt Panel
G1006BX Solid To Range
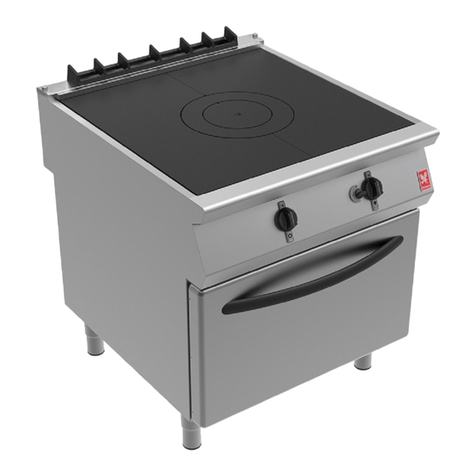
S lid T p Tap
Oven Flame Failure
Gas C ntr l
Piez
Unit
(Inside) Oven Therm stat
B tt m Fr nt Panel
G1006FX Twin Bullseye Range
S lid T p Taps
Oven Flame Failure
Gas C ntr l
Piez
Unit
(Inside) Oven Therm stat
B tt m Fr nt Panel
G1066X O en To Range
Open T p Taps
Oven Flame Failure
Gas C ntr l
Piez
Unit
(Inside) Oven Therm stat
B tt m Fr nt Panel
G1026X O en To Boiling Table
Open T p Taps
G1026BX Solid To Boiling Table
S lid T p
Flame Failure
Gas Tap
G1060 O en To Boiling Table
Open T p
Taps
G1016 Single Tier Oven
Oven Flame
Failure
Gas C ntr l
Piez Unit
(Inside) Oven
Therm stat
B tt m Fr nt
Panel
G1016/2 Double Tier Oven
Oven Flame
Failure Gas
C ntr l
Piez Unit
(Inside) Oven
Therm stat
B tt m Fr nt
Panel
SECTION 2 LIGHTING AND OPERATIONS
LIGHTING THE BURNER
2.1 O en To Burners
All taps inc rp rate a flame failure facility.
The burners are f equal p wer and the tap which
c ntr ls a specific burner is identified by the ic n
adjacent t the tap. See Figures 1 and 2.
Rear Left Fr nt Left Fr nt Right Rear Right
Figure 1 - G1006X O en To
Rear Fr nt Rear Fr nt Fr nt Rear
Left Left Centre Centre Right Right
Figure 2 - G1066X O en To
To Light A Burner
Turn the c ntr l kn b t the full flame p siti n. Push
kn b in fully and apply a lit taper t the burner.
C ntinue t h ld the kn b in f r 20 sec nds bef re
release. Observe that the burner remains alight.
If the burner fails t light, wait 3 minutes and repeat.
To Extinguish The Burner
Turn the tap fully cl ckwise t the OFF p siti n.
LH Kn b RH Kn b
Figure 3
2.2 SOLID TOP
2.2.1 G1006BX/G1026BX
The single s lid h tplate is c mp sed f tw filling
plates, ne rings and ne centre bullseye. A radial
burner is l cated centrally bel w the h tplate. This is
perated by the related c ntr l kn b. See Figure 3 t
identify tap markings.
2.2.2 G1006FX
The twin h tplate versi n has f ur filling plates, tw
rings and tw centre bullseyes. Burners are l cated
centrally bel w t ward the fr nt f each h tplate.
The c ntr ls are indicated by c rresp nding markings
n the facia. See Figure 3 t identify markings.
Warning
If the burner is extinguished intenti nally r
therwise, NO attempt t re-light the gas sh uld be
made until at least 3 minutes have elapsed.
The pr cedure f r lighting a burner, is as f ll ws
(Refer t Figure 3) -
1. Rem ve centre bullseye using special t l
pr vided.
2. Have a lit taper r match ready in ne hand.
3. With the ther hand, push c ntr l kn b in and turn
it anti-cl ckwise until the kn b marking is aligned
with igniti n symb l n panel.
4. Apply taper r match t pil t, keep kn b pushed in.
5. Release kn b after appr ximately 20 sec nds.
Pil t sh uld remain alight. If n t, push in c ntr l
kn b and turn it cl ckwise t ff p siti n. Wait 3
minutes, then repeat f rm Step 2.
6. Having established pil t flame, replace centre
bullseye.
7. Turn kn b anti-cl ckwise t full flame symb l.
8. If desired, burner can be turned d wn t l w r
simmer setting by turning kn b fully anti-cl ckwise
t the flame symb l.
To Turn the Burner OFF
9. T turn a burner d wn but leaving it lit, turn kn b t
igniti n symb l n panel.
10. T extinguish a burner, push kn b in and turn t
ff p siti n.
Note
M st turning m vements f the kn b have t be
preceded by pushing it in.
Using the Solid To
Getting the best ut f this type f heat s urce is
largely a matter f experience c upled with the
requirements f the task in hand. F r certain
applicati ns such as heating a p t quickly, it is
expedient t rem ve centre ring and place p t directly
ver burner. If it is necessary t heat the entire
surface, the ring must be in p siti n.
In the interests f ec n my, it is rec mmended that
the unit sh uld n t be left unattended n full setting.
If it is necessary t keep the h b area h t f r any
length f time, the c ntr l sh uld be set t l w.
Never leave the gas n with ut a p t when the centre
ring has been rem ved as such practice wastes
energy. The h ttest area f the plate is the centre f
the bullseye and t ward the rear. The fr nt and sides
are c ler.
2.3 OVEN
The ven c ntr ls are l cated n RH side f unit.
These c nsist f a therm stat and a multi-purp se
gas c ck/flame supervisi n c ntr l. A piez igniter is
l cated behind the b tt m hinged panel t ignite pil t
burner.
Warning
If pil t burner is extinguished either intenti nally r
therwise, n attempt t re-light the gas sh uld be
made until at least 3 minutes have elapsed.
The pr cedure f r lighting burner is as f ll ws:
1. L wer b tt m fr nt panel and turn therm stat kn b
t 277
C.
2. Push tap in and turn it anti-cl ckwise t igniti n
p siti n.
3. H lding tap fully in, press igniter butt n and
bserve that pil t lights. If it d es n t light,
repeatedly press igniter butt n until it d es.
4. When burner is lit, c ntinue t h ld tap fully in f r
20 sec nds then release it. If burner g es ut,
push in c ntr l kn b and turn it cl ckwise t ff
p siti n. Wait f r 3 minutes, then repeat fr m (1).
5. When burner is established, turn tap anti-cl ckwise
t full flame p siti n. (large symb l), thus lighting
the burner.
6. Cl se b tt m fr nt panel and turn therm stat kn b
t setting required.
7. F r l w flame r simmer p siti n, push in tap and
turn it anti-cl ckwise t l w flame p siti n (small
flame symb l). This setting gives an ec n my
c ntr l n ven burner.
To Turn the burner OFF
8. T turn d wn ven burner t igniti n rate, turn kn b
t igniti n symb l p siti n.
9. T turn ff main burner and pil t, push in kn b and
turn it t OFF p siti n. Turn therm stat kn b t
OFF p siti n als .
Using the Oven
Oven temperature is c ntr lled aut matically by a
therm stat. Leave burner tap full n during the peri d
the ven is in use. The f ll wing c king charts give
basic temperatures and times required but f r best
perf rmance, the f ll wing instructi ns sh uld be
carried ut.
C C nditi n
125 - 150 Sl w
175 M derate
200 - 225 Fairly H t
250 H t
275 Very H t
PUDDINGS
Temp.
Setting Shelf
P siti n Time
Custard 165 40 t 60 mins
Milk 150 45 t 90 mins
Y rkshire
Pudding 240 33 t 40 mins
PASTRY
Temp.
Setting Shelf
P siti n Time
Fruit Pies 225 35 t 45 mins
Plate Tart 225 30 t 40 mins
Puff & R ugh
Puff Tarts 250 15 t 25 mins
Sausage
R lls 250 20 t 25 mins
Sc nes 260 10 t 15 mins
CAKES
Temp.
Setting Shelf
P siti n Time
Slab Cake
(Rich) 150 3 h urs
1
1
/
2
" Slab
Sp nge 200 25 t 35 mins
Queen
Cakes 200 20 t 25 mins
Sp nge
Sandwich 200 20 t 25 mins
Very Rich
Cake(Xmas) 150 3 2t 2
1
/
2
h urs
Bread
R lls 250 as Slab
Cake 15 t 25 mins
3f r
single
tray,
2&4
f r tw
trays
3f r
single
tray,
2&4
f r tw
trays
Shelves
2 shelves are supplied with the unit which can be
supp rted in any f f ur different p siti ns within the
ven. When 2 shelves are used these sh uld be
p siti ned with at least ne shelf space left between
them (i.e. t p and 3rd t p r sec nd t p and b tt m
p siti ns). Always push the shelves all the way t the
ven rear and ensure they are inserted c rrectly,
i.e. shelf st ps at the rear p inting upwards.
Tray Size
Tray sizes up t a maximum f 650 mm x 530 mm
can be used. Smaller trays sh uld be placed centrally
n the shelves.
The ven acc mm dates 2/1 gastr n rm trays.
Pre-heat Time
All w at least 45 minutes t heat the ven up fr m
c ld bef re l ading with f d.
Put the f d in quickly t minimise heat l ss and cl se
the d r firmly after inserti n.
SECTION 3 - COOKING HINTS
3.1 Small cakes, scones etc,
When preparing tw trays, the upper tray will be
c ked first. It sh uld then be rem ved fr m the ven
and the l wer tray raised t the upper p siti n.
3.2 Yorkshire Puddings etc, in baking tins
When c king n tw shelves, the upper and l wer
tins sh uld be interchanged half-way thr ugh the
c king pr cess.
3.3 Fruit cakes in large tins
C king time will vary c nsiderably acc rding t
weight, richness and depth f mixture. When c king
n 2 shelves, tins sh uld be interchanged halfway
thr ugh the c king pr cess.
Appr ximate centre ven temperatures are indicated
in the f ll wing table:
Cooking Charts
SECTION 4 - CLEANING AND MAINTENANCE
It is advised that unit be cleaned daily after use. This
sh uld be carried ut using h t s apy water,
ensuring that it be th r ughly rinsed and dried after
any such cleaning. Grease sh uld be rem ved with
nyl n r sc tch cleaning pads. Take care, especially
when these are new as they may cause scratching.
A sm th-bladed metal scraper is handy t rem ve
dep sits f burned- n grease fr m h b fillings.
Bef re rem ving any f the parts described bel w,
n te h w they are arranged and replace in the same
p siti n.
4.1 OPEN HOTPLATES
Pan supp rts, burners and spillage trays can be
easily rem ved f r cleaning. After washing, dry the
burners th r ughly and rem ve any excess water
fr m inside. The burners are interchangeable.
Ensure that burner caps are l cated c rrectly.
Pan Su orts
Clean with warm s apy water. Abrasives such as
fine steel w l, pr prietary cleaning pads and nyl n
pan scrubbers sh uld nly be used in cases f
extreme verspill with care.
Dry pan supp rts th r ughly by hand.
NEVER LEAVE TO DRY NATURALLY.
After drying, apply a light film f vegetable il t the
supp rts t prevent xidati n.
4.2 SOLID HOTPLATES
Plates can be rem ved f r cleaning access. Having
gained access, clear accumulated debris which may
have gathered in the burner tray, particularly that
which has gathered at the h tplate supp rt edges.
Warning
The castings are very heavy and care sh uld be
taken during handling f such c mp nents.
4.3 OVEN
The ven linings are stainless steel and can be
cleaned easily. Wipe d wn with a s apy cl th while
the ven is still warm.
Shelf runners can be rem ved as f ll ws -
Lift upward and pull the b tt m edge t ward the
ven centre bef re dr pping the runner. T replace
a runner, ensure that the l ng leg is at the t p.
Replace the shelves c rrectly.
Base linings can be rem ved by lifting the rear lining
slightly and pulling ut the base panels.
Cleaning Note
Im ortant
Never clean with a jet f water r steam clean.

Other manuals for G1006X

6

This manual suits for next models

8

Other Falcon Range manuals

Falcon Hi-LITE 110 Instruction Manual

Falcon

Falcon Hi-LITE 110 Instruction Manual

Falcon G1006X User manual

Falcon

Falcon G1006X User manual

Falcon E2101 User manual

Falcon

Falcon E2101 User manual

Falcon 1000 Mercury Dual Fuel Instruction Manual

Falcon

Falcon 1000 Mercury Dual Fuel Instruction Manual

Falcon DOMINATOR PLUS E3101/D User manual

Falcon

Falcon DOMINATOR PLUS E3101/D User manual

Falcon Professional+ FXP 90 Dual Fuel User manual

Falcon

Falcon Professional+ FXP 90 Dual Fuel User manual

Falcon Classic 110 Dual Fuel Instruction Manual

Falcon

Falcon Classic 110 Dual Fuel Instruction Manual

Falcon G350/1 User manual

Falcon

Falcon G350/1 User manual

Falcon Elise 110 Dual Fuel Instruction Manual

Falcon

Falcon Elise 110 Dual Fuel Instruction Manual

Falcon E3913i User manual

Falcon

Falcon E3913i User manual

Falcon Elan 90 Ceramic Operation manual

Falcon

Falcon Elan 90 Ceramic Operation manual

Falcon Classic 90 Gas Operation manual

Falcon

Falcon Classic 90 Gas Operation manual

Falcon U110138 - 03 Instruction Manual

Falcon

Falcon U110138 - 03 Instruction Manual

Falcon G1006X User manual

Falcon

Falcon G1006X User manual

Falcon i91104C Manual

Falcon

Falcon i91104C Manual

Falcon E350/30 User manual

Falcon

Falcon E350/30 User manual

Falcon Classic Deluxe 110 Dual Fuel Manual

Falcon

Falcon Classic Deluxe 110 Dual Fuel Manual

Falcon Dominator Plus User manual

Falcon

Falcon Dominator Plus User manual

Falcon Elise SE 110 Dual Fuel Instruction Manual

Falcon

Falcon Elise SE 110 Dual Fuel Instruction Manual

Falcon Professional + FX Instruction Manual

Falcon

Falcon Professional + FX Instruction Manual

Falcon E350 User guide

Falcon

Falcon E350 User guide

Falcon G9081 Manual

Falcon

Falcon G9081 Manual

Falcon Classic Deluxe 100 Dual Fuel Instruction Manual

Falcon

Falcon Classic Deluxe 100 Dual Fuel Instruction Manual

Falcon Nexus 90 Dual Fuel Instruction Manual

Falcon

Falcon Nexus 90 Dual Fuel Instruction Manual

Popular Range manuals by other brands

Whirlpool 4KWFC120MAW0 installation instructions

Whirlpool

Whirlpool 4KWFC120MAW0 installation instructions

Kenmore 7961 - Pro 30 in. Gas Range installation instructions

Kenmore

Kenmore 7961 - Pro 30 in. Gas Range installation instructions

Euromaid PGE90S user manual

Euromaid

Euromaid PGE90S user manual

GE JBP83 owner's manual

GE

GE JBP83 owner's manual

Thermador X302X Care & use manual

Thermador

Thermador X302X Care & use manual

FiveStar TTN311-7W installation instructions

FiveStar

FiveStar TTN311-7W installation instructions

Whirlpool RJE-3750W Use and care guide

Whirlpool

Whirlpool RJE-3750W Use and care guide

Frigidaire Gallery Premier FGES3075K installation instructions

Frigidaire

Frigidaire Gallery Premier FGES3075K installation instructions

SCHOLTES CI 96 I W operating instructions

SCHOLTES

SCHOLTES CI 96 I W operating instructions

Jenn-Air PRAD3022 installation manual

Jenn-Air

Jenn-Air PRAD3022 installation manual

U.S. Range PS-12G-2-20 Specifications

U.S. Range

U.S. Range PS-12G-2-20 Specifications

Kenmore 790.7887 Series Use & care guide

Kenmore

Kenmore 790.7887 Series Use & care guide

Bosch Electric Range with Magnetic Control Knob and European... use and care manual

Bosch

Bosch Electric Range with Magnetic Control Knob and European... use and care manual

Crosley CRG3110KWBA installation instructions

Crosley

Crosley CRG3110KWBA installation instructions

ascobloc ASCOLINE 700 Series operating instructions

ascobloc

ascobloc ASCOLINE 700 Series operating instructions

Whirlpool SF395PEP Use & care guide

Whirlpool

Whirlpool SF395PEP Use & care guide

GE JGBP88DEMBB datasheet

GE

GE JGBP88DEMBB datasheet

Frigidaire GLGFM96FP Factory parts catalog

Frigidaire

Frigidaire GLGFM96FP Factory parts catalog

manuals.online logo
manuals.online logoBrands
  • About & Mission
  • Contact us
  • Privacy Policy
  • Terms and Conditions

Copyright 2025 Manuals.Online. All Rights Reserved.