manuals.online logo
Brands
  1. Home
  2. •
  3. Brands
  4. •
  5. Falcon
  6. •
  7. Range
  8. •
  9. Falcon E350/30 User manual

Falcon E350/30 User manual

RZZ 209 Ref.1
E350/30
FOUR HOTPLATE RANGE
USERS INSTRUCTIONS
Falcon Foodservice Equipmen
HEAD OFFICE AND WORKS
PO Box 37, Foundry Lo n, L rbert.
Stirlingshire. Scotl nd. FK5 4PL
AFE SERVICE CONTACT -
PHONE - 01438 751 111 FAX - 01438 369 900
SECTION 1 - GENERAL DESCRIPTION
SECTION 2 - CONTROLS and OPERATION
SECTION 3 - COOKING HINTS
SECTION 4 - CLEANING and MAINTENANCE
This ppli nce h s been CE-m rked on the b sis of compli nce with the Low Volt ge nd EMC Directives for
the volt ges st ted on the D t Pl te.
IMPORTANT
This appliance mus only be ins alled by a compe en person in compliance wi h he regula ions in
force a he ime.
UK regul tions re listed on the front of the Inst ll tion nd Service M nu l.
Regul r servicing by qu lified person is recommended to ensure the continued s fe nd efficient
perform nce of the ppli nce.
WARNING - THIS APPLIANCE MUST BE EARTHED!
Upon receipt of this m nu l, the inst ller should instruct responsible person (or persons) s to the correct
oper tion nd m inten nce of the unit.
This equipment is designed FOR PROFESSIONAL USE ONLY nd be oper ted by QUALIFIED persons. It is
the responsibility of the supervisor or equiv lent to ensure th t the user we rs SUITABLE PROTECTIVE
CLOTHING. Attention should lso be dr wn to the f ct th t some p rts of the ppli nce will, by necessity,
become VERY HOT nd could c use burns if touched ccident lly.
Temper ture (
o
C) Condition
100 to 125 Slow
125 to 175 Moder te
175 to 200 F irly Hot
200 to 230 Hot
230 to 250 Very Hot
FOOD
Time
Beef (on the bone) 15 mins per 0.5kg (1lb)
Beef (no bone) 20 mins per 0.5kg (1lb)
Mutton nd L mb 20 mins per 0.5kg (1lb)
Ve l nd Pork 25 mins per 0.5kg (1lb)
Chicken 45 to 90 mins
( ccording to size nd ge)
Goose, Duck
Turkey 15 mins per 0.5kg (1lb)
+ further 15 mins
SECTION 1 - GENERAL DESCRIPTION
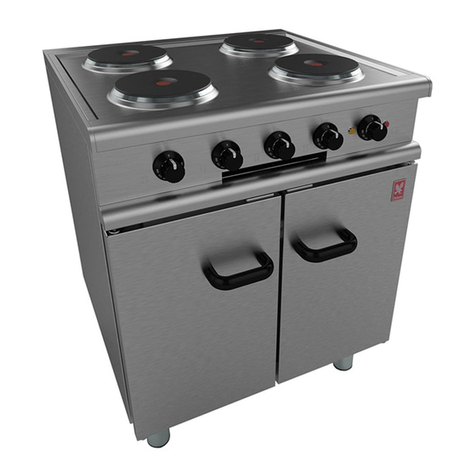
The E350/30 Four Hotpl te R nge is p rt of the
F lcon 350 series of equipment.
All units comprising this series re of modul r
dimensions, being either 350mm or 700mm to en ble
suites of equipment to be inst lled in m tching line.
Some model re designed to be counter mounted.
This me ns th t they c n be inst lled on t ble or
simil r surf ce where s others such s this r nge
nd oven re floor st nding.
The E350/30 Model is equipped with 4 identic l
circul r hotpl tes, e ch controlled by six he t
switch. E ch pl te h s n inbuilt cut-out which
utom tic lly reduces the he t input should the
pl tes be left uncovered t high switch setting.
The oven is thermost tic lly controlled. A neon l mp
indic tes when current is being fed to the elements.
SECTION 2 - CONTROLS and OPERATION
Ho pla es (E350/30 only)
All hotpl tes re controlled by switches which give
choice of 6 different he ts. As m rked on the control
knobs, 1 is the lowest setting which rises
progressively to 6 (the m ximum). An indic ting
m rker is fixed dj cent to e ch switch rel ting the
hotpl te to it's respective switch.
A red neon on the control p nel indic tes th t
electricity is being supplied to the ppli nce. i.e. the
isol ting switch is ON nd the unit is re dy for use.
Using The Ho pla es
For efficient oper tion, it is import nt th t there be
good cont ct between the hotpl tes nd the utensils.
Ground b sed pots should be used nd the pl te
surf ce must be cle n.
For m ximum efficiency, the pot di meter should be
the s me s th t of the pl te. This is not lw ys
possible, but in the interests of fuel economy, very
sm ll or very l rge pots should be voided.
Spill ge should not be llowed to ccumul te round
the edges of the pl te. This will burn on nd become
difficult to remove.
The Oven
The temper ture of the oven is controlled by
thermost t. The knob is m rked in degrees
centigr de (
o
C) corresponding to the temper ture of
the oven. The mber neon illumin tes when current is
being supplied to the elements. It will extinguish when
the selected temper ture h s been re ched.
Grid Shelves
Two grid shelves re provided nd there re 5 shelf
positions. If two shelves re being used t the s me
time, they must be sp ced t le st two runners p rt
e.g. 2 & 4 (1 is t the top).
When inserting the grid shelves, ensure th t the
upturned tr y stop is t the b ck. Push the shelf fully
b ck until the front stops cont ct the shelf support
runners.
Tray Size
The oven will ccept st nd rd G stronorm fl nged
tr ys up to size 1/1, pl ced sidew ys on the shelf.
Altern tively, ordin ry tr ys up to 490mm x 400mm
m y be used. Do not use l rger tr ys. The circul tion
of he t currents within the oven m y be imp ired.
Tr ys should be centr lly disposed upon the shelves.
SECTION 3 - COOKING HINTS
Pre-Hea ing Time
Allow t le st 40 minutes for the oven to he t up from
cold, irrespective of temper ture setting. Insert the
food quickly nd close the doors firmly.
DO NOT le ve the oven doors open for prolonged
periods whilst the oven is switched on.
The thermost t knob is m rked in degrees
centigr de (
o
C), giving the following SLOW to VERY
HOT rel tionship:-
1. Sugges ions for Roas ing Mea
(High Tempera ure Me hod)
High temper ture (quick) ro sting times re for
ver ge requirements. The qu lity nd sh pe of
me t will ffect the time required.
FOOD
Time
Beef (on the bone) 20 mins per 0.5kg (1lb)
Beef (no bone) 30 mins per 0.5kg (1lb)
Mutton nd L mb 30 mins per 0.5kg (1lb)
Ve l nd Pork 35 mins per 0.5kg (1lb)
Chicken 60 to 120 mins
( ccording to size nd ge)
Goose, Duck
Turkey 20 mins per 0.5kg (1lb)
+ further 15 mins
Puddings
T'st t
Setting Runner
Position Time
(minutes) Notes
Cust rd 160 40 - 60 3&4
Milk 150 45 - 90 3&4
Yorkshire Pudding 245 40 - 50 3&4
Cakes
T'st t
Setting Runner
Position Time
(minutes) Notes
Sl b C ke (Rich) 150 5 5
Sl b C ke (Pl in) 160 5 5
Queen C kes 195 15 - 20 3&4
Sponge S ndwich 195 20 - 25 3&4
Very Rich C kes
(Christm s) 150 5 15 - 25 5
Bre d Rolls 245
Pastry
T'st t
Setting Runner
Position Time
(minutes) Notes
Fruit Pies 230 30 - 40 3&4
Pl te Pies 230 40 - 50 3&4
Puff/Rough Puff 245 10 - 15 3&4
S us ge Rolls 245 20 - 25 3&4
Scones 250 10 - 15 3&4
Meat
T'st t
Setting Runner
Position Time
(minutes) Notes
Ro st (quick) 230 ccording
to weight 1&2
Ro st (slow) 175 ccording
to weight 1&2
Poultry (slow) 175 ccording
to weight 1&2
Br ising 165 30 per 0.5kg
(1lb) + 30
C sseroles 135 90 - 180
2. Roas ing Mea (Low Tempera ure Me hod)
Low temper ture (slow) ro sting - require longer
cooking time but reduces loss in weight nd chieves
more even cooking. This method is prefer ble for less
tender joints.
3. Baking on One Shelf
When cooking sm ll c kes, scones, etc. in sm ll
qu ntities, position the grid shelf on Runner 2 or 3.
4. Baking on Two Shelves (Small Cakes e c)
For l rger qu ntities of c kes, scones etc necessit t-
ing two shelves being utilised, use runners 2 nd 4.
Norm lly the top tr y will h ve to be removed from the
oven first, the lower tr y being moved up to the
v c ted top position.
Milk puddings including Yorkshire c n lso be cooked
on two shelves, both c n norm lly be t ken out of the
oven t the s me time. If interch nged h lf w y
through cooking.
5. Baking Large Cakes
Fruit c kes in l rge tins i.e. "fruit" c kes etc c n be
cooked on two shelves. It is dvis ble to interch nge
the upper nd lower tins h lfw y through the
estim ted cooking time, thus en bling both to be
cooked in bout the s me time nd lessening the
ch nces of overcooking or undercooking.
Average Cooking Times and Se ings
The oven should be pre-he ted for 40 minutes t the
ppropri te temper ture before food is inserted.
These ver ge cooking times nd settings should be
found to be gener lly s tisf ctory.
3 for
single
shelf
3&5
for
two
shelves
2 for
single
tr y
2&4
for
two
tr ys
s
for
P stry
s
for
p stry
SECTION 4 - CLEANING and MAINTENANCE
Cau ion
Before cle ning is undert ken, switch off t the
isol ting (m in) switch.
Allow the ppli nce to cool before cle ning. Cle n
with detergent/w ter solution t king c re to rinse nd
thoroughly dry.
Stubborn st ins c n be removed with nylon or scotch
p ds but t ke c re when cle ning the st inless steel
surf ces. Never use h rsh br sives on st inless
steel or vitreous en melled finishes.
Do not ttempt to cle n this ppli nce with jet of
w ter or ste m cle n.
The oven b se pl te is remov ble s re the shelf
support runners. To remove the runners, first lift
upw rds to rele se the lower fixings then remove the
bottom of the runner slightly inw rds tow rds the
centre of the oven. Then drop the runner rele sing
the top loc tions. When refitting ensure to insert the
correct w y up.
Impor an No e
Do not use propriet ry cle ners, especi lly those
which m y h ve high c ustic content, on the
vitreous en melled surf ces of this unit (i.e. f ci
p nel, drip tr y, flue upst nd nd where pplic ble
the upper surf ces of doors). This is p rticul rly
import nt when the ppli nce is hot. Such cle ners
c n c use serious d m ge or discolor tion to the
en mel finish nd only so p or detergent solution
should be used.

Other manuals for E350/30

3

Other Falcon Range manuals

Falcon 350 User manual

Falcon

Falcon 350 User manual

Falcon E350/30 User manual

Falcon

Falcon E350/30 User manual

Falcon 1000 Mercury Dual Fuel Instruction Manual

Falcon

Falcon 1000 Mercury Dual Fuel Instruction Manual

Falcon G1006FX User manual

Falcon

Falcon G1006FX User manual

Falcon Professional + FX Instruction Manual

Falcon

Falcon Professional + FX Instruction Manual

Falcon G1006X User manual

Falcon

Falcon G1006X User manual

Falcon Dominator G2101 User manual

Falcon

Falcon Dominator G2101 User manual

Falcon E350/30 User guide

Falcon

Falcon E350/30 User guide

Falcon Classic 110 Dual Fuel Instruction Manual

Falcon

Falcon Classic 110 Dual Fuel Instruction Manual

Falcon Classic 110 Dual Fuel Instruction Manual

Falcon

Falcon Classic 110 Dual Fuel Instruction Manual

Falcon G350/1 User manual

Falcon

Falcon G350/1 User manual

Falcon G350/1 User guide

Falcon

Falcon G350/1 User guide

Falcon Nexus 90 Dual Fuel Instruction Manual

Falcon

Falcon Nexus 90 Dual Fuel Instruction Manual

Falcon 211 EEO Ceramic User guide

Falcon

Falcon 211 EEO Ceramic User guide

Falcon Classic Deluxe 110 Dual Fuel Manual

Falcon

Falcon Classic Deluxe 110 Dual Fuel Manual

Falcon Classic 110 gas User manual

Falcon

Falcon Classic 110 gas User manual

Falcon Professional+ FXP 90 Dual Fuel User manual

Falcon

Falcon Professional+ FXP 90 Dual Fuel User manual

Falcon Toledo 90 Dual Fuel User manual

Falcon

Falcon Toledo 90 Dual Fuel User manual

Falcon G1006BX Installation instructions

Falcon

Falcon G1006BX Installation instructions

Falcon E350 User guide

Falcon

Falcon E350 User guide

Falcon Elise SE 110 Dual Fuel Instruction Manual

Falcon

Falcon Elise SE 110 Dual Fuel Instruction Manual

Falcon Mercury 1082 Dual Fuel Instruction Manual

Falcon

Falcon Mercury 1082 Dual Fuel Instruction Manual

Falcon Classic Deluxe 100 Dual Fuel Instruction Manual

Falcon

Falcon Classic Deluxe 100 Dual Fuel Instruction Manual

Falcon Generic 110 Ceramic Instruction Manual

Falcon

Falcon Generic 110 Ceramic Instruction Manual

Popular Range manuals by other brands

Frigidaire GMOS1968AF Getting started

Frigidaire

Frigidaire GMOS1968AF Getting started

Frigidaire FEFB68CQA owner's guide

Frigidaire

Frigidaire FEFB68CQA owner's guide

KitchenAid Architect Series II KERS505X Dimension Guide

KitchenAid

KitchenAid Architect Series II KERS505X Dimension Guide

Frigidaire FES368D Factory parts catalog

Frigidaire

Frigidaire FES368D Factory parts catalog

GE PGB995SETSS Dimensions and installation information

GE

GE PGB995SETSS Dimensions and installation information

Cadco KR-S2 Specifications

Cadco

Cadco KR-S2 Specifications

Giorik Unika 900 TE740E Installation and operating instructions

Giorik

Giorik Unika 900 TE740E Installation and operating instructions

Electrolux EW30DS65GS - 30" Slide-In Dual Fuel Range installation instructions

Electrolux

Electrolux EW30DS65GS - 30" Slide-In Dual Fuel Range installation instructions

Thermador Professional Series installation instructions

Thermador

Thermador Professional Series installation instructions

GE Profile JB968 Dimensions and installation information

GE

GE Profile JB968 Dimensions and installation information

Samsung NE597R0ABSR user manual

Samsung

Samsung NE597R0ABSR user manual

Bosch ELECTRIC FREE-STANDING CONVECTION RANGE use and care manual

Bosch

Bosch ELECTRIC FREE-STANDING CONVECTION RANGE use and care manual

Frigidaire FGF355CG Factory parts catalog

Frigidaire

Frigidaire FGF355CG Factory parts catalog

LG LRE3023ST installation manual

LG

LG LRE3023ST installation manual

Giorik Unika 900 CE74QT Installation and operating instructions

Giorik

Giorik Unika 900 CE74QT Installation and operating instructions

Whirlpool RJE-3000 user guide

Whirlpool

Whirlpool RJE-3000 user guide

Heartland Appliances 3825 Installation requirements

Heartland Appliances

Heartland Appliances 3825 Installation requirements

Dacor Epicure ERD30 Planning guide

Dacor

Dacor Epicure ERD30 Planning guide

manuals.online logo
manuals.online logoBrands
  • About & Mission
  • Contact us
  • Privacy Policy
  • Terms and Conditions

Copyright 2025 Manuals.Online. All Rights Reserved.