manuals.online logo
Brands
  1. Home
  2. •
  3. Brands
  4. •
  5. Faller
  6. •
  7. Toy
  8. •
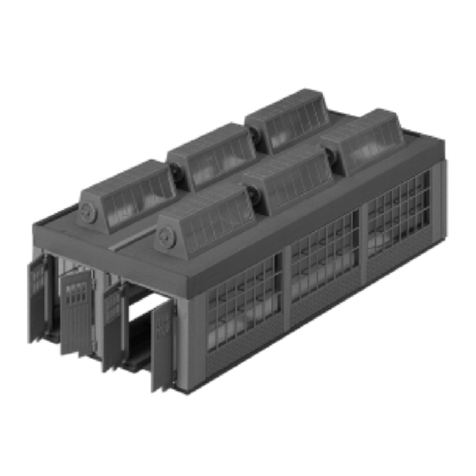
  9. Faller 3-STALL ROUNDHOUSE User manual

Faller 3-STALL ROUNDHOUSE User manual

Sa. Nr. 221 237 0
RINGLOKSCHUPPEN, 3-STÄNDIG
3-STALL ENGINE ROUNDHOUSE
ROTONDE À LOCOMOTIVES À 3 EMPLACEMENTS
RINGLOCLOODS, DRIE SPORIG Art. Nr. 120177
Inhalt Spritzlinge
Contents Sprues
Contenu Moulages
Inhoud Gietstukken
13x
23x
33x
43x
53x
61x
73x
83x
10 1x
Machen Sie sich bitte vor Beginn des Bastelns mit dem Bausatzinhalt und der Anleitung vertraut und prüfen Sie die Vollständigkeit.
Im Reklamationsfall gilt die gesetzliche Gewährleistungspflicht. Sollte ein Teil fehlen, übersenden Sie bitte den Teilewunsch und den
Kaufbeleg an: Gebr. FALLER GmbH, Kundendienst, Kreuzstraße 9, D-78148 Gütenbach, [email protected]. Sollten Sie einmal
weitere Ersatzteile benötigen, senden wir Ihnen den benötigten Spritzling, bei Verfügbarkeit, gerne kostenpflichtig zu.
Bitte beachten Sie, dass produktionsbedingt Einzelteile übrig bleiben können.
Before building your model, please familiarize yourself with the contents of the kit and the instructions for use, also checking
whether the set of parts is complete. In case of any complaint, the legal guarantee obligation shall apply. Should a part be missing,
please send the designation of the part required and the receipt documenting your purchase to: Gebr. FALLER GmbH, Kundendienst,
Kreuzstraße 9, D-78148 Gütenbach, [email protected].
Should you require further spare parts one day, we shall be pleased to send you, with costs, the required sprue, if it is available.
Please note that, on grounds of the production process, some single injection molded parts may be superfluous.
Avant de commencer votre modèle, veuillez vous familiariser avec le contenu du kit et la notice d’emploi, et contrôlez que le lot de
pièces est complet. En cas de réclamation, il s’appliquera l’obligation de garantie légale. Au cas où une pièce manquerait, veuillez
envoyer la désignation de la pièce souhaitée et le bon d’achat à: Gebr. FALLER GmbH, Kundendienst, Kreuzstraße 9,
D-78148 Gütenbach, [email protected]. Au cas où vous auriez besoin un jour d’autres pièces détachées, nous vous enverrons
volontiers la grappe requise, si elle est disponible, contre paiement.
Veuillez noter que, pour des raisons de production, il se peut que des pièces détachées soient superflues.
Maak uzelf vóór het bouwen vertrouwd met de inhoud van het bouwpakket en met de handleiding en controleer de volledigheid.
In geval van reclamatie geldt de wettelijke garantieverplichting. Mocht er een onderdeel ontbreken, stuur het verzoek om he
gewenste onderdeel en het aankoopbewijs dan naar: Gebr. FALLER GmbH, klantenservice, Kreuzstraße 9, D-78148 Gütenbach,
[email protected].
Als u ooit meer reserveonderdelen nodig hebt, sturen wij het benodigde gietstuk, indien beschikbaar, graag tegen betaling naar u op.
Let op: om productieredenen kunnen losse onderdelen overblijven.
D
F
GB
NL
Art. Nr. 170688
SPEZIAL-SEITENSCHNEIDER
Für den Zusammenbau des Modells empfehlen wir folgende FALLER-Artikel (sind nicht im Bausatz enthalten):
For the assembly of the kit we recommend following FALLER products (not included in the kit):
Pour l’assemblage du modèle, nous vous recommandons les articles FALLER suivants (non inclus dans le kit):
Om dit model te bouwen adviseren wij de volgende FALLER producten (maken geen deel uit van deze bouwset):
Art. Nr. 170490 | 170492 | 170494
FALLER SUPER-EXPERT | EXPERT | LASERCUT
Art. Nr. 170687
FALLER-BASTELMESSER
WICHTIGER HINWEIS
Bevor Sie mit der Montage beginnen,
sollten Sie sich zuerst mit den möglichen Varianten befassen.
IMPORTANT NOTICE
Before you start assembling your kit,
please familiarize yourself thoroughly with the variations possible.
AVIS IMPORTANT
Avant de commencer le montage,
vous devez en premier vous préoccuper des differéntes variantes.
BELANGRIJKE AANWIJZINGEN
Voordat u met de montage van het model begint,
zou u zich op de hoogte moeten stellen van de mogelijke varianties.
2
3
Varianten:
3 x Art. 120177
1 x Art. 120175
1 x Art. 120177
4
M 1:1
1 1 1 1 1
1 1 1 1 1
2 2
2 3
4 4 4 4 4 4
3
3
Das abgebildete Papier-Musterfenster mit transparentem Klebeband auf die beiliegende Fensterfolie kleben und diese ausschneiden. Fensterfolie vorsichtig mit wenig Klebstoff auf die Rückseite der Fensterrahmen aufkleben.
Using clear adhesive tape fix the pattern window made of paper pictured to the window plastic sheet supplied, and cut that sheet out. Using very little glue, cautiously stick the window sheet to the back of the window frame.
À l’aide de ruban adhésif transparent coller la fenêtre à dessin en papier représentée sur la feuille transparente fournie, et découper cette feuille. Coller avec précaution la feuille transparente, avec très peu de colle,
au dos du cadre de la fenêtre.
De afgebeelde papieren raamdecoratie met transparant plakband op de meegeleverde raamfolie plakken en uitknippen. Raamfolie voorzichtig met een beetje lijm op de achterzijde van de ramen lijmen.
Fensterfolie
Window foil
Feuillet transparent
Vensterfolie
3 x
3 x
A
BC
3/2
3/33/42/2
6/2
7/1
8/3 2/3 8/3
4/6
1/2
1/1
22
1 1
2
5
Inhalt Tüte
Contents bag
Contenu sachet
Inhoud zakje
6
E
F
GH
4/10
4/11
4/8 5/17
5/15 5/16
5/12
5/13
5/14
2/1
6/3
8/1 8/2
4/5
2/5
4/3
4/9
6 x 3 x
3 x
3 x
A
B
C
D
D
F
E
D
2/6 Art. Nr. 180671:
Beleuchtung, liegt nicht bei
Illumination, not included
Éclairage, non jointe
Verlichting, niet bijgevoegd
7
J
K
33311
2/1
8/2
8/13/5
6/4 2/4 2/2
6/1
F
G
E
I
B
D
HA
8
M
E
F
K
2/6
B
D
H H
Wenn mehrere Lokschuppen aneinander gebaut werden sollen, Position I und K
durch Teile 2/1, 8/1 und 8/2 ersetzen (siehe Position J).
If serval engine sheds are to be build side by side, replace items I and K by parts 2/1, 8/1 and 8/2 (see item J).
Si plusieurs remises à locomotives doivent être montées en contigu, remplacer position I et K
par les pièces 2/1, 8/1 et 8/2 (voir position J).
Als meerdere lokloodsen naast elkaar gebouwd moeten worden,
positie I en K vervagen door aanbrengen van delen 2/1, 8/1 en 8/2 (zie pos. J).
A
I
J
L
L
Stabilisierungsstege heraustrennen.
Cut out stabilizing bars.
Retirer les traverses de stabilisation.
Stabiliseringstrips verwijderen.
9
O
7/7
7/5
7/4
7/3 7/6
1/14
1/10
1/9
1/9
1/13
1/10
1/13
1/12
1/12 1/12
7/9
7/11
7/12 7/12
7/2
7/8
7/11
7/10
N
M
Art. Nr. 180671:
Beleuchtung, liegt nicht bei
Illumination, not included
Éclairage, non jointe
Verlichting, niet bijgevoegd N
10
Q
RS
T
U
Märklin M + C Märklin M + C
P
4/2
4/2 4/1
4/4
4/1
4/4
4
4
3 x 3 x
P
O
Q
Tnicht kleben
do not glue
ne pas coller
niet lijmen
Art. Nr. 120136:
2 Untersuchungsgruben,
liegt nicht bei
2 Inspection pits,
not included
2 Fosses de visite,
non jointe
2 Inspectiekuilen,
niet bijgevoegd
11
W
Druckfeder, nicht kleben
Compression spring, do not glue
Ressort à pression, ne pas coller
Drukveer, niet lijmen
Drahtbügel
Wire bow
Etrier
Draadbeugel
4/7
V
U
V
Inhalt Tüte Contents bag
Contenu sachet Inhoud zakje
12
1/15
1/3
1,5 mm1,5 mm
X
Bei Verwendung von Märklin C - Gleisen bitte rechts und links am Gleisbett 1,5 mm Material abschneiden!
If Märklin-C-tracks are used, please cut off material from the track ballast - 1,5 mm each on the right and left.
En utilisant des voies C de Märklin, découper à droite et à gauche du ballast do voie 1,5 mm de matériau.
Bij gebruik van Märklin C - rails moet links en rechts van de railbedding 1,5 mm materiaal worden weggesneden.
Bei Märklin M und C - Gleisen entfallen Teil 1/3 und Teil 1/15.
Part 1/3 and part 1/15 are not needed for Märklin - M - and - C - tracks.
Acec des voies M et C de Märklin, la pièce 1/3 et la pièce 1/15 ne sont pas nécessaires.
Bij Märklin M - en C - rails vervallen deel 1/3 en 1/15.
YW
13
5/9
10/1
5/1
5/2
5/7
3 x
b
c
Klebestellen gut abtrocknen lassen (ca. 45 Min.).
Allow glued joint zo dry well (apporox. 45 min.).
Laisser sécher les pièces collées pendant 45 minutes environ.
Laat het geheel vooral goed drogen (ca. 45 min.).
a
5/8
2/13
5/11
5/3
2/9
2/7
a
b
14
de
f
nicht kleben
do not glue
ne pas coller
niet hier lijmen
c
3 x
3 x
1/7
1/8
5/5
5/5
1/6
1/5
1/4
2/10
5/4
5/4
d
1:1
e
Y
15
g2/12 2/11
5/10
f
16 Märklin Art. Nr. : 7286
Märklin Art. Nr. : 2202
Fleischmann Art. Nr. : 6052
6152
6154
3x2200 3x2200
3x6006
3x6106
2x2224 2270
Fleischmann Art. Nr. : 6057
6058
6157
6158

Other manuals for 3-STALL ROUNDHOUSE

1

This manual suits for next models

1

Other Faller Toy manuals

Faller 130483 User manual

Faller

Faller 130483 User manual

Faller 190066-2 User manual

Faller

Faller 190066-2 User manual

Faller 232255 User manual

Faller

Faller 232255 User manual

Faller VIADUCT SET, TWO-TRACK, CURVED User manual

Faller

Faller VIADUCT SET, TWO-TRACK, CURVED User manual

Faller CAR WASH User manual

Faller

Faller CAR WASH User manual

Faller Town hall 131274 User manual

Faller

Faller Town hall 131274 User manual

Faller 130339 User manual

Faller

Faller 130339 User manual

Faller Val Tuoi Viaduct-Set User manual

Faller

Faller Val Tuoi Viaduct-Set User manual

Faller 131382 User manual

Faller

Faller 131382 User manual

Faller Maize Silo 130531 User manual

Faller

Faller Maize Silo 130531 User manual

Faller OIL EXTRACTION PUMP User manual

Faller

Faller OIL EXTRACTION PUMP User manual

Faller 140340 1 User manual

Faller

Faller 140340 1 User manual

Faller 232542 User manual

Faller

Faller 232542 User manual

Faller TOWN CHURCH User manual

Faller

Faller TOWN CHURCH User manual

Faller 232244 User manual

Faller

Faller 232244 User manual

Faller TOWN WALL User manual

Faller

Faller TOWN WALL User manual

Faller TOWN DECORATION SET User manual

Faller

Faller TOWN DECORATION SET User manual

Faller 140318 User manual

Faller

Faller 140318 User manual

Faller GATEKEEPER'S HOUSE User manual

Faller

Faller GATEKEEPER'S HOUSE User manual

Faller GANTRY CRANE User manual

Faller

Faller GANTRY CRANE User manual

Faller 120580 User manual

Faller

Faller 120580 User manual

Faller 109271 User manual

Faller

Faller 109271 User manual

Faller HUNTER HUT WITH RAISED HIDE User manual

Faller

Faller HUNTER HUT WITH RAISED HIDE User manual

Faller TRAILERS FOR GRIPPER TBM User manual

Faller

Faller TRAILERS FOR GRIPPER TBM User manual

Popular Toy manuals by other brands

Mega Bloks Probuilder CARBON Series manual

Mega Bloks

Mega Bloks Probuilder CARBON Series manual

Trix C 5/6 Elefant Series manual

Trix

Trix C 5/6 Elefant Series manual

Fisher-Price 77855 instructions

Fisher-Price

Fisher-Price 77855 instructions

WARCRADLE SCENICS WSA520003 Assembly guide

WARCRADLE SCENICS

WARCRADLE SCENICS WSA520003 Assembly guide

Massoth LGB 20670 Track cleaning loco quick guide

Massoth

Massoth LGB 20670 Track cleaning loco quick guide

Fisher-Price Miracles&Milestones J0126 manual

Fisher-Price

Fisher-Price Miracles&Milestones J0126 manual

Contixo T1 instruction manual

Contixo

Contixo T1 instruction manual

Viessmann 4518 Operation manual

Viessmann

Viessmann 4518 Operation manual

Astonica 50105629 instruction manual

Astonica

Astonica 50105629 instruction manual

Horizon Hobby E-flite Twin Timber instruction manual

Horizon Hobby

Horizon Hobby E-flite Twin Timber instruction manual

Tiger Electronics Barney 87-523 instruction manual

Tiger Electronics

Tiger Electronics Barney 87-523 instruction manual

MTHTrains RailKing Vendor Trailer operating instructions

MTHTrains

MTHTrains RailKing Vendor Trailer operating instructions

Horizon Hobby E-flite EFL54500 instruction manual

Horizon Hobby

Horizon Hobby E-flite EFL54500 instruction manual

Power Wheels CDD15 owner's manual

Power Wheels

Power Wheels CDD15 owner's manual

VolantexRC Ranger manual

VolantexRC

VolantexRC Ranger manual

RTS 2T17 REIMS-GUEUX COMMENTATORS LOOKOUT Assembly instructions

RTS

RTS 2T17 REIMS-GUEUX COMMENTATORS LOOKOUT Assembly instructions

Zapf Creation My Little Baby Born I Can Swim! quick guide

Zapf Creation

Zapf Creation My Little Baby Born I Can Swim! quick guide

REVELL Battleship H.M.S. Prince Of Wales Assembly manual

REVELL

REVELL Battleship H.M.S. Prince Of Wales Assembly manual

manuals.online logo
manuals.online logoBrands
  • About & Mission
  • Contact us
  • Privacy Policy
  • Terms and Conditions

Copyright 2025 Manuals.Online. All Rights Reserved.