manuals.online logo
Brands
  1. Home
  2. •
  3. Brands
  4. •
  5. Faller
  6. •
  7. Toy
  8. •
  9. Faller 130546 User manual

Faller 130546 User manual

Sa. Nr. 130 546 2
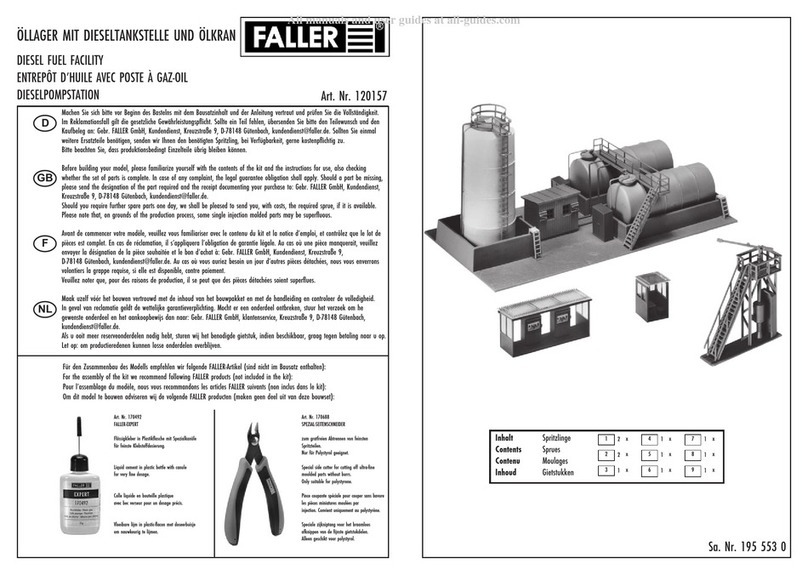
Inhalt Spritzlinge
Contents Sprues
Contenu Moulages
Inhoud Gietstukken
11x
2 A 2x
2 B 2x
32x
5 A 1x
8 A 2x
22 AB 4x
26 B 8x
STALLUNG
STABLE
ÉTABLE
STALLEN Art. Nr. 130546
Machen Sie sich bitte vor Beginn des Bastelns mit dem Bausatzinhalt und der Anleitung vertraut und prüfen Sie die Vollständigkeit.
Im Reklamationsfall gilt die gesetzliche Gewährleistungspflicht. Sollte ein Teil fehlen, übersenden Sie bitte den Teilewunsch und den
Kaufbeleg an: Gebr. FALLER GmbH, Kundendienst, Kreuzstraße 9, D-78148 Gütenbach, [email protected]. Sollten Sie einmal
weitere Ersatzteile benötigen, senden wir Ihnen den benötigten Spritzling, bei Verfügbarkeit, gerne kostenpflichtig zu.
Bitte beachten Sie, dass produktionsbedingt Einzelteile übrig bleiben können.
Before building your model, please familiarize yourself with the contents of the kit and the instructions for use, also checking whether
the set of parts is complete. In case of any complaint, the legal guarantee obligation shall apply. Should a part be missing, please
send the designation of the part required and the receipt documenting your purchase to: Gebr. FALLER GmbH, Kundendienst,
Kreuzstraße 9, D-78148 Gütenbach, [email protected].
Should you require further spare parts one day, we shall be pleased to send you, with costs, the required sprue, if it is available.
Please note that, on grounds of the production process, some single injection molded parts may be superfluous.
Avant de commencer votre modèle, veuillez vous familiariser avec le contenu du kit et la notice d’emploi, et contrôlez que le lot de
pièces est complet. En cas de réclamation, il s’appliquera l’obligation de garantie légale. Au cas où une pièce manquerait, veuillez
envoyer la désignation de la pièce souhaitée et le bon d’achat à: Gebr. FALLER GmbH, Kundendienst, Kreuzstraße 9,
D-78148 Gütenbach, [email protected]. Au cas où vous auriez besoin un jour d’autres pièces détachées, nous vous enverrons
volontiers la grappe requise, si elle est disponible, contre paiement.
Veuillez noter que, pour des raisons de production, il se peut que des pièces détachées soient superflues.
Maak uzelf vóór het bouwen vertrouwd met de inhoud van het bouwpakket en met de handleiding en controleer de volledigheid.
In geval van reclamatie geldt de wettelijke garantieverplichting. Mocht er een onderdeel ontbreken, stuur het verzoek om he
gewenste onderdeel en het aankoopbewijs dan naar: Gebr. FALLER GmbH, klantenservice, Kreuzstraße 9, D-78148 Gütenbach,
[email protected].
Als u ooit meer reserveonderdelen nodig hebt, sturen wij het benodigde gietstuk, indien beschikbaar, graag tegen betaling naar u op.
Let op: om productieredenen kunnen losse onderdelen overblijven.
D
F
GB
NL
Art. Nr. 170688
SPEZIAL-SEITENSCHNEIDER
zum gratfreien Abtrennen von feinsten
Spritzteilen.
Nur für Polystyrol geeignet.
Special side cutter for cutting off ultra-fine
moulded parts without burrs.
Only suitable for polystyrene.
Pince coupante spéciale pour couper sans bavure
les pièces miniatures moulées par
injection. Convient uniquement au polystyrène.
Speciale zijkniptang voor het braamloos
afknippen van de fijnste gietstukdelen.
Alleen geschikt voor polystyrol.
Für den Zusammenbau des Modells empfehlen wir folgende FALLER-Artikel (sind nicht im Bausatz enthalten):
For the assembly of the kit we recommend following FALLER products (not included in the kit):
Pour l’assemblage du modèle, nous vous recommandons les articles FALLER suivants (non inclus dans le kit):
Om dit model te bouwen adviseren wij de volgende FALLER producten (maken geen deel uit van deze bouwset):
Art. Nr. 170492
FALLER-EXPERT
Flüssigkleber in Plastikflasche mit Spezialkanüle
für feinste Klebstoffdosierung.
Liquid cement in plastic bottle with canule
for very fine dosage.
Colle liquide en bouteille plastique
avec bec verseur pour un dosage précis.
Vloeibare lijm in plastic-flacon met doseerbuisje
om nauwkeurig te lijmen.
2
8 x
8 x
26/2H02
Deco 2
2/6
3/5
Deco 1
3/4
A
B
A
Fensterfolie
Die beiliegende Fensterfolie entsprechend der Abbildungen ausschneiden und vorsichtig mit wenig Klebstoff auf die Rückseite der Fensterrahmen aufkleben.
Window foil
Cut the attached window foil according the illustrations and glue it carefully with a little glue to the rear side of the window frames.
Feuillet transparent pour fenêtres
Découper le feuillet transparent pour fenêtres inclus d’après l’illustration. Coller proprement avec un peu de colle sur la face arrière du cadre des fenêtres.
Vensterfolie
De meegeleverde vensterfolie conform de afbeeldingen uitknippen of uitsnijden en voorzichtig met een beetje lijm op de achterzijde van het raam plakken.
Fensterfolie
Window foil
Feuillet transparent
Vensterfolie
Fensterfolie
Window foil
Feuillet transparent
Vensterfolie
3
2 x
2 x
2 x
2 x
C
B
B
B
B
D
E
F
22/2
22/1
22/2
22/1
C
E
4
FD
1/1
2/5
G
H
IJ
G
I
2 x
2 x
Loch durchstechen
(Reed-Sensor, liegt nicht bei)
Pirece hole through (Reed sensor,
not included)
Piquez le trou (Détecteur Reed,
non jointe)
Gat doorstéken (Reed-sensor,
niet bijgevoegd)
Art. Nr. 161670:
Spezial-Fahrdraht, liegt nicht bei
Special contact wire, not included
Fil de contact spécial, non jointe
Speciale rijdraad, niet bijgevoegd
Art. Nr. 161675:
Stopp-Stelle, liegt nicht bei
Stop section, not included
Point d’arrêt stop, non jointe
Stopplaats, niet bijgevoegd
5
2/7
3/6
3/72/1Deco 3
H
H
J
K
LMNO
2 x 2 x 2 x
K
L
M
NN
Fensterfolie
Window foil
Feuillet transparent
Vensterfolie
6
P
Q
O
P
2/12 2/12 2/112/11 2/10
2/10
2/4
2/4
R
Q
2/18
2/2 2/3
2/9
2/9
2/8
2/8
S
2/18
7
R
nicht kleben
do not glue
ne pas coller
niet lijmen
Nur an dieser Stelle kleben.
Only apply glue to this point.
Coller exclusivement cet emplacement.
Alleen op deze plaats lijmen.
8
TUV
WXY
U
V
WX
2/15
2/17
2/15
2/16
2/192/20
2/14
2/24
2/22 2/25 2/25
2/17
nicht kleben
do not glue
ne pas coller
niet lijmen
nicht kleben
do not glue
ne pas coller
niet lijmen
nicht kleben
do not glue
ne pas coller
niet lijmen
Nur an dieser Stelle kleben.
Only apply glue to this point.
Coller exclusivement cet emplacement.
Alleen op deze plaats lijmen.
9
S
T
Y
2/19 2/21 2/22
2/20
2/25 2/25
2/14
2/17 2/17
abc
d
ef
ab
c
d
nicht kleben
do not glue
ne pas coller
niet lijmen
nicht kleben
do not glue
ne pas coller
niet lijmen
nicht kleben
do not glue
ne pas coller
niet lijmen
nicht kleben
do not glue
ne pas coller
niet lijmen
Nur an dieser Stelle kleben.
Only apply glue to this point.
Coller exclusivement cet emplacement.
Alleen op deze plaats lijmen.
Nur an dieser Stelle kleben.
Only apply glue to this point.
Coller exclusivement cet emplacement.
Alleen op deze plaats lijmen.
10 e
f
g
h
g
12/4
Nur an dieser Stelle kleben.
Only apply glue to this point.
Coller exclusivement cet emplacement.
Alleen op deze plaats lijmen.
nicht kleben
do not glue
ne pas coller
niet lijmen
Art. Nr. 130525:
Stall-Inneneinrichtung, liegt nicht bei
Stable interior equipment, not included
Aménagement intérieur d’étable, non jointe
Stal-inrichting, niet bijgevoegd
Art. Nr. 180624:
Torantriebseinheit, liegt nicht bei
Gate motor unit, not included
Unité de propulsion de porte, non jointe
Aandrijfeenheid voor het hek, niet bijgevoegd
11
Variante Art. 180624 2/13
2/23
28 mm
28 mm
i
Wird der Taster auf Position a oder b heruntergedückt und gehalten, öffnet sich das Tor.
Achtung: keine Endabschaltung !
Wird der Taster losgelassen, bleibt das Tor in der Position stehen.
Wird der Taster an der gegenüberliegenden Seite
(a oder b) heruntergedrückt und gehalten, schließt sich das Tor wieder.
Achtung: keine Endabschaltung !
If the push button is pressed to position a or b and maintained, the door will open.
Caution: no switching off in the limit position !
Whenever the push button is released, the door will stay in the position.
If the push button is pressed to the opposite side (a or b) and maintained,
the door will close again.
Caution: no switching off in the limit position !
En restant appuyé sur le commutateur en position A ou B, la porte s’ouvre.
Attention : pas d’arrêt en fin de position !
En lâchant le commutateur, la porte reste en position.
En appuyant sur la position inverse du commutateur et en restant appuyé (A ou B)
la porte se refermera.
Attention : pas d’arrêt en fin de position !
Als de knop op positie a of b ingedrukt wordt en vastgehouden, gaan de deuren open.
Let op! Geen eindafschakeling.
Zodra u de knop loslaat blijven de deuren in die stand staan.
Als de knoppen aan de tegenoverliggende zijden (a of b) worden
ingedrukt zullen de deuren weer sluiten.
Let op! Geen eindafschakeling.
Beim Einbau von Art. Nr. 180624 verwenden (Seite 3).
Use when mounting Art. no. 180624 (page 3).
A utiliser pour le montage de la N° 180624 (page 3).
Bij inbouw van Art. nr. 180624 gebruiken (pagina 3).
j
h
i
Art. Nr. 180624:
Torantriebseinheit, liegt nicht bei
Gate motor unit, not included
Unité de propulsion de porte, non jointe
Aandrijfeenheid voor het hek, niet bijgevoegd
ab
Art. Nr. 180641:
Transformator, liegt nicht bei
Transformer, not included
Transformateur, non jointe
Trafo, niet bijgevoegd
12
Funktionsweise:
Beim ersten Einschalten der Steuerung bleiben alle Motoren in der Montageposition stehen.
Wenn z. B. zwischen GND und »Start 1R« eine kurze Verbindung hergestellt wird, z. B. mit einem Taster oder Reedsensor,
läuft der angeschlossene Motor von Getriebe 1 so lange rechts herum, bis der Endschalter »1R« erreicht wird.
Wenn GND mit »Start 1L« kurz verbunden wird, dreht sich der Motor von Getriebe 1 so lange links herum, bis der Endschalter »1L« erreicht wird.
Die Endschaltersignale werden jeweils von der Getriebeeinheit an die Universalschalteinheit gegeben.
Mit dem Poti »P1« kann die Geschwindigkeit für Motor 1 eingestellt werden.
Gleiches gilt auch entsprechend für die anderen Antriebseinheiten.
Mode of operation:
When switching the control unit on for the first time, all motors will stay in the assembly position. Whenever a short connection is established for example between »GND« and »Start 1R«,
using a push button or a dry-reed contact for instance, the connected motor of gear 1 will rotate clockwise until reaching the limit switch »1R«.
After a short connection between »GND« and »Start 1L«, the motor of gear 1 will rotate anticlockwise until reaching the limit switch »1L«.
The signals sent out by the limit switches are transmitted by the respective gear box to the all-purpose switching unit.
Potentiometer »P1« allows to adjust the speed of motor 1.
All this similarly applies to the other drive units.
Principe de fonctionnement:
Lors de la première mise sous tension du module de commande, les moteurs restent en position de montage.
En branchant la borne »GND« et »START 1R« sur les bornes de l’inverseur, le moteur 1 avec son entrainement tournera vers la droite jusqu’à la position du fin de course »1R«.
Si on branche la borne »GND« et »START 1L«, le moteur 1 tournera à gauche jusqu’au fin de course »1L«.
Les positions des fins de course sont reportées dans le boitier universel.
La vitesse de rotation du moteur 1 peut être réglée à l’aide du potentiomètre »P1«.
Ceci est identique pour les autres boitiers de transmission.
De bediening:
Bij de eerste keer inschakelen van de besturing blijven alle aandrijvingen staan in de start/montage positie.
Als b.v. tussen »GND« en »Start 1R« een korte verbinding gemaakt wordt met een schakelaar of reedcontact zal de aangesloten motor 1 rechtsom draaien zolang er een elektrische verbinding is en het eindpunt,
b.v. deur helemaal open, bereikt is. Maakt u contact tussen »GND« en »1L« zal motor 1 linksom draaien en de deur sluiten. Een eindsignaal wordt door de aandrijféénheid aan de universele schakeléénheid
doorgegeven. Met de potentiometer kunt u de snelheid van motor 1 instellen. Vanzelfsprekend geldt dit ook voor de andere aandrijféénheden.
13
8/1
k
l
m
n
oj
k
lm
n
5/3
18 mm 19 mm
18 mm
3/5
3/11 3/10
3/5
3/1
3/1
2 x
m19 mm n
Art. Nr. 180654:
Beleuchtung, liegt nicht bei
Illumination, not included
Eclairage, non jointe
Verlichting, niet bijgevoegd
14
3/9
po3/9
15
qp
3/9 3/9
16
q
r

Other Faller Toy manuals

Faller SIENA User manual

Faller

Faller SIENA User manual

Faller Roundabout Bar User manual

Faller

Faller Roundabout Bar User manual

Faller 130166 User manual

Faller

Faller 130166 User manual

Faller DHL LOGISTIC CENTRE User manual

Faller

Faller DHL LOGISTIC CENTRE User manual

Faller 2 viaduct piers User manual

Faller

Faller 2 viaduct piers User manual

Faller BEETHOVENSTRASSE 2 TOWN HOUSES User manual

Faller

Faller BEETHOVENSTRASSE 2 TOWN HOUSES User manual

Faller 282708 User manual

Faller

Faller 282708 User manual

Faller 180330 User manual

Faller

Faller 180330 User manual

Faller 2 ALLOTMENTS User manual

Faller

Faller 2 ALLOTMENTS User manual

Faller PLATFORM WITH KIOSK User manual

Faller

Faller PLATFORM WITH KIOSK User manual

Faller GOLDBECK 130890 User manual

Faller

Faller GOLDBECK 130890 User manual

Faller 190288/2 User manual

Faller

Faller 190288/2 User manual

Faller Car Center User manual

Faller

Faller Car Center User manual

Faller LARGE ALPINE FARM WITH BARN User manual

Faller

Faller LARGE ALPINE FARM WITH BARN User manual

Faller Level crossing 282730 User manual

Faller

Faller Level crossing 282730 User manual

Faller 232354 User manual

Faller

Faller 232354 User manual

Faller Bergheim 131280 User manual

Faller

Faller Bergheim 131280 User manual

Faller Schlossberg Inn User manual

Faller

Faller Schlossberg Inn User manual

Faller MARBACH User manual

Faller

Faller MARBACH User manual

Faller 120504 User manual

Faller

Faller 120504 User manual

Faller 161652 User manual

Faller

Faller 161652 User manual

Faller 222164 User manual

Faller

Faller 222164 User manual

Faller 120223 User manual

Faller

Faller 120223 User manual

Faller FUEL DEPOT NATURAL ENERGY User manual

Faller

Faller FUEL DEPOT NATURAL ENERGY User manual

Popular Toy manuals by other brands

Ecotop Spacewalker I 06604 user manual

Ecotop

Ecotop Spacewalker I 06604 user manual

Kiddypix Blizz operating instructions

Kiddypix

Kiddypix Blizz operating instructions

LEGO 21134 instructions

LEGO

LEGO 21134 instructions

LEGO 7190 Instructions for use

LEGO

LEGO 7190 Instructions for use

Fisher-Price W6171 instructions

Fisher-Price

Fisher-Price W6171 instructions

Seagull Models SUPER TUCANO instruction manual

Seagull Models

Seagull Models SUPER TUCANO instruction manual

LOG CABIN TOYS COUNTRY CHAPEL instructions

LOG CABIN TOYS

LOG CABIN TOYS COUNTRY CHAPEL instructions

TickiT SiliShapes 54517 manual

TickiT

TickiT SiliShapes 54517 manual

Märklin 37685 manual

Märklin

Märklin 37685 manual

GRAUPNER 4565.HOTT Operating instuctions

GRAUPNER

GRAUPNER 4565.HOTT Operating instuctions

Eduard Bismarck Part 2 Assembly instructions

Eduard

Eduard Bismarck Part 2 Assembly instructions

Hasbro G.I. JOE Vs. Cobra Cobra Raven Wild Weasel manual

Hasbro

Hasbro G.I. JOE Vs. Cobra Cobra Raven Wild Weasel manual

Giant J3-90 instruction manual

Giant

Giant J3-90 instruction manual

Hangar 9 Twist Plug-N-Play Assembly manual

Hangar 9

Hangar 9 Twist Plug-N-Play Assembly manual

LEGO Atlantis 8075 Building instructions

LEGO

LEGO Atlantis 8075 Building instructions

LEGO NINJAGO 2520 Building instructions

LEGO

LEGO NINJAGO 2520 Building instructions

Super Flying Model SE5a Instruction

Super Flying Model

Super Flying Model SE5a Instruction

LEGO MINECRAFT 21121 Building instructions

LEGO

LEGO MINECRAFT 21121 Building instructions

manuals.online logo
manuals.online logoBrands
  • About & Mission
  • Contact us
  • Privacy Policy
  • Terms and Conditions

Copyright 2025 Manuals.Online. All Rights Reserved.