manuals.online logo
Brands
  1. Home
  2. •
  3. Brands
  4. •
  5. Faller
  6. •
  7. Toy
  8. •
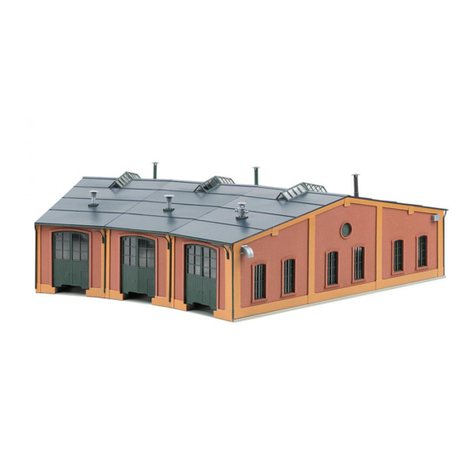
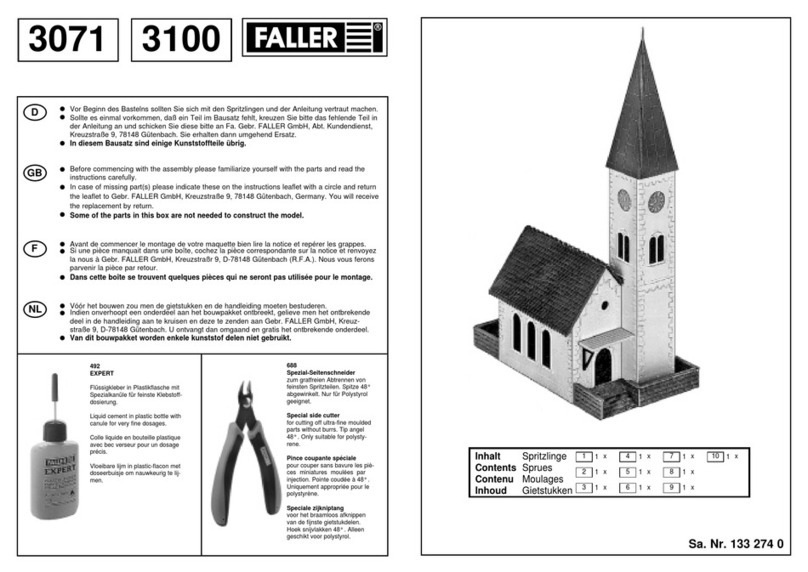
  9. Faller BEBENHAUSEN MONASTERY User manual

Faller BEBENHAUSEN MONASTERY User manual

Sa. Nr. 130 816 2
Art. Nr. 130816
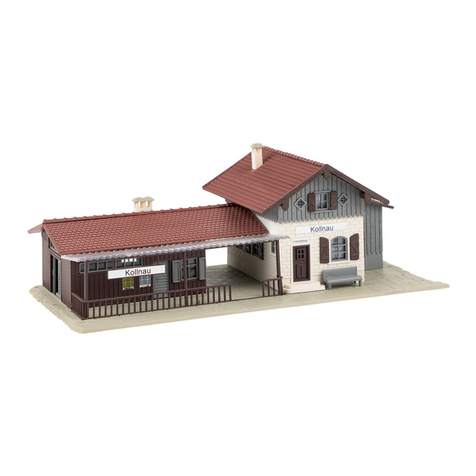
KLOSTER »BEBENHAUSEN«
»BEBENHAUSEN« MONASTERY
CLOÎTRE DE »BEBENHAUSEN«
KLOOSTER »BEBENHAUSEN«
Vor Beginn des Bastelns sollten Sie sich mit den Spritzlingen und der Anleitung vertraut machen.
Sollte es einmal vorkommen, dass ein Teil im Bausatz fehlt, kreuzen Sie bitte das fehlende Teil in
der Anleitung an und schicken Sie diese bitte an Fa. Gebr. FALLER GmbH, Abt. Kundendienst,
[email protected], Kreuzstraße 9, 78148 Gütenbach. Sie erhalten dann umgehend Ersatz.
Es kann vorkommen, dass bei einem Bausatz Einzelteile übrig sind.
Before beginning with the assembly please familiarize yourself with the parts and read the instructions carefully.
In case of missing parts please indicate these on the instructions leaflet with a circle and return
the leaflet to Gebr. FALLER GmbH, [email protected], Kreuzstraße 9, D-78148 Gütenbach, Germany.
You will receive the replacement by return.
It may happen in a kit that some parts are not required.
Avant de commencer le montage de votre maquette bien lire la notice et repérer les grappes.
Si une pièce manque dans une boîte, cochez la pièce correspondante sur la notice et renvoyez-la-nous
à Gebr. FALLER GmbH, [email protected], Kreuzstraße 9, D-78148 Gütenbach (R.F.A.).
Nous vous ferons parvenir la pièce par retour.
Dans certains kits, il est possible que certaines pièces ne soient pas utilisées.
Vóór het bouwen zou men de gietstukken en de handleiding moeten bestuderen.
Indien onverhoopt een onderdeel aan het bouwpakket ontbreekt, gelieve men het ontbrekende deel
in de handleiding aan te kruisen en deze te zenden aan Gebr. FALLER GmbH, [email protected],
Kreuzstraße 9, D-78148 Gütenbach. U ontvangt dan omgaand en gratis het ontbrekende onderdeel.
Het kan voorkomen dat u bij bepaalde bouwdozen onderdelen overhoudt.
D
F
GB
NL
170688
Spezial-Seitenschneider
zum gratfreien Abtrennen von feinsten Spritzteilen.
Spitze 48° abgewinkelt. Nur für Polystyrol geeignet.
Special side cutter
for cutting off ultra-fine moulded parts without burrs.Tip angel 48°.
Only suitable for polystyrene.
ince coupante spéciale
pour couper sans bavure les pièces miniatures moulées par injection.
Pointe coudée à 48°. Uniquement appropriée pour le polystyrène.
Speciale zijkniptang
voor het braamloos afknippen van de fijnste gietstukdelen.
Hoek snijvlakken 48°. Alleen geschikt voor polystyrol.
170492
FALLER-EX ERT
Flüssigkleber in Plastikflasche mit Spezialkanüle
für feinste Klebstoffdosierung.
FALLER-EX ERT
Liquid cement in plastic bottle with canule
for very fine dosage.
FALLER-EX ERT
Colle liquide en bouteille plastique
avec bec verseur pour un dosageprécis.
FALLER-EX ERT
Vloeibare lijm in plastic-flacon
met doseerbuisje om nauwkeurig te lijmen.
Für die ontage benötigen Sie Plastik-Klebstoff und Expert Lasercut-Kleber.
Wir empfelen:
FALLER-Klebstoff EXPERT (Art. Nr. 170492)
FALLER--Klebstoff EXPERT-Lasercut (Art. Nr. 170494)
FALLER-Spezial-Seitenschneider (Art. Nr. 170688)
FALLER-Bastelmesser (Art. Nr. 170687)
For mounting you need plastic cement and Lasercut cement.
Our recommendation:
FALLER cement EXPERT (Art. No. 170492)
FALLER cement EXPERT-Lasercut (Art. No. 170494)
FALLER special side cutter (Art. No. 170688)
FALLER modeller’s knife (Art. No. 170687)
Pour le montage, utiliser de la colle plastique et de la coller Lasercut.
Nous vous recommandons les produits suivants:
Colle FALLER EXPERT (Art. Nr. 170492)
Colle FALLER EXPERT-Lasercut (Art. Nr. 170494)
Pince coupante diagonale spéciale FALLER (Art. Nr. 170688)
Couteau de bricolage FALLER (Art. Nr. 170687)
Voor de montage heeft u plasticlijm en Lasercut lijm nodig.
Wij adviseren:
FALLER-plasticlijm EXPERT (Art. Nr. 170492)
FALLER-Lasercut lijm (Art. Nr. 170494)
FALLER-speciaal zijkniptang (Art. Nr. 170688)
FALLER-knutselmes (Art. Nr. 170687)
2
Inhalt Spritzlinge Schachtel I
Content oulded parts Box I
Contenu Grappes Boite I
Inhoud Spuitgietstuk doos I
1 A T+V 1 x
1 A R+U 1 x
1 AC S+U+H 4 x
1 BC G+X 2 x
1 BC G+Y 2 x
1 BC H+Z 3 x
1 A T+U 2 x
6 ABCD 1 x
6 ACD 1 x
6 C 2 x
11 ABC H+X 2 x
11 ABC H+Y 1 x
11 AB H+Y 1 x
11 A H 2 x
Inhalt Spritzlinge Schachtel II
Content oulded parts Box II
Contenu Grappes Boite II
Inhoud Spuitgietstuk doos II
4 BD V 2 x
4 BD W 6 x
4 AD Y 4 x
4 ACD X 4 x
54 x
8 ABCD 4 x
8 BD 2 x
11 A H 8 x
Auf allen Anfangsseiten sind die Spritzlinge aufgeführt, die man für die folgenden Bauabschnitte benötigt.
Alle angefangenen Spritzlinge nach Gebrauch unbedingt wieder zurück in die dazugehörige Schachtel legen, um die nötige Übersicht beizubehalten.
On all first pages you will find a list of the moulded parts that are required for the sections of construction that follow.
Every moulded part you have started to use should imperatively be put back in the corresponding box, after use, to maintain the general view that is needed.
Sur chaque première page figure la liste des grappes dont on a besoin pour les tranches de travaux qui suivent.
Il faut absolument remettre dans la boite correspondante, après utilisation, toutes les grappes entamées afin de conserver la vue d’ensemble nécessaire.
Op elke beginpagina staan de spuitgietstukken afgebeeld die voor de volgende bouwfasen nodig zijn.
Elk deels bewerkt spuitgietstuk na gebruik absoluut weer terug doen in de bijbehorende doos om het noodzakelijke overzicht te kunnen behouden.
Inhalt Spritzlinge Schachtel III
Content oulded parts Box III
Contenu Grappes Boite III
Inhoud Spuitgietstuk doos III
2 ABCD 5 x
2 AC 2 x
2 A 1 x
7 A X+Y 1 x
7 BCD 1 x
7 A X+Y 1 x
7 BC 1 x
11 AB H+V 1 x
11 AB H+W 1 x
12 ABCD 2 x
12 A X 2 x
12 A Y 2 x
13 ABCD 1 x
13 C 1 x
9 ABC 1 x
9 AC 1 x
9 C 2 x
4 AD Y 2 x
4 B U 2 x
Inhalt Spritzlinge Schachtel IV
Content oulded parts Box IV
Contenu Grappes Boite IV
Inhoud Spuitgietstuk doos IV
10 AB 8 x
3 ABC 4 x
3 A 4 x
8 1 x
10 E 1 x
10 B 1 x
Tüte:
Anlenkdraht 1 x
Servo 1 x
Schrauben 3 x
Servohebel 1 x
Fensterfolie
Die beiliegende Fensterfolie entsprechend der benötigten Größe ausschneiden und vorsichtig mit wenig Klebstoff auf die Rückseite der Fensterrahmen aufkleben.
Window foil
Cut the attached window foil according the illustrations and glue it carefully with a little glue to the rear side of the window frames.
Feuillet transparent pour fenêtres
Découper le feuillet transparent pour fenêtres inclus d’après l’illustration. Coller proprement avec un peu de colle sur la face arrière du cadre des fenêtres.
Vensterfolie
De meegeleverde vensterfolie conform de afbeeldingen uitknippen of uitsnijden en voorzichtig met een beetje lijm op de achterzijde van het raam plakken.
Kirche, Seite 3 - 14
Church, pages 3 - 14
Église, pages 3 - 14
Kerk, pagina 3 - 14
Sommerrefektorium/Kapelle, Seite 15 - 17
Summer refectory/Chapel, pages 15 - 17
Réfectoire d’été/Chapelle, pages 15 - 17
Zomerrefectorium/Kapel, pagina 15 - 17
Refektorium/Westflügel, Seite 18 - 22
Refectory/West wing, pages 18 - 22
Réfectoire/Aile ouest, pages 18 -22
Refectorium/Westvleugel, pagina 18 - 22
arlatorium/Ostflügel, Seite 23 - 26
arlour/East wing, pages 23 - 26
arloir/Aile est, pages 23 - 26
arlatorium/Oostvleugel, pagina 23 - 26
Kreuzgang, Seite 27 - 28
Cloister, pages 27 - 28
Cloître, pages 27 - 28
Kruisgang, pagina 27 - 28
3
A1/12 H1/12 H 1/12 H
1/11 H
Fensterfolie
Window foil
Feuillet transparent
Vensterfolie
2/16
1/9 Z
2/16
2/16
2/16
1/11 H
1/9 Z 1/9 Z
1/1 T
2/17 2/172/15 2/15 2/15 2/15
1/2 T
8/11
8/13
4/16
1/3 V
8/9
Schachtel I Spritzlinge Nr. 1
Schachtel II Sprues no. 4 + 8
Schachtel III oulages nr. 2
Gietstukken nr.
Fensterfolie
Window foil
Feuillet transparent
Vensterfolie
Fensterfolie
Window foil
Feuillet transparent
Vensterfolie
B
CD
E
A
B
C
D
Kirche
Church
Église
Kerk
2 x
2/17
1/11 G 1/11 G
1/12 G
2/17
1/3 U Dec 1
4/16
1/12 G 1/1 R
1/1 S
2 x 1/9 X
1/9 Y
1/3 U1/3 U
1/1 S
Fensterfolie
Window foil
Feuillet transparent
Vensterfolie
Fensterfolie
Window foil
Feuillet transparent
Vensterfolie
Fensterfolie
Window foil
Feuillet transparent
Vensterfolie
Fensterfolie
Window foil
Feuillet transparent
Vensterfolie
Fensterfolie
Window foil
Feuillet transparent
Vensterfolie
FGHI
F
G
H
I
JKL
Art. Nr. 180660 liegt nicht bei
not included
non jointe
niet bijgevoegd
MN
K
4/16
L
M
Glänzende Seite außen
Glossy face outside
Côté brillant vers l’extérieur
Glanzende zijde buiten
Schachtel I Spritzlinge Nr. 1
Schachtel II Sprues no. 4
Schachtel III oulages nr. 2 + 9
Gietstukken nr.
4
1/3 U 1/8 1/8
1/1 S 4/16
K
1/9 Y
5
OPQM
O
P
E
N
R
S
Q
J
Klebestellen gut abtrocknen lassen!
Allow glue joints to dry well!
Laisser bien sécher les points de collage!
Alle gelijmde punten goed laten drogen!
9/19 9/199/189/18
9/18
9/18
R
Papiermaske
Papermask
asque
asker
Papiermaske
Papermask
asque
asker
M5A M5B
Papiermaske
Papermask
asque
asker M7
Papiermaske
Papermask
asque
asker M7
66/12
6/9
6/8 6/8 6/8 6/12
Art. Nr. 180660 liegt nicht bei
not included
non jointe
niet bijgevoegd
T
V
WX
S
T
V
W
6/11
9/20
9/20
11/11
11/10
1/10
6/8
11/1011/10
11/11
Fensterfolie
Window foil
Feuillet transparent
Vensterfolie
Fensterfolie
Window foil
Feuillet transparent
Vensterfolie
Papiermaske
Papermask
asque
asker M8
Schachtel I Spritzlinge Nr. 1 + 6 + 11
Schachtel II Sprues no. 4 + 8
Schachtel III oulages nr. 9
Gietstukken nr.
7
X
a
YZ
Y
bc
d
a
b
c
Papiermaske
Papermask
asque
asker M2 A
Papiermaske
Papermask
asque
asker M2 B
Art. Nr. 180660 liegt nicht bei
not included
non jointe
niet bijgevoegd
2 x 2 x
Fensterfolie
Window foil
Feuillet transparent
Vensterfolie
4/16
1/131/10 1/10
6/1
6/2 6/28/12
6/3
Z Z
8
11/2
11/1 H
11/2 11/5
11/5
11/411/411/4 11/4
11/1 H
11/1 H
11/1 H
11/6 X
ef
g
h
e
f
g
2 x 11/6 Y
2 x 11/8
2 x
ijki
j
Schachtel I Spritzlinge Nr. 1 + 6 + 11
Schachtel III Sprues no. 12
Schachtel IV oulages nr. 3
Gietstukken nr.
9
d
h
k
k
3/17
3/15
1/5
1/4
3/14
12/3 12/3
3/18
3/20
3/16
3/22
6/4
6/4
3/17
3/15 1/4 1/5 6/10
3/14
3/293/263/273/32
3/32
3/22
3/21
3/16
l3 x
3 x
mn
l
Nur an dieser Stelle kleben. Only apply glue to this point. Coller exclusivement cet emplacement. Alleen op deze plaats lijmen.
nicht kleben
do not glue
ne pas coller
niet lijmen
o
pqn
o
m
Colorierungsvorschlag, grau
Colouring proposal, grey
Proposition de coloration, gris
Kleurenvoorstel, grijs
Colorierungsvorschlag, grau
Colouring proposal, grey
Proposition de coloration, gris
Kleurenvoorstel, grijs
Colorierungsvorschlag, grau
Colouring proposal, grey
Proposition de coloration, gris
Kleurenvoorstel, grijs
Colorierungsvorschlag, grau
Colouring proposal, grey
Proposition de coloration, gris
Kleurenvoorstel, grijs
10
m
q
1/6 1/7
3/263/25 3/29
3/28
41,5 mm
3/243/233/25 3/26
r
s
t
m
p
1/4 1/5
r
s
Schachtel I Spritzlinge Nr. 1
Schachtel III Sprues no. 13
Schachtel IV oulages nr. 3
Gietstukken nr.
11
3/4
3/2
3/1
1/10
1/6
3/5
3/8
3/3
3/6
3/4
3/2
3/1
3/7
3/3
13/13
13/13
1/13
3/103/11
3/30 3/28
3/6 1/7 1/4 1/5
2 x
2 x
u
3/28
3/133/12
3/31
vw
x
t
u
v
w
x
yzy y
Colorierungsvorschlag, grau
Colouring proposal, grey
Proposition de coloration, gris
Kleurenvoorstel, grijs
Colorierungsvorschlag, grau
Colouring proposal, grey
Proposition de coloration, gris
Kleurenvoorstel, grijs
Colorierungsvorschlag, grau
Colouring proposal, grey
Proposition de coloration, gris
Kleurenvoorstel, grijs
46 mm
12
ABC
D
!
E
F
A
B
C
D
E
9/13 9/12
9/14
9/11 9/17 10/1 10/19 10/1910/1
10/2
10/2
10/2
10/2
10/2
10/2
10/2
10/2
9/17
9/15
9/10
9/11
10/4
10/14 10/14 10/5
10/14 10/14 10/5
10/4
10/4
10/3
10/3
10/4
10/4 10/4 10/4
10/4
nicht kleben
do not glue
ne pas coller
niet lijmen
Drahtbügel
Wire bow
Etrier
Draadbeugel
Inhalt Tüte Contents bag
Contenu sachet Inhoud zakje
Das Zahnrad des icro-Servos darf auch beim Schrauben des Servohebels
nicht von Hand bewegt werden! Servohebel vor dem Aufstecken in den Draht einfädeln.
The toothed wheel of the icro Servo may not be moved by hand, not even when screwing
the servo lever on! Thread the servo lever on the wire before plugging.
On ne doit pas faire tourner à la main la roue dentée du servomoteur miniature, même quand on
visse le levier du servomoteur ! Avant d’emboiter, faire passer le levier du servomoteur dans le fil.
Het tandwiel van de microservo mag ook tijdens het vastschroeven van de servohendel
niet handmatig worden bewogen! Servohendel voor plaatsing in de draad voeren.
siehe Seite 14!
see page 14!
voir page 14!
zie pagina 14!
Schachtel IV
Inhalt Tüte
Contents bag
Contenu sachet
Inhoud zakje
Schachtel I Spritzlinge Nr. 11
Schachtel II Sprues no. 8
Schachtel III oulages nr. 9
Schachtel IV Gietstukken nr. 10
13
11/7 81 mm
11/3
11/3
8/10
z
F
GHIJ
K
L
GG
G
GG
H
III
J
J
K
K
L
M
8 x
2 x
8 x 4 x
10/7
10/6
10/910/10 10/13
10/9 10/8 10/16
10/15
H
4 x
10/13
10/17
10/18
10/17
55 mm
55 mm
L
35 mm
35 mm
14
Das Zahnrad des icro Servos (Art. Nr. 180726)
darf nicht von Hand bewegt werden!
The toothed wheel of the icro Servo (Art. no.180726)
may not be moved by hand!
On ne doit pas faire tourner à la main la roue
dentéedu Servomoteur iniature (Réf. 180726) !
Het tandwiel van de micro servo’s (art. nr. 180726)
mag niet met de hand worden bewogen!
Der Serovhebel muss vor dem montieren am Servo abgeschnitten werden, sodass er die Länge wie in der Zeichnung hat.
Das Servo muss bei der ontage des Hebels bereits über die Servosteuerung (liegt nicht bei) in ittelstellung gebracht worden sein.
Der Hebel wird waagerecht auf das Servo montiert, in dieser Stellung sollte die Glocke senkrecht hängen.
Der maximale Ausschlag des Servohebels beträgt nach oben und unten jeweils etwa 40° und muss ebenfalls über die Servosteuerung eingestellt werden.
Stellen Sie die Servosteuerung auf Dauerlauf ein. Die Glockenfunktion ist nicht für den Dauerbetrieb ausgelegt !
Die Zeit für eine Hin- und Her-Bewegung der Glocke kann nach Belieben eingestellt werden, wir empfehlen etwa 2 Sekunden.
Passende Sounds finden Sie auf unserem Soundmodul 180730 (liegt nicht bei). Wählen Sie dort im Ordner »Kirchenglocke« die Datei »Kirchenglocken« aus.
Experten-Tips für die Servoeinstellung finden Sie auf unserer Homepage unter www.faller.de beim Artikel 130816 Kloster »Bebenhausen«.
Prior to mounting the lever on the servo, the lever must be cut to the suitable length as shown in the drawing.
When installing the lever, the servo must have been already put in its central position using the servo control (not included).
The lever is mounted on the servo in the horizontal, in that position the bell should hang vertically.
The maximum amplitude of oscillation of the servo lever is approximately 40° upwards and downwards, and has also to be set using the servo control.
Set the servo control to permanent working. Note that the drive of the bell is not designed for permanent working!
The time for a back and forward movement of the bell can be set at will, we recommend a period of about two seconds.
You will find suitable sounds in our sound module 180730 (not included). There select file »Church bells« in directory »Church bell«.
Specialists’ tips for the setting of the servo can be found on our website www.faller.de at article 130816 »Bebenhausen« onastery .
Avant son montage sur le servomoteur, il faut couper le levier pour qu’il présente la longueur comme sur le dessin.
Lors du montage du levier, on doit déjà avoir mis le servomoteur dans sa position centrale au moyen de la commande (non fournie).
On monte le levier à l’horizontale sur le servomoteur, dans cette position la cloche devrait pendre à la verticale.
L’amplitude d’oscillation maximale du levier est d’environ 40° vers le haut et vers le bas, et il faut également la régler à l’aide de la commande.
Réglez la commande du servomoteur sur Fonctionnement permanent. Noter que l’entrainement de la cloche n’est pas dimensionné pour un fonctionnement
permanent !
On peut régler à sa convenance la durée d’un mouvement d’aller et retour de la cloche, nous recommandons environ 2 secondes.
Vous trouverez des sons qui conviennent dans notre module de bruitage 180730 (non fourni).
Dans ce module, sélectionnez dans le répertoire »Cloche d’église« le fichier »Cloches d’église«.
Pour le réglage du servomoteur, vous trouverez des astuces de spécialistes sur notre site www.faller.de – à l’article 130816 Cloitre de »Bebenhausen«.
De servohendel moet voor het monteren op de servo worden afgekort zodat deze de lengte heeft als in de tekening.
De servo moet bij montage van de hendel reeds via de servosturing (niet meegeleverd) in de middenpositie zijn gezet.
De hendel wordt horizontaal op de servo gemonteerd, in deze positie dient de klok loodrecht te hangen.
De maximale slag van de servohendel is naar boven en beneden telkens ongeveer 40° en dient ook via de servosturing te worden ingesteld.
Stelde servosturing in continu draaien. De klokfunctie is niet ontworpen voor continubedrijf!
De tijdsduur voor het heen en weer bewegen van de klok kan naar wens ingesteld, wij adviseren ongeveer 2 seconden.
Bijpassende geluiden vindt u op onze Sound-module 180730 (niet meegeleverd). Selecteer daar in de map »Kerkklokken« het bestand »Kerkklokken«.
Deskundig advies over servo-instellingen vindt u op onze startpagina op www.faller.de bij artikel 130816 Klooster »Bebenhausen«.
M
N
10/12
40°
16 V AC
40°
10/11
G
G G
J
JI
Schachtel IV Spritzlinge Nr. 10
Sprues no.
oulages nr.
Gietstukken nr.
15
1/3 U
1/1 T
1/11 G 1/11 H 1/11 H2/15 2/15
A
B
C
D
A
B C
2 x
Fensterfolie
Window foil
Feuillet transparent
Vensterfolie
1/11 G1/11 H
A
1/11 H 2/15
4/16
2/15
Fensterfolie
Window foil
Feuillet transparent
Vensterfolie
Fensterfolie
Window foil
Feuillet transparent
Vensterfolie
Sommerrefektorium/Kapelle
Summer refectory/Chapel
Réfectoire d’été/Chapelle
Zomerrefectorium/Kapel
Schachtel I Spritzlinge Nr. 1
Schachtel II Sprues no. 4
Schachtel III oulages nr. 2
Gietstukken nr.
16
3/2 3/5
3/8
3/3
3/4
3/2
3/1
3/7
3/3
3/6
E F
GH
I
J
D
E
F
F
G
H
I
2 x
2 x
2 x
2 x
2 x
11/1 H
11/1 H
13/13
11/4 11/2
4/3
3/33
11/4
3/43/1 3/6
K
L
M
N
K
L
M
J
Papiermaske
Papermask
asque
asker M4
Art. Nr. 180660 liegt nicht bei
not included
non jointe
niet bijgevoegd
4/16
11/3
1/4
1/5
K
70 mm
13/13
107 mm 3 mm
nicht kleben
do not glue
ne pas coller
niet lijmen
Colorierungsvorschlag, grau
Colouring proposal, grey
Proposition de coloration, gris
Kleurenvoorstel, grijs
Colorierungsvorschlag, grau
Colouring proposal, grey
Proposition de coloration, gris
Kleurenvoorstel, grijs
Schachtel I Spritzlinge Nr. 1 + 11
Schachtel II Sprues no. 4
Schachtel III oulages nr. 9 + 13
Schachtel IV Gietstukken nr. 3 + 10
17
OP
O
8 x
N
Q
R
ST
P
Q
R
S
10/32
10/20
10/20
10/20
10/20
10/31
10/26
10/26
10/26
10/2610/26
10/26
10/26
10/26
10/27
10/27
10/27
10/2710/27
10/27
10/27
10/27
10/21 9/16 10/28
10/21
10/24
O
10/24 10/22
10/23
10/25
10/25
10/22
10/30
10/23
!!
18
4/4 V
8/10
4/4 V
5/19
5/20
5/7 5/95/114/1 Y5/215/7 8/85/85/8 5/16 5/16 8/10
5/55/6 5/6
8/5
8/6 8/6
8/17
8/1
8/58/5 8/4 8/5 8/4
8/7
8/13 4/19
4/21
45 mm
5/1 5/3
5/20 5/2
5/21
5/4
A
B
C
D
EF
AC
E
Fensterfolie
Window foil
Feuillet transparent
Vensterfolie
Fensterfolie
Window foil
Feuillet transparent
Vensterfolie
12,5 x 17,2 mm
34 mm
12,5 x 17,2 mm 8 x 17,2 mm 12,5 x 17,2 mm 12,5 x 17,2 mm
8/12
8/3 8/1
8/2
8 x 17,2 mm 9 x 11,3 mm 9,5 x 17 mm
8 x 9,5 mm
6,5 x 15,8 mm
Fensterfolie
Window foil
Feuillet transparent
Vensterfolie
Fensterfolie 11,5 x 24 mm
Window foil
Feuillet transparent
Vensterfolie
4/21
4/4 W
Fensterfolie
Window foil
Feuillet transparent
Vensterfolie
Fensterfolie 8 x 9,5 mm
Window foil
Feuillet transparent
Vensterfolie
Refektorium/Westflügel
Refectory/West wing
Réfectoire/Aile ouest
Refectorium/Westvleugel
5/4 5/5
Schachtel II Spritzlinge Nr. 4 + 5 + 8
Schachtel III Sprues no. 4
oulages nr.
Gietstukken nr.
19
D
F
GHG
H
IJ
KL
I
J
8/17
8/13
4/21
8 mm
8 mm
Fensterfolie
Window foil
Feuillet transparent
Vensterfolie
4/21
5/1 5/35/20 5/2
5/11
5/21
4/4 W
4/1 Y
4/1 Y
4/16 4/16 4/164/16
5/10
4/1 Y
8/3 8/1 8/25/12
Fensterfolie
Window foil
Feuillet transparent
Vensterfolie
Fensterfolie 9 x 11,3 mm
Window foil
Feuillet transparent
Vensterfolie
Fensterfolie 9,5 x 17 mm
Window foil
Feuillet transparent
Vensterfolie
8 x 9,5 mm
Art. Nr. 180660 liegt nicht bei
not included
non jointe
niet bijgevoegd
Art. Nr. 180660 liegt nicht bei
not included
non jointe
niet bijgevoegd
20
B
KL
M
N
O
PQM
NO
P
11/1 H
11/1 H
11/1 H
11/1 H
11/5 11/5 5/18 5/18 5/2211/511/5
Papiermaske
Papermask
asque
asker M3
Papiermaske
Papermask
asque
asker M3
Schachtel II Spritzlinge Nr. 4 + 5 + 8 + 11
Schachtel III Sprues no. 3 + 7 + 9 + 12 + 13
Schachtel IV oulages nr. 8
Gietstukken nr.
11/3 11/3
4/18
4/17

This manual suits for next models

1

Other Faller Toy manuals

Faller PLATFORM User manual

Faller

Faller PLATFORM User manual

Faller DOUBLE SILO User manual

Faller

Faller DOUBLE SILO User manual

Faller SUMMIT CROSS WITH MOUNTAIN PEAK User manual

Faller

Faller SUMMIT CROSS WITH MOUNTAIN PEAK User manual

Faller 951 User manual

Faller

Faller 951 User manual

Faller 222125 User manual

Faller

Faller 222125 User manual

Faller TOWN WALL User manual

Faller

Faller TOWN WALL User manual

Faller HALF-TIMBERED HOUSE User manual

Faller

Faller HALF-TIMBERED HOUSE User manual

Faller GANTRY CRANE User manual

Faller

Faller GANTRY CRANE User manual

Faller 110204 User manual

Faller

Faller 110204 User manual

Faller Level Crossing With Signal Tower User manual

Faller

Faller Level Crossing With Signal Tower User manual

Faller PEDESTRIAN OVERPASS DER EISERNE STEG User manual

Faller

Faller PEDESTRIAN OVERPASS DER EISERNE STEG User manual

Faller Small villa 293044 User manual

Faller

Faller Small villa 293044 User manual

Faller OLD-TOWN WALL User manual

Faller

Faller OLD-TOWN WALL User manual

Faller AUBANCE STATION User manual

Faller

Faller AUBANCE STATION User manual

Faller DOUBLE SILO User manual

Faller

Faller DOUBLE SILO User manual

Faller Platform batten luminaire User manual

Faller

Faller Platform batten luminaire User manual

Faller 272532 User manual

Faller

Faller 272532 User manual

Faller 130235 User manual

Faller

Faller 130235 User manual

Faller Chemist's 232279 User manual

Faller

Faller Chemist's 232279 User manual

Faller 140333 User manual

Faller

Faller 140333 User manual

Faller PLASTER SILO AND BUILDING-SITE TRAILER User manual

Faller

Faller PLASTER SILO AND BUILDING-SITE TRAILER User manual

Faller 222174 User manual

Faller

Faller 222174 User manual

Faller FORTUNA MINE User manual

Faller

Faller FORTUNA MINE User manual

Faller 130323 User manual

Faller

Faller 130323 User manual

Popular Toy manuals by other brands

FMS Kingfisher 1400mm instruction manual

FMS

FMS Kingfisher 1400mm instruction manual

Fisher-Price GPP74 quick start guide

Fisher-Price

Fisher-Price GPP74 quick start guide

Fisher-Price Little People Play Inside Schoolhouse manual

Fisher-Price

Fisher-Price Little People Play Inside Schoolhouse manual

The World Models Manufacturing UniJet instruction manual

The World Models Manufacturing

The World Models Manufacturing UniJet instruction manual

Roban Bell 407 instruction manual

Roban

Roban Bell 407 instruction manual

Little Tikes Triple Play Splash T-Ball quick start guide

Little Tikes

Little Tikes Triple Play Splash T-Ball quick start guide

GREAT PLANES Factor 30cc instruction manual

GREAT PLANES

GREAT PLANES Factor 30cc instruction manual

Fisher-Price Nick Jr The Backyardigans L2176 manual

Fisher-Price

Fisher-Price Nick Jr The Backyardigans L2176 manual

Amewi A110 instruction manual

Amewi

Amewi A110 instruction manual

GRAUPNER DISCUS 2CT Building instructions

GRAUPNER

GRAUPNER DISCUS 2CT Building instructions

Eduard F-4B quick start guide

Eduard

Eduard F-4B quick start guide

AeroWorks edge 540 Assembly manual

AeroWorks

AeroWorks edge 540 Assembly manual

Eduard EF-2000 Typhoon Single Seater S.A. Assembly instructions

Eduard

Eduard EF-2000 Typhoon Single Seater S.A. Assembly instructions

Circuit Cubes Robots Roll! manual

Circuit Cubes

Circuit Cubes Robots Roll! manual

Hasbro G.I. Joe Cobra H.I.S.S. Tank v5 instructions

Hasbro

Hasbro G.I. Joe Cobra H.I.S.S. Tank v5 instructions

Fisher-Price GEOTRAX P1370 user manual

Fisher-Price

Fisher-Price GEOTRAX P1370 user manual

Compass 3D Plus Nitro Powered Helicopter Assembly manual

Compass

Compass 3D Plus Nitro Powered Helicopter Assembly manual

Eduard 36 341 manual

Eduard

Eduard 36 341 manual

manuals.online logo
manuals.online logoBrands
  • About & Mission
  • Contact us
  • Privacy Policy
  • Terms and Conditions

Copyright 2025 Manuals.Online. All Rights Reserved.