LED condition:
switch on power and press “Start” button in terms of different working pattern
The following LED condition will display a HDD damage under the different
working pattern. The explanation describes the case of HDD1 normal, HDD2
faulty, otherwise the opposite way around.)
5
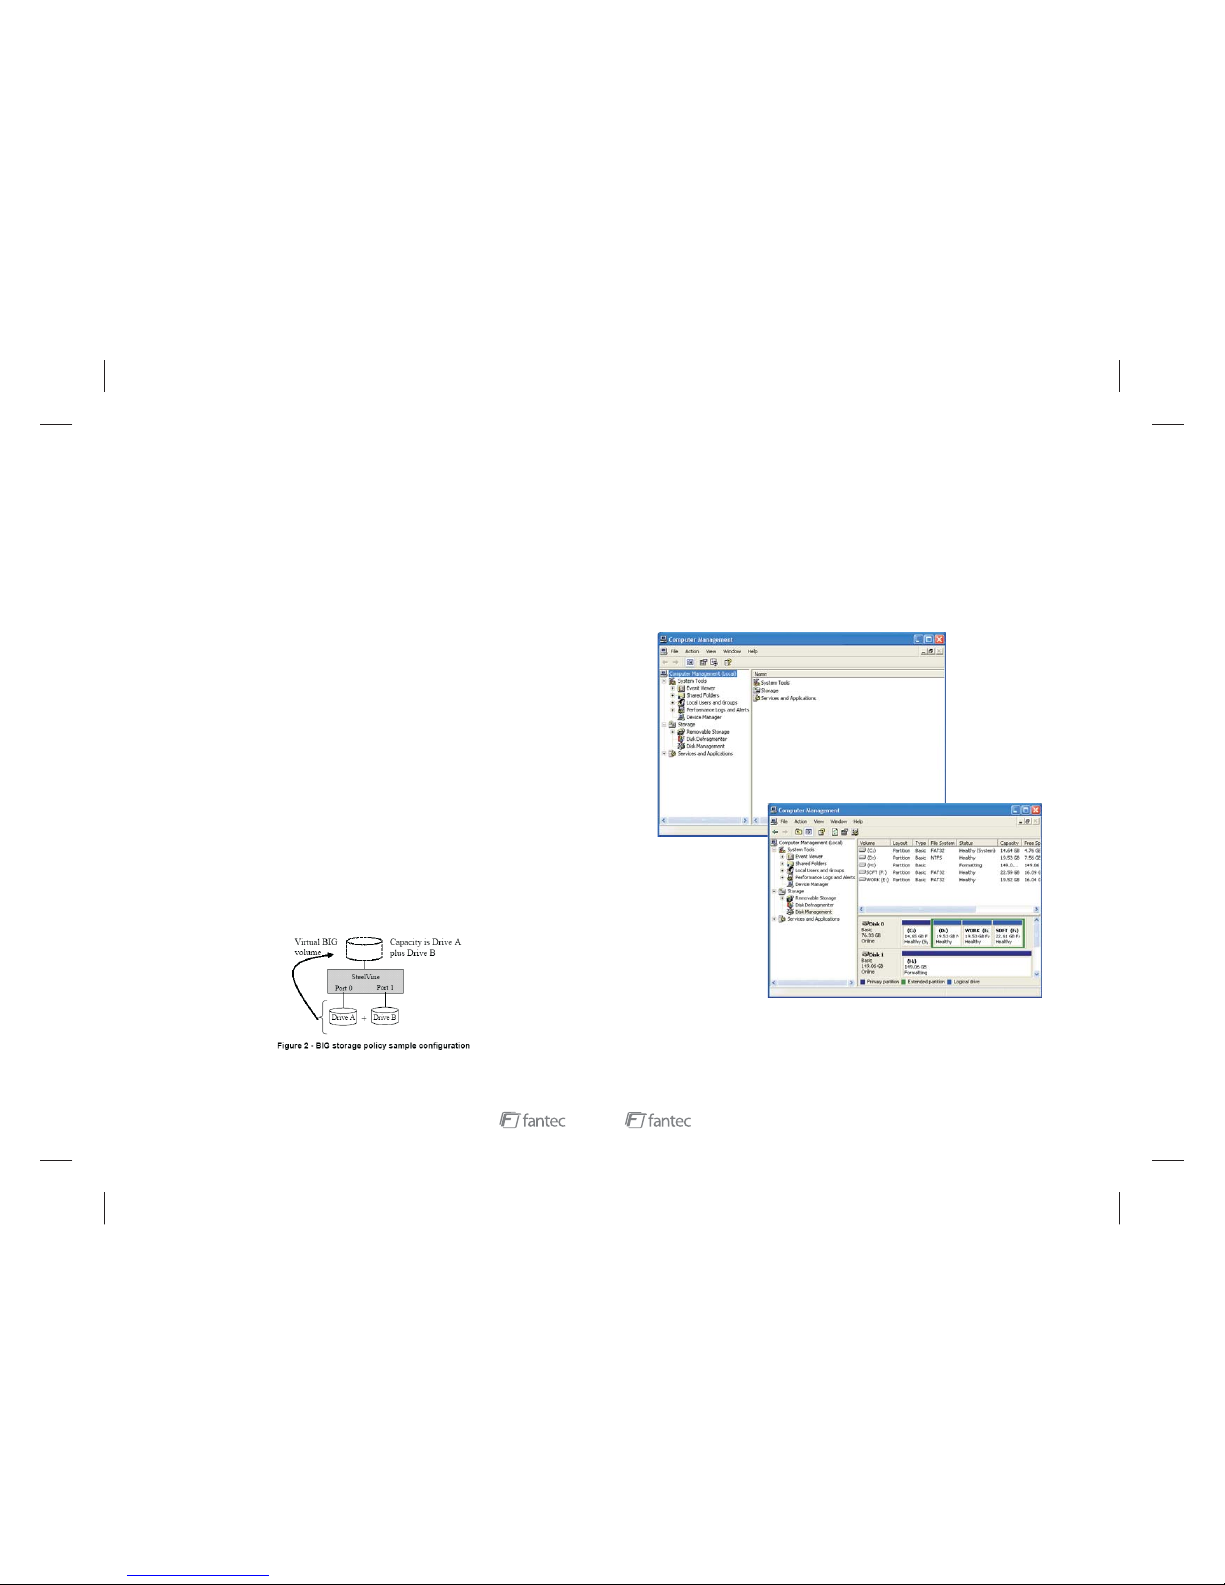
perform similar volume management activities, but those products are very
sophisticated and are not included in this manual.
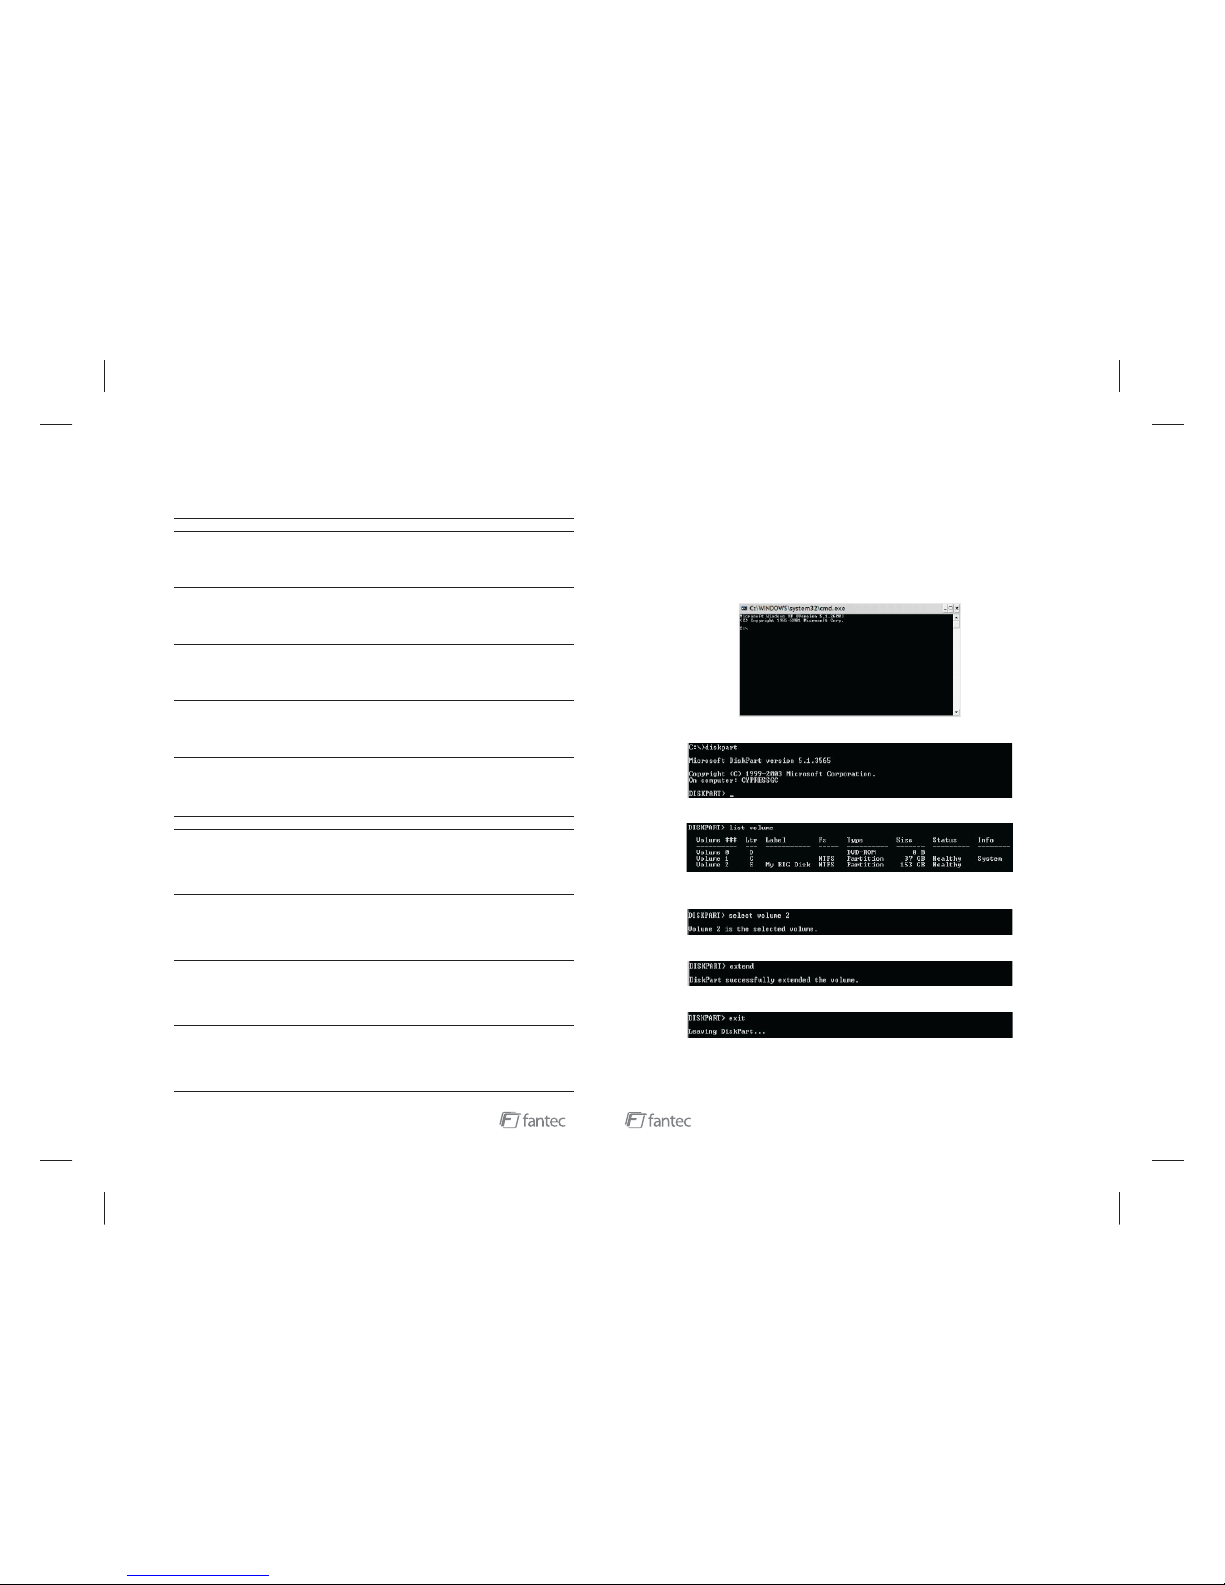
Before you can use DiskPart.exe commands on a hard drive disk
partition/volume, you must first list and then select the partition/volume to extend
their capacity to match the virtual hard drives created in the SteelVine Manager
GUI.
1. Open a command prompt window by clicking Start --Run, then entering "cmd"
Procedure
2. At a command prompt, type “diskpart”.
5. Type “extend”
6. Type “exit” to quit Diskpart.exe
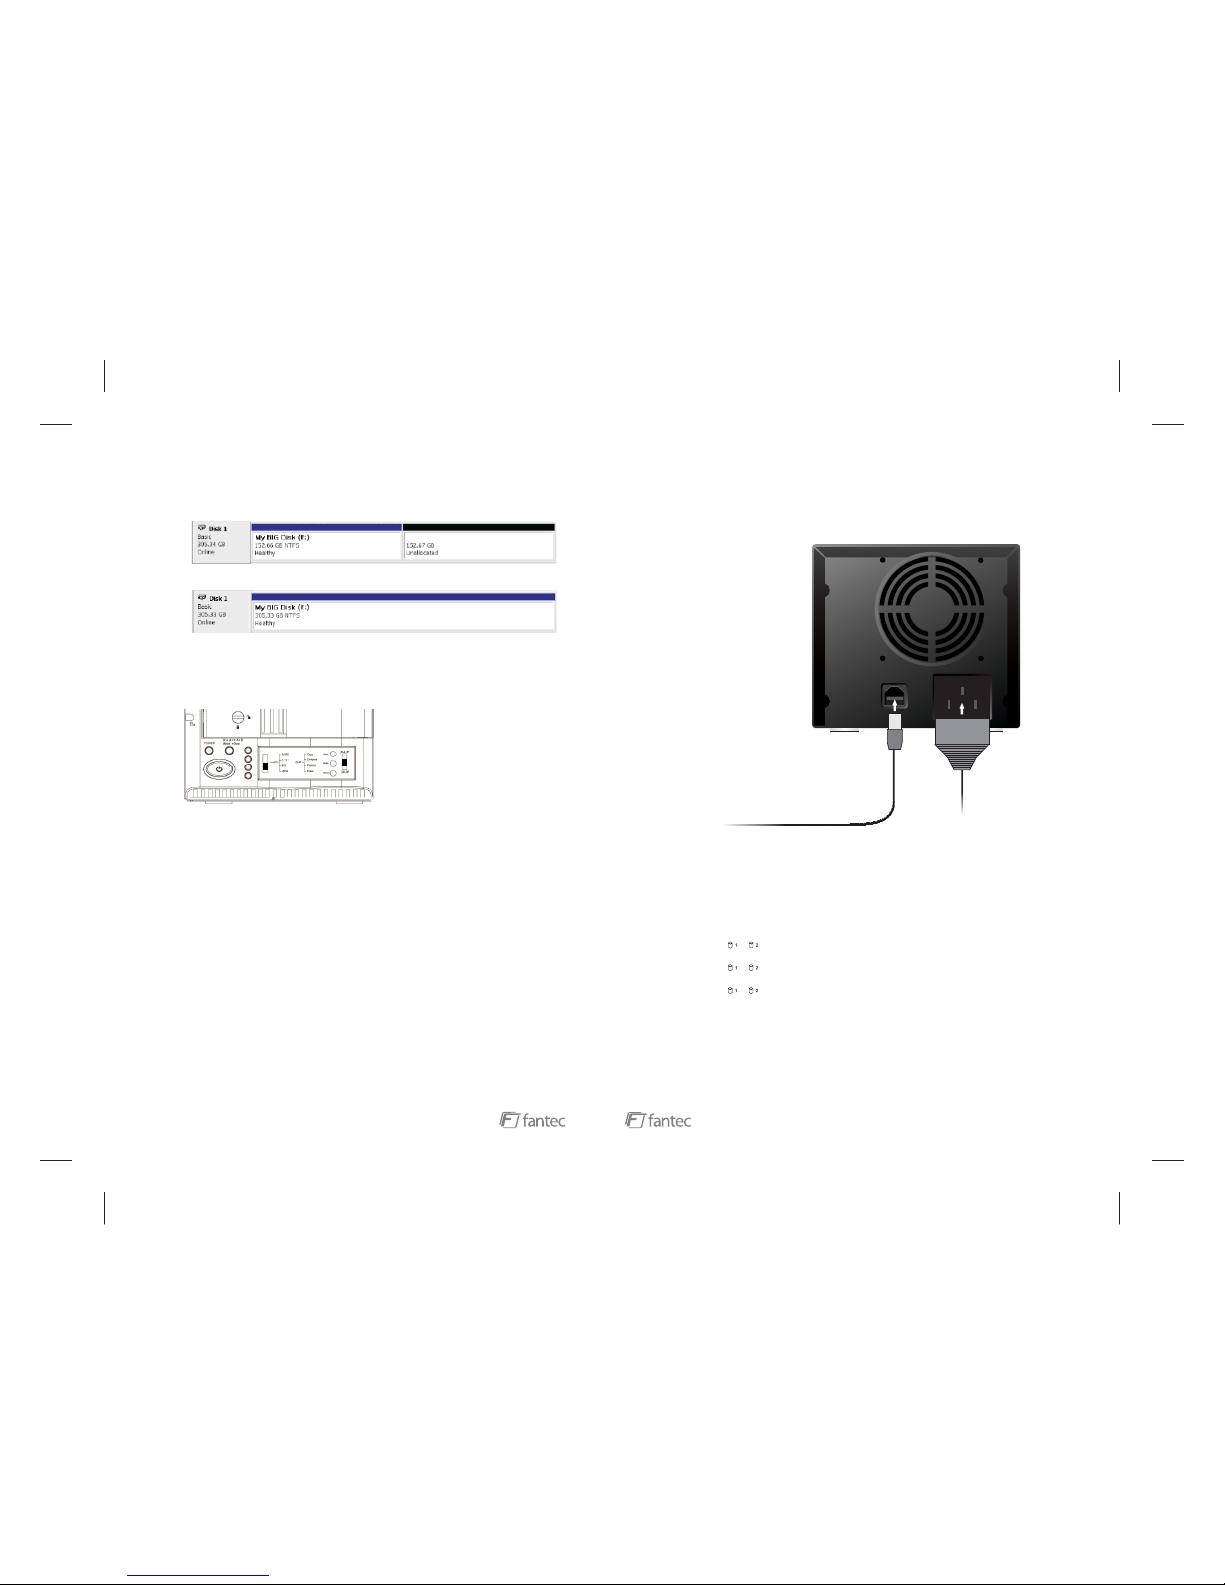
The volume size will be updated to reflect the expanded physical storage capacity
while maintaining all of the existing data that is stored on the volume.
3. Type” list volume” to display the existing volumes on the computer.
4. Type select volume <volume_number> where “<volume_number>” is number
of the volume that you want to extend. In this case that will be “2”.
PATTERN HDD carries on the self-checking
RAID0
Material transmission
Under the material transmission: The
HDD1 and the HDD2 LED glitter with
purple light. The material transmission
completes when LED sends the blue
light
RAID1
JBOD
BIG
HDD1 and HDD2 LED glitter in turn
with blue & red lights. Self-
checking completes when LED
sends blue light
Under the material transmission: The
HDD1 and the HDD2 LED glitter with
purple light. The material transmission
completes when LED sends the blue
light
Under the material transmission: The
HDD1 and the HDD2 LED glitter with
purple light. The material transmission
completes when LED sends the blue
light
HDD1 and HDD2 LED glitter in turn
with blue & red lights. Self-
checking completes when LED
sends blue light
Under the material transmission
condition: LED glitters with purple light
while operating different HDD. The
material transmission completes when
LED sends blue light
HDD1 and HDD2 LED glitter in turn
with blue & red lights. Self-
checking completes when LED
sends blue light
HDD1 and HDD2 LED glitter in turn
with blue & red lights. Self-
checking completes when LED
sends blue light
PATTERN HDD carries on the self-checking
RAID0
Material transmission
Under the material transmission condition: The
HDD1 LED glitters with purple light, and the
HDD2 LED glitters in turn with blue & red lights.
The material transmission completes when
HDD2LED sends blue light and the HDD1LED
continue glittering in turn with blue & red lights.
RAID1
JBOD
BIG
HDD1 and the HDD2 LED glitter in
turn with blue & red lights. Self-
checking completes when the
HDD2 LED sends blue light, and
the HDD1 LED continues glittering
in turn with blue& red lights.
Under the material transmission condition: The
HDD1 LED glitters with purple light, and the
HDD2 LED glitters in turn with blue & red lights.
The material transmission completes when
HDD2 LED sends blue light and the HDD1 LED
continue glittering in turn with blue & red lights.
HDD1 and the HDD2 LED glitter in
turn with blue & red lights. Self-
checking completes when the
HDD2 LED sends blue light, and
the HDD1 LED continues glittering
in turn with blue& red lights.