9
ITALIANOENGLISHFRANÇAIS ESPAÑOL
ACI SVEZIA
ACI ALLUMINIO
ISTRUZIONI PER POSA IN OPERA
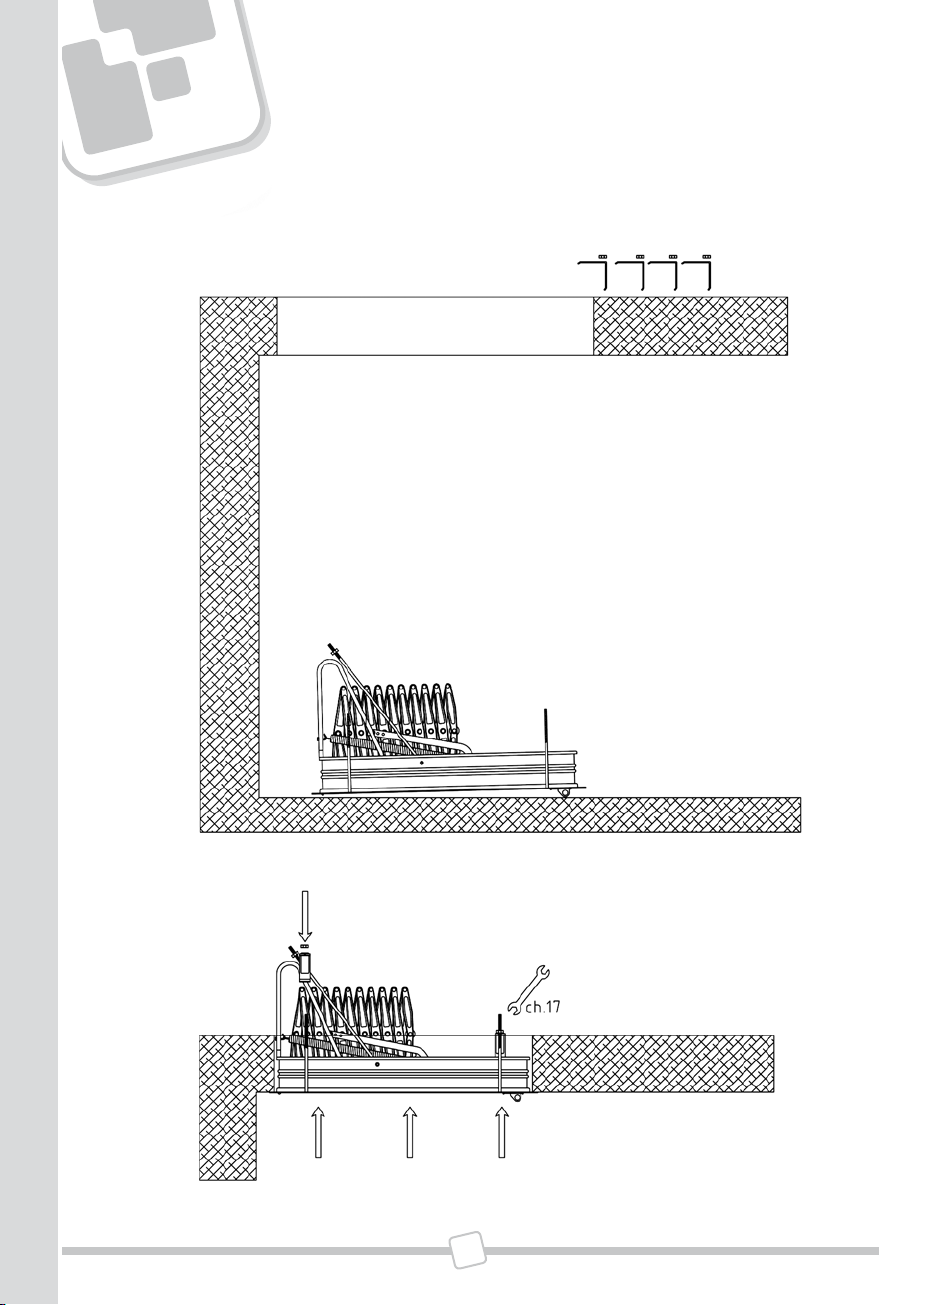
1.
Aprire l’imballo e lasciare al piano inferiore la scala e il bastone d’apertura, portando al piano
superiore le 4 staffe di fissaggio con relativi dadi 10 ma.
2.
Aiutandosi con supporti o corde, infilare, da sotto, la scala nel foro, quindi inserire subito
verticalmente le 4 staffe forate sopra le barre filettate 10ma sporgenti, avvitando i dadi 10ma
con chiave 17, fino quando la battuta inferiore della scala aderisce alla soletta (non stringere
definitivamente).
3.
Guardare da sotto la scala (chiusa) e assicurarsi che la fessura fra telaio e pannello sia costante
(scala in squadro), e comunque che il pannello non tocchi il telaio.
In caso contrario occorre adattare la scala da sopra, effettuando piccoli spostamenti.
Stringere poi definitivamente la scala a soletta tramite chiave 17 ai dadi 10ma delle staffe.
N.B. Si consiglia di tagliare la parte di barra filettata eccedente da dado di bloccaggio.
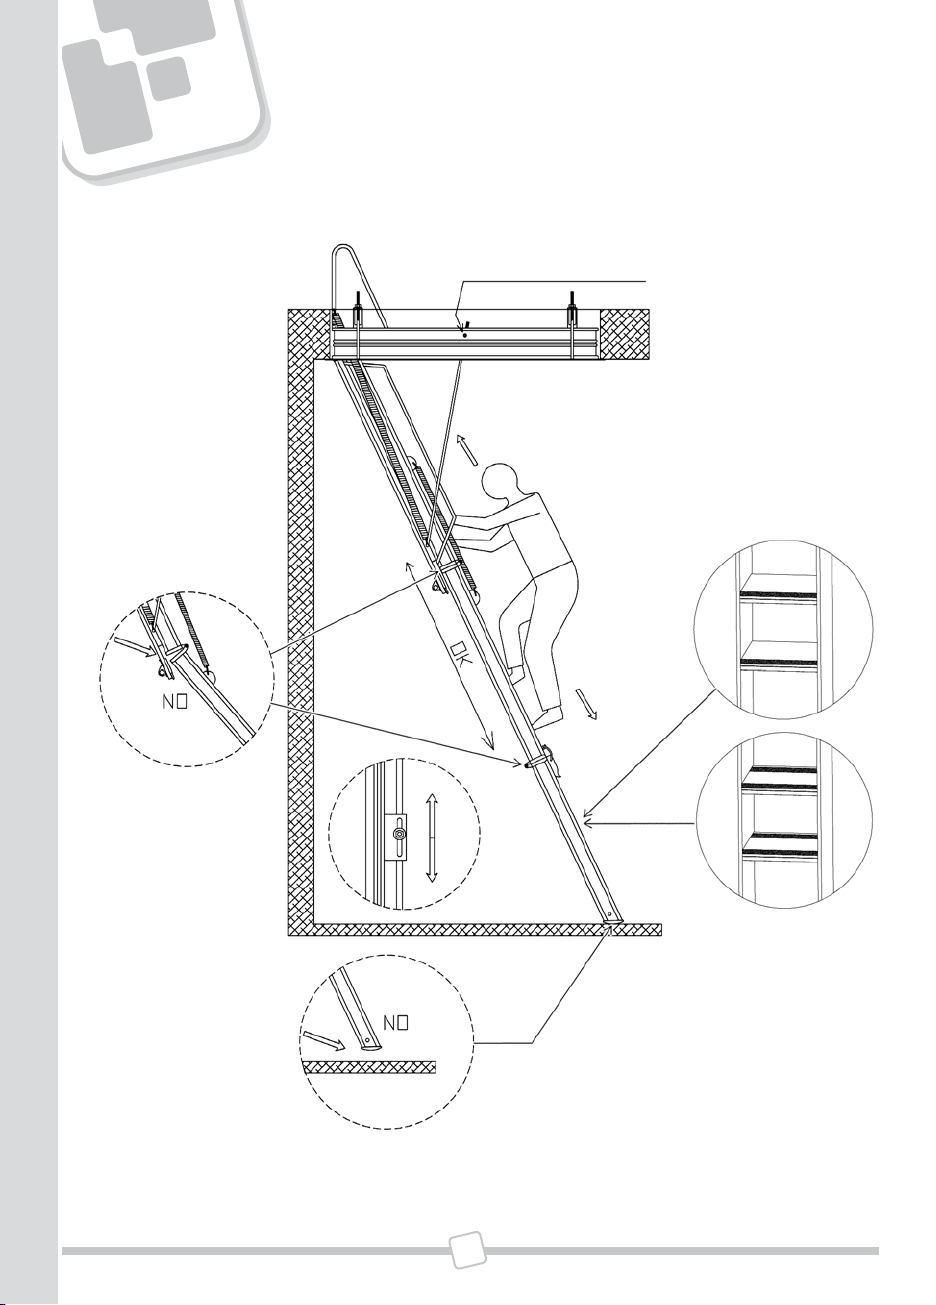
4.
Aprire la scala, da sotto, agendo sull’anello della serratura tramite il bastone con gancio d’apertura
dopo averlo innestato, (è in 2 pz.) ruotare e stendere le rampe fino a terra (le 2 ruotine piccole in
nylon devono appoggiare a pavimento). Nel caso che la scala debba essere regolata per altezze al
limite del consentito, occorre agire sui tiranti, avvitando o svitando entrambi i dadi M10, tramite
chiave 17 (i dadi devono sempre appoggiare contemporaneamente sui nottolini).
A rampa appoggiata svitare o avvitare il grano M10x50 in modo che lo stesso appoggi sempre
sul telaio.
N.B. La scala non va murata.
N.B. La salita e la discesa della scala vanno effettuate con il corpo rivolto sempre nella stessa direzione.
5.
Per l’eventuale montaggio del corrimano, destra salendo, occorre agire a scala aperta.
Posizionare il corrimano di fianco alla rampa, con la leva a“L”in corrispondenza della leva preforata
inferiore, e quella retta in corrispondenza della leva preforata superiore, quindi avvitare le 2+2 viti
con dadi, tramite cacciavite e chiave 10.
N.B. Il corrimano non può essere fornito e montato su:
ACI SVEZIA: 70 x 70 - 70 x 60 - 70 x 50
ACI ALLUMINIO: 70 x 60 - 70 x 70 - 70 x 50 - 80 x 50 - 90 x 50 - 100 x 50
(vedi disegni pagg. 4 - 5)
(vedi disegni pagg. 4 - 5)