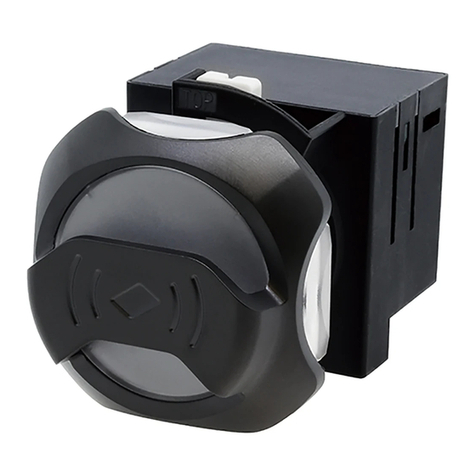
Farfisa SOLVO FP2000 User manual

- 1 -
Mi 2521/1
ITALIANO
ENGLISH
Art. FP2000
IT Modulo RFID.
Modulo RFID per SOLVO.
Speciche tecniche:
- Alimentazione: 12Vca/cc - 160mA massimo
- Massimo numero di carte utenti: 400 (1600 opzionale)
- Programmazione attraverso Master card o tramite PC
- Modalità relè: monostabile o bistabile
- Capacità massima contatti: 24 Vca/2 A
Tecnologia RFID: 125 KHz
- Dimensioni: 49x49x18 mm,
compatibile per il montaggio su pulsantiere TD2000R e TD2000RA.
Morsetti
1 Ingresso tensione positiva continua o alternata
2 Massa tensione continua o Ingresso alternata
3/4 Comune e contatto normalmente aperto relè
P r o g r a m m a z i o n e
Per accedere al menù di programmazione premere e tenere premuto il
pulsante SW1: il led rosso ed il buzzer indicano il passo di programma-
zione (ad esempio 1 lampeggio e un beep breve indicano il "passo 1", 2
lampeggi e 2 beep indicano il"passo 2" e così via). Rilasciare il pulsante
SW1 in corrispondenza del momento corrispondente al passo di pro-
grammazione desiderato e premerlo nuovamente per confermare. Se
il pulsante SW1 non viene premuto entro 10 secondi, il lettore tornerà
automaticamente alla modalità stand-by.
Nota
Prima di procedere con la programmazione si consiglia di cancellare
tuttele eventualiinformazionirelativealleschedepresentiinmemoria.
Per fare questo selezionare il passo di programmazione "6", premere
il pulsante SW1, rilasciarlo, il led si accenderà per alcuni secondi ed un
beep lungo confermerà l'azione.
1 ) C o d i c a ( m e m o r i z z a z i o n e ) d e l l e s c h e d e :
Ci sono due metodi per memorizzare le schede nel sistema:
a) Senza scheda Master:
- Selezionareilprimopassodiprogrammazione,presentarelasche-
da da memorizzare, illed si spegnerà e verrà emesso un suono dal
buzzer. Ripetere l'operazione per tutte le altre schede richieste.
b) Con scheda Master:
- AbilitarepreliminarmentelafunzioneschedaMastercomedescrit-
to al passo "3", quindi selezionare il passo di programmazione “1”
e presentare la scheda per memorizzarla come scheda Master.
- Per procedere con la memorizzazione delle altre schede utente:
presentare prima la scheda Master (verrà emesso un beep lungo),
il led inizierà a lampeggiare e verranno emessi una serie di beep
brevi, entro 10 secondi presentare la scheda utente da memoriz-
zare. Ripetere l’operazione per tutte le schede utenti richieste.
Presentando una scheda utente già memorizzata si otterranno
una serie di beep di dissuasione.
2) Modalità buzzer
(attivo per impostazione di fabbrica)
Per impostazione di fabbrica il buzzer emette un suono in corrispon-
denza di ciascun passo di programmazione. Per modicare la mo-
dalità di funzionamento del buzzer, selezionare il secondo passo di
programmazione e premere il pulsante SW1: un beep lungo indicherà
che il buzzer è attivo, un beep breve indicherà che il buzzer è stato
disabilitato.
EN RFID pcb module
RFID pcb module for SOLVO.
Technical specications:
- Power supply: 12 Vac/dc - 160 mA maximum
- number of user's cards: 400 (1600 optional)
- Programming by master card or from PC
- Relay mode: monostable or bistabe
- Maximum contacts relay capacity: 24Vac/2 A
- RFID technology: 125 KHz
- Dimensions: 49x49x18 mm,
ts TD2000R and TD2000RA door stations panels.
Terminals
1 Positive or alternate voltage input
2 Ground dc voltage or alternate voltage input
3/4 Common and normally open contact of the relay
Programming.
To enter the programming menu push and keep pressed button SW1:
the red led and the buzzer indicate the step of programming (i.e. 1 blink
and short beep mean "rst step", 2 blinks and 2 beeps mean “second
step" and so on). Release the SW1 button at the moment related to the
required programming step and then press it again to conrm the
selection. If SW1 is not pressed within 10 seconds, the reader will come
back to the stand-by mode.
Note
Before begin device programming it is strongly recommendedto erase
allcardsinformationeventuallyalreadystoredinthedevice'smemory.
To do this enter the step of programming "6", press SW1 and release it,
the led turns on for few seconds and long beep will conrm the action.
1) Coding users cards:
There are two ways of storing user's cards:
a) Without a Master card:
- Select the rst programming step, present the card to the reader,
the led turns o and buzzer sounds. Repeat the same operation
for all the other cards required.
b) With a Master card:
- Enable the Master Card function as described in the step "3" rstly
and then select the programming step “1”, present the card to store
it as Master Card.
- To code the other user’s cards: present the MC to the reader (a long
beep will be emitted), the led starts blinkng, and also a series of
short beeps will be emitted, within 10 seconds maximum present
the user’s card you need to code. Repeat this step for all the re-
quired user’s cards.
Presenting an user’s card which was already stored, the reader
will emit a series of dissuasive beeps.
2) Buzzer mode.
(switch on by default):
By factory default the buzzer sounds allthe time for the programming
mode.To change the buzzer working mode, enter the second program-
ming step and press SW1: a long beep means the buzzer is on, a short
beep means the buzzer is o.
3) Enabling the Master card (MC) function.
To use a Master card it is preliminary required to enable the function
by selecting the step 3. Then the following card coded on the reader

- 2 -
ITALIANO
ENGLISH
Mi 2521/1
3) Abilitazione della funzione scheda Master (MC):
Per poter utilizzare una scheda Master è necessario preliminarmente
abilitare la funzione tramite il passo “3”. La scheda memorizzata
successivamente come descritto al punto “1a” sarà la scheda Master.
Selezionando il terzo passo di programmazione si avrà un beep lungo
ad indicare che la funzione scheda Master è stata abilitata o un beep
breve ad indicare la funzione scheda Master è stata disabilitata.
4) Modalità relè:
Il relè interno può essere programmato sia in modalità monostabile
(impostazione di fabbrica) sia bistabile. Per modicare la modalità di
funzionamento del relè: selezionare il passo di programmazione “4”,
premere il pulsante SW1: un beep breve indicherà la selezione della
modalità monostabile, mentre un beep lungo indicherà la selezione
della modalità bistabile.
5) Durata dell'attivazione del relè:
Per modicare la durata di attivazione del relè: selezionare il passo
5 di programmazione, premere il pulsante SW1, il led si accenderà,
da questo momento è possibile selezionare il tempo di attivazione (1
secondo - 100 min),premere il pulsante SW1 al termine dell’intervallo
temporale richiesto.
6 ) C a n c e l l a z i o n e d i t u t t e l e c a r t e :
Per cancellare completamente tutte le carte precedentemente
memorizzate: selezionare il passo 6 e premere il pulsante SW1, il led
rosso rimarrà acceso per alcuni secondi e quindiverrà emesso un beep
lungo per conferma.
Si raccomanda di prestare attenzione alla selezione del passo
di programmazione “6” in quanto non è possibile annullare
l'operazione. La selezione del passo di programmazione “6”
cancellerà anche l’eventuale scheda Master memorizzata (ma
non disabiliterà la funzione scheda Master).
IT Schema di collegamento con alimentatore ester-
no in comune con la serratura
EN Wiring diagram with external power supply in
combination with the door lock release.
IT Sequenza di montaggio
Per il montaggio del modulo lettore di prossimi-
tà sul retro della TD2000R o TD2000RA, seguire
l’ordine mostrato nella gura accanto:
1. Posizionare l’antenna RFID al centro della -
nestra prestando attenzione che la gomma di
protezione sia rivolta verso l’alto e che i due
terminali escano verso la parte centrale della
pulsantiera;
2. Inserire la piastrina di acciaio fornita in do-
tazione alla TD2000R o TD2000RA facendola
scorrere attraverso le due barre lettate;
3. Avvitare i due dadi distanziali, evitando di
serrarli troppo per non danneggiare l’antenna
RFID;
4. inserire il circuito e quindi bloccarlo utilizzan-
do due ulteriori dadi di ssaggio.
La ACI Srl Farsa Intercoms si riserva il diritto di modicare in qualsiasi momento i prodotti qui illustrati. ACI Srl Farsa Intercoms reserves the right to modify the products illustrated at any time.
ACI srl Farsa Intercoms
Via E. Vanoni, 3 • 60027 Osimo (AN) • Italy
Tel: +39 071 7202038 (r.a.) • Fax: +39 071 7202037
e-mail: info@farsa.com • www.farsa.com
Directive 2012/19/EU (WEEE-RAEE)
Smaltire il dispositivo secondo quanto prescritto dalle norme per la tutela dell'ambiente.
Dispose of the device in accordance with environmental regulations.
Mi2521/1
6
1
2
4
3
5
FP2000
PB
TD2000R
TD2000RA
PB
S+
S-
6
1
2
4
3
5
FP2000
IT Schema di collegamento con serratura alimentata dalla pulsan-
tiera TD2000R / TD2000RA stessa
EN Wiring diagram with door lock supplied by the door station
TD2000R / TD2000RA itself
EN Mounting sequence
To mount the RFID reader module on the
TD2000R or TD2000RA back it is recommended
to follow the order showed on the picture here:
1. Place the RFID antenna on the window center
being careful that the side with rubber is on the
top and that the 2 terminals come out toward
the door station’s center;
2. Insert the inox plate provided with TD2000R
or TD2000RA by sliding it through the two thre-
aded rods;
3. Screw the two spacer bolts, avoiding to ti-
ghten too much to do not damage the RFID an-
tenna;
4. Insert the PCB circuit and then x it in the po-
sition using the last two bolts.
according to the point “1a” will be the Master Card. Selecting the
programming step 3 the reader will emit a long beep for Master Card
function enabled or a short beep for Master Card function disabled.
4) Relay mode:
The built-in relay can be programmed to work in monostable mode (by
default) or in bistable mode.
To change the relay mode: enter the programming step “4”, press SW1:
a short beep means monostable mode is selected, a long beep the
bistable mode is selected.
5) Duration of relay activation:
To change the duration of relay activation: enter the fth step, press
SW1, the led turns on, from that moment you can set the time of acti-
vation (1 second - 100 min), press again SW1 till the end of the required
period.
6) Ereasing all the cards:
To completely erase the card information: enter the sixth step and
press SW1, the red led will be on for few seconds and then a long beep
will be emitted to conrm.
It is recommended to be careful to select the programming step
“6” since it is not possible to undo the operation. By selecting
the programming step “6” event the Master card will be deleted
(but the Master card function will be not disabled)
It is reccommended to carefully handle the
RFID antena terminals to avoid damages
during its mounting. Do not power the device
before connecting the RFID antenna.
Si raccomanda di prestare attenzione nel
maneggiare i terminali dell’antenna RFID per
non danneggiarla irreparabilmente durante
il montaggio. Non alimentare il dispositivo
senza prima aver collegato l’antenna.
Popular RFID System manuals by other brands
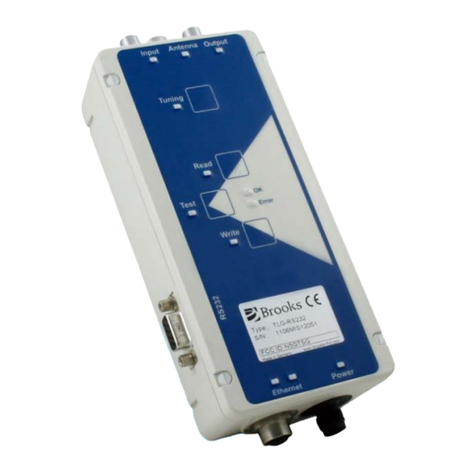
Brooks
Brooks LF80C product manual
Omron
Omron V600 Series Operation manual

Stid
Stid ultrys user manual
Brigade Electronics
Brigade Electronics ZoneSafe ZS-1000-TT user manual
AWID
AWID Sentinel-Prox SP-6820 Reader Installation sheet
Kiwitron
Kiwitron KiwiCross Gate K006950 Installation, use and maintenance manual
