Fastway onestep Setup guide

Instructions for Setup and Use
1) Remove wheel chock from packaging, and remove the center
cotter pin (a) and clevis pin (b) from the arms.
2) Set the chock between the tires and extend them out until the
wedges touch the tires.
3) Slide the clevis pin into one of the holes in the arms to
temporarily hold them in place. Don’t insert the cotter pin yet.
4) Remove the chock, and remove the clevis pin, then slide the
arms apart until the next set of holes line up.
5) Place the clevis pin into one of the sets of holes, and then
replace the cotter pin to secure it.
If you are not able to lengthen or shorten the chock to t your
axle spacing using the arm holes for adjustment, the bolts
holding the ends of the scissor arms can be moved. Use the
included hex key (Allen wrench) and a socket wrench to move
the bolts to either of the other two adjustment holes in the
wedges.
AVERTISSEMENT
AVERTISSEMENT
ADVERTENCIA
ADVERTENCIA
WARNING
WARNING
The Fastway®ONEstep™Chock was designed to be used on
level ground and gentle slopes. Do not use chock on grades
that are excessive or unreasonably steep. Always remember to
remove chock before attempting to tow trailer. Damage caused
by driving over the wheel chock is not covered by warranty.
a
b
Patent Pending
TM

8) To remove the chocks, grasp the handle rmly in the middle
and pull upward.
Others prefer to place the pin so that the arms hang at about the
same length, and then step down on the tail ends of the wedges
to force them open before sliding them between the wheels.
Try each way a few times to see which works best for you.
Some people prefer to place the pin off-center so that one arm
hangs below the other. This allows them to ‘drag’the chocks
along the ground and open them up before sliding them under
the tire.
6) Slide the chocks into position between the tires so that the
wedges are centered on the tread of the tire. Step down on the
center of the arms to force them out against the tires and lock
them into place.
9) To lock the chock, step the chock into place tightly between
the wheels. Place the padlock through one of the empty holes
in the center of the arms, or through one of the lock holes in the
wedges just above the scissor arms. Note: The lock is to be used
as a theft deterrent. The lock will not guarantee the chocks can not be
stolen.
7) Lean the cable handle against the tire so that it is within easy
reach when you want to remove the chocks.
Instructions for Setup and Use
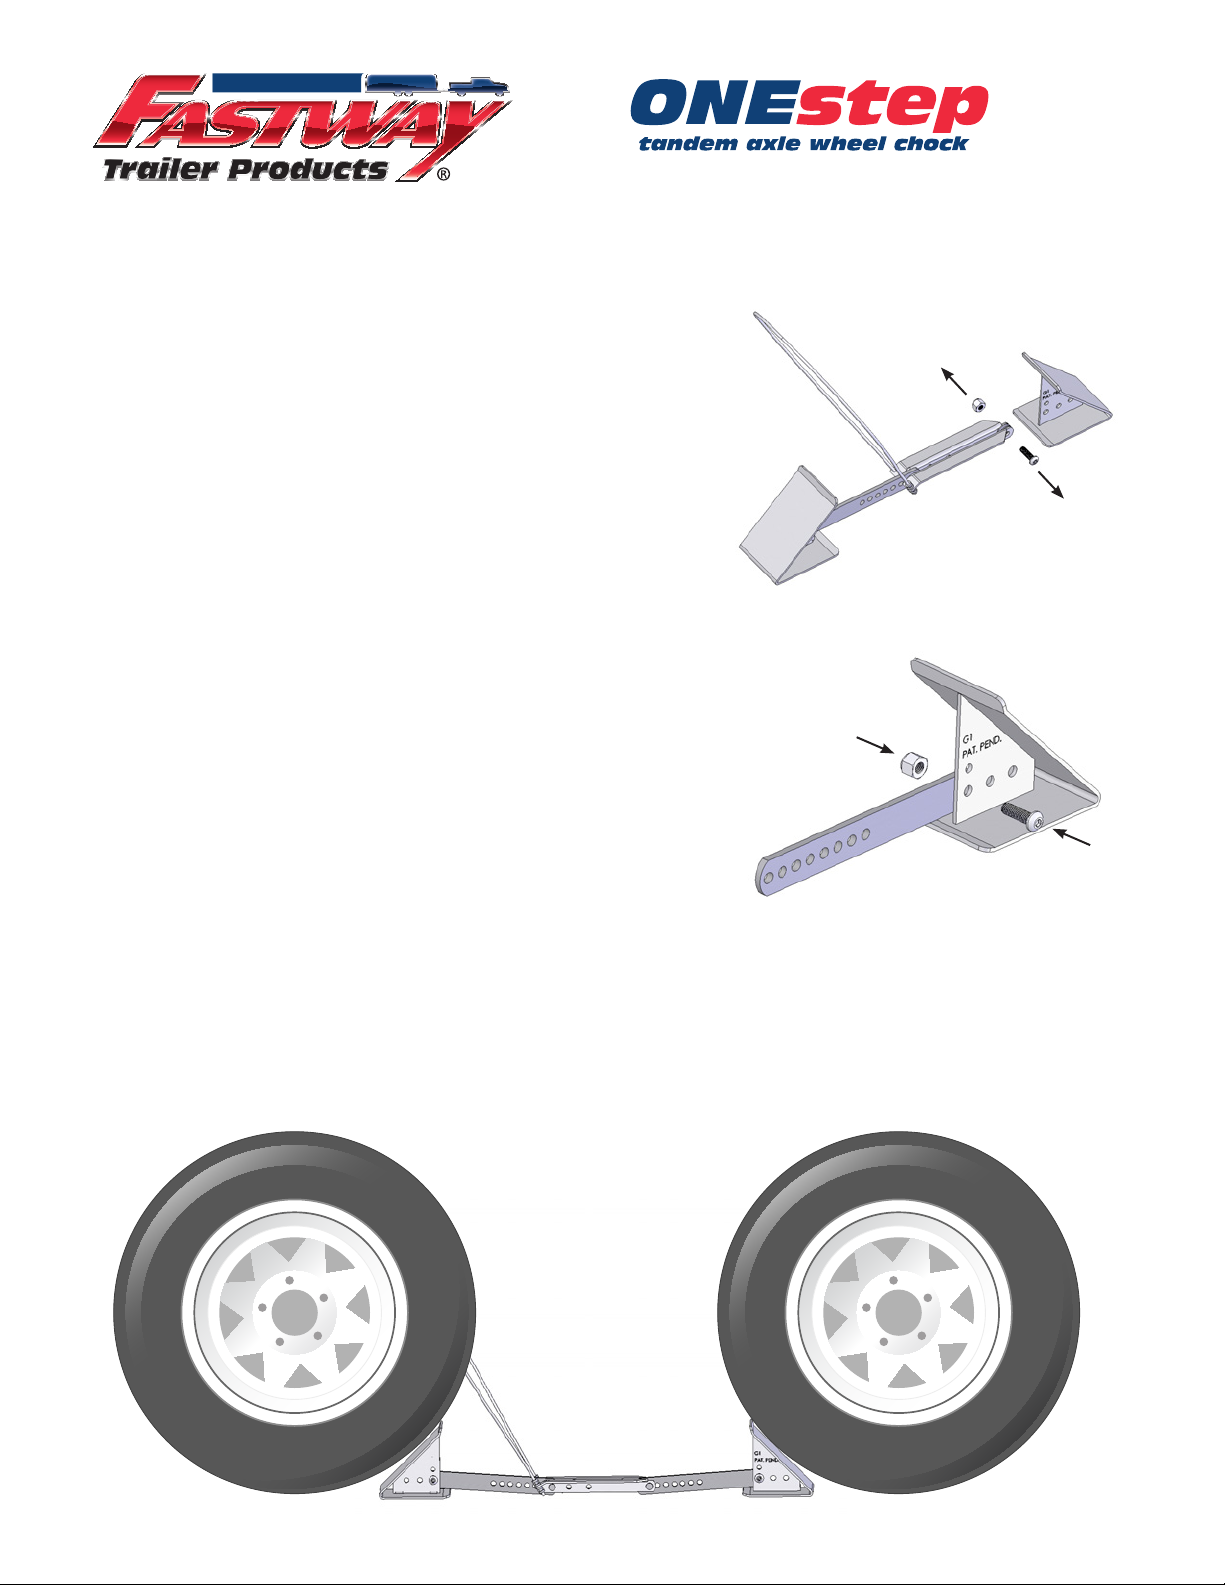
1) Remove the chock and other parts from the packaging.
Remove the bolt and nut holding the double arms to the
wedge using the hex key provided for adjustments, and a
9/16” socket. See Figure 1.
Figure 1
Figure 2
4) Temporarily place the second clevis pin into the hole
that aligns best between the double and single arms. Do
not put the retainer clip into place on the pin yet.
3) Set the chock between the tires and extend them
out until the wedges touch the tires. See Steps 3 - 5
in the standard instructions.
2) Using the same nut and bolt, install the extra
single arm onto that same wedge. The bolt should
go through the end of the arm with the single hole.
See Figure 2.
5) Slide the chocks out from the tires. Remove the clevis
pin, and slide the chock arms apart one hole, then replace
the pin. Clip the pin into place.
6) Place the chock between the tires again. It should t snuggly between the tires, with the center arms not
dropping all the way to the ground. Step down on the center arms to lock the chock into place. Pull up on the
cable handle to remove the chock. See Figure 3.
7) Re-adjust the chock as necessary by moving the clevis pin to different holes, or by moving the end bolts that
attach the arms to the wedges to a different hole.
Figure 3
XL
TM
Chock Setup
Other Fastway Automobile Accessories manuals


