FatShark RCV922 User manual

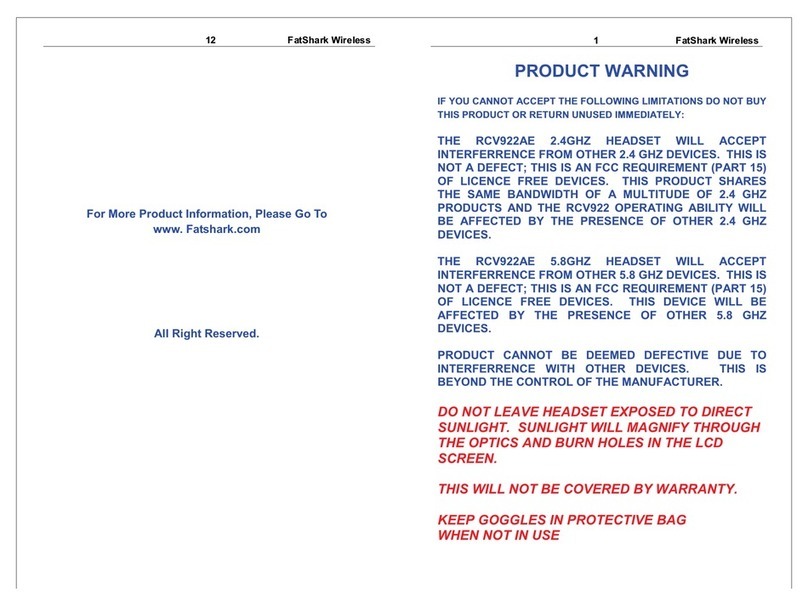
PRODUCT WARNING
IF YOU CANNOT ACCEPT THE FOLLOWING LIMITATIONS DO NOT BUY
THIS PRODUCT OR RETURN UNUSED IMMEDIATELY:
THE RCV922AE 2.4GHZ HEADSET WILL ACCEPT
INTERFERRENCE FROM OTHER 2.4 GHZ DEVICES. THIS IS
NOT A DEFECT; THIS IS AN FCC REQUIREMENT (PART 15)
OF LICENCE FREE DEVICES. THIS PRODUCT SHARES
THE SAME BANDWIDTH OF A MULTITUDE OF 2.4 GHZ
PRODUCTS AND THE RCV922 OPERATING ABILITY WILL
BE AFFECTED BY THE PRESENCE OF OTHER 2.4 GHZ
DEVICES.
THE RCV922AE 5.8GHZ HEADSET WILL ACCEPT
INTERFERRENCE FROM OTHER 5.8 GHZ DEVICES. THIS IS
NOT A DEFECT; THIS IS AN FCC REQUIREMENT (PART 15)
OF LICENCE FREE DEVICES. THIS DEVICE WILL BE
AFFECTED BY THE PRESENCE OF OTHER 5.8 GHZ
DEVICES.
PRODUCT CANNOT BE DEEMED DEFECTIVE DUE TO
INTERFERRENCE WITH OTHER DEVICES. THIS IS
BEYOND THE CONTROL OF THE MANUFACTURER.
DO NOT LEAVE HEADSET EXPOSED TO DIRECT
SUNLIGHT. SUNLIGHT WILL MAGNIFY THROUGH
THE OPTICS AND BURN HOLES IN THE LCD
SCREEN.
THIS WILL NOT BE COVERED BY WARRANTY.
KEEP GOGGLES IN PROTECTIVE BAG
WHEN NOT IN USE
12 F atSha rk Wir eles s 1 FatShark Wireless
For More Products Information, Please Go To
www. gowiththeshark.com
All Right Reserved.

RCV922 Wireless Video Glasses
Please read before operating this device
Congratulations on purchasing the Fat Shark RCV922 Aviator Edition
wireless video glasses. To ensure your continued enjoyment, please take the
time to read through this operating manual before using.
Safety Precautions:
1. Used the enclosed charger for charging the batteries. It is specially
designed to charge Lithium Polymer batteries.
2. When wearing the glasses you don’t have any visual reference and
you may experience vertigo. Best to use when sitting down or
leaning up against something.
Charging Instructions
This unit comes with a 7.4V, 900mAh lithium polymer battery. This will power
the video headset for approximately 1.5hr in wireless mode and
approximately 3 hrs in direct connect mode (receiver off). The 1A charger will
charge the battery in under an hour.
When the charger is plugged in with no battery attached, the LED will be
GREEN. When you connect the 7.4V LiPo battery the LED will turn RED
(charging). When fully charged, the LED will turn back to GREEN
Battery and Charger
Battery
·7.4V 900mAh Lithium Polymer
·Internal PCB for charge and
discharge monitoring and safety circuit.
Charger
·8.4V 1.0A Li-Ion charger
·AC 100-240V
·50-60Hz
·Plug prong style dependent on
country purchased from.
Notes and advice from
experienced video pilots:
·Always perform a range test before flying. This includes AV
and RC controls. Some RC RXs can be affected by the
proximity of other electronic devices.
·Best to space components away from each other.
·Do not listen to anyone who says you can use 2.4Ghz AV with
2.4Ghz RC controllers. 2.4Ghz AV + 2.4Ghz RC = crash.
·Your 2.4Ghz TX will not affect the RC control of other RC users
(however, their controllers will affect your AV reception).
·Until experienced, practice flying in a familiar area to avoid
becoming disorientated.
·Due to antenna characteristics, there is a “null”directly above
the antenna. You may notice excessive video breakup when
flying overhead (can tilt your head to regain solid signal).
·If using 2.4Ghz, be aware of other 2.4Ghz RC users. If they
turn their RC radio on while next to you, they may knock out
your image.
·5.8Ghz signal strength drops off very fast (2.4Ghz is more
gradual). If using 5.8Ghz, stay safely within solid AV range.
2 FatShark Wireless 11 F atSha rk Wir eles s

The charger will automatically stop charging when the battery is fully
charged. Do not leave plugged in while unattended.
DO NOT LEAVE BATTERY ATTACHED TO CHARGER WHEN
CHARGER IS NOT PLUGGED IN.
Headset battery fits into strap. There is a “pocket”sewn into the strap on
the right side (next to power in). Stretch the strap and battery will be held
in place by the elastic properties of the strap.
Choosing the Best Channel
For best performance, select a channel that has the least amount of
interference.
While the transmitter is turned OFF, Turn on the video headset and look at
the screen as you check each channel. Clear channels will have a
consistent static background. Channels with interference will have
horizontal static lines.
Once you have chosen the clearest channel on the headset, set the
transmitter to the same channel.
Contents Checklist:
-RCV922 Video Headset
-Fat Shark headset storage bag
-Transmitter
-TX cable (2p Molex power, 5p Molex camera)
-7.4V 900mAh LiPo battery pack
-8.4V LiPo battery charger
-3dBi headset antenna
-Earphones with adjustable volume control
-Operator manual
-120 cm AV cable male RCA
-Extra fitting foam
5.8Ghz 100mW TX
·Transmitting power: 100mW
·Current consumption: 250mA
·Supply voltage: 6-12V DC
·Transmit distance: 300m line
of sight (no interference)
·Channels: 7, synchronization of
stereo audio and video
·Transmitting frequency: 5.8Ghz,
·FM Audio/Video Modulation
·CH1: 5740Mhz, CH2: 5760Mhz,
CH3: 5780Mhz, CH4: 5800Mhz
CH5: 5820Mhz, CH6: 5840Mhz
CH7: 5860Mhz
2.4Ghz 10mW Transmitter
·Transmitting power: 10mW
·Current consumption: 50mA
·Supply Voltage: 6-12V DC
·Transmit distance: 300m line
of sight (no interference)
·Channels: 4, synchronization of
stereo audio and video
·Transmitting frequency: 2.4Ghz,
·FM Audio/Video Modulation
·CH1: 2414Mhz, CH2: 2432Mhz,
CH3: 2450Mhz, CH4: 2468Mhz
10 F atSha rk Wir eles s 3 FatShark Wireless

Headset Controls:
4 Position Mode Switch:
Position 1: Off
Position 2: AV out. Wireless operation. LCD will display
transmitted image. AV cable can simultaneously be attached for
recording.
Position 3: NORM. Wireless operation. LCD will display
transmitted image. AV port can also output LCD image (if problems
with splitting video image - try position 2)
Position 4: AV in. Direct connect operation. Receiver is off and
video can be fed to the LCD via AV cables.
Earphone Jack: Connect earphones. Volume adjustment on cable.
AV in/out Jack: Connect AV cables
Power Jack (right side of headset): Connect battery pack.
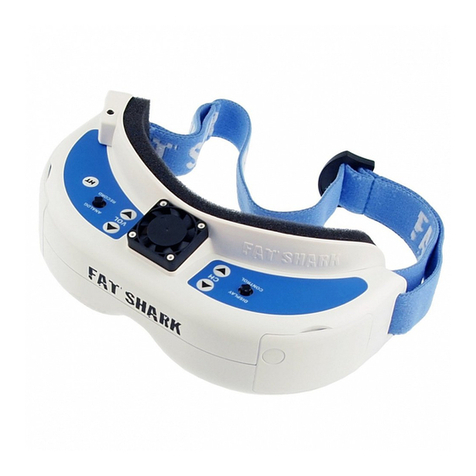
IPD sliders: Interpupillary optical spacing adjustment.
Optics:
·FOV 46 degrees diagonal
·Interpupillary (IPD) distance: 58mm –70mm
·Image size: 80" @ 7'
·Optional diopter lens inserts available in -2, -4, -6 dpt
Audio:
·Stereo (volume adjustment on earphone cable)
User Controls:
·channel selection
·Contrast/brightness
·IPD adjustment
Electrical:
·Power supply, 7-9V
·Power consumption: 230/450mA (direct/wireless)
System: NTSC/PAL auto select
Mechanical:
·Ergonomic molded shape. Foam seal for comfort and ambient light
reduction.
·Weight: 125g (without battery)
·Adjustable headband
Display
·Two full color micro LCD's
·Color arrangement: RGB stripe
·Resolution 922,000 pixels per eye
·640 X 480 lines
Receiver
·2.4 Ghz, 4ch/ 5.8Ghz 7ch (model dependant)
Interface
·Wireless
·Direct (AV in port)
·Input signal -85dBm (+/- 10dBm)
RCV922 Headset
4 FatShark Wireless 9 FatShark Wireless

Trouble shooting
Symptom
Picture not clear
White static lines
Cause
Channel selection on TX
not same as on headset.
Another 2.4GHz device
is operating nearby
Objects or people are
betweenyouandtheTX
Interference from other
2.4Ghz equipment.
Solution
Ensure both TX and
headset are on the
same channel
Change your location or
change channel
Ensure a clear line of
sight between TX and
headset
Change channel
Change location
Image is fuzzy
Lens fogs up
User is near sighted
(optics is set for focusing
at 2m distance)
Interpupillary distance
not suitable to your face
Temperature difference
between your face and
the headset lenses
causes condensation.
Wear contact lenses.
Adjust IPD sliders
-Use anti-fog solution on
lenses
-Wear goggles on head
during setup to allow
lens to warm up
Warranty
The system can be exchanged for a new unit within 7 days for any
manufacturing defects if returned in new condition. The video headset will
be warranted for repair for 2 years if no signs of excessive use. Buyer will
be responsible for shipping costs. If beyond the warranty period we will
provide repair services.
Headset Controls (cont.):
Channel Select Switch: RF Channel position.
2.4Ghz: 4 position channel select
5.8Ghz: 7 channel up/down scroll control
SMA connector: Antenna attachment
Display controls: adjust brightness/contrast
Brightness: left/right (dark/bright)
Contrast: away/towards (more contrast/ less contrast)
Diopter Lens holder: Slide optional diopter lens into slots
Optional lens available in -2, -4 and -6 dpt
8 FatShark Wireless 5 FatShark Wireless

Transmitter Controls:
2.4Ghz 10mW/ 100mW
4 Channel switch: NoteTXshowninCh1
AV in: Connect to 5p camera Molex connector
Power out: 5V Power output as shown on
TX label to power camera
Voltage in: 6.0 - 12V:
CAUTION: IF USING TO POWER A CCD
CAMERA, GROUND TEST FOR 1HR BEFORE
USING, SOME CCD USE HIGH POWER AND
MAY CAUSE TX TO OVERHEAT AND SHUTDOWN
5.8Ghz 100mW
7 Channel 3p DIP switch
AV in: Connect to 5p camera Molex connector
Power out: 5V Power output as shown on
TX label to power camera
Voltage in: 6.0 - 9V direct, 7-16V through inline
switching regulator (included):
CAUTION: IF USING TO POWER CCD or HD CAMERA be sure to use the
included inline switching regulator..
For maximum distance it is very important that a clear line of sight exists
between the transmitter and the video headset. 2 of the worst causes of
interference are human bodies and reinforced concrete.
The headset receiver may become warm to touch during use (particularly in
the antenna region and top middle). This is normal.
Although you don’t require any license to operate this device, you are still
legally responsible for operating in a responsible manner. If someone has
told you that your transmitter is interfering with their 2.4 Ghz system you are
legally responsible to remedy the situation by either changing to a different
channel, moving locations or cease using. Please be a responsible user of
this device.
AV IN/OUT PORT
AV Cable Pin Out
Yellow: Video White: Audio Left Red: Audio Right
Recording Video
Connect RCV922 AV cable to AV out port on underside of headset. Connect
recording device to cables and set up as per manufacturer directions.
Note: Cables pins are not all the same (see above chart), be sure to connect
to RCV headset using the included cables.
6 FatShark Wireless 7 FatShark Wireless
Ground Video AudR AuL
Table of contents
Other FatShark 3D Glasses manuals
