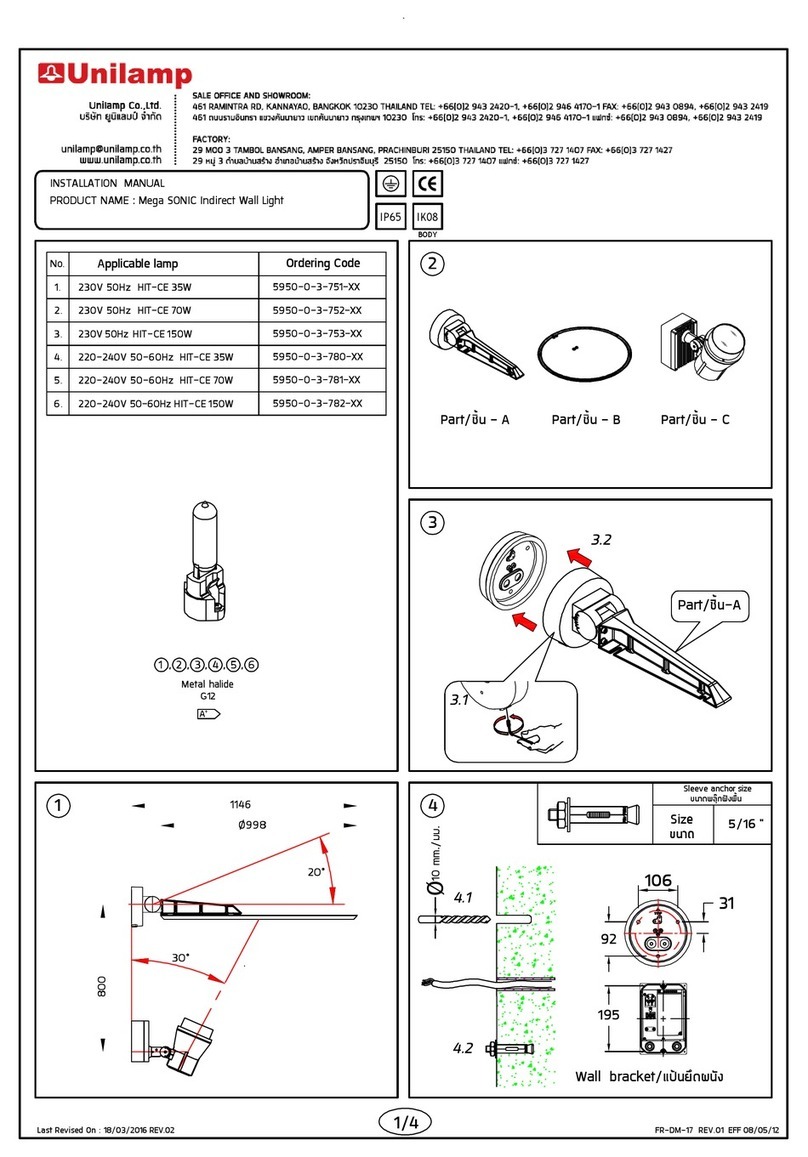
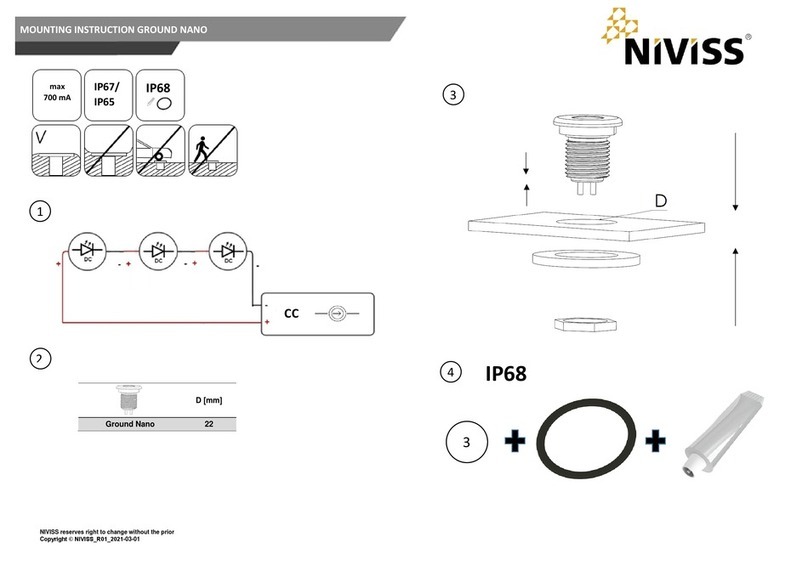
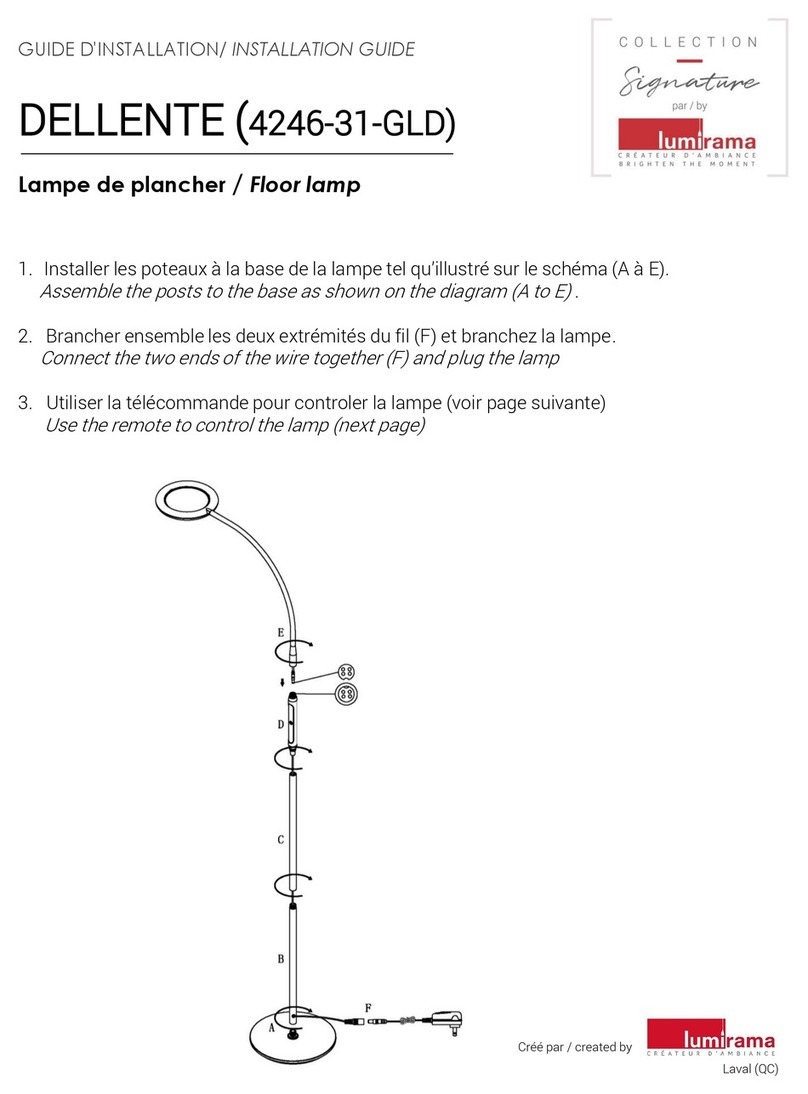
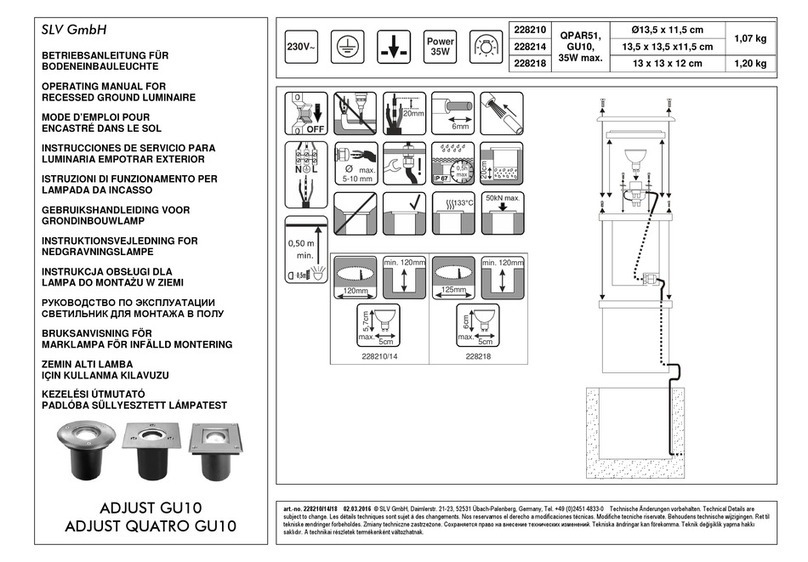
Fazzini 02.737.00 User manual

Lampada Visita
Examination Lamp
02.737.00 / 02.738.00
Manuale Utente
User Manual
02.737.00 - 02.738.00_UM_IT_EN_Rev.04_08.10.2012 .:: 1 / 8 ::.
02.737.00
02.738.00
02.737.00
02.738.00
LAMPADA VISITA
EXAMINATION LAMP
Manuale Utente
User Manual
IMPORTANTE
Leggere attentamente le istruzioni prima dell’utilizzo.
WARNING
Read the instructions carefully before using the device.

Lampada Visita
Examination Lamp
02.737.00 / 02.738.00
Manuale Utente
User Manual
02.737.00 - 02.738.00_UM_IT_EN_Rev.04_08.10.2012 .:: 2 / 8 ::.
Sommario/Index
MANUALE UTENTE .............................................................................................................................2
DISIMBALLO DEL PRODOTTO................................................................................................................................. 3
SPECIFICHE TECNICHE ........................................................................................................................................... 3
SET-UP E FUNZIONAMENTO .................................................................................................................................. 3
TEMPI DI UTILIZZO................................................................................................................................................ 3
MONTAGGIO ........................................................................................................................................................ 4
SOSTITUZIONE DELLA LAMPADA ALOGENA ........................................................................................................... 4
POSIZIONAMENTO ED INSTALLAZIONE DELL’UNITA’ .............................................................................................. 4
USER MANUAL......................................................................................................................................5
DELIVERY AND UNCRATING OF UNIT ..................................................................................................................... 5
TECHNICAL SPECIFICATIONS .................................................................................................................................. 5
SET-UP AND OPERATION....................................................................................................................................... 5
MOUNTING INSTRUCTIONS................................................................................................................................... 6
LAMP REPLACEMENT ............................................................................................................................................ 6
LOCATION AND INSTALLATION OF UNIT ................................................................................................................ 6

Lampada Visita
Examination Lamp
02.737.00 / 02.738.00
Manuale Utente
User Manual
02.737.00 - 02.738.00_UM_IT_EN_Rev.04_08.10.2012 .:: 3 / 8 ::.
Manuale Utente
I prodotti ed i relativi accessori devono essere in buono stato d’utilizzo prima della messa in funzione.
E’ responsabilità di ciascun specialista del prodotto la verifica della regolarità dei parametri d’uso in relazione alle
specifiche.
Nessun prodotto o accessorio deve essere utilizzato qualora un malfunzionamento sia ipotizzato.
L’installazione, l’operazione, la ricerca di guasti e la relativa riparazione devono essere effettuati esclusivamente da
personale specializzato ”Nota #1” che conosca il prodotto, le parti di ricambio e le informazioni necessarie.
ATTENZIONE
Prima di effettuare ispezioni al prodotto, accertarsi che non sia collegato alla rete elettrica.
Non utilizzare in presenza di liquidi infiammabili/esplosivi, gas o simili
Non lasciare il prodotto esposto ad agenti atmosferici o a fonti di calore.
L’utilizzo del prodotto in condizioni diverse da quelle specificate nel presente manuale può
pregiudicarne l’efficienza.
Nota #1 - Una persona qualificata che abbia sufficiente conoscenza od esperienza che gli consentano di evitare i pericoli legati all’uso dell’elettricità; una persona
sufficientemente informata o che lavori sotto la supervisione di una persona qualificata che gli consenta di evitare i pericoli legali all’uso dell’elettricità
(es.operatori o manutentori)
DISIMBALLO DEL PRODOTTO
Disimballare ed ispezionare il prodotto nel corso della ricezione. Qualora sia riscontrato un danno, informare il
personale addetto alla consegna e contattare la società di spedizione immediatamente.
Annotare qualsiasi danno all’interno del bollettino di consegna e trattenere il materiale per l’ispezione.
Le richieste di danni devono essere emesse al momento della consegna.
Non restituire materiale senza autorizzazione scritta.
Nel caso di danno dovuto al trasporto, richiedere ispezione da parte del trasportatore del mezzo utilizzato per il
trasporto e del materiale.
Controllare attentamente i sigilli dell’imballo ed assicurarsi che i beni siano ricevuti in conformità a quanto dichiarato
sulle etichette dei colli.
SPECIFICHE TECNICHE
Codice
Alimentazione elettrica principale
Tensione (V)
Frequenza (Hz)
Potenza massima (W)
02.737.00
230
50 / 60
50
02.738.00
230
50 / 60
50
Codice
Lampadina Alogena
Tensione
(V)
Potenza massima
(W) Angolo del fascio luminoso Attacco
Temperatura
colore
(ºK)
Intensità luminosa (lux)
02.737.10
12
50
38º
GU5.3
3000
11.000 a 50 cm
02.738.10E
12
50
10º
GU5.3
3000
52.422 a 50 cm
SET-UP E FUNZIONAMENTO
1. Fissare la lampada alla base seguendo le istruzioni.
2. Collegare il cavo di alimentazione alla base del trasformatore e l'altra estremità in una presa di corrente alternata.
3. Spostare l'interruttore in posizione "ON" per utilizzare.
TEMPI DI UTILIZZO
Tempo di utilizzo standard:
30 minuti ON
15 minuti OFF

Lampada Visita
Examination Lamp
02.737.00 / 02.738.00
Manuale Utente
User Manual
02.737.00 - 02.738.00_UM_IT_EN_Rev.04_08.10.2012 .:: 4 / 8 ::.
MONTAGGIO
1. Montare i raggi [1] nella base [2] e stringere le viti [3]
2. Inserire le cinque ruote [4] nella base di plastica finchè
si sente lo “scatto” di avvenuto inserimento nella loro
sede
3. Inserire lo stelo [5] della lampada nel buco centrale
della base
4. Inserire la rondella piatta e il bullone/vite [6]nella
parte opposta del buco centrale della base
5. Stringere il bullone/vite
SOSTITUZIONE DELLA LAMPADA ALOGENA
ATTENZIONE
LA LAMPADA PUO’ SCOTTARE
1. Spegnere l'unità e scollegare il cavo di alimentazione dalla presa a muro
2. Lasciare che la lampada si raffreddi prima di effettuare la sostituzione
3. Svitare la calotta frontale
4. Afferrare la lampada e sfilarla direttamente dal suo supporto.
5. Per sostituire con la lampada di ricambio spingere la lampada nel suo attacco
6. Avvitare la calotta frontale
POSIZIONAMENTO ED INSTALLAZIONE DELL’UNITA’
L’articolo è stato testato e regolato nel nostro impianto prima della spedizione, tranne nei casi in cui sia stato indicato
diversamente. Seguire le regole di installazione come segue.
Non posizionare l’unità vicino a materiali infiammabili o a gas pericolosi.
Non installare l’unità in un ambiente corrosivo . Un ambiente corrosivo può causare un calo delle prestazioni dell’unità
e un deterioramento delle componenti plastiche.
Ventilazione: si consiglia l’installazione in un’area dotata di buona ventilazione. Distanziare l’unità e gli eventuali
accessori, di almeno 2cm dalle pareti.
Non posizionare l’unità in modo tale da rendere difficoltoso maneggiare il cavo d’alimentazione.
1. Leggere il libretto d’istruzioni per intero
2. Non utilizzare questo articolo in modalità non specificate dal presente manuale. Un utilizzo improprio può mettere
fuori uso i dispositivi di sicurezza ed compromettere la garanzia.
3. Questo articolo non è progettato per utilizzo con materiali volatili o esplosivi. Non testare con materiali che
potrebbero rilasciare gas esplosivi o infiammabili nella lampada. Tale operazione potrebbe causare esplosioni o
incendi.
4. Ogni operazione di manutenzione deve essere effettuata solo da personale qualificato.
5. Non posizionare l’unità vicino a materiale infiammabile o fumi e vapori pericolosi.
6. Non installare l’unità in un ambiente corrosivo
7. Non posizionare l’unità in modo tale da rendere difficoltoso maneggiare il cavo d’alimentazione
8. Prima di effettuare il collegamento elettrico all’unità, seguire le istruzioni specifiche indicate nel paragrafo
“Collegamento elettrico” nella sezione Istruzioni d’installazione. L’errata applicazione delle indicazioni riportate,
potrebbe danneggiare l’unità e compromettere la garanzia.
9. Non modificare alcun componente meccanico o elettrico
10. L’esposizione a temperature elevate potrebbe causare ferite. Non toccare superfici molto calde. Prendere le dovute
precauzioni prima di aprire la lampada surriscaldata o di maneggiarne gli elementi interni.
11. Non modificare alcun componente dell’unità. Utilizzare solo accessori e/o ricambi originali (OEM). La modifica ai
componenti o l’utilizzo di ricambi non originali potrebbe causare danni all’articolo o alle persone.
1
3
2
4
5
6

Lampada Visita
Examination Lamp
02.737.00 / 02.738.00
Manuale Utente
User Manual
02.737.00 - 02.738.00_UM_IT_EN_Rev.04_08.10.2012 .:: 5 / 8 ::.
User Manual
All equipment and accessories should be in good working order prior to use.
It is the responsibility of each facility’s engineering department to test equipments and “routine basis” to determine
if the devices are functioning within specifications.
No device or accessory should be used if a malfunction is suspected.
The installation, operation, search for breakdowns and the repair of equipment must only be performed by trained
personnel (Remark #1) who have sufficient knowledge about the equipment, spare parts, and the information
supplied.
WARNING
BEFORE STARTING TO INSPECT THE DEVICE, MAKE SURE IT IS NOT CONNECTED TO THE ELECTRIC
POWER SUPPLY NETWORK.
DO NOT USE THE APPLIANCE IN THE PRESENCE OF INFLAMMABLE AND/OR EXPLOSIVE LIQUIDS,
GASES OR MIXTURES.
DO NOT LEAVE THE APPLIANCE EXPOSED TO ATMOSPHERIC AGENTS OR HEAT SOURCES.
USING THE APPLIANCE UNDER DIFFERENT CONDITIONS THAN THOSE SPECIFIED IN THIS HANDBOOK
MAY PREJUDICE ITS SAFETY AND ITS TECHNICAL PARAMETERS
Remark #1 - An educated (qualified) person has sufficient knowledge or experience to allow him to avoid the dangers presented by electricity, whereas an informed
(trained) person is sufficiently informed or works supervised by qualified persons, so as to allow him to avoid the dangers presented by electricity (e.g. operators or
maintenance staff).
DELIVERY AND UNCRATING OF UNIT
Inspect equipment and shipping crate immediately upon receipt. If any damage is apparent, you should both report it to
the trucking delivery person and contact the transportation company immediately.
Make notes of any damage on the Bill Of Lading. Retain all shipping materials for inspection. Any claims for damage
must start at the receiving point. Do not return goods without written authorization.
When submitting a claim for shipping damage, request that the carrier inspect the shipping container and equipment.
Check packing slip carefully and make sure all materials have been received as indicated on the packing ticket.
TECHNICAL SPECIFICATIONS
Code
Electrical Main Feeding
Voltage (V)
Frequency (Hz)
Max Power (W)
02.737.00
230
50 / 60
50
02.738.00
230
50 / 60
50
Code
Alogen bulb
Voltage
(V)
Power
(W) Beam Angle Plug
Color Temperature
(ºK) Intensity (lux)
02.737.10
12
50
38º
GU5.3
3000
11.000 a 50 cm
02.738.10E
12
50
10º
GU5.3
3000
52.422 a 50 cm
SET-UP AND OPERATION
1. Secure the lamp to the base following the instructions.
2. Plug the power cord into the base of the transformer and the remaining end into a grounded AC outlet.
3. Toggle the light switch to the “ON” position to operate.
DUTY TIME FOR STANDARD USE:
30 MINS ON
15 MINS OFF

Lampada Visita
Examination Lamp
02.737.00 / 02.738.00
Manuale Utente
User Manual
02.737.00 - 02.738.00_UM_IT_EN_Rev.04_08.10.2012 .:: 6 / 8 ::.
MOUNTING INSTRUCTIONS
1. Mount rays [1] in the base [2] tighten the screws
[3]
2. Insert the five casters [4]in the rays [1] until they
“snap” into place.
3. Insert column [5]of the lamp into center hole of
the base.
4. Insert the flat washer and bolt/screw [6] into the
center hole from the other side.
5. Tighten head bolt/screw
LAMP REPLACEMENT
CAUTION
LAMP MAY BE HOT.
1. Allow the lamp to cool before replacing.
2. Turn the unit off and unplug the power cord from both the wall outlet and the lamp
3. Slide the cover up to remove it.
4. Grasp the lamp connector and pull the lamp straight out of its holder.
5. Pull the lamp from its connector and replace it with the spare lamp
6. Push the lamp back into the holder.
7. Close the lamp
8. Return the unit to the patient area and plug power cord back into bottom of unit and wall outlet.
LOCATION AND INSTALLATION OF UNIT
Your equipment has been fully operated, tested, and balanced in our plant prior to shipment, unless notified otherwise.
Follow the installation requirements below.
Do not place the unit near combustible materials or hazardous gas.
Do not install unit in a corrosive environment. A corrosive environment may lead to poor performance
and deterioration of plastic components.
Ventilation: The unit should be installed in an area where there is good air ventilation. Allow a minimum of 20mm
between any wall and any side of the unit (or to any equipment mounted to it).
Do not position the unit in a manner that would make it difficult to operate your main power cord.
1. Read this entire Operation
2. Do not use this equipment in any manner not specified in this manual. Improper use may impair the safety features
employed and will void your warranty.
3. This equipment is not designed for use with volatile or explosive materials. Do not install test articles that may
release explosive or flammable gas in the examination lamp. Loading of such materials may result in explosion or
fire.
4. Only qualified service personnel should ever be permitted to perform any service-related procedure on this
equipment!
5. Do not place the unit near combustible materials or hazardous fumes or vapors.
6. Do not install unit in a corrosive environment
7. Do not position the examination lamp in a manner that would make it difficult to operate your main power cord.
8. Before making the power supply connection to your equipment, you must follow the specific directions stated
under “Power Connection” in the Installation Instructions section. Failing to perform the directions stated may
damage your equipment and void your warranty!
9. Do not adjust any mechanical or electrical components.
10. Human exposure to extremes temperature can cause injury. Do not touch hot surfaces. Take appropriate
precautions before opening the heat examination lamp and upon handling any oven contents.
11. Do not modify any component on this unit. Use only original equipment manufactured (OEM) parts as replacement
parts. Modifications to any component, or the use of a non-OEM replacement part could cause damage to your
equipment or personal injury.
1
3
2
4
5
6

Lampada Visita
Examination Lamp
02.737.00 / 02.738.00
Manuale Utente
User Manual
02.737.00 - 02.738.00_UM_IT_EN_Rev.04_08.10.2012 .:: 7 / 8 ::.
ATTENZIONE
SPEGNERE L’APPARECCHIATURA E STACCARE IL CAVO DI ALIMENTAZIONE DALLA PRESA DI
CORRENTE ALLA FINE DI OGNI UTILIZZO.
NON POSIZIONARE L’APPARECCHIATURA IN MODO DA RENDERE DIFFICILE LE OPERAZIONI SUL
CAVO DI ALIMENTAZIONE.
WARNING
AFTER USING TURN OFF THE DEVICE AND UNPLUG FROM MAINS SECTOR.
LOCATE THE DEVICE KEEPING THE POWER CABLE EASY TO REACH.
SIMBOLI
SULL’APPARECCHIO
SYMBOLS ON THE DEVICE
MARCHIO DI CONFORMITA’ ALLA DIRETTIVA 2004/108/CE
CE MARK IN CONFORMITY WITH EC DIRECTIVE 2004/108/CE
ATTENZIONE CONSULTARE IL MANUALE D’USO
WARNING CHECK THE INSTRUCTION MANUAL
APPARECCHIO CLASSE 2
CLASS 2 EQUIPMENT
PER L'ELIMINAZIONE ATTENERSI ALLE DISPOSIZIONI DI LEGGE IN
MATERIA DI SMALTIMENTO DIFFERENZIATO.
FOR DISPOSAL FOLLOW THE PROVISIONS IN THE MATTER OF
SEPARATE COLLECTION OF WASTE
30 MINS ON
15 MINS OFF
TEMPO DI UTILIZZO
DUTY TIME

Lampada Visita
Examination Lamp
02.737.00 / 02.738.00
Manuale Utente
User Manual
02.737.00 - 02.738.00_UM_IT_EN_Rev.04_08.10.2012 .:: 8 / 8 ::.
Per l'eliminazione attenersi alle disposizioni di legge in materia di smaltimento differenziato.
For disposal follow the provisions in the matter of separate collection of waste
Pour l'élimination conformez-vous aux dispositions de la loi en matière d'écoulement différentié des déchets
Cuando vaya a desecharlo, rogamos sigan las normas de separación de cada residuo
Para eliminar deve respeitar as instruções sobre a separação dos resíduos recolhidos
CERTIFICATO DI GARANZIA / WARRANTY CERTIFICATE /
CERTIFICATE DE GARANTIE / CERTIFICADO DE GARANTIA
CERTIFICADO DE GARANTIA / ZÁRUČNÍ LIST
FAZZINI S.R.L.
S.S. PADANA SUP. 317 - 20090 VIMODRONE - ITALY
TEL +39 02 2651521 - FAX +39 02 27409242
E-MAIL : FAZZINI@FAZZINI.IT
CODE SERIAL NUMBER / LOT
STAMP, SIGNATURE & DATE
RIVENDITORE / DEALER / REVENDEUR / COMPRADOR / REVENDEDOR / DISTRIBUTOR
DATA D’ACQUISTO / DATE OF PURCHASE / DATE D’ACHAT / FECHA DE COMPRA / DATA DE COMPRA / DATUM OBJEDNÁVKY
ACQUIRENTE / BUYER / ACHETEUR / COMPRADOR / CLIENTE / ZAKAZNIK
Fazzini s.r.l.
S.S.PADANA SUPERIORE, 317
20090 VIMODRONE - ITALY
Fax : +39.02.27409242
e-mail : fazzini@fazzini.it
web : www.fazzini.it
This manual suits for next models
1
Table of contents
Languages:
Popular Outdoor Light manuals by other brands

Vaxcel
Vaxcel T0178 Assembly and installation instructions
Licatec
Licatec Edgelight PLM III Series Assembly instruction
STERNO HOME
STERNO HOME GL42076 instructions

Quoizel
Quoizel TFIK8409VA Assembly instruction sheet
Quoizel
Quoizel LWS3445A installation instructions
Spectroline
Spectroline OPTIMAX Multi-lite OPK-300N Operator's manual
