FEB 9322 User manual

9322 - Smart Wi-Fi curtain controller
1- Safety warning
Warning: Failure to follow the safety guidelines provided below could lead to re, electric shock,
other types of injury, or damage to the Smart curtain controller or other property. Read all safety
information below before using the Smart Relay.
Avoid high humidity or extreme temperatures;
Avoid prolonged exposure to sunlight or intense UV light;
Do not drop or do not subject the unit to strong vibrations;
Do not disassemble or try to repair the unit;
The Smart curtain controller works at high voltage (230V) do not keep within reach of
children;
Disconnect the house power when installing this product;
Do not bring into contact with ammable liquids, gases and other explosive substances.
2 – Welcome
We present your smart Wi-Fi actuator.
This actuator is powered by the mains voltage and allows you to manage the motor of a rolling
shutter or awning in four different ways:
1. You can connect it to the Amazon Alexa and Google Home voice assistants;
2. It can be controlled from your smartphone via the Smart Life app;
3. It can be combined with one or more wireless buttons from the FEB Easy family, including
the double push button 9320/2;
4. It’s possible to wire two traditional push buttons directly to the actuator;
5. You can control the motor by pressing the button on the actuator itself.
In this guide you will nd an overview of the product and instructions for installation and start-up.

3 - A detailed look at your device
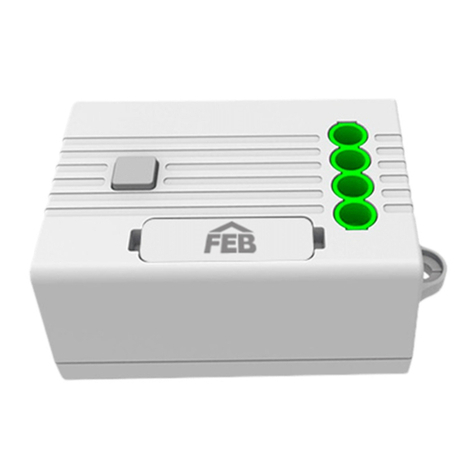
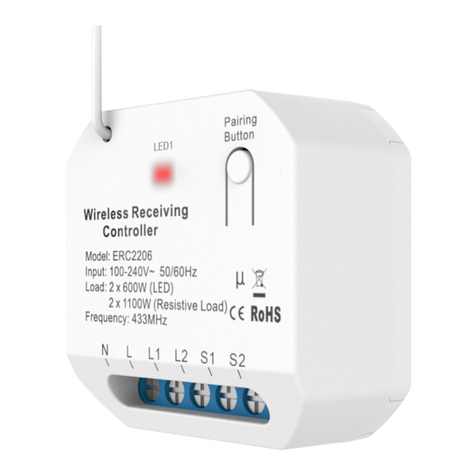
Il vostro Attuatore Smart Wi-Fi 9322
Connection terminals: these are the terminals to which you connect the power supply, the
shutter motor and the traditional buttons. From left to right the terminal sequence is: 1)
Power supply neutral, 2) Power supply live, 3) Motor live direction 1, 4) Motor live direction 2,
5) Traditional button live direction 1, 6) Traditional button live direction 2.
Pairing button: this button performs several functions. It is used to start the procedure for
connecting to the Wi-Fi network in your home, to start pairing with the wireless buttons and
to restore the device to its factory settings. It is also possible to directly control the actuator
by pressing this button to move the motor rst in one direction and then in the other.
LED indicators: two indicators that provide feedback on the status of the device. In normal
operation, the LED indicates the status of the load: on when it is on and off when it is off, the
red LED for one direction of the motor and the green for the other. When the product is
started, the red LED ashes quickly, to indicate that the actuator is not yet connected to a Wi-
Fi network.
Antenna: it is the antenna used to receive radio signals from the FEB Easy wireless buttons.

4 – Start up
In the image below nd the connection diagram of the module. Important: Always
remember to disconnect the house power when installing this product.
Connection diagram for the 9322
To pair the 9322 actuator with a FEB Easy wireless button, simply press the pairing button for
about 3 seconds, until the red LED indicator starts ashing, at this point press the button you
want to pair. Just press the button once. You will see that the red LED will stop ashing,
indicating that the two have been paired. The subsequent pairing will automatically refer to
the opposite direction of the motor and so on alternately. It is possible to connect more than
one button to the same actuator, up to a maximum of 10 buttons (5 pairs of controls for the
two directions of the motor). There are no limits, instead to the number of actuators that can
be controlled by the same button, simply repeat the pairing procedure between the button
and all the actuators that you want to be controlled by the same button.
To connect the 9322 actuator to your home Wi-Fi network, download the Smart Life app
from the Google Play Store, or from the Apple App Store. Touch the + sign in the upper right
corner and select "Add manually". Scroll down the page until you nd the product “Wi-Fi
curtain switch” and select it. At this point, start the connection, check that the network name
and password are correct and that there is a 2.4GHz network. The app will ask you to check
that the LED indicator is ashing rapidly and when you have conrmed it, the addition to the
network will begin. The process takes about 2 minutes, after which you will see your new
module successfully added to the app. At this point you can change the name and start
controlling it from your smartphone. In the app options you can create scenarios, links with
other devices, time schedules and pair the actuator with Amazon Alexa, Google Home, with
the IFTTT platform and various other IoT service providers.
If the LED is not ashing quickly, you can press the pairing button for about 10 seconds: the
LED will ash slowly, then quickly and eventually remain on steady, at this point, when it is
steady, release the pairing button. The device will be ready to proceed with pairing with a Wi-
Fi network as described in the previous point.
To connect the actuator to the voice assistants, you need to activate the Smart Life skills on
Google Home or Alexa, directly from their apps. At this point you can proceed with the
discovery of the devices available for connection and start controlling your 9322 with voice

commands or from the Google Home or Amazon Alexa apps. With the latter, to stop the
shutter when it is moving, the voice command must start with "Alexa, pause (name given to
the shutter)".
Repeater mode: when you have a button connected to multiple actuators and the furthest
actuator is out of range, you can set the closest actuator to act as a signal repeater, thus
extending the operating range. The signal of each button of the system is not repeated, but
only of the one connected to the actuator that must repeat the signal. Obviously, the others
downstream must also be connected to the button, otherwise the signal they receive has no
effect on them. To activate the repeater mode, simply press the pairing button of the
actuator on which you want to activate the mode for about 7 seconds, i.e. when the signal
LED changes from slow ashing to faster ashing, at this point the button can be released
and the mode is activated. This mode is particularly useful in the case of a button such as the
9320/2 or 9320/4T used in coordinated mode to manage the general ON and OFF of different
actuators at a certain distance from each other.
To reset a connection between the actuator and the button, press the pairing button for
about 12 seconds, at which point the LED indicator will start ashing, will remain lit briey
and then go off, at this point release the button. When this sequence is nished, the actuator
and button will be disconnected.
If you change your Wi-Fi password or if you change your router, repeat the process described
above for connecting to a Wi-Fi network, including resetting the Wi-Fi settings if the LED is
not blinking rapidly.
The actuator supports the automatic detection of the wired switch type (rocker or push
button): after the controller is powered on, press the wired switch once to set the wired
switch type. To reset the wired switch type, power off the controller and the power it on
again.
5 - Caratteristiche tecniche
Power supply: 110~240 VAC 50/60Hz
Maximum current: 1.7 A
Maximum power: 390W at 230V
Wireless network: Wi-Fi IEEE 802.11 b/g/n 2.4G & RF 433MHz
Operating distance: Indoor <= 25m / Outdoor <= 60 m
Operating temperature: -5 - 50°C
Dimensions: 44 x 44 x 22 mm
6 – Troubleshooting
The device does not connect to Wi-Fi:
◦Check the ashing of the LED, as indicated in the Startup section;
◦Verify that your router is set to use 2.4GHz Wi-Fi;

◦Check that your phone is connected to 2.4GHz Wi-Fi;
◦Keep phone, router and 9322 module close to each other during connection.
The device sometimes appears offline in the app:
◦It could be due to the router: routers models allow simultaneous connection only of so
many Wi-Fi devices. Check that your router has not reached the maximum number of
connected devices at the same time.
Table of contents
Other FEB Controllers manuals
Popular Controllers manuals by other brands
Omron
Omron G9SP Series manual

American Megatrends
American Megatrends MegaRAC MG9077 datasheet

ZPA
ZPA MODACT MOPED 52 039 Mounting instructions
Mitsubishi Electric
Mitsubishi Electric MELSEC iQ-F Series user manual
Honeywell
Honeywell MN7505 installation instructions

Vais Technology
Vais Technology SoundLinQ SL3x owner's manual

