FeherGuard FG-AR User manual

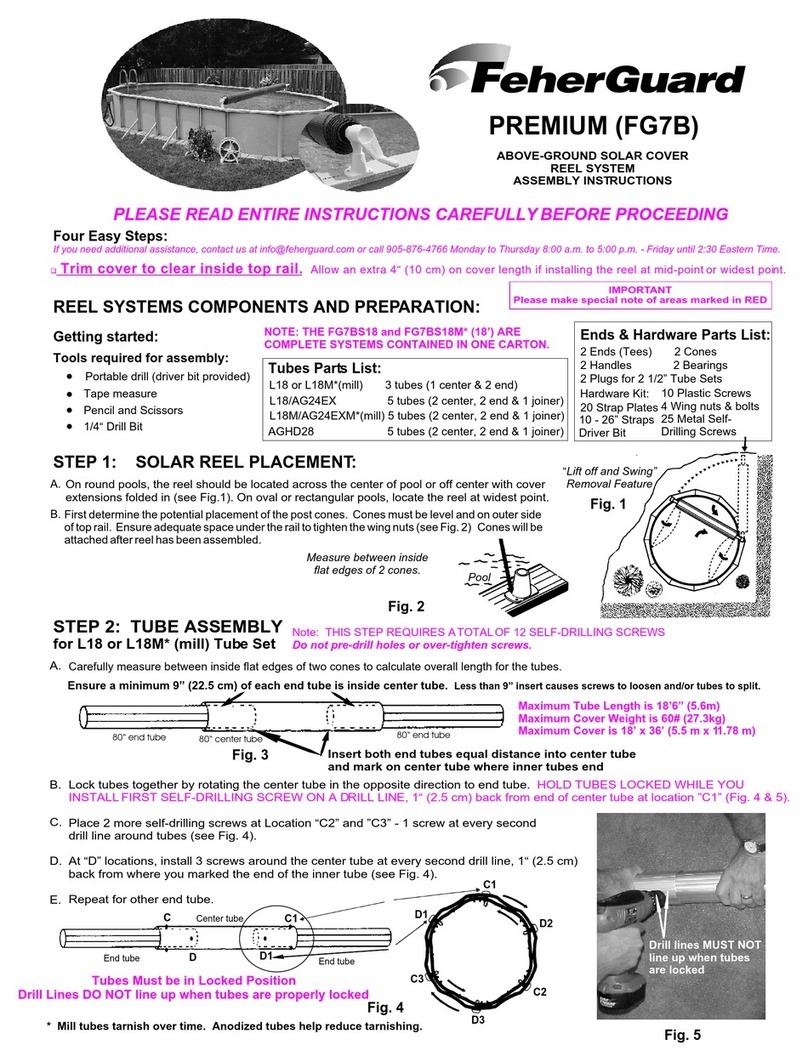
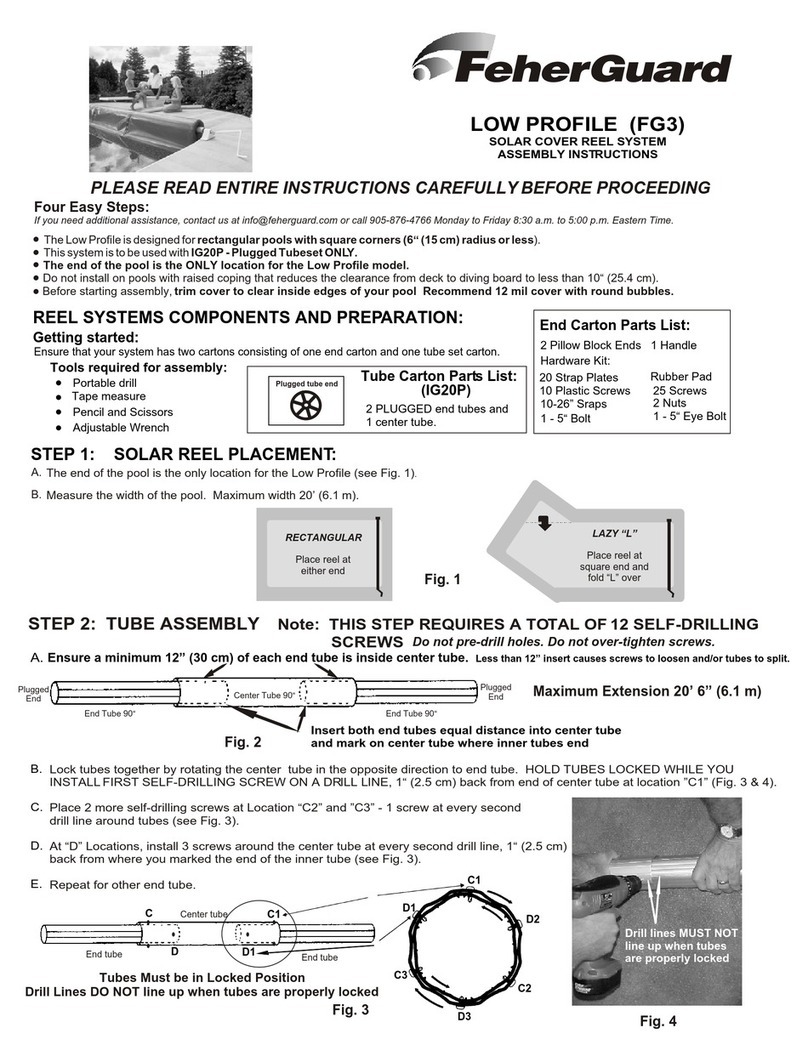
STEP 2: TUBE ASSEMBLY
STEP 1: SOLAR REEL PLACEMENT:
ASSEMBLY INSTRUCTIONS
AUTO REEL
Automatic Rollup
FG-AR
PLEASE READ ENTIRE INSTRUCTIONS CAREFULLY BEFORE PROCEEDING
REEL SYSTEMS COMPONENTS AND PREPARATION:
Getting started:
Ensure that your system has two cartons consisting of one end carton and
one tube set carton.
Tools required for assembly:
·Portable drill
·Tape measure
·Pencil and Scissors
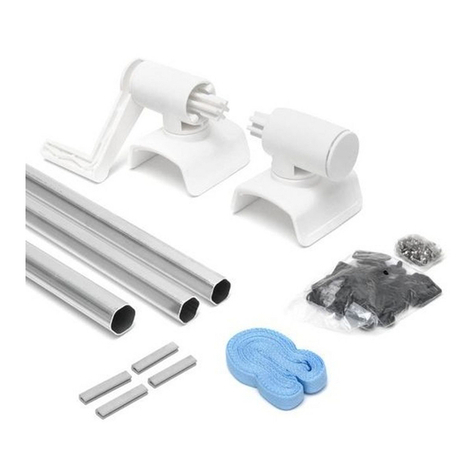
Tube Carton Parts List:
2 end tubes and 1 center tube
AUTO REEL Parts List:
1 Bracket End
1 Handle
1 Bearing
2 Plugs for L16M, L18M & L20M Tubes
1 Water Discharge Hose
Hardware Kit: 10 Strap Plates
10 Straps
10 Plastic Screws
29 Self-drilling Metal Screws
A.
B.
Determine the best location for the reel system. The widest point of the pool is the preferred locations (see Fig. 1 below).
At the determined location, measure the width of the pool and add 6“ (15 cm).
Ensure minimum of each end tube is inside center tube (see table below right).
Less than minimum insert causes screws to loosen and/or tubes to split.
Insert both end tubes equal distance into center tube
and mark on center tube where inner tubes end
Fig. 2
Fig. 1
A.
Recommended Solar Cover is 12 mil with round bubbles.
Allow an extra 4“ (10 cm) on cover length if installing the reel at mid-point or off-center.
Before starting assembly, trim cover so it does not touch the sides of your pool when rolling up.
Above-Ground
pools with deck
Insert Width Cover Cover
Tube Min. Max. Max. Wet Max.
Weight
L18M 9“ 18’6“ (5.7 m) 60# (27.3kg) 18x36
L20M 12“ 20’6“ (6.3 m) 60# (27.3kg) 20x40
L16M 9“ 16’6” (5.0 m) 60# (27.3kg) 16x32
·
·
Mill tubes tarnish over time. This does not affect tube integrity.
Four Easy Steps:
If you need additional assistance, contact us at [email protected] or call 905-876-4766 Monday to Friday 8:30 a.m. to 5:00 p.m. Eastern Time.
Recommend Safety Glasses
1 Auto End
Optional Locking Casters are available: Part Name FG-CK1
Lock tubes together by rotating the center tube in the opposite direction to end tube. HOLD TUBES LOCKED WHILE YOU
INSTALL FIRST SELF-DRILLING SCREW ON A DRILL LINE, 1“ (2.5 cm) back from end of center tube at Location ”C1”
(see Fig. 3 & 4).
Place 2 more self-drilling screws at Location “C2” & “C3” - 1 screw at every second drill line
around tubes (see Fig. 3).
At “D” locations install 3 screws around the center tube at every second drill line, 1“ (2.5 cm)
back from where you marked the end of the inner tube from Fig. 2A (see also Fig. 3).
Repeat for other end tube.
B.
C.
D.
E.
C3
End tube End tube
Center tube
C
D
C1
C1
Drill lines DO NOT
line up when
tubes are locked
Tubes Must be in Locked Position
Drill Lines DO NOT line up when tubes are locked
D2
D1
D1
THIS STEP REQUIRES A TOTAL OF 12 SELF-DRILLING SCREWS DO NOT pre-drill holes or over-tighten screws.
C2
Fig. 3
D3
Fig. 4
End Tube End Tube
Center Tube

Tube
Fig. 10
Strap
Square corner Radius corner
First strap is placed 6“ (15 cm) in from inside edge of pool or at start of radius corner.
Place system across widest point of pool or if radius corners are greater than 6”.
Pool
B.
6“ (15 cm)
(Optional) FG-CK1
1. FG-PLG
Plug
Space all straps evenly between outside marks
Fig. 5
3. End
Bracket
4. FG-HANC
Handle
Insert Plug (#1) into End Tube.
Place Bearing (#2) inside End Bracket
Push Handle (#4) through Bearing and fully into Tube with Plug.
Insert 3 self-drilling screws (#5) through tube in line with bumps on plug
rim (at Long Prongs) and 1“ (2.5 cm) from tube end. (see Fig. 7).
2. FG-BEA005
Bearing
Attach remaining straps (Evenly Spaced) on a drill line with
metal screws (see Fig. 10).
or over-tighten screw.
Mark two outside strap location on tube DRILL LINES.
These two straps are placed 6“ (15 cm) in from inside edges
of pool or at the start of the radius corner (see Fig. 9).
Use all straps provided.
DO NOT pre-drill holes
A.
STRAP ATTACHMENT - TO TUBE
Fig. 9
(Optional)
FG-CK1
STEP 3B: ASSEMBLE AUTO END
Push Water Discharge Hose onto right side of Auto End (Fig. 6)
Insert Plug (#1) into End Tube.
Push Tube with Plug fully onto Auto End shaft.
Insert 3 self-drilling screws (#5) through tube in line with a bumps
on plug rim (at Long Prongs) and 1“ (2.5 cm) from tube end. (Fig. 7)
IMPORTANT:
5. AUTO REEL END When
ends are assembled insert
3 screws through tube in
line with bumps on plug
rim (at long prongs), 1“
(2.5 cm) from tube end.
Insert
Screws
Fig. 7
AUTO END
Fig. 6
For Systems Placed at Pool End (RECTANGULAR Pools) (Fig.11)
Cover
(Bubbles
Down)
Fig. 11
Fig. 12
For Systems placed at Mid-Pool or Off Center (ROUND, OVAL or IRREGULARLY SHAPED Pools) (Fig. 12)
Strap end
Cover is
folded
“Pinched Fold”
(Bubbles In)
Strap end
Fold cover where system will be placed
(bubbles in). Pierce hole through both sides of
cover, 1“ (2.5 cm) back from the fold and
straight down (perpendicular) from a strap
already attached to tube. Push threaded plastic
screw through holes in cover then tighten
snugly into plate. Repeat for remaining straps.
Place straps evenly
along fold.
D.
Pinched
Fold
Pierce hole through cover, 1“ (2.5 cm) back from
edge of cover and straight down (perpendicular)
from a strap already attached to tube. Push
threaded plastic screw through hole in cover
then tighten snugly into plate. Repeat for
remaining straps.
Choose either Fig. 11 OR Fig. 12 - the appropriate instructions below for your pool shape. If you have determined a mid-pool or
off-center placement, it may be easier if you move the cover away from the pool and fold it (Bubbles In) on a flat surface.
Strap Plate to Cover
Strap Plate to Cover
STRAP ATTACHMENT - TO COVER
PLASTIC Screw
PLASTIC Screw
When you start to roll up the cover, all straps must take hold of the cover at the same time. Adjust the strap length at strap plate if necessary.
C.
Water Discharge Hose
Screw
Drill Line)
Metal
Self-Drilling
(attach straps
along a
Strap end
Fig. 8
Attach this end
to Solar Cover
Strap
STEP 4: STRAP ATTACHMENT
Attach a Strap Plate (extras included)
to one end of all Straps provided
(see Fig. 7).
Attach this end
to Tube
Strap end
Strap Plate
(Side View)
BRACKET END
5. Insert 3 Screws, 1“ (2.5 cm) from
tube end (See Fig. 7)
Assemble in numerical order (see Fig. 5):
STEP 3A: ASSEMBLE BRACKET END

CARE AND STORAGE:
PLACING COVER ON POOL:
Move Reel System (with cover attached) across the pool to the exact location where you determined in Step 1.
(Optional Locking Casters (FG-CK1) are available.) *
IMPORTANT: Auto End Lever MUST be in the “REST” (Neutral) position - to the right.
Using handle at the Bracket End, unroll the cover 5 turns (releases any water pressure in Auto End) then “walk” cover
slowly on pool.
REMOVING COVER FROM POOL:
Attach your garden hose onto left side of Auto End (Fig. 13).
Turn on the water then move the Auto End Lever to the left - “REWIND”. The cover will roll up automatically.
Adjust cover if necessary.
IMPORTANT: When the cover is completely rolled, return Lever to “REST” (Neutral) position on the right.
Turn off water at tap. Failure to do so will void Warranty.
Disconnect Garden Hose from Auto End.
USING YOUR AUTO REEL
Hose
Discharge
Water
Garden Hose
attachment
AUTO END
In order to protect the warranty on your Solar Cover, it is essential to use a protective cover when it is rolled up on the
reel. In the summer use a Protective Sheet with UV inhibitors and in Winter, a Winter Jacket. If not provided, they can
be purchased from your pool retailer.
DO NOT ALLOW AUTO END TO FREEZE !
IF THERE IS A DANGER OF FREEZING TEMPERATURES, REMOVE AUTO END FROM SYSTEM, TURN TUBE SHAFT
AND ENSURE ALL WATER HAS DRAINED THEN STORE IN A LOCATION ABOVE FREEZING.
When re-assembling, check all screws and tighten, if necessary
in a pool partially covered by the solar cover.
FROM THE POOL BEFORE SWIMMING.
Under no circumstances, should one swim
SAFE USE OF YOUR SOLAR REEL:
COMPLETELY REMOVE REEL SYSTEM / COVER
Solar Reel systems are designed solely to remove solar covers
and are not made to support people or any other weight.
4.
1.
2.
3.
2.
1.
5.
3.
Fig. 13
1.
2.
3.
* Other FeherGuard Accessories available through Pool Retailer:
FG-FASKIT Tube & Blanket Fastening Kit (10 sets tube & blanket fasteners & 10 - 26” straps / package)
FG-RS26 Reel Strapping (10 - 26” Straps / package)
FG-MPR Mid-Grip Pull Rope (helps pull Solar Blanket on to Pool - 35’ Rope, 2 clips, 2 plates, 2 fasteners / package)
FG-PFS Tube & Blanket Fasteners (10 sets / package)
FG-BPS Protective Sheet with UV Inhibitors (Wrap to protect solar blanket on the reel 24’ x 3 1/2’ / package)
FG-BS2X6 Blanket Straps (secures rolled up Solar Blanket on Reel - 2 x 54” straps with buckles / package)
FG-CK1 Package of 4 - 2" Locking Casters
FG-RS50 Reel Strapping (1 Roll 50’ Strapping / package)
*Quick-Connect recommended
(not supplied)

Thank you for buying the AUTO REEL System.
We know it will make solar cover handling easy for you.
FeherGuard “Three Year” Warranty Registration
Please Print
PURCHASER: ______________________________________________________________________________
ADDRESS: __________________________________________________________ CITY: _________________
STATE/PROVINCE/COUNTRY:
____________________________________ ZIP/POSTAL CODE: __________________________
___________________________________
________________________________ ______________________
MODEL # PURCHASE DATE
STORE LOCATION
Any implied warranties are limited in duration to the three-year period from the date of delivery to
the original consumer purchaser. Excluded from this warranty are all consumables (bearings,
straps, strap plates, screws). Tarnishing or discoloration of mill aluminum tubes can occur.
This is not a warranty issue as tarnishing does not affect tube performance.
Three Year Warranty:
FeherGuard at its option shall supply free of charge any part found to be defective in workmanship
or material.
This warranty is void if there is evidence of purchaser abuse, improper installation or normal wear.
Disassembling AUTO END may void warranty.
FeherGuard will not be liable for incidental or consequential damages resulting from any defects in
workmanship or material. Some States/Provinces/Countries do not allow the exclusion or limitation
of incidental or consequential damages, so the foregoing limitations or exclusions may not apply.
FeherGuard warrants for a period of three years from the date of delivery to the original consumer
purchaser, that the AUTO REEL System shall be free from defects in workmanship or material,
under normal use and in accordance with FeherGuard’s written installation and use instructions.
To validate Warranty, return this registration form within 30 days of purchase. You may also register
your warranty online on our Home Page at www.feherguard.com.
Warranty claims should be processed through your Dealer and include your proof of purchase.
This Warranty gives the claimant specific legal rights. The provisions of this Warranty are in
addition to and not a modification of or a subtraction from the statutory warranties and other rights
and remedies contained in applicable local legislation.
AUTO REEL
FeherGuard Products Ltd.
Milton, Ontario CANADA
Specifications subject to change without notice. 04 21
04 21
Other FeherGuard Lighting Equipment manuals


