Feit Electric PATH/SYNC/SOL/NK User manual

We appreciate the trust and confidence you have placed in Feit Electric through the purchase of this Solar LED Pathway Light.
We strive to continually create quality products designed to enhance your home. Visit us online to see our full line of products available for your home improvement needs.
Thank you for choosing Feit Electric.
Questions, problems, missing parts?
Before returning to store, visit feit.com/help for further assistance.
Model: PATH/SYNC/SOL/NK
USE AND CARE GUIDE
SOLAR LED PATHWAY LIGHT

Table of Contents
READ BEFORE INSTALLATION AND SAVE THESE INSTRUCTIONS
Safety Information
WARNING: RISK OF SHOCK. Dispose of used battery
promptly according to local recycling or waste regulations.
Keep battery out of reach of children and its original package
until ready to use. Clean battery contacts and device contacts
prior to installing new battery. Ensure that the battery is
installed correctly with regard to polarity (+ and -).
CAUTION: Contains one 18650 rechargeable lithium-Ion
batteries. Risk of fire, explosion, or burns. Do not disassemble.
Do not crush or damage the batteries. Do not heat or incinerate.
Do not open or disassemble. Do not make modifications to
this product.
Table of Contents . . . . . . . . . . . . . . . . . . . . . . . . . . . . . . . . . . . . . . . . . . . . . . . . . . . . . . . . . . . . . . . . . . . . . . . . . . . . . . . . . . . . . . . . . . . . . . . . 2
Safety Information . . . . . . . . . . . . . . . . . . . . . . . . . . . . . . . . . . . . . . . . . . . . . . . . . . . . . . . . . . . . . . . . . . . . . . . . . . . . . . . . . . . . . . . . . . . . . . . 2
Warranty . . . . . . . . . . . . . . . . . . . . . . . . . . . . . . . . . . . . . . . . . . . . . . . . . . . . . . . . . . . . . . . . . . . . . . . . . . . . . . . . . . . . . . . . . . . . . . . . . . . . . . . 2
Pre-Installation . . . . . . . . . . . . . . . . . . . . . . . . . . . . . . . . . . . . . . . . . . . . . . . . . . . . . . . . . . . . . . . . . . . . . . . . . . . . . . . . . . . . . . . . . . . . . . . . . . 3
Tools Required . . . . . . . . . . . . . . . . . . . . . . . . . . . . . . . . . . . . . . . . . . . . . . . . . . . . . . . . . . . . . . . . . . . . . . . . . . . . . . . . . . . . . . . . . . . . . . . . 3
Hardware Included . . . . . . . . . . . . . . . . . . . . . . . . . . . . . . . . . . . . . . . . . . . . . . . . . . . . . . . . . . . . . . . . . . . . . . . . . . . . . . . . . . . . . . . . . . . . . 3
Pathway Light Installation . . . . . . . . . . . . . . . . . . . . . . . . . . . . . . . . . . . . . . . . . . . . . . . . . . . . . . . . . . . . . . . . . . . . . . . . . . . . . . . . . . . . . . . . . 4
Operation without Remote . . . . . . . . . . . . . . . . . . . . . . . . . . . . . . . . . . . . . . . . . . . . . . . . . . . . . . . . . . . . . . . . . . . . . . . . . . . . . . . . . . . . . . . . . 4
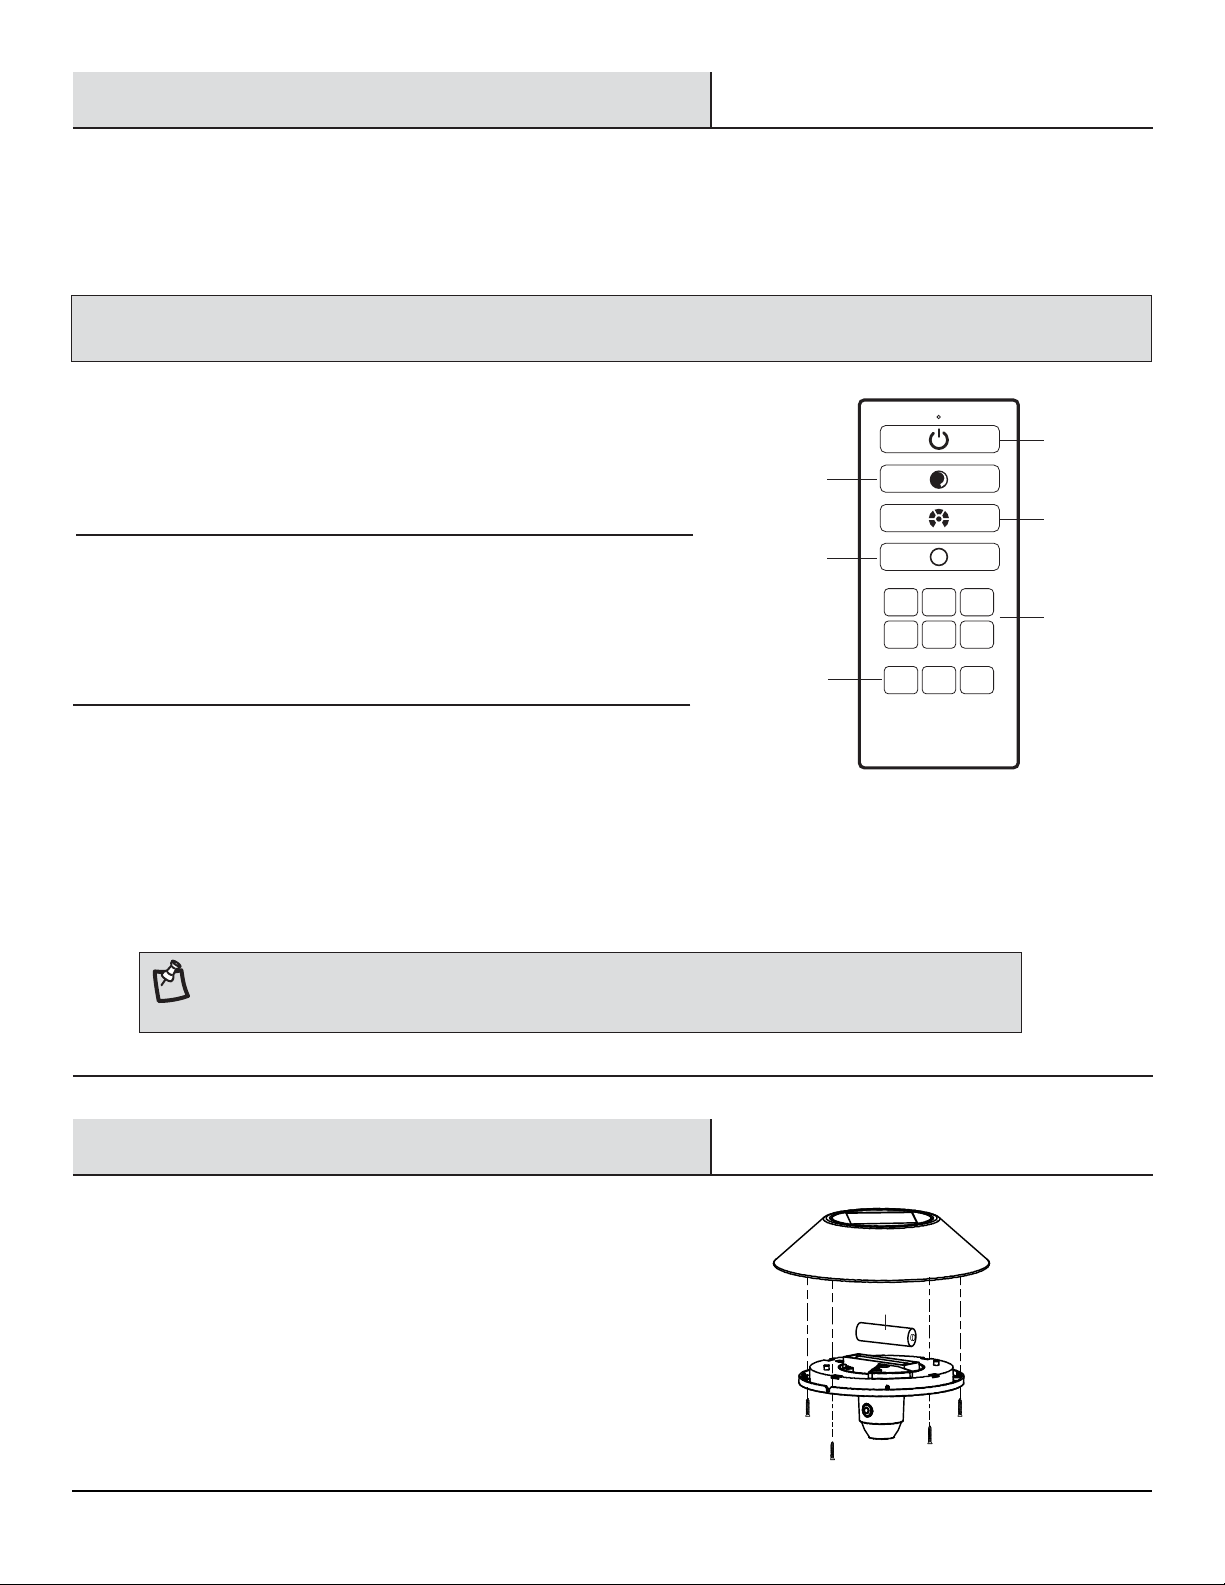
Operation with Remote . . . . . . . . . . . . . . . . . . . . . . . . . . . . . . . . . . . . . . . . . . . . . . . . . . . . . . . . . . . . . . . . . . . . . . . . . . . . . . . . . . . . . . . . . . . . 5
Battery Replacement . . . . . . . . . . . . . . . . . . . . . . . . . . . . . . . . . . . . . . . . . . . . . . . . . . . . . . . . . . . . . . . . . . . . . . . . . . . . . . . . . . . . . . . . . . . . . 5
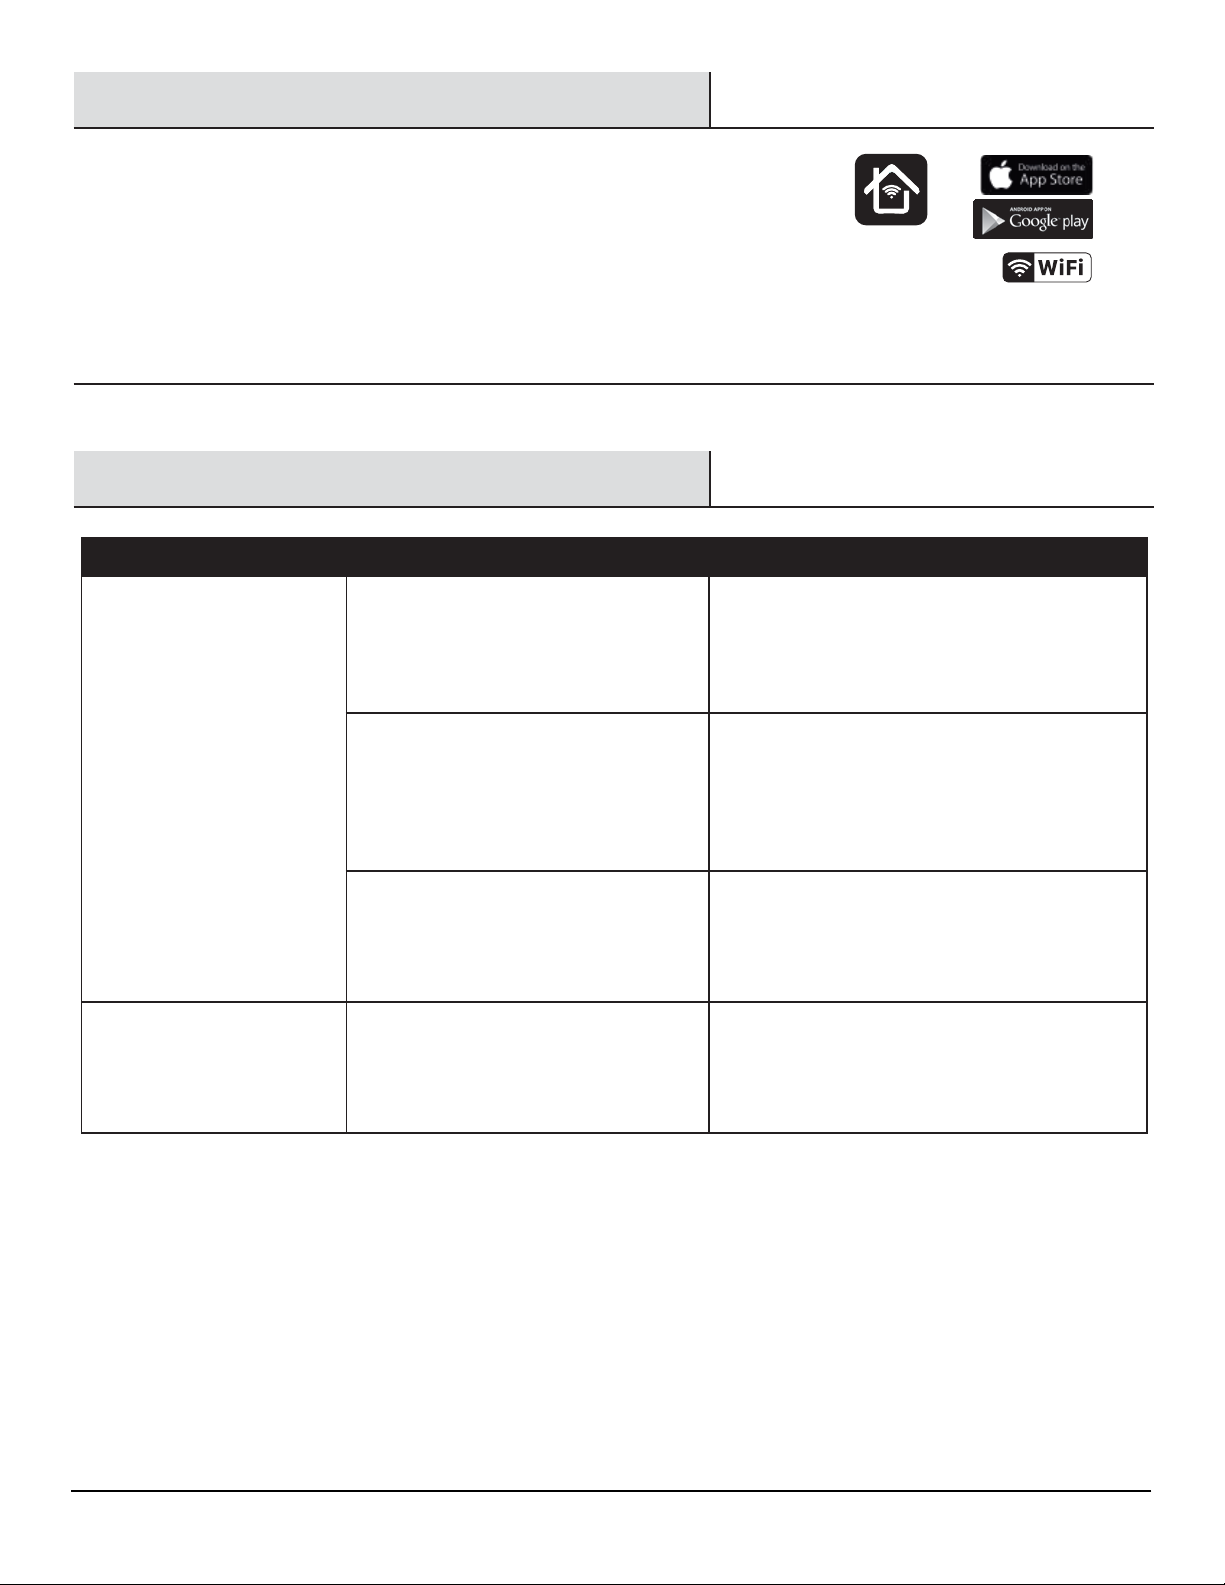
Set up with Smart Bridge . . . . . . . . . . . . . . . . . . . . . . . . . . . . . . . . . . . . . . . . . . . . . . . . . . . . . . . . . . . . . . . . . . . . . . . . . . . . . . . . . . . . . . . . . . 6
Troubleshooting . . . . . . . . . . . . . . . . . . . . . . . . . . . . . . . . . . . . . . . . . . . . . . . . . . . . . . . . . . . . . . . . . . . . . . . . . . . . . . . . . . . . . . . . . . . . . . . . . 6
Limited Warranty
2WWW.FEIT.COM
Supplier’s Declaration of Conformity:
47 CFR § 2.1077 Compliance Information
Responsible Party:
Feit Electric Company
4901 Gregg Road,
Pico Rivera, CA 90660, USA
Unique Identifier:
PATH/SYNC/SOL/NK
This product is warrantied to be free from defects in workmanship and materials for up to three years from date of purchase. If the product fails within the
warranty period, please contact feit electric at [email protected], visit feit.Com/contact-us for instructions on replacement or refund. Replacement or refund is
your sole remedy. Except to the extent prohibited by applicable law, any implied warranties are limited in duration to the duration of this warranty. Liability
for incidental or consequential damages is hereby expressly excluded. Some states and provinces do not allow the exclusion of incidental or consequential
damages, so the above limitation or exclusion may not apply to you. This warranty gives you specific legal rights, and you may also have other rights which
vary from state to state or province to province.
FCC STATEMENT
This device complies with part 15 of the FCC Rules. Operation is subject to the following two conditions: (1) This device may not
cause harmful interference, and (2) this device must accept any interference received, including interference that may cause
undesired operation. Note: This equipment has been tested and found to comply with the limits for a Class B digital device,
pursuant to part 15 of the FCC Rules. These limits are designed to provide reasonable protection against harmful interference in a
residential installation. This equipment generates, uses and can radiate radio frequency energy and, if not installed and used in
accordance with the instructions, may cause harmful interference to radio communications. However, there is no guarantee that
interference will not occur in a particular installation. If this equipment does cause harmful interference to radio or television
reception, which can be determined by turning the equipment off and on, the user is encouraged to try to correct the interference
by one or more of the following measures: Reorient or relocate the receiving antenna. Increase the separation between the
equipment and receiver. Connect the equipment into an outlet on a circuit different from that to which the receiver is connected.
Consult the dealer or an experienced radio/TV technician for help. Any changes or modifications not expressly approved by the
manufacturer could void the user's authority to operate the equipment.
DUSK TO DAWN OPERATION:
The light will automatically turn on at dusk and remain on through the
night for 6 hours. The light will remain off throughout the day, until
dusk. NOTE: To make sure this function works properly, always have
the switch in the ‘ON’ position (including daytime).
HOW SOLAR LIGHTS WORK
Solar light has a solar panel that converts sunlight into electricity.
During the day, the electricity converted by the solar panel is stored
in the rechargeable battery. At night, the solar light is powered by
the battery using the electricity stored during the day. The operating
time depends on geographical location, daily weather conditions and
season.
CHOOSING THE RIGHT LOCATION
Select a location with full, direct sunlight. Do not install in shady
areas as these areas will not allow the battery to be fully charged
and will reduce nighttime working hours. Be sure that the selected
location is not close to other nighttime light sources such as
streetlights or porch lights. These light sources may keep the solar
lights from turning on automatically.

Pre-Installation
TOOLS REQUIRED
HARDWARE INCLUDED
NOTE: Hardware not shown to actual size.
Part Description Quantity
AA LED Pathway Light 1
BB 12 in. Pole 1
CC Ground Stake 1
AA BB CC
Rubber Mallet
Phillips
screwdriver
3WWW.FEIT.COM

IMPORTANT: Do not push on the pathway
light (AA) or you may damage the device.
Pathway Light Installation
Installing the stake
□ Push the ground stake (CC) into the ground. Using rubber mallet, insert ground stake (BB) deep enough into the
ground to ensure fully assembled pathway light (AA) is stable and does not tip over.
1
Installing the Pathway Light
□ Align the pathway light (AA) with the slot on the 12 in. pole (BB).
Slide the pathway light (AA) downward then turn clockwise
□ Align the ground stake (CC) slot with the rivet indicator on the pathway light.
Slide the pathway light (AA) base downward and then turn clockwise.
2
CC
CC
BB
4WWW.FEIT.COM
Removing the insulating tab
□The light will not operate without pulling out the insulating tab.
3
On/Off/Cycle
&
Pairing Button
Operation without Remote
Turning on the fixture
□Turn the on the pathway light (AA) by pressing the button located on the base, below the light.
1
This Onesync fixture works on its own or with remote/smart bridge for grouping and expanded control.
Selecting a Color
□To cycle thru the colors, push the button.
□Colors are: Soft White, Bright White, Cool White, Daylight, Deluxe Daylight,
Red, Blue, Green, Yellow, Orange, Purple, Teal, and Pink.
□The pathway light will remember the color setting when next turned on.
2
NOTE: When installing product in hard or dry
soil, water the soil several hours beforehand to
make the installation easier. You can also
break up the ground lightly with a stake or a
fork. Don’t force stake into the ground as
excess force can break or bend the stake.
DUSK TO DAWN OPERATION:
The light will automatically turn on at dusk and remain on through the night for 6 hours. The light will remain off throughout the
day, until dusk. NOTE: To make sure this function works properly, always have the switch in the ‘ON’ position (including daytime).
IMPORTANT: Light brightness is determined by the charge
level of the batteries. Brightness will decrease during operation
to extend battery life
AA

WWW.FEIT.COM
5
1 2 3
4 5 6
2hr 4hr 8hr
Timer
Reset
Groups
LOW HIGH
RGB
Operation with Remote (sold separately)
Entering pairing mode
□Hold down the pairing button for 3 seconds. Once the pathway light (AA)
starts to blink slowly it is in pairing mode. The pathway light (AA)
remains in pairing mode for three minutes before timing out.
1
Pairing the remote to the fixture
□While the pathway light (AA) is in pairing mode, press and hold
the desired Groups button (1, 2, 3, 4, 5 or 6) for 3 seconds to pair
the remote to the selected group.
The light will flash once, and the fixture will exit pairing mode.
2
Unpairing the fixture from the remote
□To unpair, first follow step 1 so that the fixture is in pairing mode. Once the fixture is in
pairing mode, on the OneSync remote, press the pairing group button and hold the power
button for 3 seconds. The light will flash once and the fixture will exit pairing mode.
□The light will flash once, and the fixture will exit pairing mode.
□To unpair from all groups at once, hold down button on the OneSync fixture for 10 seconds.
It will flash three times rapidly to indicate that that all groups have been unpaired from the fixture.
3
On/Off
Select Group
Colors Cycle
Brightness
Level Selectable
White Color
Cycle
Set Daily Time
Battery Replacement
Replacing the battery
□To replace the rechargeable battery (B), unscrew the lid screws (4) located
under the light, using a Phillips head screwdriver.
□Replace current lithium-ion battery (B) with a new lithium-ion 18650
2200mAH 3.7V minimum 8.14 Wh only.
Install battery correctly with regard to the polarity (+ and -).
□Reattach (the lid) by lining up the rivet on the inside of the lid with the
corresponding opening on the base (located directly above the On/Off button).
Once lid is resting squarely on the base, insert and tighten the (4) screws
using a Phillips head screwdriver.
1
NOTE: The remote comes equipped with a universal Group #1. To create unique groups, pair using Groups #2-6.
All fixtures are pre-paired to the universal Group #1 so that they will immediately respond with any remote
Group #1 command. To not operate on this universal group, follow the unpairing instructions in Step 3.
Operating with a OneSync remote allows for expanded control. Modify settings of individual OneSync fixtures or multiple fixtures in groups.
The OneSync remote has a 100ft control range and will command all paired fixtures within 100ft of the remote.
All OneSync fixtures are equipped with a signal repeater that will repeat any remote commands to all other fixtures within 100ft. Placing
fixtures within 100ft of at least one other fixture creates a control network and allows for unlimited remote control range, as long as there is a
functioning OneSync fixture within 100ft to relay the command.
B
Example: You can install a OneSync fixture, then another OneSync fixture 100ft away from the first unit. Continue to install 3 more OneSync
fixtures in this way so that the last fixture is 500ft away. Using this relay technology, the remote will control the farthest fixture that is 500ft away.

WWW.FEIT.COM
6
Downloading and installing the Feit Electric app
□Search for the Feit Electric app in the App Store or Google Play Store.
□Download and Install the Feit Electric app on your smart device.
□Connect to a 2.4GHz Wi-Fi network that covers your installation location.
□Follow the instructions in the Feit Electric app & Smart Bridge manual
to pair your OneSync lights.
1
Set up with Smart Bridge
Troubleshooting
Only supports
2.4GHz Wi-Fi
Networks
Feit Electric App
The battery is not fully charged.
The panel is near an external light
source that is inadvertently
triggering the dusk to dawn sensor.
The lights go out too early. The battery charge is low.
Ensure the solar panel is positioned in a
location that provides full and direct
sunlight. If installed in a shady area, the
battery will take a longer time to charge,
and may not fully charge, and reduce
working hours.
Allow the batteries to get a full charge by
powering off the fixture for 1-2 days. Or
relocate the fixture to an area with direct
sunlight. Check panel for dirt, damage, or
light obstruction.
Relocate the panel to an area that does not
have any external light sources or remove
the external light sources from the panel’s
proximity.
PROBLEM POSSIBLE CAUSES CORRECTIVE ACTION
The light will not turn on.
The battery is not making contact.
Loosen the battery cover screws, pull out
the battery cover and inspect the battery
connection. After inspection, reinsert the
battery.

FEIT ELECTRIC COMPANY | PICO RIVERA, CA | www.feit.com
Questions, problems, missing parts?
Before returning to store, visit feit.com/help for further assistance.
Table of contents
Other Feit Electric Outdoor Light manuals

Feit Electric
Feit Electric LV/LANDSCAPE/RGBW/AG User manual

Feit Electric
Feit Electric PATH/SYNC/SOL/BZ/2 User manual

Feit Electric
Feit Electric LAN15/4WY/BLK User manual

Feit Electric
Feit Electric SYNC/PLUG/REM User manual

Feit Electric
Feit Electric SL20-10/SOL/V1 User manual

Feit Electric
Feit Electric onesync SPOT/PANEL/SYNC User manual

Feit Electric
Feit Electric LAN11RND/SYNC/BZ User manual

Feit Electric
Feit Electric S15CWPK/850/BZ User manual