SMART SN TRANSMITTER – OPERATING INSTRUCTIONS
MU2B-0328GE51 R0207A
8
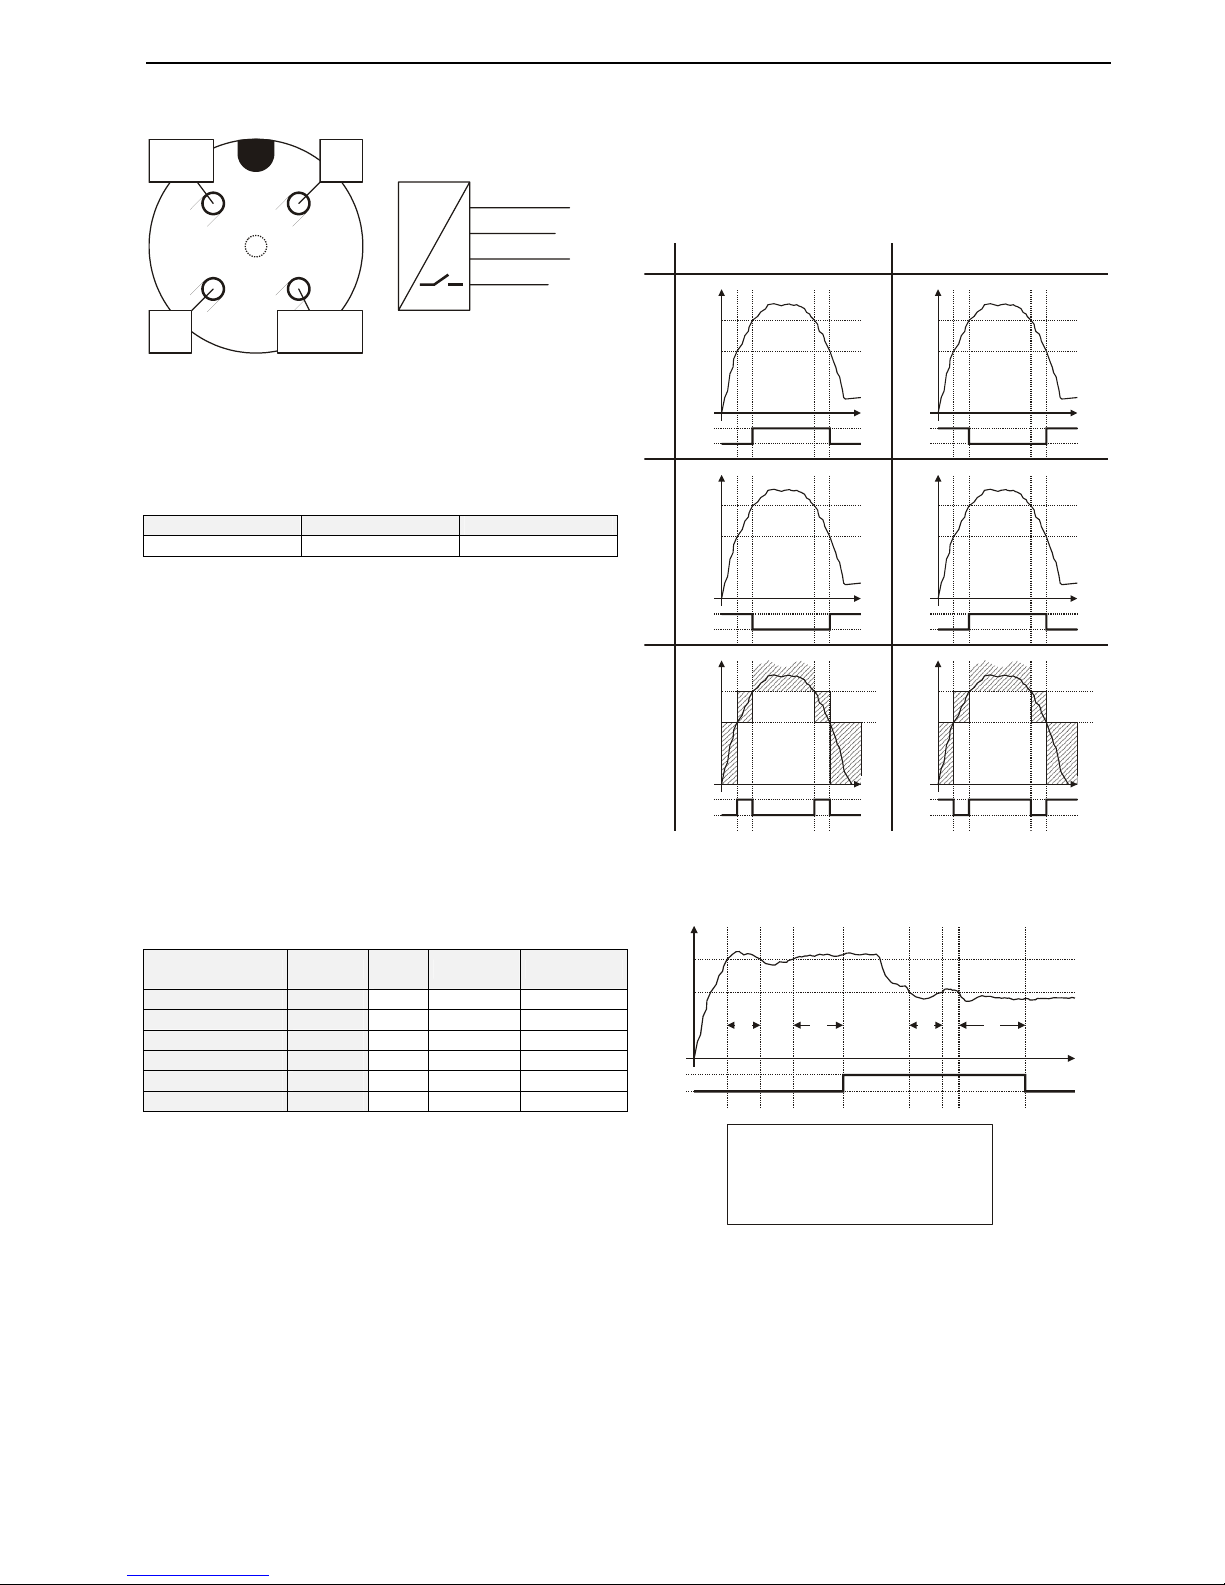
Where
y
n
is the analog output value
x
n
is the measured offset-compensated pressure in this
cycle
y
n-1
is the analog output value generated in the previous
cycle
PEAKS
Here, you can view the historical max. and min. measured
pressures as well as the max. measured temperature
(historical = measured since the device has been put into
operation / since the last time the peaks were cleared).
If desired, by proceeding to "Clear" and choosing "yes," you
can also permanently erase all such values. All such peaks
will then be erased and the recording of peaks will be re-
initiated.
DISPLAY
Here, you can select/alter various modes of displaying screen
information.
UNIT
Here, you can choose the units in which the device displays
pressures:
•bar: All pressures will be displayed in bars.
•Pa: All pressures will be displayed in Pascals.
•Psi: All pressures will be displayed in pounds / in
2
.
The default setting is "bar".
LANGUAGE
English is the only supported language.
BACKLIGHT
Here, you can select how the device's screen backlight
should operate:
•Always: The backlight will remain ON at all times.
•Demand: The backlight will come ON whenever the
device's keys are operated, and remain ON for 25 sec.
•Never: The backlight is shut OFF permanently.
The default setting is "Never"
NOTE: The only backlight option supported by the SN 2-
Wire Transmitter is "Never."
REFRESH
Here, you can set how often (in seconds) the screen contents
should be refreshed (i.e. refilled with freshly-measured data).
Possible values range from 1 to 9 seconds.
The default setting is "1" sec.
ROTATE
Here, you can permanently rotate (by 0°, 90°, 180°, or 270°)
the orientation in which the screen's contents are displayed.
This is for easier viewing / enhanced legibility.
The default setting is "0" degrees (i.e. screen contents vertical
when device mounted in upright position).
CONTRAST
Here, you can choose the degree of contrast with which the
screen's contents are displayed:
•Min.: The contrast is decreased to its minimum value;
•Mean: The contrast is set to its mean value;
•Max.: The contrast is increased to its maximum value.
The default setting is "Mean".
EXTRAS
SIMUL. (= SIMULATION MODE)
The simulation mode allows the user to test the device within
the application without actually applying pressure.
When the simulation mode is initiated, the device's diagnostic
features are not active, and use of the device in an active
safety application is impossible.
After leaving the simulation mode and returning to the normal
operating mode, the device is again ready for use in safety
applications.
•Yes: The simulation mode is started.
•No: The device remains in its normal operating mode.
The default setting is "No".
WARNING
After you have completed testing in the simulation mode, do
not forget to return to this screen and re-instate the active
operating mode.
SET CODE
Here, you can change the ENTRY CODE. After leaving the
PARAMETRIZATION LEVEL and proceeding through the
CONFIRMATION LEVEL, the new ENTRY CODE will then be
in effect.
RESET
Here, you can re-instate all factory (i.e. default) settings:
•Yes: All factory settings are re-instated.
•No: currently-set values are retained.
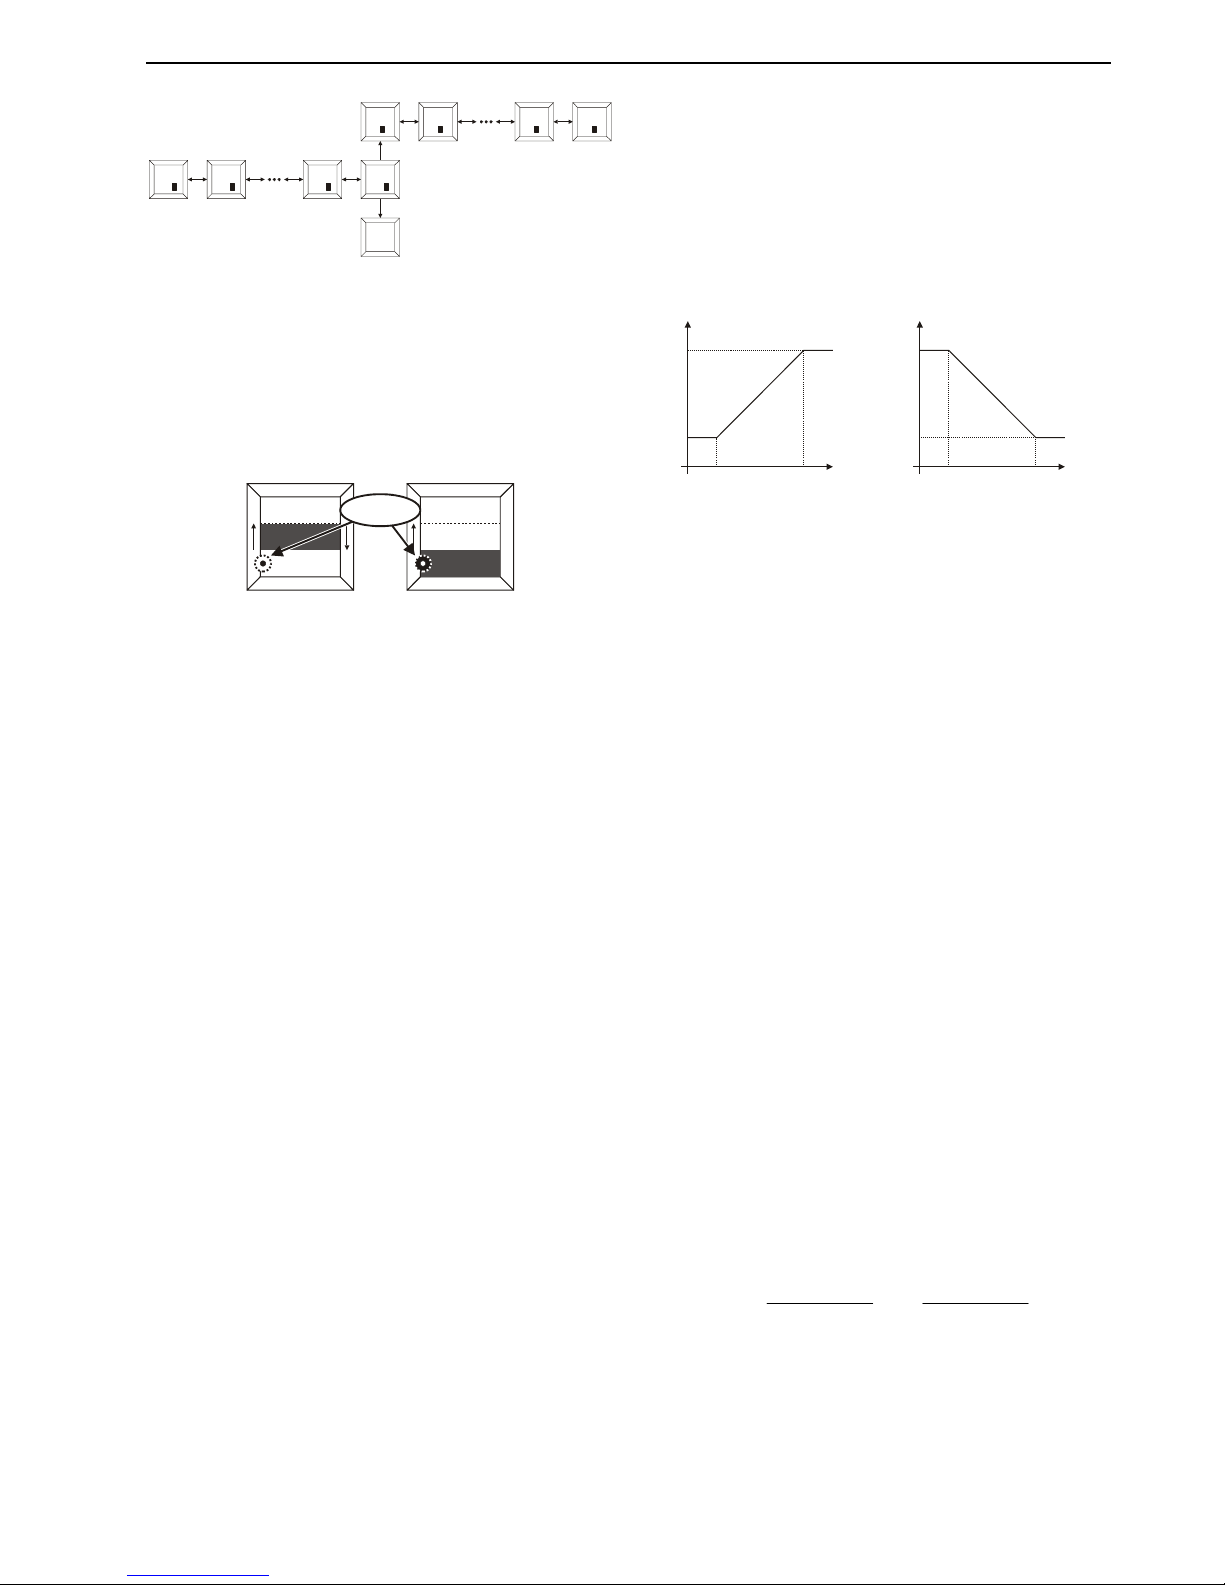
PLAUSIBILITY CHECK
Upon attempting to leave the PARAMETRIZATION LEVEL,
the device will perform two checks to determine the
plausibility of your values.
ERROR MESSAGE: "MIN. DISTANCE BETW. START-PT. AND
END-PT. IS 50% FS. PLEASE CORRECT PARAMS"
The difference between the set-point and the reset-point will
be checked. If the distance is too small (i.e. less than 50% of
the full-scale), this error message will appear.
ERROR MESSAGE: "OFFSET MUST BE BETWEEN -25%FS &
+25%FS. PLEASE CORRECT"
The offset will also be checked. If the offset is not within 25%
of the full-scale, this error message will appear.
CONFIRMATION LEVEL
Here, you have the opportunity of once again viewing all of
the device's settings (including any changes you may have
made) in a quick overview. If you reject any settings, you will
be automatically redirected to the PARAMETRIZATION
LEVEL. If you accept all settings, these values will be
permanently stored, and you will be automatically redirected
to the DISPLAY LEVEL.
IMPORTANT
You should be completely satisfied with the correctness of the
settings displayed in the CONFIRMATION LEVEL. As soon
as you complete the CONFIRMATION LEVEL, all of these
settings will become effective.