FERREX F-APS3000 User manual

User Manual
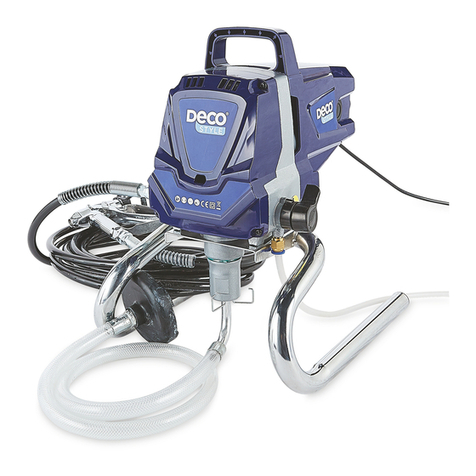
PAINT SPRAY STATION
F-APS3000
support@scheppach.com.au
MODELL:
F-APS3000 10/2023
828141
AFTER SALES SUPPORT
1300 855 831
AU
Made in China
FERREX® is a registered trademark of ALDI Stores
DISTRIBUTED BY:
ALDI STORES
1 SARGENTS ROAD
MINCHINBURY NSW 2770
www.aldi.com.au
ALDI GUARANTEES THAT OUR EXCLUSIVE BRAND PRODUCTS ARE DEVELOPED TO
OUR STRINGENT QUALITY SPECIFICATIONS. IF YOU ARE NOT ENTIRELY SATISFIED
WITH THIS PRODUCT, PLEASE RETURN IT TO THE NEAREST ALDI STORE WITHIN
60 DAYS FROM THE DATE OF PURCHASE, FOR A FULL REFUND OR REPLACEMENT,
OR TAKE ADVANTAGE OF OUR AFTER SALES SUPPORT BY CALLING THE
SUPPLIER’S CUSTOMER SERVICE HOTLINE.
3
Contents
Dok./Rev.-Nr. 828141_20230525
Content .............................................................................................3
Package contents/part list ........................................................... 6
Introduction.................................................................................... 9
Layout .............................................................................................10
Scope of delivery............................................................................11
Intended use...................................................................................11
General safety warnings...............................................................11
Technical data................................................................................19
Unpacking......................................................................................21
Working procedures.....................................................................21
Before use ..................................................................................... 23
Use.................................................................................................. 24
Cleaning and care.........................................................................27
Electrical connection................................................................... 29
Disposal and recycling .................................................................31
Troubleshooting............................................................................32
AU
YEARS
WARRANTY
5
Translation of original instruction manual

54
H
8
G
5
18
A
1235
4
7
6
8
9
10
111213
1415
B C
16
5
15
17
D E F
I
J K
21
20
19
26
25
23
24
22
29
27
14
28
6
Package contents/part list
11 x Paint Spray Station (Main Unit)
21 x High Pressure Pipe
31 x Gun Body
41 x Filter Element (1 x pre-assembled)
52 x Nozzle (311/517)
62 x Screw (3,5/9,5 mm)
71 x Instruction Manual
81 x Warranty card

7
Explanation of the symbols on the device
Caution - Read the operating instructions to reduce the risk of inquiry!
Wear ear-muffs. The impact of noise can cause damage to hearing.
Wear a breathing mask. Dust which is injurious to health can be generated
when working on wood and other materials.
Wear safety goggles. Sparks generated during working or splinters, chips and
dust emitted by the device can cause loss of sight.
Wear protective gloves.
Wear non-slip, conductive safety shoes.
Wear protective clothing.
Warning! Before installation, cleaning, alterations, maintenance, storage and
transport switch off the device and disconnect it from the power supply.

8
Made in China
Complies with the Australian norms and standards.

Introduction
9
1. Introduction
Congratulations on choosing to buy a FERREX®product.
All products brought to you by FERREX®are manufactured to the highest standards
of performance and safety, and as part of our philosophy of customer service and
satisfaction, are backed by our comprehensive 5 Years Warranty.
We hope you will enjoy using your purchase for many years to come.
Note:
According to the applicable product liability law the manufacturer of this device is
not liable for damages which arise on or in connection with this device in case of:
• improper handling,
• non-compliance with the instructions for use,
• repairs by third party, non-authorised skilled workers,
• installation and replacement of non-original spare parts,
• improper use,
• failures of the electrical system due to the non-compliance with the electrical spec-
ifications and regulations.
Recommendations:
Read the entire text of the operating instructions prior to the assembly and opera-
tion of the device.
These operating instructions are intended to make it easier for you to get familiar
with your device and utilise its intended possibilities of use.
The operating instructions contain important notes on how to work safely, properly
and economically with your machine and how to avoid dangers, save repair costs,
reduce downtime, and increase the reliability and working life of the machine.
In addition to the safety regulations contained herein, you must in any case comply
with the applicable regulations of your country with respect to the operation of the
machine.
Put the operating instructions in a clear plastic folder to protect them from dirt and
humidity, and store them near the machine. The instructions must be read and care-
fully observed by each operator prior to starting the work. Only persons who have
been trained in the use of the machine and have been informed on the related dan-
gers and risks are allowed to use the machine. The required minimum age must be
met.

10
Layout (Fig. A)
In addition to the safety notes contained in the present operating instructions and
the special regulations of your country, the generally recognised technical rules for
the operation of identically constructed machines must be observed.
2. Layout (Fig. A)
1. Return hose
2. Suction hose
3. Pressure regulator
4. Storage compartment for nozzles and filters
5. Nozzle
6. Safety catch
7. Paint spray gun
8. Handle
9. Trigger
10. Connecting thread
11. HEA filter
12. High-pressure hose
13. Function switch (SPRAY/PRIME)
14. Connecting thread
15. Intake filter
16. Valve trigger
17. Filter plate
18. Plastic ring
19. Holder
20. Nozzle chamber
21. Nozzle holder
22. Spring
23. Washer
24. Ball
25. O-ring
26. Inlet valve
27. Fastening screw
28. Hex screw
29. Hose clips

Scope of delivery
11
3. Scope of delivery
• 1x Paint Spray Station (Main Unit)
• 1x High Pressure Pipe
• 1x Gun Body
• 1x Filter Element (1 x pre-assembled)
• 2x Nozzle (311/517)
• 2x Screw (3,5/9,5 mm)
• 1x Instruction Manual
• 1x Warranty Card
4. Intended use
This appliance is designed for painting indoor walls as well as outdoor objects.
Permissible materials for use include:
• water-based paints and varnishes.
Do not use for:
• Flammable coatings, materials containing acetone or nitro thinners,
• Materials that contain highly abrasive components,
• Facade paint, lyes and acidic coating materials.
Do not use the appliance in areas where there is a risk of explosion. Any other usage
or modification of the appliance is deemed to be improper and carries a significant
risk of accidents. The manufacturer accepts no responsibility for damage(s) resulting
from improper usage. This appliance is intended for domestic use only.
5. General safety warnings
mWARNING: Read all safety warnings, instructions, illustrations and
specifications provided with this power tool. Failure to follow all instruc-
tions listed below may result in electric shock, fire and/or serious injury.
Save all warnings and instructions for future reference.
The term “power tool” in the warnings refers to your mains-operated
(corded) power tool or batteryoperated (cordless) power tool.

12
General safety warnings
1. Work area safety
a) Keep your work area clean and well-lit. Cluttered or dark areas
invite accidents.
b) Do not operate power tools in explosive atmospheres, such as
in the presence of flammable liquids, gases or dust. Power tools
create sparks which may ignite the dust or fumes.
c) Keep children and bystanders away while operating a power
tool. Distractions can cause you to lose control.
2. Electrical safety
a) Power tool plugs must match the outlet. Never modify the plug
in any way. Do not use any adapter plugs with earthed (ground-
ed) power tools. Unmodified plugs and matching outlets will re-
duce risk of electric shock.
b) Avoid body contact with earthed or grounded surfaces, such as
pipes, radiators, ranges and refrigerators. There is an increased
risk of electric shock if your body is earthed or grounded.
c) Do not expose power tools to rain or wet conditions. Water enter-
ing a power tool will increase the risk of electric shock.
d) Do not abuse the cord. Never use the cord for carrying, pulling
or unplugging the power tool. Keep cord away from heat, oil,
sharp edges or moving parts. Damaged or entangled cords in-
crease the risk of electric shock.
e) When operating a power tool outdoors, use an extension cord
suitable for outdoor use. Use of a cord suitable for outdoor use re-
duces the risk of electric shock.
f) If operating a power tool in a damp location is unavoidable, use
a residual current device (RCD) protected supply. Use of an RCD
reduces the risk of electric shock.
3. Personal safety
a) Stay alert, watch what you are doing and use common sense
when operating a power tool. Do not use a power tool while you
are tired or under the influence of drugs, alcohol or medication.
A moment of inattention while operating power tools may result in
serious personal injury.

General safety warnings
13
b) Wear personal protective equipment and always safety goggles.
Protective equipment such as a dust mask, non-skid safety shoes,
hard hat or hearing protection used for appropriate conditions will
reduce personal injuries.
c) Preventunintentionalstarting.Ensuretheswitchisintheoff-po-
sition before connecting to power source and/or rechargeable
battery, picking up or carrying the tool. Carrying power tools with
your finger on the switch or energising power tools that have the
switch on invites accidents.
d) Remove any adjusting key or screwdriver before turning the
power tool on. A wrench or a key left attached to a rotating part of
the power tool may result in personal injury.
e) Do not overreach. Keep proper footing and balance at all times.
This enables better control of the power tool in unexpected situa-
tions.
f) Dress properly. Do not wear loose clothing or jewellery. Keep
your hair and clothing away from moving parts. Loose clothes,
jewellery or long hair can be caught in moving parts.
g) If devices are provided for the connection of dust extraction and
collection facilities, ensure these are connected and properly
used. Use of dust collection can reduce dust-related hazards.
h) Do not let familiarity gained from frequent use of tools allow
you to become complacent and ignore tool safety principles. A
careless action can cause severe injury within a fraction of a second.
4. Power tool use and care
a) Do not force the power tool. Use the correct power tool for your
application. The correct power tool will do the job better and safer
at the rate for which it was designed.
b) Do not use the power tool if the switch does not turn it on and
off. Any power tool that cannot be controlled with the switch is dan-
gerous and must be repaired.
c) Disconnect the plug from the power source and/or remove the
battery pack, if detachable, from the power tool before making
any adjustments, changing accessories, or storing power tools.
Such precautionary measures reduce the risk of starting the power
tool accidentally.

14
General safety warnings
d) Store idle power tools out of the reach of children and do not al-
low persons unfamiliar with the power tool or these instructions
to operate the power tool. Power tools are dangerous in the hands
of untrained users.
e) Maintain power tools and accessories. Check for misalignment
or binding of moving parts, breakage of parts and any other
condition that may affect the power tool’s operation. If dam-
aged, have the power tool repaired before use. Many accidents
are caused by poorly maintained power tools.
f) Keep cutting tools sharp and clean. Properly maintained cutting
tools with sharp cutting edges are less likely to bind and are easier
to control.
g) Use electric tools, insertion tools, etc. according to these instruc-
tions. taking into account the working conditions and the work
to be performed. Use of the power tool for operations different from
those intended could result in a hazardous situation.
h) Keep handles and grasping surfaces dry, clean and free from oil
and grease. Slippery handles and grasping surfaces do not allow for
safe handling and control of the tool in unexpected situations.
5. Service
a) Only have your electric tool repaired by qualified specialists and
only with original spare parts. . This will ensure that the safety of
the power tool is maintained.
Additional safety instructions
• RISK OF EXPLOSION AND FIRE! Make sure there are no ignition sourc-
es in the vicinity. There is a risk of explosion due to the potential
formation of an explosive atmosphere in combination with ignition
sources (e.g. by electrostatic discharge, electric sparks, hot surfac-
es)!
• RISK OF INJURY! DUE TO MISUSE! Do not point the appliance towards
people or animals.
• RISK OF EXPLOSION/FIRE! SMOKING PROHIBITED! Do not cause any
sparks or ignite a naked flame. Make sure there are no ignition
sources in the vicinity, such as open fires, smoking cigarettes, cigars
and tobacco pipes, sparks, glowing wires, hot surfaces, etc.
• WARNING! Keep your distance from the nozzle tip!

General safety warnings
15
• Do not spray yourself, other people or animals. Keep your hands
and other body parts out of the spray jet. If the spray jet pierces
your skin, seek medical assistance immediately. The sprayed mate-
rial can even penetrate through a glove and into the skin and thus
into your body.
• Do not treat an injection wound as a simple cut. A high-pressure jet
can inject toxins into the body and cause serious injuries (e.g. necro-
sis, loss of limbs). In the event of a chemical penetration of the skin,
seek medical assistance immediately.
• Before each use, the following points must be observed in accord-
ance with the operating instructions:
1. Do not use an appliance if it is faulty.
2. Secure the hand spray gun against accidental activation using
the safety catch on the trigger.
3. Ensure earthing – The connection must be made via a properly
earthed safety socket (Schuko).
4. Check the maximum permissible operating pressure of the
high-pressure hose and spray gun.
5. Check all connections for leaks.
• Strictly follow the instructions on regular cleaning and maintenance
of the appliance. Observe the following rules before carrying out
any work on the appliance and at every work break:
1. Depressurise the spray gun and the high-pressure hose.
2. Secure the hand spray gun against accidental activation using
the safety catch on the trigger.
3. Switch off the appliance.
• Do not use the appliance in areas that fall under the explosion pro-
tection ordinance.
• Keep your work area clean, well lit and free of paint and solvent
containers, cloths and other inflammable materials. Possible risk of
spontaneous combustion. Make sure you have functional fire extin-
guishers available at all times.
• Do not spray or clean with materials whose ignition point is lower
than 21°C. Use waterbased materials, non-volatile hydrocarbons or
similar materials. The evaporation of volatile solvents will cause an
explosive environment.

16
General safety warnings
• Do not spray near ignition sources such as static electric sparks,
open flames, ignition flames, hot items, motors, cigarettes or sparks
caused by plugging in/unplugging power cables or by operating
switches. These kinds of ignition sources could ignite a fire in the
environment.
• Do not spray any material if you do not know whether it is potential-
ly dangerous. Unknown materials can cause hazards.
• To avoid potential risks, damaged mains cables should be replaced
by the manufacturer, their customer service department or some-
one similarly qualified.
• Wear additional personal protective equipment such as suitable
gloves and a protective mask/respirator when spraying or when
handling chemicals. Wearing appropriate protective equipment for
the conditions reduces your exposure to dangerous substances.
• Be aware of the potential hazards of the sprayed material. Follow
the markings on the container and the manufacturer’s information
on the spray material you are using, including the instructions to
use personal protective equipment. Follow the manufacturer’s in-
structions to reduce the risk of fire and injuries caused by poisons,
carcinogens, etc.
• The spray gun must not be used for spraying flammable substanc-
es. Do not clean spray guns with flammable solvents.
• Secure the appliance and the spray gun.
• Secure all hoses, connections and filter parts before starting up the
spray pump. Unsecured parts can come loose with great force or
fluid can escape at high pressure, causing serious injury. Always se-
cure the spray gun when assembling or disassembling the nozzle
and during any breaks in work.
• Be prepared for recoil from the spray gun during operation. At high
operating pressure, pulling the trigger causes a recoil force of up to
15 N. If you are not prepared for this, your hand may be pushed back
or you may lose your balance. This can lead to injuries. Continuous
exposure to this recoil can lead to permanent damage to health.
• Max. operating pressure: the permissible operating pressure for the
spray gun, high-pressure hose and spray gun accessories must not
be less than the maximum operating pressure of 110 bar (11 MPa)
indicated on the appliance.

General safety warnings
17
• The appliance must be connected via a properly earthed safety
socket (Schuko). The connection must be equipped with a residual
current device INF ≤ 30 mA.
• Make sure that the mains supply being connected corresponds to
the values indicated on the type plate.
• Before carrying out any work on the appliance, relieve the pressure
and disconnect the mains plug from the socket.
• You must earth the object that you are intending to spray!
• Observe the user manual when installing, maintaining and repair-
ing the appliance.
• The appliance must be earthed during installation.
• Ensure adequate ventilation in the spray area and sufficient fresh
air in the entire room. Wear a mask!
• Always wear suitable safety goggles to keep hazardous vapours
and liquids away from your eyes.
• Wear protective clothing to keep paint away from your skin and hair.
• WARNING! Under certain circumstances, the flow rate of the coating
material may cause electrostatic charges to occur on the appliance
during spraying. They can cause sparks or flames when discharged.
Therefore, make sure that the appliance is always earthed via the
electrical installation. The connection must be made via a properly
earthed safety socket (Schuko).
• Pay attention to the hazards that may be caused by the sprayed
substance and also observe the labels on the containers or the in-
structions given by the manufacturer of the substance.
• When working indoors: Ensure that no vapours containing solvents
form in the area around the appliance. Place the appliance on the
side facing away from the spray object. Keep a minimum distance of
5 m between the motor unit and the spray gun
• WARNING! When working outdoors: Do not allow vapours containing
solvents to drift towards the appliance. Pay attention to the wind
direction! Position the appliance so that no vapours containing sol-
vents can reach and build up around the appliance. Keep a mini-
mum distance of 5 m between the appliance and the spray gun.
• There is a risk of a short-circuit if water penetrates the appliance!
Never clean the appliance with a high-pressure or steam cleaner.

18
General safety warnings
• Do not use a solvent container with a small opening to clean the ap-
pliance. An explosive atmosphere could form. Earth the container
beforehand.
Safety instructions for the high-pressure hose
• Caution: Risk of injury from injection! Leaks can develop in the
high-pressure hose due to wear, kinking and improper use. Fluid
from the leak can be injected into the skin.
• The electrostatic charge from the spray gun and high-pressure hose
is discharged via the high-pressure hose.
• Check the high-pressure hose thoroughly before each use.
• Never pull on the high-pressure hose to move the appliance.
• Never try to repair a defective high-pressure hose yourself!
• Replace a damaged high-pressure hose immediately.
• Avoid sharp bending or kinking; the smallest bending radius is
about 20 cm.
• Protect the high-pressure hose from sharp objects and edges.
• Never twist the high-pressure hose.
• Do not immerse the high-pressure hose in solvent. Wipe the outside
only with a soaked cloth.
• Route the high-pressure hose so that there is no risk of tripping.
• Do not drive over the high-pressure hose.
• NOTE: The risk of damage increases with old highpressure hoses. We
recommend replacing the high-pressure hose every 6 years.
RESIDUAL RISKS
When using the tool, additional residual risks may occur that are not list-
ed in the enclosed safety instructions. These risks can arise from mis-
use, prolonged use, etc.
Even if you follow the relevant safety regulations and use safety equip-
ment, certain resi ual risks cannot be avoided. These include:
• Lung damage, if no suitable breathing protection is worn;
• Hearing damage, if hearing protection is not worn;
• Eye damage, if suitable eye protection is not worn;
• Damage to health due to swinging of your hands and arms during
prolonged operation of the appliance or if the appliance is not prop-
erly held or maintained. If you use an appliance for a long period of
time, take regular breaks.

Technical data
19
WARNING! HAZARDS CAUSED BY MATERIALS AND SUBSTANCES
• There is a risk of coming into contact with or absorbing coating ma-
terials and/or cleaning fluids. There is also a risk of inhaling vapours
from liquids. This can cause permanent damage under certain con-
ditions.
• Always wear personal protective equipment when working on the
appliance!
• Ensure sufficient technical or natural ventilation.
• Follow the manufacturers’ safety instructions for the respective
coating materials and cleaning liquids.
• If you experience any symptoms, seek medical advice!
6. Technical data
Rated voltage 230 V~50 Hz
Motor rating W 550 W
Max. paint ow rate 1250 ml/min
Max. working pressure ca. 110 bar
Max. temperature of coating
material 40 °C
Protection class I
Protection rating IPX3
Weight ca. 7,8 kg
Subject to technical modifications!
The noise emission values were measured in accordance with EN 14462 .
Wear hearing protection.
The effects of noise can cause a loss of hearing.

20
Technical data
Noise data
sound pressure level LpA 78,4 dB
uncertainty KpA 2,5 dB
sound power level LWA 91,2 dB
uncertainty KWA 2,5 dB
mWarning: Noise can have serious effects on your health. If the machine noise ex-
ceeds 85 dB, please wear suitable hearing protection.
Wear hearing protection.
The effects of noise can cause a loss of hearing. Keep the noise level and vibration
to a minimum!
• Only use faultless devices.
• Maintain and clean the device at regular intervals.
• Adapt your working methods to the device.
• Do not overload the device.
• Have the device checked if necessary.
• Switch the device off if it is not in use.
Vibraion data
Total vibration value of the handle ah<2,5 m/s²
uncertainty K 1,5 m/s²
• The vibration emission values and the noise emission values given in these in-
structions have been measured in accordance with a standardised test procedure
and can be used for comparison of the power tool with another tool.
• The specified total vibration values and the noise emission values can also be used
to make a provisional load estimate.
• Depending on the manner in which the power tool is being used, and in particu-
lar the kind of workpiece being worked, the vibration and noise emission values
can deviate from the values given in these instructions during actual use of the
power tool.

Unpacking
21
Try to keep the vibration load as low as possible. Measures to reduce the vibration
load are, e.g. wearing gloves and limiting the working time. Wherein all states of
operation must be included (e.g. times when the power tool is switched off and times
where the power tool is switched on but running without load).
7. Unpacking
• Open the packaging and carefully remove the product.
• Remove the packaging material, as well as the packaging and transport safety de-
vices (if present).
• Check whether the scope of delivery is complete.
• Check the product and accessory parts for transport damage. In the event of com-
plaints the carrier must be informed immediately. Later claims will not be recog-
nised.
• If possible, keep the packaging until the expiry of the warranty period.
• Familiarise yourself with the product by means of the operating manual before us-
ing for the first time.
• With accessories as well as wearing parts and replacement parts use only original
parts. Spare parts can be obtained from your specialist dealer.
• When ordering please provide our article number as well as type and year of man-
ufacture for the product.
mWARNING!
The product and the packaging material are not children‘s toys! Do not let chil-
dren play with plastic bags, films or small parts! There is a danger of choking
or suffocating!
8. Working procedures
Material and paint selection
mATTENTION! Do not use textured wall paints or coatings as this will block the
spray gun tip and damage internal components of the airless spray station.
Material and paints which can be used
Although a large number of materials and paints can be sprayed, some cannot.
Please check with the manufacturers’ recommendations.

22
Working procedures
The following materials and paints can be used:
• Water based paints
• Wood preservatives
• Oil based paints
• Primers
• Enamel paint
• Wash primer
• Varnish
• Oil
• Stains
Materials and paints which cannot be used
The use the following materials and paints will cause premature wear and block the
spray tip. This will void warranty.
• Paints and lacquers containing heavily abrasive components such as
• Exterior textured wall paints
• Dispersion paints
• Glazes
• Caustic and alkaline substances
• Lyes
• Textured coating
• Acids
• Emulsion paints
• Silicate paints
• Flammable materials
NOTE:
• Ensure that the spray material and thinning agent are compatible. Using an un-
suitable thinning agent may cause clots that clog the appliance.
• To find out which thinning agent is suitable for your spray material (water, paint
thinner), refer to the manufacturer’s notes provided with the spray material.
• Granular products and products containing solids must not be sprayed. Their abra-
sive effect will shorten the service life of the appliance.
Preparing the spray surface
• WARNING! Risk of electric shock due to penetrating spray material! Be sure to mask
any sockets and switches.

Before use
23
• Cover any surfaces around the spray area extensively and thoroughly. Any surface
that is not masked could become contaminated.
• Make sure that the spray surface is clean, dry and free of grease.
• Polished surfaces should be lightly sanded and the sanding dust removed.
Spraying technique
• Always hold the paint spray gun at the same distance and at a right angle to the
object. The ideal spraying distance is approx. 20–25 cm. Move the paint spray gun
evenly with your whole arm.
• Determine the appropriate settings in each case by experimenting, e.g. on a piece
of cardboard.
• Do not switch the appliance on/off above the spray area, but start and stop the
spraying process approx. 10 cm outside the spray area.
9. Before use
Assembly
You can assemble the appliance using two adjustable spanners (not supplied). Alter-
natively, you can also use a 16 mm and 19 mm wrench (not supplied).
High-Pressure hose connection (Fig. A, B)
1. Fit the high-pressure hose (12) into the connecting thread (14) on the appliance.
Tighten the nut using an adjustable spanner. Counter the nut of the connection
thread with a second adjustable spanner.
2. Fit the other end of the high-pressure hose to the connecting thread (14) of the
paint spray gun. Tighten the nut using an adjustable spanner. Counter the nut of
the connection thread of the paint spray gun with a second adjustable spanner.
Suction Hose and Return hose connection
The suction hose and return hose are pre-assembled on the machine.
1. If the suction hose or return hose needs to be changed, use a flat head screw-
driver (not included) to loosen the screw on the hose clamp suction hose mesh
filter, hose clamp suction hose inlet port, hose clamp return hose inlet port and
remove the hose.
2. Replace by a new hose (suction hose / return hose) and mount it in the opposite
direction.

24
Use
Selecting/changing the nozzle (Fig. G)
Nozzle 311: low viscosity spray material
Nozzle 517: viscous spray material
Insert the corresponding nozzle (5) with the arrow tip in the spraying direction into
the nozzle chamber (20).
Replacing HEA filter (Fig. C)
WARNING! The system must be depressurised in order to carry out the following
work. To do this, follow the instructions in the section „Depressurising the appliance“.
1. Remove the high-pressure hose (12) from the paint spray gun (7).
2. Turn the handle (8) clockwise until the upper end can be detached from the
paint spray gun (7). You can attach an adjustable spanner to the lower end of
the handle to help.
3. Insert the appropriate filter (11) for the installed nozzle (5).
4. Turn the handle (8) anticlockwise back into the thread of the paint spray gun (7).
NOTE Clean the filters (11) regularly and replace them, if necessary. You can obtain
replacement filters from the service hotline given in the section „Service“.
10. Use
1. Place the suction hose (2) and return hose (1) in the paint bucket.
2. Press the valve trigger (16) to ensure that the valve is free of any blockages (see
Fig. D).
3. Insert the plug into a mains power socket.
4. Turn the function switch (13) to the horizontal position (PRIME).
5. Turn the pressure regulator (3) to position 2 to ensure that the paint is pumped
through the system.
6. Wait until the paint runs through the return hose (1) back into the
paint bucket. Turn the pressure regulator (3) to position 0 (off).
NOTE If no paint comes out, follow the measures described in the section „Elimi-
nating suction problems“.
7. Turn the function switch (13) to the vertical position (SPRAY).
8. Turn the pressure regulator (3) to a level corresponding to the viscosity of the
sprayed material.
9. Hold the paint spray gun (7) over an empty container.
Table of contents
Other FERREX Paint Sprayer manuals
