Fervi 443 User manual

OPERATION AND
MAINTENANCE MANUAL
Multi
-
function soldering gun
Art. 0443
TRANSLATION OF THE ORIGINAL INSTRUCTIONS
fervi.com

HARDWARE
Page
2
of
10
PREFACE
Please ensure you have read this manual before any
operation
TRANSLATION OF THE ORIGINAL INSTRUCTIONS
It is compulsory
to read this instruction manual before starting operation. The guarantee of
smooth operation and full performance of the product is highly dependent on the application
of all the instructions contained in this manual.
Operator Qualifications
The wor
kers responsible for using this object must have all the necessary information,
education and receive adequate training regarding safety, including:
a)
Conditions of use for the equipment;
b)
Foreseeable abnormal situations, pursuant to Article 73 of Legislative
Decree
81/08.
We guarantee the product's conformity to specifications and technical instructions
described in the Manual on the date of issue, listed on this page; however, the product
may be subject to potentially major technical changes in the future
, without the
Manual being updated.
Therefore, contact FERVI for information about modifications that may have been
implemented.
REV. 2
November
2013
fervi.com

HARDWARE
Page
3
of
10
CONTENTS
1
PRECAUTIONS WITH REG
ARD TO ELE
CTRIC SHOCKS
................................
4
1.1
Technical Assistance
................................
................................
................................
.....
4
2
DESCRIPTION OF THE S
OLDERING GUN AND INT
ENDED USE
...................
5
2.1
Technical specifications
................................
................................
................................
6
2.2
Identification plate
................................
................................
................................
.......
6
3
IMPROPER USE AND CON
TRAINDICATIONS
................................
..............
7
4
HOW TO USE
................................
................................
.............................
8
4.1
Switching on and off
................................
................................
................................
.....
8
4.2
Using the solderi
ng gun
................................
................................
................................
8
5
MAINTENANCE AND CLEA
NING
................................
................................
.
9
6
EXPLODED VIEW AND SP
ARE PARTS
................................
.......................
10
fervi.com

HARDWARE
Page
4
of
10
1
PRECAUTIONS WITH REG
A
RD TO ELECTRIC
SHOCKS
1.1
Technical Assista
nce
For any problem or request for clarification, please do not hesitate to contact the support
service of the retailer from whom you purchased the product.
Risks associated with electric shocks
Check that the power plug is disconnected before touching live parts.
Make sure the power supply complies with the machine's required voltage and frequency
requirements.
DO NOT use different
types of power supplies.
DO NOT spray or pour water on the unit.
DO NOT cool the tip in water.
In case of contact with water, immediately unplug the power supply.
Avoid using the disassembled unit.
For repairs, contact Customer Support.
fervi.com

HARDWARE
Page
5
of
10
2
DESCRIPTION OF THE S
OLDERING GUN AND
INTENDED USE
The
Multifunction soldering gun (Art. 0443)
is
an device for soldering electronic circuits
with tin wire.
Given the possibility to modulate the operating temperature, the device can also be used for
pyrography, and the welding or cutting of plastic parts.
The device is powered by the mains power supp
ly 230 V/50 Hz.
The soldering gun is made up of the following parts (see Figure 1):
Figure
1
-
General view and main parts
1
Power cable
2
Gun handle
3
Trigger switch
4
Soldering tip
5
LED light
6
Central body with cooling slits
7
Temperature adjustment knob
4
6
5
3
2
1
7
fervi.com

HARDWARE
Page
6
of
10
2.1
Technical specifications
Power voltage (V) / frequency (Hz)
230 AC / 50
Maximum power (W)
200W
Protection class
II
Soldering temperature (°C)
Range A:
70
-
200
Range B:
200
-
350
Range C:
35
0
-
500
2.2
Identification plate
Figure
2
–
Identification plate
fervi.com

HARDWARE
Page
7
of
10
3
IMPROPER USE AND CON
TRAINDICATIONS
THE FOLLOWING IS STRICTLY PROHIBITED!
Using the device on a surface that is unstable or that is susceptible to being damaged
by heat or is easily flammable;
Resting the soldering gun in such a way that the tip touches or is close to a heat
-
sensitive surface;
Allowing the appliance to be used by untrained personnel and those who have not read
the instruction manual;
Using the de
vice in uncontrolled climatic conditions, humid or dusty environments, in
potentially explosive atmospheres;
Using the soldering gun for a long period of time;
Using the soldering gun in the presence of children;
Replacing the tips, performing inspections
and maintenance without disconnecting the
power plug and when still hot;
Modifying and/or tampering with the device;
Using power sources other than those prescribed;
Throwing water on the device and/or touch it with wet hands.
When not in use the soldering
gun should be resting in such a way that the tip does not
touch heat
-
sensitive objects.
Burns
Be careful when holding the soldering gun, not to touch the tip when still hot. You could burn
yourself !
fervi.com

HARDWARE
Page
8
of
10
4
HOW TO USE
4.1
Switching on and off
Switching on
and off is achieved by inserting (and removing)
the plug into/from a mains socket 230 V / 50 Hz. To remove
the plug, hold it by the body and never pull the cord (see
Figure 3).
Figure
3
–
Removing the
plug
4.2
Using the soldering
gun
Before soldering, clean the parts to be soldered.
Press the trigger switch to heat the tip (when pressing the
switch the LED light turns on at the same time to increase
visibility of the working area).
Figure
4
–
LED light
It is possible to modulate the temperature of the soldering
gun so as to make it multifunctional. The temperature
adjustment knob is located on the upper part of the gun
and allows three temperature ranges to be selected A, B
and C.
Figure
5
–
Temperature
selector
Always keep the tip clean and apply a sufficient layer of tin to be brazed.
Only hold the soldering gun by the handle and put it down in such a way that the tip is not
touching any object or surface.
After finishing
work let the soldering gun cool down. Never immerse it in water to avoid
the risk of electric shock.
fervi.com

HARDWARE
Page
9
of
10
5
MAINTENANCE AND CLEA
NING
The purpose of this chapter is to provide all the information on maintenance procedures and
the frequency required for the
Mu
ltifunction soldering gun.
INTERVENTION
Frequency
Daily
Weekly
1.
General visual inspection
X
2.
General cleaning
X
3.
Maintenance of the tip
X
1.
General visual inspection:
check the overall status of the device and, in particular, the
flexible power cabl
e and the presence of any damage or missing parts.
2.
General cleaning:
cleaning is necessary to free the soldering gun of deposits of tin, dust
or dirt and to prevent the clogging of the ventilation slits.
Risks associated with cleaning
Wait
for the soldering gun to cool and clean it gently, using a soft dry cloth. Do not use
organic solvents for cleaning.
3.
Maintenance of the tip:
Keep the tip of the soldering gun away from objects or surfaces after switching it off or
before storage until
it reaches room temperature, only clean the tip before heating;
Do not use the soldering gun for a long period of time, so as not to damage the surface
of the tip;
Clean it every week or every 20 hours of use and remove any residue that forms on the
rod, d
o not use cleaning fluids that contain chlorine or acids but resin or active resin
fluids. Wipe the tip only when it is cold, do not ever clean it with coarse abrasive
material or use files;
If an oxide layer has formed, it can be eliminated by gently usin
g sandpaper No. 600
-
800, isopropyl alcohol or equivalent, and then immediately heat and cover the tip with
tin to prevent oxidation of the cleaned surface.
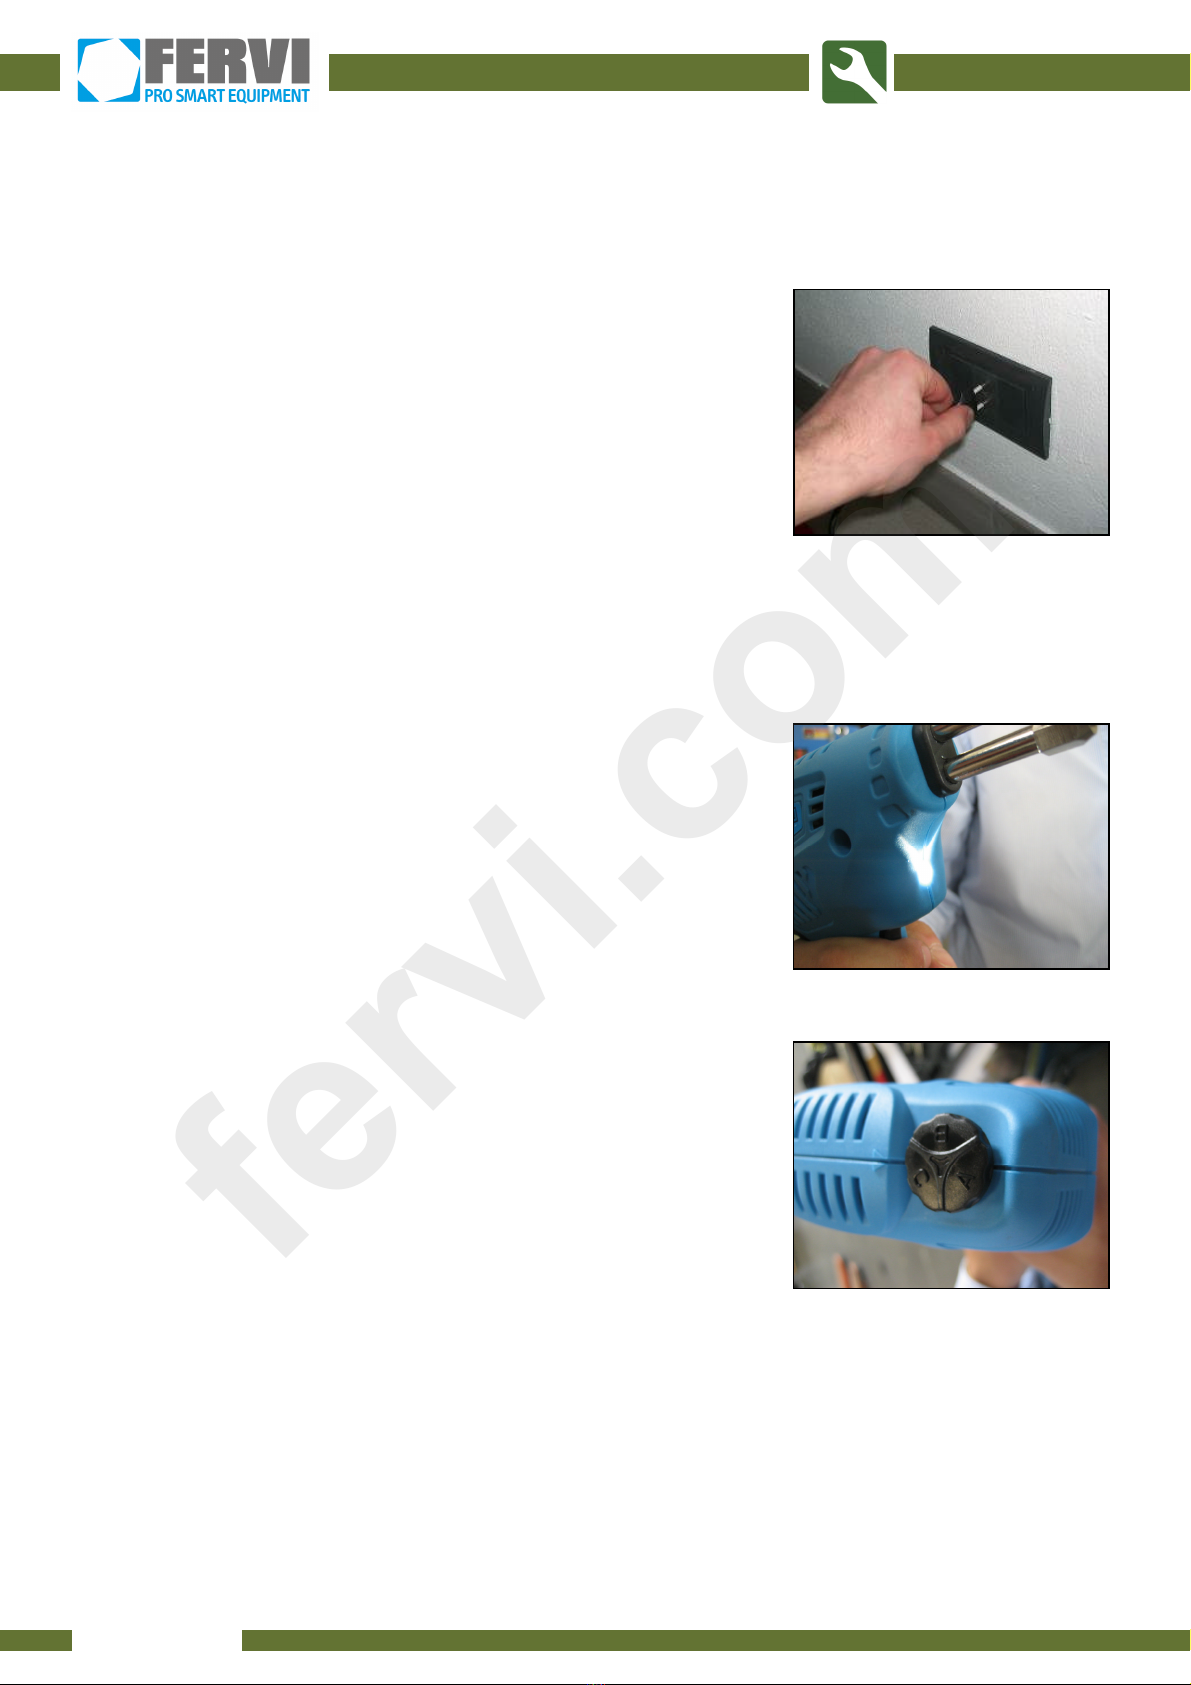
Condition of the Power Supply Cord
The power cord only protects against contact with hot metallic parts for a brief moment. The
soldering gun can no longer be used if the cable has been damaged. Given
its special
construction, the power cord can not be replaced.
fervi.com

HARDWARE
Page
10
of
10
6
EXPLODED VIEW AND SP
ARE PARTS
Ref.
Description
Ref.
Description
0443/01
Soldering tip
0443
/09
Power cable
0443/02
Holding nut
0443/10
Cable inlet casing
0443/03
Spacer
0443/11
Cable end
0443/04
Transformer
0443/12
Temperature adjustment system
board
0443/05
Temperature adjustment knob
0443/13
Bolt
0443/06
Left housing
0443/14
Switch
0443/
07
Right housing
0443/15
Switch lever
0443/08
Screw
0443/16
LED light board
fervi.com
Table of contents