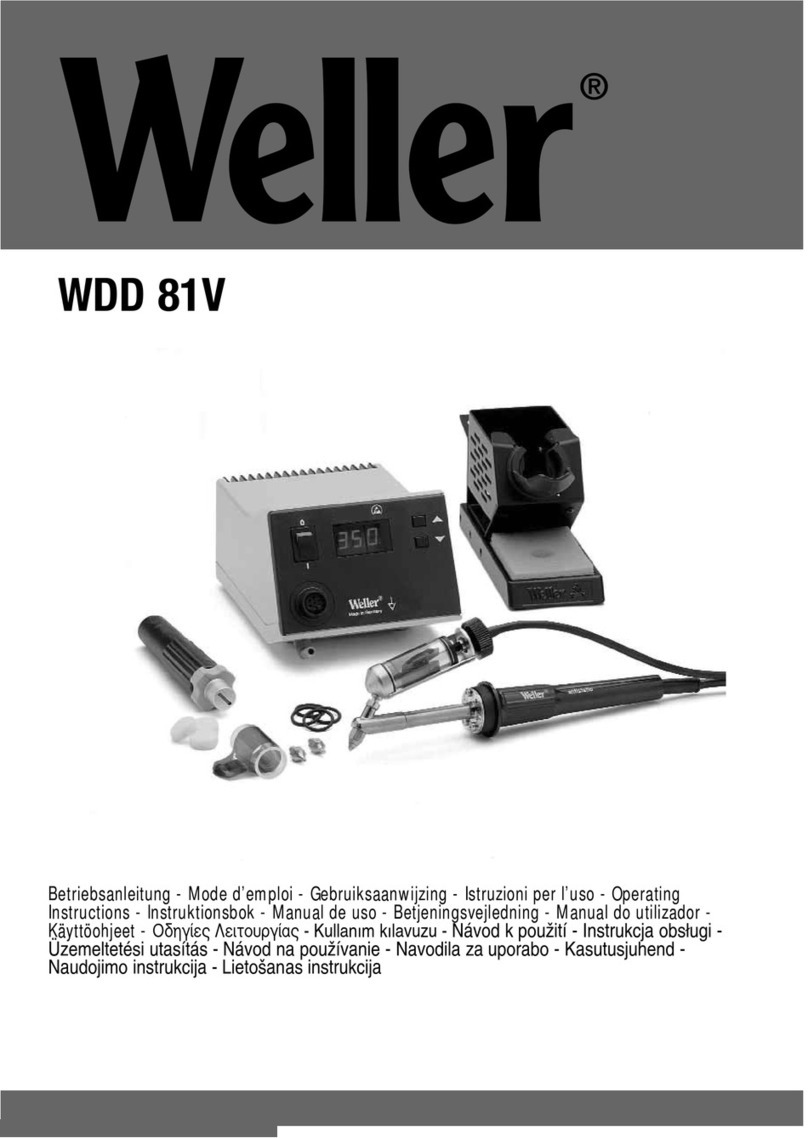
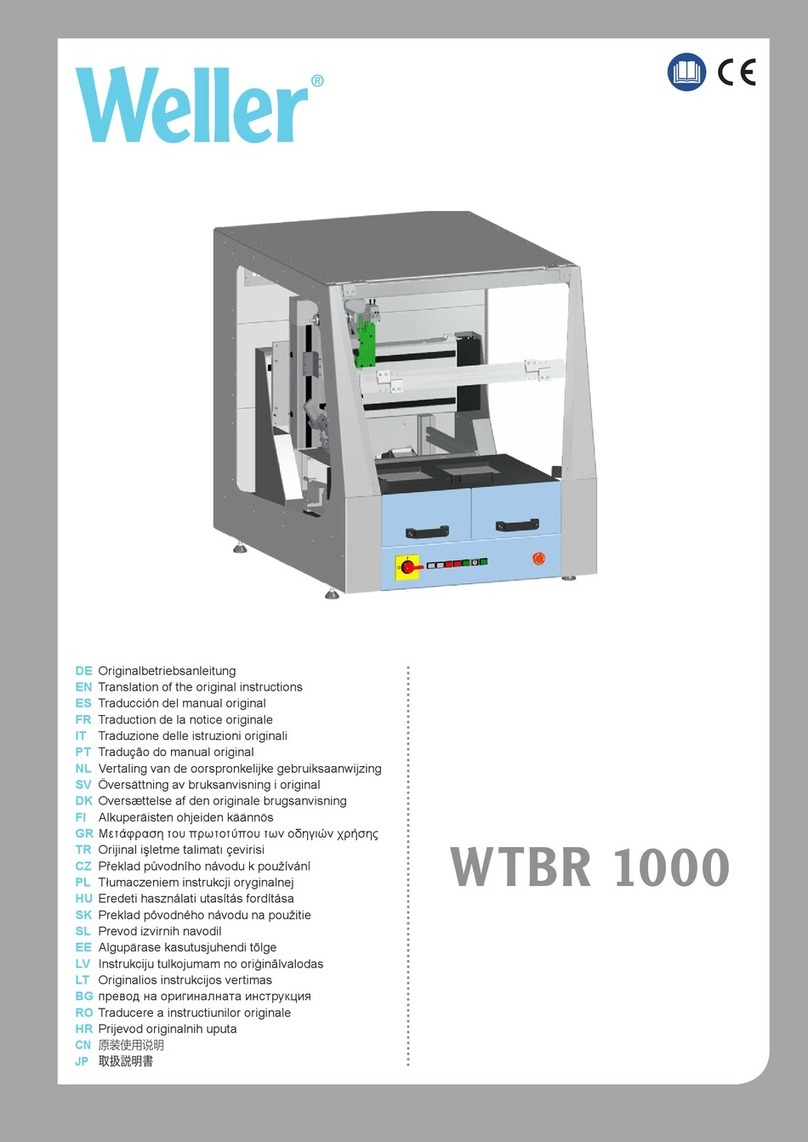
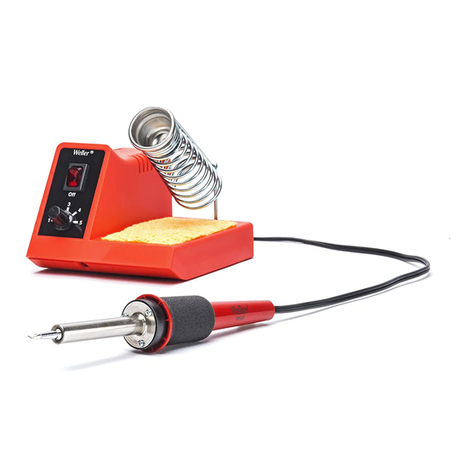
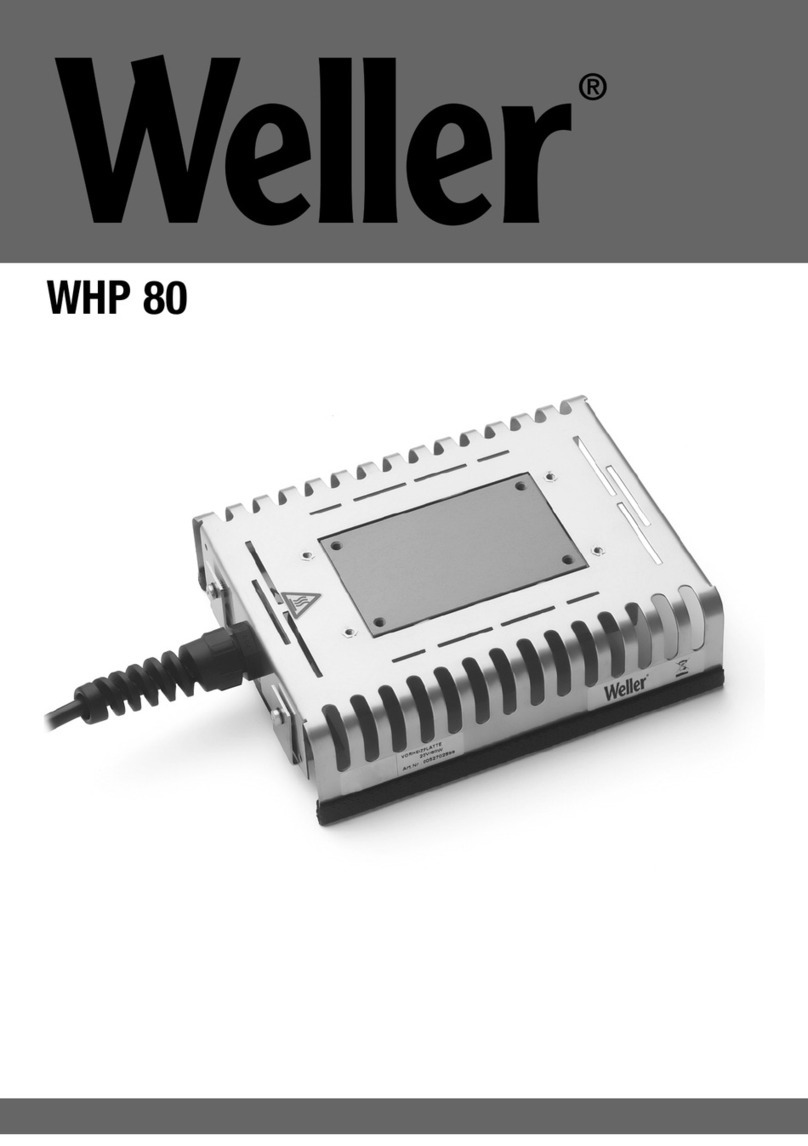
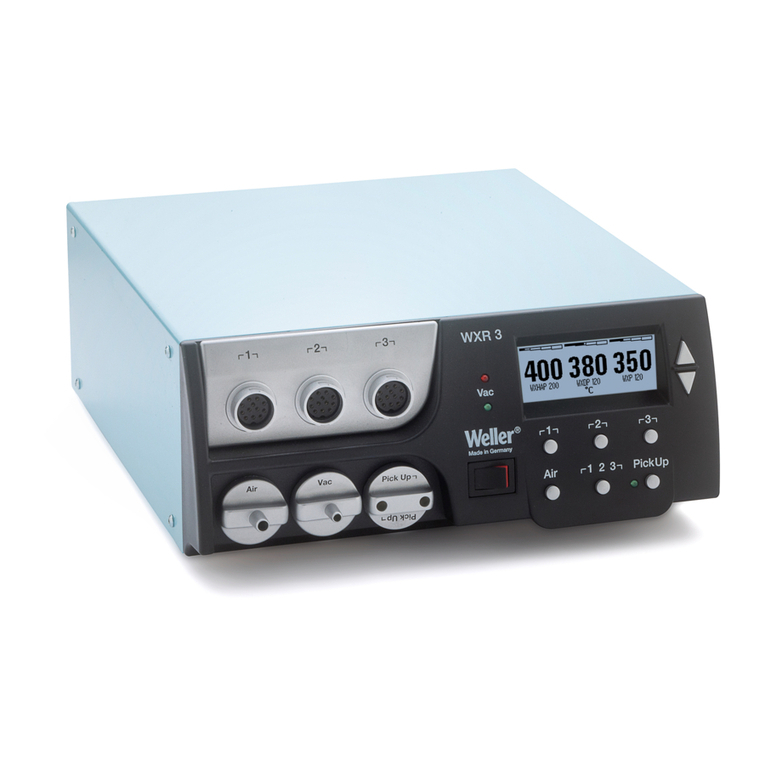
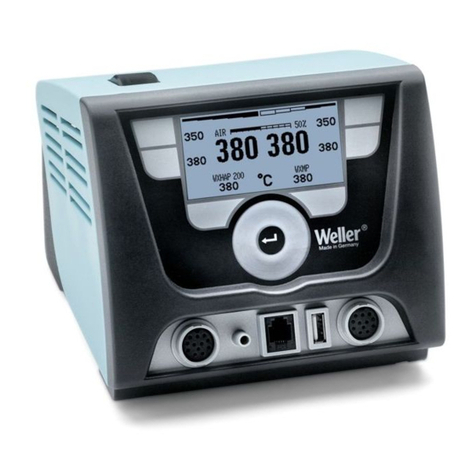
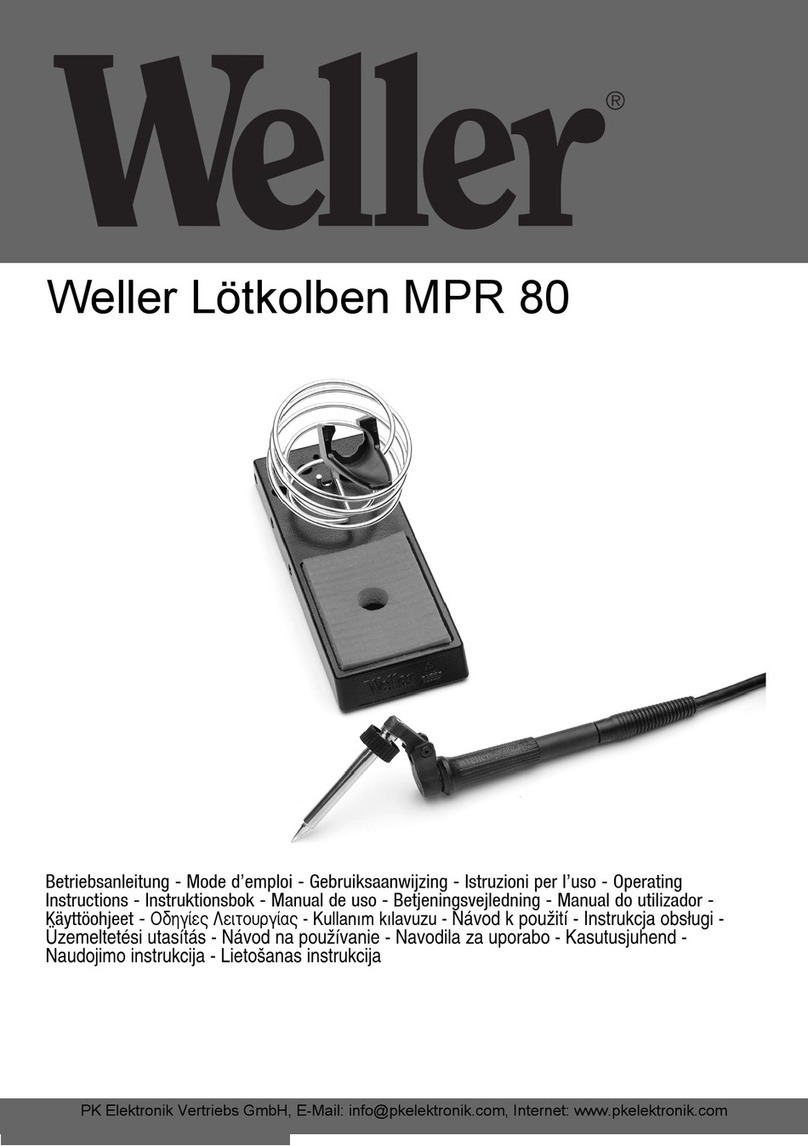
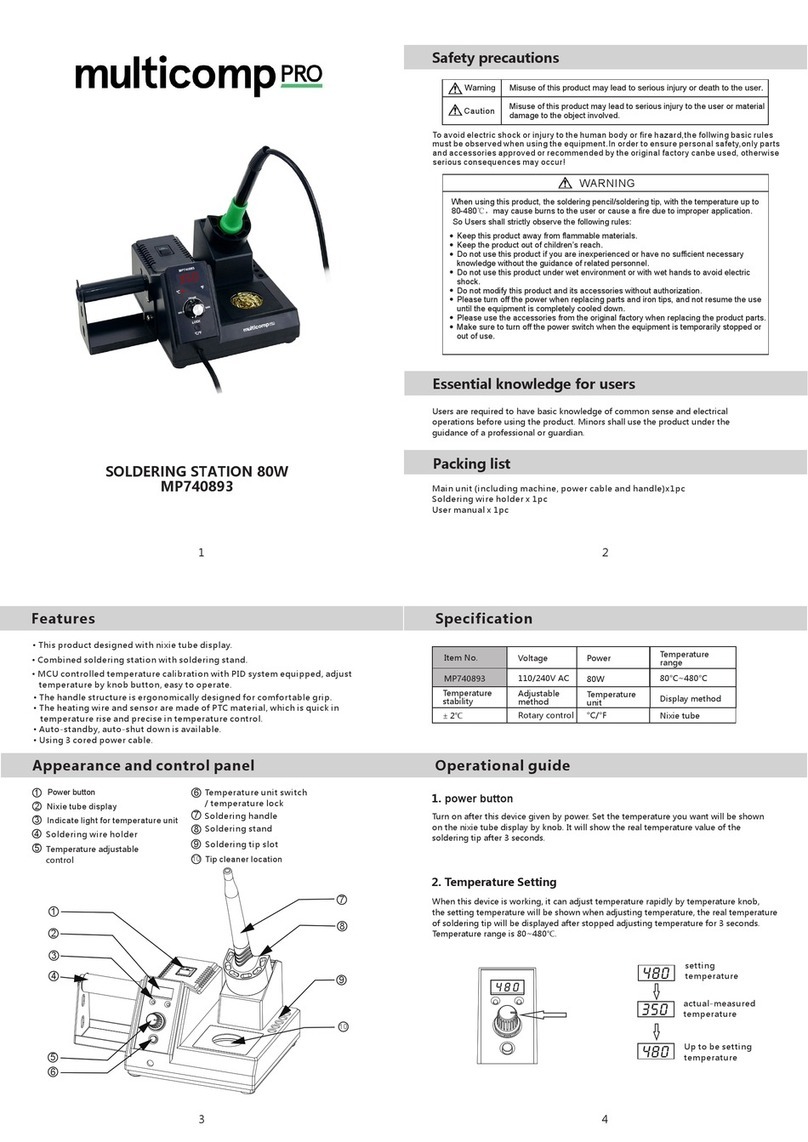
Weller WXR 3 User manual

WXR 3
DE Originalbetriebsanleitung
GB Translation of the original instructions
ES Traducción del manual original
FR Traduction de la notice originale
IT Traduzione delle istruzioni originali
PT Tradução do manual original
NL Vertaling van de oorspronkelijke
gebruiksaanwijzing
SV Översättning av bruksanvisning
i original
DK Oversættelse af den originale
brugsanvisning
FI Alkuperäisten ohjeiden
käännös
GRȂİIJȐijȡĮıȘIJȠȣʌȡȦIJȠIJȪʌȠȣ
IJȦȞȠįȘȖȚȫȞȤȡȒıȘȢ
TR2ULMLQDOLúOHWPHWDOLPDWÕoHYLULVL
CZ3ĜHNODGSĤYRGQtKRQiYRGX
NSRXåtYiQt
PL 7áXPDF]HQLHPLQVWUXNFMLRU\JLQDOQHM
HU (UHGHWLKDV]QiODWLXWDVtWiVIRUGtWiVD
SK 3UHNODGS{YRGQpKRQiYRGX
QDSRXåLWLH
SL Prevod izvirnih navodil
EE algupärase kasutusjuhendi tõlge
LV Instrukciju tulkojumam no
RULƧLQƗOYDORGDV
LT Originalios instrukcijos vertimas
BG ɉɪɟɜɨɞɧɚɨɪɢɝɢɧɚɥɧɚɬɚ
ɢɧɫɬɪɭɤɰɢɹ
RO Traducere a instructiunilor
originale
HR Prijevod originalnih uputa
RU Ɉɪɢɝɢɧɚɥɶɧɨɟɪɭɤɨɜɨɞɫɬɜɨɩɨ
ɷɤɫɩɥɭɚɬɚɰɢɢ
www.calcert.com [email protected]1.800.544.2843 0
5
10
15
20
25
30

6
6
DE USB-Schnittstelle
GB USB port
ES Interfaz USB
FR Interface USB
IT Interfaccia USB
PT Interface USB
NL USB-poort
SV USB-port
DK USB-port
FI USB-liitäntä
GR ĬȪȡĮįȚİʌĮijȒȢ86%
TR USB arabirim
CZ 5R]KUDQt86%
PL =áąF]H86%
HU USB csatlakozó
SK Rozhranie USB
SL Vmesnik USB
EE USB-liides
LV 86%SLHVOƝJYLHWD
LT 86%VąVDMD
BG 86%ɢɧɬɟɪɮɟɣɫ
RO ,QWHUIDĠă86%
HR 6XþHOMH86%
RU ɂɧɬɟɪɮɟɣɫ86%
DE Schnittstelle
GB Interface
ES Interfaz
FR Interface
IT Interfaccia
PT Interface
NL Interface
SV *UlQVVQLWW
DK Interface
FI /LLWW\Pl
GR ĬȪȡĮįȚİʌĮijȒȢ
TR Arabirim
CZ 5R]KUDQt
PL Interfejs
HU Interfész
SK Rozhranie
SL Vmesnik
EE Liides
LV Saskarne
LT 6ąVDMD
BG ɂɧɬɟɪɮɟɣɫ
RO ,QWHUIDĠă
HR 6XþHOMH
RU ɂɧɬɟɪɮɟɣɫ
DE Potentialausgleich
GB Equipotential bonding
ES Equipotencial
FR Compensation de potentiel
IT Compensazione di potenziale
PT (TXLOtEULRGRSRWHQFLDO
NL Potentiaalvereffening
SV Potentialutjämning
DK Spændingsudligning
FI Potentiaalin tasaus
GR ǼȟȓıȦıȘįȣȞĮȝȚțȠȪ
TR 3RWDQVL\HOGHQJHOHPHVL
CZ 9\URYQiQtSRWHQFLiOĤ
PL :\UyZQDQLHSRWHQFMDáX
HU )HV]OWVpJNLHJ\HQOtWĘKYHO\
SK
=iVXYNDY\URYQDQLDSRWHQFLiORY
SL 9WLþQLFD]DL]HQDþHYDQMH
potenciala
EE Potentsiaalide ühtlustuspuks
LV 3RWHQFLƗOXL]OƯG]LQƗãDQDV
SLHVOƝJYLHWD
LT 3RWHQFLDORLãO\JLQLPRƳYRUơ
BG ɂɡɪɚɜɧɹɜɚɧɟɧɚ
ɩɨɬɟɧɰɢɚɥɢɬɟ
RO Egalizare de potențial
HR ,]MHGQDþDYDQMHSRWHQFLMDOD
RU ȼɵɪɚɜɧɢɜɚɧɢɟɩɨɬɟɧɰɢɚɥɨɜ
1
2
3
4
DE 1HW]VLFKHUXQJ
GB Mains fuse
ES Fusible
FR Fusible secteur
IT Protezione della rete
PT )XVtYHOGHUHGH
NL 1HWEHYHLOLJLQJ
SV 1lWVlNULQJ
DK 1HWVLNULQJ
FI Verkkosulake
GR ǾȜİțIJȡȚțȒĮıijȐȜİȚĮįȚțIJȪȠȣ
TR ùHEHNHVLJRUWDVÕ
CZ 6tĢRYiSRMLVWND
PL %H]SLHF]QLNVLHFLRZ\
HU +iOy]DWLEL]WRVtWpN
SK 6LHĢRYiSRLVWND
SL 2PUHåQDYDURYDOND
EE Võrgukaitse
LV (OHNWULVNƗWƯNODGURãLQƗWƗMV
LT Tinklo saugiklis
BG Ɇɪɟɠɨɜɩɪɟɞɩɚɡɢɬɟɥ
RO 6LJXUDQĠăGHUHĠHD
HR 0UHåQLRVLJXUDþ
RU ɉɪɟɞɨɯɪɚɧɢɬɟɥɶɷɥɟɤɬɪɨɫɟɬɢ
USB COM 1
43
COM 2
41 2
www.calcert.com [email protected]1.800.544.2843 0
5
10
15
20
25
30
7
7
DE Vakuumanschluss
GB Vacuum connection
ES 7RPDGHYDFtR
FR Raccord de vide
IT Collegamento per vuoto
PT /LJDomRGHYiFXR
NL Vacuümaansluiting
SV Vakuumanslutning
DK Vakuumtilslutning
FI 7\KML|OLLWlQWl
GR ȈȪȞįİıȘțİȞȠȪ
TR 9DNXPED÷ODQWÕVÕ
CZ 3ĜtSRMNDYDNXD
PL 3U]áąF]HSUyĪQL
HU 9iNXXPFVDWODNR]y
SK 3UtSRMNDYiNXD
SL 3ULNOMXþHN]DSRGWODN
EE Vaakumühendus
LV 9DNXXPDSLHVOƝJXPV
LT Vakuumo jungtis
BG ɋɴɟɞɢɧɢɬɟɥɟɧɟɥɟɦɟɧɬɡɚ
ɜɚɤɭɭɦ
RO Racord pentru vid
HR 9DNXXPVNLSULNOMXþDN
RU ȼɚɤɭɭɦɧɨɟɫɨɟɞɢɧɟɧɢɟ
DE Luftanschlussnippel für
Heißluftkolben
GB Air connection nipple for
hot air tools
ES Boquilla de conexión del
aire para el soldador de
aire caliente
FR Raccord de connexion
d‘air pour fers à air chaud
IT
1LSSORGLFROOHJDPHQWRDULD
per saldatore ad aria calda
PT
1LSOHVGHOLJDomRGHDUSDUD
ferros de soldar por ar quente
NL Luchtaansluitnippel voor
heteluchtbout
SV Luftanslutningsnippel för
hetluftspenna
DK Lufttilslutningsnippel til
varmluftskolbe
FI Ilmaliitäntänippa ku-
umailmakolville
GR ȈIJȩȝȚȠıȪȞįİıȘȢĮȑȡĮȖȚĮ
ȑȝȕȠȜȠșİȡȝȠȪĮȑȡĮ
TR 6ÕFDNKDYDSLVWRQXLoLQ
KDYDED÷ODQWÕQLSHOL
CZ âURXERYDFtSĜtSRMNDY]GX-
FKXSURKRUNRY]GXãQêStVW
PL âURXERYDFtSĜtSRMNDY]GX-
FKXSURKRUNRY]GXãQêStVW
HU
/HYHJĘFVDWODNR]yD
IRUUyOHYHJĘVSiNDV]iPiUD
SK 3UtSRMNDY]GXFKXSUH
WHSORY]GXãQ~U~þNX
SL 3ULNOMXþQL QDVWDYHN VSDM-
NDOQLND]DYURþL]UDN
EE Õhuühenduse nippel
kuuma õhu kolvidele
LV *DLVDSLHVOƝJXPDQLSHOLV
NDUVWƗJDLVDORGƗPXUDP
LT .DUãWRRURVWnjPRNOLRRUR
jungties antgalis
BG ɇɢɩɟɥɡɚɩɪɢɫɴɞɢɧɹɜɚɧ
ɧɚɜɴɡɞɭɯɡɚɩɨɹɥɧɢɤɫ
ɝɨɪɟɳɜɴɡɞɭɯ
RO 1LSOXGHUDFRUGDUHSHQWUX
letconul cu aer cald
HR
1D]XYLFD]DSULNOMXþDN]UD-
ND]DOHPLORQDYUXüL]UDN
RU
ɉɨɞɤɥɸɱɟɧɢɟ ɜɨɡɞɭɯɚ
ɧɢɩɩɟɥɶɞɥɹɝɨɪɹɱɟɣ
ɩɚɣɤɢɜɨɡɞɭɯɚ
6
5
Pick
Up 1
Air Vac Pick Up ¬
Pick Up ¬
65 6
Pick
Up 2 UP /
'2:1
6
7
7
DE LED Vakuum
GB Vacuum LED
ES /('9DFtR
FR LED vide
IT LED Vuoto
PT /('GRYiFXR
NL LED vacuüm
SV /\VGLRGYDNXXP
DK LED vakuum
FI 7\KML|Q/('
GR /('țİȞȠȪ
TR Vakum LED'i
CZ LED vakuum
PL 'LRGD/('SUyĪQL
HU 9iNXXP/('
SK LED-dióda: podtlak
SL LED-dioda podtlaka
EE LED vaakum
LV Vakuuma LED diode
LT LED vakuumas
BG ȼɚɤɭɭɦ/('
RO LED vid
HR LED vakuum
RU ɋɜɟɬɨɞɢɨɞɧɵɣɢɧɞɢɤɚɬɨɪ
ɜɚɤɭɭɦɚ
www.calcert.com [email protected]1.800.544.2843 0
5
10
15
20
25
30

8
8
1DE Isttemperatur / Solltemperatur
GB Actual temperature / nominal
temperature
ES Temperatura real / temperatu-
ra de referencia
FR Température réelle / tempéra-
ture de consigne
IT Temperatura reale / tempera-
tura nominale
PT Temperatura real / temperatu-
ra nominal
NL Werkelijke temperatuur /
gewenste temperatuur
SV Faktisk temperatur / börtem-
peratur
DK Faktisk temperatur / nominel
temperatur
FI Todellinen lämpötila / ohje-
lämpötila
GR ȆȡĮȖȝĮIJȚțȒșİȡȝȠțȡĮıȓĮ
ȠȞȠȝĮıIJȚțȒșİȡȝȠțȡĮıȓĮ
TR )LLOLVÕFDNOÕNQRPLQDOVÕFDNOÕN
CZ 6NXWHþQiWHSORWDQRPLQDO
VÕFDNOÕN
PL 7HPSHUDWXUDU]HF]\ZLVWD
temperatura zadana
HU 0pUWKĘPpUVpNOHWWHPSHUDWX-
UDKĘPpUVpNOHW
SK 6NXWRþQiWHSORWD
SRåDGRYDQiWHSORWD
SL Dejanska temperatura /
åHOHQDWHPSHUDWXUD
EE Tegelik väärtus / sihttempe-
ratuur
LV )DNWLVNƗWHPSHUDWnjUDYƝODPƗ
WHPSHUDWnjUD
LT (VDPDWHPSHUDWnjUDQXVWDW\-
WRMLWHPSHUDWnjUD
BG Ⱦɟɣɫɬɜɢɬɟɥɧɚɬɟɦɩɟɪɚɬɭɪɚ
Ɂɚɞɚɞɟɧɚɬɟɦɩɟɪɚɬɭɪɚ
RO 7HPSHUDWXUDHIHFWLYă7HP-
SHUDWXUDQRPLQDOă
HR Stvarna temperatura / Zadana
temperatura
RU Ɏɚɤɬɢɱɟɫɤɚɹɬɟɦɩɟɪɚɬɭɪɚ
Ɂɚɞɚɧɧɚɹɬɟɦɩɟɪɚɬɭɪɚ
DE Solltemperatur
GB 1ominal temperature
ES Temperatura de referencia
FR Température de consigne
IT Temperatura nominale
PT Temperatura nominal
NL *ewenste temperatuur
SV Börtemperatur
DK 1ominel temperatur
FI Ohjelämpötila
GR ȅȞȠȝĮıIJȚțȒșİȡȝȠțȡĮıȓĮ
TR 1RPLQDOVÕFDNOÕN
CZ 1RPLQDOVÕFDNOÕN
PL Temperatura zadana
HU THPSHUDWXUDKĘPpUVpNOHW
SK PRåDGRYDQiWHSORWD
SL äelena temperatura
EE Sihttemperatuur
LV VƝODPƗWHPSHUDWnjUD
LT 1XVWDW\WRMLWHPSHUDWnjUD
BG Ɂɚɞɚɞɟɧɚɬɟɦɩɟɪɚɬɭɪɚ
RO 7HPSHUDWXUDQRPLQDOă
HR Zadana temperatura
RU Ɂɚɞɚɧɧɚɹɬɟɦɩɟɪɚɬɭɪɚ
DE Festtemperatur
GB Fixed temperature
ES 7HPSHUDWXUD¿MD
FR 7HPSpUDWXUH¿[H
IT 7HPSHUDWXUD¿VVD
PT 7HPSHUDWXUD¿[D
NL Vaste temperatuur
SV Fast temperatur
DK Fast temperatur
FI Kiinteä lämpötila
GR ȈIJĮșİȡȒșİȡȝȠțȡĮıȓĮ
TR 6DELWVÕFDNOÕN
CZ 6WDQRYHQiWHSORWD
PL 7HPSHUDWXUDVWDáD
HU 5|J]tWHWWKĘPpUVpNOHW
SK 3HYQiWHSORWD
SL Stalna temperatura
EE Püsitemperatuur
LV 1RWHLNWƗWHPSHUDWnjUD
LT )LNVXRWRMLWHPSHUDWnjUD
BG ɇɟɩɪɨɦɟɧɥɢɜɚɬɟɦɩɟɪɚɬɭɪɚ
RO 7HPSHUDWXUD¿[ă
HR Fiksna temperatura
RU Ɏɢɤɫɢɪɨɜɚɧɧɚɹɬɟɦɩɟɪɚɬɭɪɚ
2
3
4
33
DE Aktiver Kanal
GB Active channel
ES Canal activo
FR Canal actif
IT Canale attivo
PT Canal ativo
NL Actief kanaal
SV Aktiv kanal
DK Aktiv kanal
FI Aktivoitu kanava
GR ǼȞİȡȖȩțĮȞȐȜȚ
TR Aktif kanal
CZ $NWLYQtNDQiO
PL $NW\ZQ\NDQDá
HU $NWtYFVDWRUQD
SK $NWtYQ\NDQiO
SL Aktivni kanal
EE Aktiivne kanal
LV $NWƯYDLVNDQƗOV
LT $NW\YXVNDQDODV
BG Ⱥɤɬɢɜɟɧɤɚɧɚɥ
RO Canal activ
HR Aktivni kanal
RU $ɤɬɢɜɧɵɣɤɚɧɚɥ
2 1
4
www.calcert.com [email protected]1.800.544.2843 0
5
10
15
20
25
30

9
9
DE '$7$/2**(5'/DNWLY
GB '$7$/2**(5'/DFWLYH
ES '$7$/2**(5'/DFWLYR
FR '$7$/2**(5'/DFWLI
IT '$7$/2**(5'/DWWLYR
PT 5(*,672'('$'26'/
activo
NL '$7$/2**(5'/DFWLHI
SV '$7$/2**(5'/DNWLY
DK '$7$/2**(5'/DNWLY
FI '$7$/2**(5'/DNWLYRLWX
GR '$7$/2**(5'/İȞİȡȖȩ
TR 9(5ø*h1/h./(<ø&ø'/DNWLI
CZ '$7$/2**(5'/DNWLYQt
PL '$7$/2**(5'/DNW\ZQ\
HU '$7$/2**(5'/DGDWQDS-
Oy]iVDNWtY
SK '$7$/2**(5'/DNWtYQ\
SL '$7$/2**(5'/MHDNWLYLUDQ
EE '$7$/2**(5'/RQDNWLLYQH
LV '$785(Ʀ,675Ɯ7Ɩ-6'5LU
LHVOƝJWV
LT $NW\YLQWDVGXRPHQǐUHJLVWUDYL-
PRƳWDLVDV'$7$/2**(5'/
BG '$7$/2**(5'/ɚɤɬɢɜɧɚ
RO '$7$/2**(5'/DFWLY
HR '$7$/2**(5'/DNWLYLUDQ
RU ɊȿȽɂɋɌɊȺɌɈɊȾȺɇɇɕɏ
ɊȾɚɤɬɢɜɢɪɨɜɚɧ
2 CH 1, 2, 3
DE Indikator Schaltausgang
GB Switching output indicator
ES Indicador salida de conexión
FR Indicateur sortie de commutation
IT Indicatore uscita di commuta-
zione
PT ,QGLFDGRUGDVDtGDGHFRPX-
tação
NL Indicator schakeluitgang
SV Indikator kopplingsutgång
DK Indikator koblingsudgang
FI .\WNHQWlOlKG|QLOPDLVLQ
GR ǻİȓțIJȘȢİʌĮijȒȢİȟȩįȠȣ
TR 'HYUHoÕNÕúÕJ|VWHUJHVL
CZ ,QGLNiWRUVStQDFtKRYêVWXSX
PL :VNDĨQLNZ\MĞFLD
SU]HáąF]DMąFHJR
HU .DSFVROyNLPHQHWLQGLNiWRU
SK ,QGLNiWRUVStQDFLHKRYêVWXSX
SL Indikator izhoda
EE Lülitusväljundi indikaator
LV 6OƝJXPDL]HMDVLQGLNDWRUV
LT Indikatoriaus jungimo išvadas
BG ȼɤɥɸɱɜɚɧɟɢɧɞɢɤɚɬɨɪɢɡɯɨɞ
RO ,QGLFDWRULHúLUHGHFRPXWDUH
HR ,QGLNDWRUSUHNLGDþD]DL]OD]
RU ɂɧɞɢɤɚɬɨɪɤɨɦɦɭɬɢɪɭɟɦɨɝɨ
ɜɵɯɨɞɚ
WFV 60A
DE Zustandsanzeige
GB Status indication
ES Indicación del estado
FR Indication d'état
IT Indicatore di stato
PT Indicação de status
NL Statusweergave
SV Statusvisning
DK Statusindikator
FI Tilanneilmaisin
GR ǼȞįİȚȟȘʌȡȠȩįȠȣ
TR Durum göstergesidir
CZ =REUD]HQtVWDYX
PL :\ĞZLHWODF]VWDQX
HU ÈOODSRWNLMHO]Ę
SK Zobrazenie stavu
SL Prikaz stanja
EE Olekuekraan
LV 6WƗYRNƺDGLVSOHMV
LT %njNOơVLQGLNDWRULXV
BG ɂɧɞɢɤɚɰɢɹɧɚɫɴɫɬɨɹɧɢɟɬɨ
RO $¿úDMXOGHVWDUH
HR Prikaz stanja
RU ɂɧɞɢɤɚɰɢɹɫɨɫɬɨɹɧɢɹ
5
7
8
6
1 5
5
5 7 66
8
DE Schnittstelle COM 1 / COM 2
GBInterface COM 1 / COM 2
ES Interfaz COM 1 / COM 2
FR Interface COM 1 / COM 2
IT Interfaccia COM 1 / COM 2
PT Interface COM 1 / COM 2
NL Interface COM 1 / COM 2
SV *UlQVVQLWW&20&20
DK Interface COM 1 / COM 2
FI /LLWW\Pl&20&20
GRĬȪȡĮįȚİʌĮijȒȢ&20&20
TR Arabirim COM 1 / COM 2
CZ 5R]KUDQt&20&20
PL Interfejs COM 1 / COM 2
HU Interfész COM 1 / COM 2
SK Rozhranie COM 1 / COM 2
SL Vmesnik COM 1 / COM 2
EE Liides COM 1 / COM 2
LV Saskarne COM 1 / COM 2
LT 6ąVDMD&20&20
BGɂɧɬɟɪɮɟɣɫ&20&20
RO,QWHUIDĠă&20&20
HR 6XþHOMH&20&20
RU ɂɧɬɟɪɮɟɣɫ&20&20
1
COM 1 COM 2
www.calcert.com [email protected]1.800.544.2843 0
5
10
15
20
25
30

35
,5
For your safety
7KDQN\RXIRUWKHFRQ¿GHQFH\RXKDYHVKRZQLQ
EX\LQJWKLVGHYLFH
The device has been manufactured in accordance
ZLWKWKHPRVWULJRURXVTXDOLW\VWDQGDUGVZKLFKHQVX-
UHWKDWLWRSHUDWHVSHUIHFWO\
Read these instructions and the
accompanying safety information
carefully before starting up the device
and starting work with the device.
Keep these instructions in a place that is acces-
sible to all users.
These instructions contain important information
ZKLFKZLOOKHOS\RXWRVWDUWXSRSHUDWHDQGVHUYLFH
WKHGHYLFHVDIHO\DQGFRUUHFWO\DVZHOODVWRHOLPLQDWH
VLPSOHIDXOWVDQGPDOIXQFWLRQV\RXUVHOYHV
The device has been manufactured in accordance
ZLWKVWDWHRIWKHDUWWHFKQRORJ\DQGDFNQRZ-
OHGJHGUHJXODWLRQVFRQFHUQLQJVDIHW\
7KHUHLVQHYHUWKHOHVVWKHULVNRISHUVRQDOLQMXU\DQG
GDPDJHWRSURSHUW\LI\RXIDLOWRREVHUYHWKHVDIHW\
LQIRUPDWLRQVHWRXWLQWKHDFFRPSDQ\LQJERRNOHWDQG
the warnings given in these instructions.
Safety information
)RUVDIHW\UHDVRQVFKLOGUHQ
DQG\RXWKVXQGHUWKHDJHRI
as well as persons who are not
familiar with these operating inst-
UXFWLRQVPD\QRWXVHWKHGHYLFH
Children should be supervised in
RUGHUWRHQVXUHWKDWWKH\GRQRW
SOD\ZLWKWKHWRRO
This device is not intended
IRUXVHE\SHUVRQVLQFOXGLQJ
FKLOGUHQZLWKOLPLWHGSK\VLFDO
VHQVRU\RUPHQWDODSWLWXGHRU
E\SHUVRQVZKRODFNNQRZOHGJH
or experience in handling the
device.
Warning! Electrical shock
Connecting the control unit incorrectly poses a risk of injury due to electric shock and
can damage the device.
&DUHIXOO\UHDGWKHDWWDFKHGVDIHW\LQIRUPDWLRQWKHVDIHW\LQIRUPDWLRQDFFRPSDQ\LQJWKHVH
RSHUDWLQJLQVWUXFWLRQVDVZHOODVWKHRSHUDWLQJLQVWUXFWLRQVIRU\RXUFRQWUROXQLWEHIRUHSXWWLQJ
WKHFRQWUROXQLWLQWRRSHUDWLRQDQGREVHUYHWKHVDIHW\SUHFDXWLRQVVSHFL¿HGWKHUHLQ
2QO\FRQQHFW:(//(5:;WRROV
1HYHUXVHWKH86%SRUWDVDSRZHUVXSSO\IRUWKLUGSDUW\GHYLFHV
If the device is faulty, active electrical conductors may be bare or the PE conductor
may not be functional.
5HSDLUVPXVWDOZD\VEHUHIHUUHGWRD:HOOHUWUDLQHGVSHFLDOLVW
,IWKHHOHFWULFDOWRROµVSRZHUVXSSO\FRUGLVGDPDJHGWKLVPXVWEHUHSODFHGZLWKDVSHFLDOO\
SUHIDEULFDWHGSRZHUVXSSO\FRUGDYDLODEOHWKURXJKWKHFXVWRPHUVHUYLFHRUJDQLVDWLRQ
Warning! Risk of burns
Risk of burns from the soldering tool while the control unit is operating. Tools may
still be hot long after they have been switched off.
$OZD\VSODFHWKHVROGHULQJWRROLQWKHVDIHW\UHVWZKLOHQRWLQXVH
2QO\FRQQHFWWKHYDFXXPDQGKRWDLUDWWKHGHVLJQDWHGSRLQWV
'RQRWGLUHFWKRWDLUVROGHULQJWRROVDWSHRSOHRULQÀDPPDEOHREMHFWV
www.calcert.com [email protected]1.800.544.2843 0
5
10
15
20
25
30

36
,5
Warning! Fire and explosion hazard!
+RWWRROVUHSUHVHQWD¿UHKD]DUG
$OZD\VSODFHWKHVROGHULQJWRROLQWKHVDIHW\UHVWZKLOHQRWLQXVH
'RQRWGLUHFWKRWDLUVROGHULQJWRROVDWSHRSOHRULQÀDPPDEOHREMHFWV
.HHSH[SORVLYHDQGÀDPPDEOHREMHFWVZHOODZD\IURPWKHGHYLFH
Do not cover the device.
6SHFL¿HG&RQGLWLRQV2I8VH
6XSSO\XQLWIRU:(//(5:;VROGHULQJWRROV
8VHWKHUHSDLUVWDWLRQRQO\IRUWKHSXUSRVHLQGLFD-
ted in the operating instructions of soldering and
GHVROGHULQJXQGHUWKHFRQGLWLRQVVSHFL¿HGKHUHLQ
)ODPPDEOHJDVHVDQGOLTXLGVPD\QRW
be extracted.
7KHGHYLFHPD\RQO\EHXVHGZLWK
FRUUHFWO\¿WWHGDQGVXLWDEOH¿OWHU
cartridges.
5HSODFH¿OWHUFDUWULGJHVZKHQIXOO
2QO\XVHWKHGHYLFHLQGRRUV3URWHFWDJDLQVWPRLV-
ture and direct sunlight.
Intended use of the soldering station/ desoldering
VWDWLRQDOVRLQFOXGHVWKHUHTXLUHPHQWWKDW\RX
adhere to these instructions,
REVHUYHDOORWKHUDFFRPSDQ\LQJGRFXPHQWV
FRPSO\ZLWKQDWLRQDODFFLGHQWSUHYHQWLRQ
guidelines applicable at the place of use.
The manufacturer will not be liable for unautho-
ULVHGPRGL¿FDWLRQVWRWKHGHYLFH
User groups
'XHWRGLIIHULQJGHJUHHVRIULVNDQGSRWHQWLDOKD]DUGVVHYHUDOZRUNVWHSVPD\RQO\EHSHUIRUPHGE\
trained experts.
Work step User groups
Default soldering parameters Specialist personnel with technical training
Replacing electrical replacement parts Electricians
Default maintenance intervals 6DIHW\H[SHUW
Operation
Filter change 1RQVSHFLDOLVWV
Operation
Filter change
Replacing electrical replacement parts
Technical trainees under the guidance and supervision
of a trained expert
For your safety
www.calcert.com [email protected]1.800.544.2843 0
5
10
15
20
25
30

37
,5
Starting up the device
Caution!
Please adhere to the operating instructions of
the connected devices.
Put the tool into operation as described in the
FKDSWHUÄ3ODFLQJLQWRRSHUDWLRQ³
Check to see if the mains voltage mat-
ches the ratings on the nameplate.
Make sure the machine is switched off before
plugging in.
After switching on the device, the microprocessor
carries out a self- test and reads out the values of
the parameters stored in the tool.
7KHVHWSRLQWWHPSHUDWXUHDQG¿[HGWHPSHUDWXUHV
are stored in the tool. The actual temperature
YDOXHLQFUHDVHVWRWKHVHWSRLQWWHPSHUDWXUH
VROGHULQJWRROLVKHDWHGXS
Soldering and desoldering
&DUU\RXWVROGHULQJZRUNDVGLUHFWHGLQWKHRSHUD-
WLQJLQVWUXFWLRQVRI\RXUFRQQHFWHGVROGHULQJWRRO
Handling the soldering tips
Coat the selective and tinnable soldering tip with
VROGHUZKHQKHDWLQJLWXSIRUWKH¿UVWWLPH7KLV
removes oxide coatings which have formed
during storage and impurities from the soldering
tip.
Make sure that the soldering tip is well coated
with solder during breaks between soldering work
and prior to storage of the device.
'RQRWXVHDJJUHVVLYHÀX[LQJDJHQWV
$OZD\VPDNHVXUHWKDWWKHVROGHULQJWLSVDUH
¿WWHGSURSHUO\
Select as low a working temperature as possible.
Select the largest possible soldering tip shape for
the application.
5XOHRIWKXPEWKHVROGHULQJWLSVKRXOGEHURXJKO\
as large as the soldering pad.
Coat the soldering tip well with solder to ensure
WKDWWKHUHLVHI¿FLHQWKHDWWUDQVIHUEHWZHHQWKH
soldering tip and the soldering area.
Prior to extended breaks between soldering work,
VZLWFKRIIWKHVROGHULQJV\VWHPRUXVHWKH:HOOHU
function to reduce the temperature when the
soldering equipment is not in use.
&RDWWKHWLSZLWKVROGHUSULRUWRVWRUDJHLI\RXGR
not intend to use the soldering iron for an
extended period of time.
$SSO\VROGHUGLUHFWO\WRWKHVROGHULQJDUHDQRWWR
the soldering tip.
Change the soldering tips using the designated
tool.
'RQRWDSSO\PHFKDQLFDOIRUFHWRWKHVROGHULQJ
tip.
Notice
The control units have been adapted to hold a
medium-sized soldering tip. Discrepancies may
occur if the tip is changed or a different shaped
tip is used.
Overload cut-out
To avoid overloading the station, power output is
DXWRPDWLFDOO\UHGXFHGLQWKHHYHQWRIDQRYHUORDG
For your safety
www.calcert.com [email protected]1.800.544.2843 0
5
10
15
20
25
30

38
,5
Equipotential bonding
a
b
c
d
)RXUYDULDQWVDUHSRVVLEOHE\FRQQHFWLQJWKHPPMDFNVRFNHW
GLIIHUHQWO\
a Hard-grounded supplied without plug.
b Equipotential
bonding with plug, equaliser at centre contact.
c Floating with plug
d Soft-grounded ZLWKSOXJDQGVROGHUHGUHVLVWRU*URXQG-
ed through selected resistor.
&DUU\LQJRXWD¿UPZDUHXSGDWH
Notice
The station must not be switched off while the
¿UPZDUHXSGDWHLVUXQQLQJ
Switch off station 1.
,QVHUWWKHPHPRU\VWLFNLQWRWKH86%SRUW
Switch on station 3.
7KH¿UPZDUHXSGDWHLVSHUIRUPHGDXWRPDWLFDOO\
,I\RXKDYHDPRUHDOUHDG\LQVWDOOHGPRUHUHFHQW
¿UPZDUHRQ\RXUVWDWLRQWKLVZLOOQRWEHFKDQJHG
Care and maintenance
Warning!
Before doing any work on the machi-
ne, pull the plug out of the socket.
Warning!
Use original replacement parts only.
Warning! Risk of burns
2QO\UHSODFHVROGHUWLSVZKHQFROG
Replace and clean suction nozzles
RQO\ZKHQKRWDQGXVLQJWKHVXLWDEOH
tool
2QO\UHSODFHKRWDLUQR]]OHVXVLQJ
the suitable tool
2QO\FOHDQRUUHSODFHVROGHU
collection tubes when cold
&OHDQWKHRSHUDWRUSDQHOLIGLUW\XVLQJDVXLWDEOH
cleaning cloth.
Filter change
&KHFNWKH¿OWHUUHJXODUO\IRUFRQWDPLQDWLRQDQG
UHSODFHLWLIQHFHVVDU\
Warning!
)DLOXUHWRXVHD¿OWHUZLOOFDXVHLUUHSDUDEOHGDPD-
ge to the vacuum pump.
Check before starting soldering whether a main
¿OWHULVLQVHUWHG
&RQWDPLQDWHG¿OWHUVPXVWEHWUHDWHGDVVSHFLDO
waste.
'LVSRVHRIUHSODFHGHTXLSPHQWSDUWV¿OWHUV
or old devices in accordance with the rules
and regulations applicable in your country.
Wear suitable protective gear.
For your safety
www.calcert.com [email protected]1.800.544.2843 0
5
10
15
20
25
30

39
,5
Standby Temp. Menu access Tool parameters
The soldering tools have a usage detection device
VHQVRULQWKHKDQGOHZKLFKDXWRPDWLFDOO\LQLWLDWHV
FRROLQJWR6WDQGE\WHPSHUDWXUHZKHQWKHVROGH-
ring tool is not in use.
Standby time (temperature deactivation) Menu access Tool parameters
When the soldering tool is not in use, the tem-
SHUDWXUHLVUHGXFHGWR6WDQGE\WHPSHUDWXUHRQ
H[SLUDWLRQRIWKHVHW6WDQGE\WLPH7KHGLVSOD\
UHDGVÄ6WDQGE\³
3UHVVFRQWURONH\WRH[LW6WDQGE\PRGH7KH
sensor integrated tool detects the change in state
DQGGHDFWLYDWHV6WDQGE\PRGHDVVRRQDVWKHWRRO
is moved.
Option Description
OFF VWDQGE\WLPHLVGHDFWLYDWHGIDFWRU\
VHWWLQJ
1-999 min VWDQGE\WLPHLQGLYLGXDOO\DGMXVWDEOH
--- The tool is not supported
AUTO OFF time (automatic switch-off time) Menu access Tool parameters
When the soldering tool is not in use, the soldering
tool heater is switched off when theAUTO OFF
time expires.
Temperature deactivation is performed indepen-
GHQWO\RIWKHVHWVWDQGE\IXQFWLRQ7KHDFWXDO
temperature is indicated and serves as a residual
KHDWGLVSOD\7KHGLVSOD\UHDGVÄ$8722))³
Option Description
OFF AUTO OFF function is deactivated
IDFWRU\VHWWLQJ
1-999 min AUTO-OFF time, can be set indivi-
GXDOO\
Sensitivity Menu access Tool parameters
Option Description
low 1RQVHQVLWLYH±5HDFWVWRKHDY\ORQJPRYHPHQW
normal VWDQGDUGIDFWRU\VHWWLQJ
high 6HQVLWLYH5HDFWVWROLJKWVKRUWPRYHPHQW
--- The tool is not supported
Max. hot air duration WXHAP Menu access Tool parameters
7KHRQWLPHRIWKHKRWDLUÀRZRIWKH:;+$3FDQ
be limited in increments of 1 to between 0 and 300
VHF7KHIDFWRU\GHIDXOWLVVÄ2))³LHDLUÀRZV
RQO\DVORQJDVWKHEXWWRQRQWKHKRWDLUWRRORUWKH
optional footswitch is pressed.
Option Description
OFF 1RGXUDWLRQGH¿QHG
IDFWRU\VHWWLQJ
1-300 s ,QGLYLGXDOO\DGMXVWDEOH
Offset (Temperature-Offset) Menu access Tool parameters
The actual soldering-tip temperature can be
DGDSWHGE\HQWHULQJDWHPSHUDWXUHRIIVHWDURXQG
&)
Parameter menu
www.calcert.com [email protected]1.800.544.2843 0
5
10
15
20
25
30

40
,5
Parameter menu
Perform. Mode Menu access Tool parameters
The function determines the heating characteris-
tics of the soldering tool to achieve the set tool
temperature.
Option Description
standard DGDSWHGPHGLXPKHDWLQJIDFWRU\
VHWWLQJ
min. slow heating
max. rapid heating
Button lock WXHAP Menu access Tool parameters
7KLVIXQFWLRQFDQEHXVHGWRDGMXVWWKHIDFWRU\
button presets of the WXAHP tool. Option Description
OFF –
21 7KH:;+$3LVVZLWFKHGRQWKH¿UVW
time the button is pressed and switched
off the next time the button is pressed.
Process window Menu access Tool parameters
The temperature range set in the process window
GHWHUPLQHVWKHVLJQDOUHVSRQVHRIWKHÀRDWLQJ
switching output.
Notice
On tools with an LED ring light (e.g. WXDP 120),
WKHSURFHVVZLQGRZGH¿QHVWKHLOOXPLQDWLRQ
characteristics of the LED ring light.
If the LED is continuously illuminated, this means
that the preselected temperature has been
reached or that the temperature is within the
predetermined process window.
$ÀDVKLQJ/('LQGLFDWHVWKDWWKHV\VWHPLV
heated or that the temperature is outside the
process window.
Language Menu access Station parameters
&+1 Ḕ㕮
'(1 Dansk
(1* English
ESP Español
),1 Suomi
FRA Français
*(5 Deutsch
+81 0DJ\DU
ITA Italiano
POR Português
RUS 3ɭɫɫɤɢɣ
SWE Svenska
TUR Türkçe
-31 㗌㜓媅
POL Polski
KOR 뼑霢ꎅ
CZE ýHVNê
Temperature version °C/°F (temperature units) Menu access Station parameters
Option Description
°C Celsius
°F Fahrenheit
www.calcert.com [email protected]1.800.544.2843 0
5
10
15
20
25
30

41
,5
Parameter menu
Password (lock function) Menu access Station parameters
$IWHUVZLWFKLQJWKHORFNIXQFWLRQRQRQO\WKH¿[HG
WHPSHUDWXUHNH\VFDQEHRSHUDWHGRQWKHVROGH-
ring station. All other settings are disabled until the
repair station is unlocked again.
Notice
If you want only one temperature value to be
VHOHFWDEOHWKHFRQWURONH\V¿[HGWHPSHUDWXUH
keys) must be set to the same temperature value.
Locking the soldering station
6HWWKHGHVLUHGWKUHHGLJLWORFNLQJFRGHEHWZHHQ
DQGXVLQJWKH83'2:1EXWWRQV
&RQ¿UPWKHFRGHZLWKWKH(QWHUNH\
7KHORFNLVDFWLYHWKHGLVSOD\VKRZVDORFN
V\PERO
Unlocking the soldering station
1. Call up the parameter menu. If the lock function
is active, the password menu item opens
DXWRPDWLFDOO\7KUHHVWDUVDUHVKRZQRQ
WKHGLVSOD\
2. Set the three-digit locking code using the UP /
'2:1EXWWRQV
3. &RQ¿UPWKHFRGHZLWKWKH(QWHUNH\
Single-channel display Menu access Station parameters
To obtain more straightforward readings, the
GLVSOD\PRGHIURPFDQVZLWFKHGIURPFKDQQHO
GLVSOD\WRFKDQQHOGLVSOD\
,IVLQJOHFKDQQHOGLVSOD\LVVHOHFWHGWKHGHYLFH
GRHVQRWUHVHWDXWRPDWLFDOO\WRFKDQQHOGLVSOD\
after setting the temperature of a tool channel.
7KHGLVSOD\PRGHFDQEHUHVHWXVLQJňʼn
Option Description
OFF $XWRPDWLFUHVHWWRFKDQQHOGLVSOD\
IDFWRU\VHWWLQJ
21 1RDXWRPDWLFUHVHWWRFKDQQHO
GLVSOD\
Vacuum pre-feed Menu access Station parameters
In order to prevent the pump from starting pre-
PDWXUHO\RUWRHQVXUHDGH¿QHGVROGHULQJMRLQW
SUHKHDWLQJWLPHLWLVSRVVLEOHWRVHWDQ21GHOD\
Option Description
0 sec OFF: vacuum pre-feed function is
2))IDFWRU\VHWWLQJ
1-10 sec 21YDFXXPSUHIHHGWLPHLQGLYL-
GXDOO\
Vacuum run-on Menu access Station parameters
To prevent the desoldering iron from becoming
clogged, it is possible to set a vacuum run-on time. Option Description
0 sec OFF: vacuum run-on function is OFF
IDFWRU\VHWWLQJ
1-10 sec 21YDFXXPUXQRQWLPHLQGLYLGXDOO\
adjustable
www.calcert.com [email protected]1.800.544.2843 0
5
10
15
20
25
30

42
,5
Parameter menu
Pressure gauge threshold Menu access Station parameters
7KLVIXQFWLRQFDQEHXVHGWRGH¿QHWKHPDLQWH-
nance interval of the desoldering tool. This is done
E\VHWWLQJWKHYDOXHLQPEDUDWZKLFKWKHHOHFWULF
pressure gauge issues a warning signal when the
LQWDNHV\VWHPLVFRQWDPLQDWHG/('RIWKHYDFXXP
SXPSVZLWFKHVIURPJUHHQWRUHG7KHVHWYDOXHLV
dependent on the suction nozzles used.
Adjustable -400 mbar to -800 mbar
IDFWRU\VHWWLQJ PEDU
1. 7KHV\VWHPWLSVDQG¿OWHUPXVWEHIUHH
2. 6HOHFWWKHPHQXLWHPÄ3UHVVXUHJDXJH
threshold“ in the menu.
3. 6HWWKHÄ3UHVVXUHJDXJHWKUHVKROG³SUHVVXUH
YDOXHZLWKWKH83RU'2:1EXWWRQ7KHVWDWXV
LED switches back and forth between red and
green. Use the UP button to increase vacuum
E\WRPEDUWKHQSLQFKWKHYDFXXPWXEH
and check whether the LED switches from
green to red.
4. Adopting the set change.
Interface COM 1 / 2 Menu access Station parameters
Option Description
RS232 6HULDOFRPPXQLFDWLRQZLWK3&RURWKHUFRPSDWLEOH:HOOHUGHYLFHVIDFWRU\VHWWLQJ
Air 7KH&20SRUWLVFRQ¿JXUHGDVDIRRWVZLWFKLQSXWIRUDFWLYDWLQJWKHDLUÀRZ
Vac 7KH&20SRUWLVFRQ¿JXUHGDVDIRRWVZLWFKLQSXWIRUDFWLYDWLQJWKHYDFXXP
PickUp 7KH&20SRUWLVFRQ¿JXUHGDVDIRRWVZLWFKLQSXWIRUDFWLYDWLQJWKH3LFN8SYDFXXP
6WRS*R The COM 1 port is used to drive an optional optotransmitter so that a KHE-P control
XQLWFDQEHDFWLYDWHGYLDDQRSWLFDO¿EUH
7KHRXWSXWLVDFWLYDWHGZKHQDWRROLVXVHG,QDGGLWLRQWKHÀRDWLQJVZLWFKHGRXWSXWLV
FORVHG7KHRXWSXWLVRIILQWKH6WDQGE\$XWR2IIRU2IISRVLWLRQVRULIQRWRROLVLQVHUWHG
Floating switching output 1 Menu access Station parameters
Floating switching output 1 is located at the COM 1 port.
Option Description
OFF IDFWRU\VHWWLQJ
ZeroSmog 7KHÀRDWLQJVZLWFKLQJRXWSXWLVFORVHGZKHQDWRROLVLQXVH6HOHFWHG=HUR6PRJ
H[WUDFWLRQV\VWHPVFDQEHFRQQHFWHGXVLQJDQRSWLRQDODGDSWRU:;+8%7KHUHDU
RS 232 port remains functional.
6ZLWFKLQJRXWSXWLVRSHQLQWKH6WDQGE\$XWR2IIRU2IISRVLWLRQVRULIQRWRROLVLQVHU-
ted.
Notice
,IWKH&20SRUWLVDOVRFRQ¿JXUHGIRUÄ6WRS*R³XVHWKHÄ)LOWHUIXOO³
message is evaluated by the WX HUB and, where applicable, a
message appears on the display .
www.calcert.com [email protected]1.800.544.2843 0
5
10
15
20
25
30

43
,5
Parameter menu
Floating switching output 2 Menu access Station parameters
Floating switching output 2 is located at the COM 2 port.
Option Description
OFF IDFWRU\VHWWLQJ
CH 1 Tool channel 1 controls the switching output
CH 1+2 Tool channel 1 + 2 controls the switching output
CH 1+2+3 Tool channel 1 + 2 + 3 controls the switching output
Notice
If the robot is at working temperature, the display will show – ok –.
Technical Data
Repair station WXR 3
Dimensions L x W x H 273 x 235 x 102 mm
[[LQFK
Weight ca. 6,7 kg
0DLQVVXSSO\YROWDJH 230 V, 50 Hz T0053500699
120 V, 60 Hz WXR 3
100 V 50/60 Hz T0053500199
Power consumption ::
6DIHW\FODVV I, antistatic housing
III, Soldering tool
Fuse 2YHUFXUUHQWUHOHDVH9$
9$
Temperature range &HOVLXV & &
)DKUHQKHLW ) )
Controllable temperature range is tool-dependent
7HPSHUDWXUHDFFXUDF\ &)7RROGHSHQGHQW:;+$3&)
7HPSHUDWXUHVWDELOLW\ &)
Equipotential bonding Via 3.5 mm pawl socket on back of unit
'LVSOD\ 240 x 88 dots / Backlighting
USB port 7KHFRQWUROXQLWFRPHVZLWKD86%SRUWIRULQVWDOOLQJ¿UPZDUHXSGDWHV
FRQ¿JXUDWLRQDQGPRQLWRULQJ
3XPS,QWHUPLWWHQWPRGH
V Max. vacuum 0,7 bar
0D[GHOLYHU\UDWHOPLQ
Max. hot air 15 l/min
Additional vacuum pump Max. vacuum0,5 bar
0D[GHOLYHU\UDWHOPLQ
www.calcert.com [email protected]1.800.544.2843 0
5
10
15
20
25
30

44
,5
Message/symptom Possible cause Remedial measures
'LVSOD\Ä
Tool has not been detected
Tool defective Check connection of tool to
device
Check connected tool
1RGLVSOD\IXQFWLRQGLVSOD\
2))
1RPDLQVVXSSO\YROWDJH Turn on mains power switch
&KHFNPDLQVVXSSO\YROWDJH
Check device fuse
1RYDFXXPDWGHVROGHULQJWRRO
Vacuum not connected
Desoldering nozzle clogged
3XPSIDXOW\
Connect vacuum hose to
vacuum connection
Service desoldering nozzle
using cleaning tool
,QVXI¿FLHQWYDFXXPDWGHVROGH-
ring tool
Filter cartridge on desoldering
tool full
0DLQ¿OWHUIXOO
&KDQJH¿OWHUFDUWULGJHRQ
desoldering tool full
&KDQJHWKHPDLQ¿OWHUHOHPHQW
on the soldering station
Hot air tool has no air
Air hose not connected
0DLQ¿OWHUIXOO
Connect or check air hose
&KDQJHPDLQ¿OWHUFDUWULGJHRQ
soldering station
Symbols
&DXWLRQ
5HDGWKHRSHUDWLQJLQVWUXFWLRQV
%HIRUHSHUIRUPLQJZRUNRIDQ\NLQG
RQWKHXQLWDOZD\VGLVFRQQHFWWKH
power plug from the socket.
ESD-compatible design and ESD-
compatible workstation
Equipotential bonding
&(PDUNRIFRQIRUPLW\
Fuse
6DIHW\WUDQVIRUPHU
Soldering
Desoldering
Hot air
Disposal
Do not dispose of electric tools together
ZLWKKRXVHKROGZDVWHPDWHULDO,Q
observance of European Directive
2012/19/EU on waste electrical and
electronic equipment and its implemen-
tation in accordance with national law,
electric tools that have reached the end
RIWKHLUOLIHPXVWEHFROOHFWHGVHSDUDWHO\
DQGUHWXUQHGWRDQHQYLURQPHQWDOO\
FRPSDWLEOHUHF\FOLQJIDFLOLW\
Dispose of replaced equipment parts,
¿OWHUVRUROGGHYLFHVLQDFFRUGDQFHZLWK
the rules and regulations applicable in
\RXUFRXQWU\
Error messages and error clearance
www.calcert.com [email protected]1.800.544.2843 0
5
10
15
20
25
30

45
,5
Original declaration of conformity
Repair station WXR 3
Tool WXHAP 200, WXDP 120, WXDV 120, WXP 65, WXP 120,
WXP 200, WXMP, WXMT, WXSB 200, WXHP 120
:HKHUHE\GHFODUHWKDWWKHSURGXFWVGHVFULEHGKHUHLQFRPSO\ZLWKWKHIROORZLQJJXLGHOLQHV
(85R+6(*(*
Applied harmonised standards:
',1(1 ',1(1
',1(1 ',1(1
',1(1 ',1(1
',1(1 ',1(1
Besigheim, 2015-07-08
T. Fischer S. Hofmann
Technical director Managing director
Authorised to compile technical documentation.
:HOOHU7RROV*PE+
&DUO%HQ]6WUDH%HVLJKHLP*HUPDQ\
Warranty
&ODLPVE\WKHEX\HUIRUSK\VLFDOGHIHFWVDUHWLPH
EDUUHGDIWHUDSHULRGRIRQH\HDUIURPGHOLYHU\WR
WKHEX\HU7KLVGRHVQRWDSSO\WRFODLPVE\WKH
EX\HUIRULQGHPQL¿FDWLRQLQDFFRUGDQFHZLWK
%*%*HUPDQ)HGHUDO/DZ*D]HWWH
:HVKDOORQO\EHOLDEOHIRUFODLPVDULVLQJIURPD
ZDUUDQW\IXUQLVKHGE\XVLIWKHTXDOLW\RUGXUDELOLW\
ZDUUDQW\KDVEHHQIXUQLVKHGE\XVHLQZULWLQJDQG
XVLQJWKHWHUPÄ:DUUDQW\³
7KHZDUUDQW\VKDOOEHYRLGLIGDPDJHLVGXHWRLPSUR-
SHUXVHDQGLIWKHGHYLFHKDVEHHQWDPSHUHGZLWKE\
unauthorised persons.
Subject to technical alterations and amendments.
For more information please visit
www.calcert.com [email protected]1.800.544.2843 0
5
10
15
20
25
30
Other manuals for WXR 3
5
Table of contents
Other Weller Soldering Gun manuals

Weller
Weller wsd 81 User manual

Weller
Weller WTHA 1 User manual

Weller
Weller WXP?65 User manual

Weller
Weller HAP 1 User manual

Weller
Weller WHA 3000P User manual

Weller
Weller WSD 130 User manual

Weller
Weller WSM 1 User manual

Weller
Weller whs 40d User manual

Weller
Weller WXsmart Operation instructions

Weller
Weller HAP 200 User manual

Weller
Weller WPHT User manual

Weller
Weller WT 2M User manual

Weller
Weller WSF 80 User manual

Weller
Weller WLC100 User manual

Weller
Weller WXsmart User manual

Weller
Weller WS 81 User manual

Weller
Weller WTCP-S User manual

Weller
Weller WMP User manual

Weller
Weller WSP 80 User manual

Weller
Weller WSF 81 D5 User manual