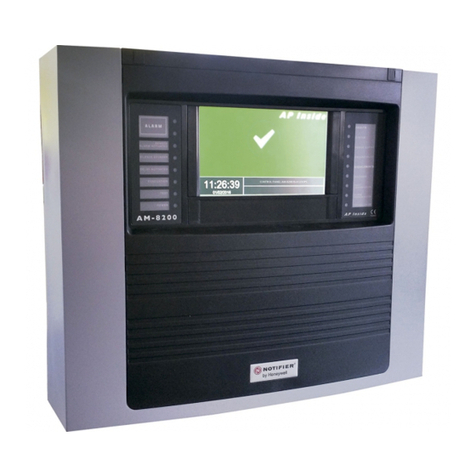
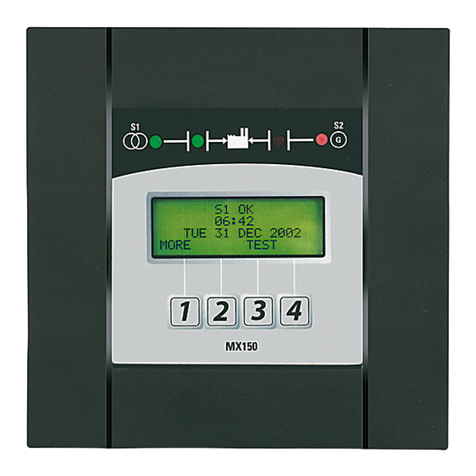
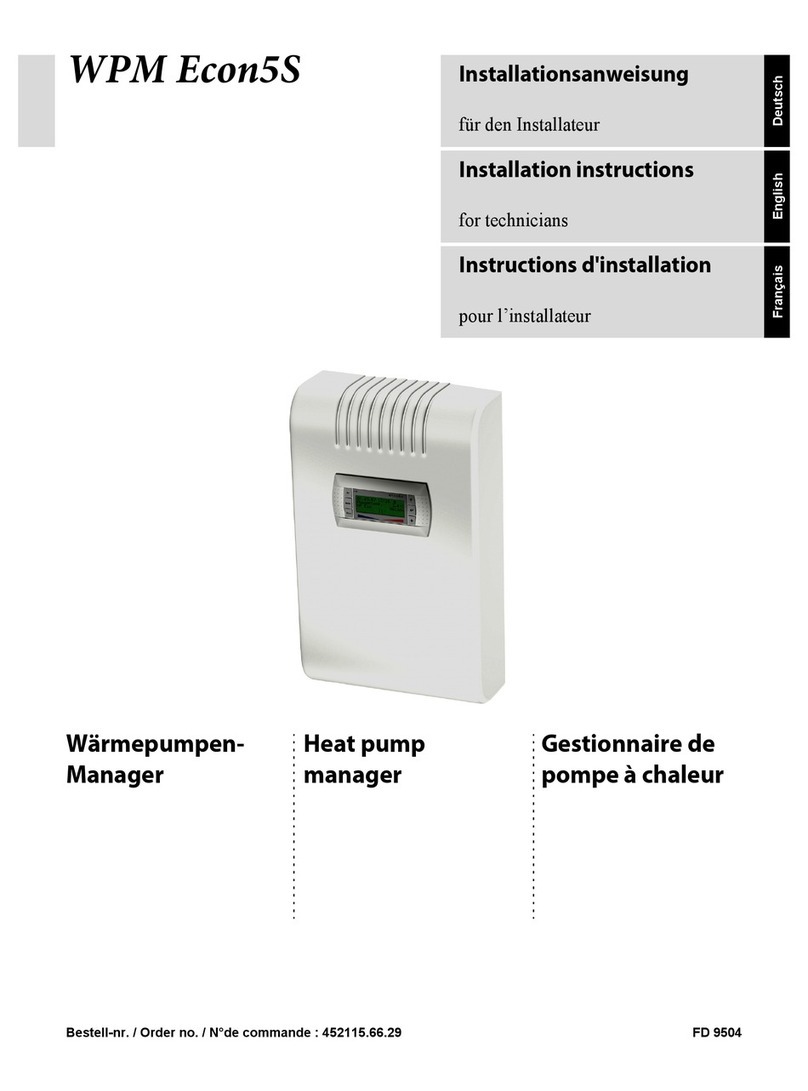
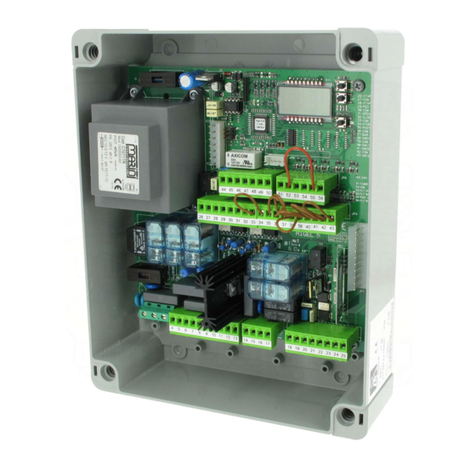
Fidelix multiDISPLAY FX-RP Series Owner's manual

Fidelix FX-RP multiDISPLAY Programming manual page 1 of 38
FX-RP multiDISPLAY programming manual
FX-RP multiDISPLAY programming manual........................................................................................................1
Getting started with the FX-RP multiDISPLAY .................................................................................................2
General overview ..........................................................................................................................................2
Device properties ..........................................................................................................................................2
Different versions ..........................................................................................................................................3
Encasings..................................................................................................................................................3
Different chip versions...............................................................................................................................4
Using the multiDISPLAY ...............................................................................................................................5
Startup.......................................................................................................................................................5
Recalibrating the touch screen and changing settings..............................................................................5
Updating the firmware of the FX-RP multiDISPLAY .....................................................................................6
Using the FX-RP multiDISPLAY with the Fidelix multi24 room controller module ........................................6
Demo projects...............................................................................................................................................6
Software ...........................................................................................................................................................6
Overview .......................................................................................................................................................6
Installation.....................................................................................................................................................7
Fidelix Graphics Editor..................................................................................................................................8
What you should know before you edit pages...........................................................................................8
The FXINDEX page...................................................................................................................................9
Editing pages (a few pointers).................................................................................................................10
HTML to Multi Display / Room Display Converter.......................................................................................11
The program’s UI.....................................................................................................................................11
Converting HTML files to the DISPLAY format........................................................................................12
Windows zoom settings and the converter..............................................................................................13
Troubleshooting the converter.................................................................................................................14
Getting projects on the multiDISPLAY............................................................................................................14
Loading projects into the FX-RP multiDISPLAY’s internal memory............................................................14
With an FX-controller...............................................................................................................................14
With a multi24 module and a PC.............................................................................................................15
With a µSD memory card ........................................................................................................................15
Using graphics from a μSD-Card ................................................................................................................15
Minimizing binary file size........................................................................................................................15
Multiple projects on one μSD-Card .........................................................................................................16
Uploading a project via Modbus..................................................................................................................16
Detailed programming ....................................................................................................................................17
Introduction .................................................................................................................................................17
Visualisation customisation.........................................................................................................................18
IEEE-754 Floating Point format...............................................................................................................20
Increment, Decrease, Minimum & Maximum ..............................................................................................20
Math operators............................................................................................................................................21
Status texts .................................................................................................................................................21
Time and date, temperature, firmware version and Modbus address.........................................................22
Internal time schedules ...............................................................................................................................23
Links............................................................................................................................................................24
Strings / texts ..............................................................................................................................................25
Entrance control user panel ........................................................................................................................26
Customising keypad buttons.......................................................................................................................26
Extended UTF-8-character support.............................................................................................................26
Modbus master functionality...........................................................................................................................27
Complete Display register structure overview ................................................................................................31
Register sections ........................................................................................................................................31
Input data (input from an external Modbus master) ....................................................................................31
Output data (output read by an external Modbus master) ..........................................................................32
How to work with input/output registers ......................................................................................................33
Trends (history)...........................................................................................................................................33
Graphical look-up table editor .....................................................................................................................34
String Variables...........................................................................................................................................34
Display parameters .....................................................................................................................................35
Change log .....................................................................................................................................................37

Fidelix FX-RP multiDISPLAY Programming manual page 2 of 38
Getting started with the FX-RP multiDISPLAY
General overview
The FX-RP multiDISPLAY’s interface is freely programmable. It consists of “pages” that are made using the
Fidelix graphics editor. Links can be made between pages, and the user will navigate in a similar way through
the pages. The graphics editor generates .htm pages that have to be converted using the “HTML to Multi Display
/ Room Display Converter”, which generates binary files that are suitable for the FX-RP multiDISPLAY.
Up to 768 kB of data (256 kB for generation 1 displays) can be stored into the internal memory of the FX-RP
multiDISPLAY. This is sufficient for most projects, but when more capacity is needed (heavy graphics, lots of
pages, …), a μSD card can be used. You can order high quality µSD cards from us, and we strongly advise you
to use these µSD cards, as a (cheaper) µSD card breakdown will result in a freezing of the user interface,
because new pages are always loaded from the µSD card when this is used. (see Using graphics from a µSD
card)
The most common way the display is used, is as Modbus slave, in which case it can hold 250 variables, that are
called and referenced to as POINTS.
Each user interface created for the FX-RP multiDISPLAY resides in its own folder. This folder will further be
referenced to as the “project folder” in this manual. This folder needs to contain at least 1 .htm file, and a folder
called “Symbols” with all symbols used in the project. When no symbols are used, the folder still needs to be
present to be able to run the conversion from .htm files to binary files for the FX-RP multiDISPLAY.
The communication between the FX-RP multiDISPLAY as a slave, and a master device uses the Modbus RTU
protocol. The FX-RP multiDISPLAY has 250 predefined points (POINTxxx) that can be freely used. Each point
has 6 registers containing its value, unit, divider etc. (see Input data and Output data)
When working with other Fidelix devices, the programmer does not need to know about the Modbus registers;
for the multi24, all necessary code is generated by the converter, and when working with an FX-controller, the
first 50 points can be directly selected as the physical point of any DI, DI, AI, AO or alarm point.
If you are not using a Fidelix controller as your Modbus master, the linking of the FX-RP multiDISPLAY points
happens in the same way, only you’ll need to program your master to read and write the correct registers. The
register structure used by the FX-RP multiDISPLAY is explained later in this document.
Device properties
Physical size
3.5” (+/- 9 cm) diameter (72 x 54 mm screen, 85 x 85mm encasing)
Power supply
12-45 VDC or 16-32 VAC (V1 = 12-26VDC or 16-26 VAC)
Resolution
320x240 pixels
Colours
16 bit depth
Images
All standard supported image types. No dynamic gifs
Modbus speed
Slave: auto detect from 4 800 to 115 200 bps
Master: freely configurable in ModbusMasterSettings.txt file (see Modbus Master
functionality) from 9 600 to 115 200 bps
Modbus settings
Slave: Default settings: 8 Data bits, no parity, 1 stop bit
Parity can be changed by placing a file “serial.txt” with content “Parity=Even”,
“Parity=Odd” or “Parity=No” in the project folder
Master: freely configurable in ModbusMasterSettings.txt file (see Modbus Master
functionality)
Display “points”
Slave: 250 points total, maximum 40 per page
Master: 40 points / page, total depends on the distribution of the registers of the
slave device(s)
(see the explanation about ModbusDevices at the end of the
Modbus Master functionality section)
Available memory
768 kB (V1 = 256 kB)

Fidelix FX-RP multiDISPLAY Programming manual page 3 of 38
Different versions
Encasings
The FX-RP (Fidelix Room Panel) multiDISPLAY is available in two different encasings. Both encasings fit in a
standard European pattress box (electrical socket or light switch size). Both have external dimensions of
85x85mm.
The FX-RP-A is straight: The FX-RP-B is +/- 7° tilted upwards:
The FX-RP-C is without encasing: The FX-HP (Fidelix Hand Panel):
Though the PCB for the Room Panel and Hand Panel have a different shape, they have in fact the same
hardware specifications and can thus be used with the exact same software.

Fidelix FX-RP multiDISPLAY Programming manual page 4 of 38
Different chip versions
Two different chips have been used for the FX-RP multiDISPLAY; deliveries before 2017 were made with chips
with 256 kB (STM32F103), and deliveries from January 2017 onwards are made with chips with 768 kB of
memory available for project pages and graphics (STM32F405). This difference is important when selecting the
correct version of the firmware for your FX-RP multiDISPLAY. The “first generation” displays use a processor
with product code STM32F103 and require firmware with version numbers 0.xx or 1.xx. The second generation
displays use a processor with product code STM32F405 and require firmware with version number 2.xx.
You can also recognise the different generation displays by their different programming connector (the red plastic
connector, used during production), capacitor (the part looking like a small button battery, holding time schedule
settings and the clock for 10-50 hours), and tamper switch, or by the PCB version; 1.52 and upwards = 2nd
generation multiDISPLAY.
multiDISPLAY 1st generation
multiDISPLAY 2nd generation
PCB version < 1.52
PCB version >= 1.52
Processor = STM32F103
Processor = STM32F405
Power supply: 12-26 VDC / 16-26 VAC
Power supply: 12-45 VDC / 16-32 VAC
Changed components
different capacitor and holder
different programming connector for production
different tamper switch

Fidelix FX-RP multiDISPLAY Programming manual page 5 of 38
Using the multiDISPLAY
Startup
The FX-RP multiDISPLAY is started by connecting the power supply.
When a project is detected, either on the internal memory or on the µSD
card, this will be loaded into working memory and a message will be
displayed. After a few seconds the “home” page of the project will be
shown.
Recalibrating the touch screen and changing settings
By pressing the touch screen of the FX-RP multiDISPLAY for about 10
seconds, the multiDISPLAY’s calibration is activated. Follow the on-
screen instructions and click each of the three blue crosses one by one
with a pointy device. Fingers can also be used, but tend to get less
precise results.
Calibration can also be called from a link on the multiDISPLAY.
After calibration, the settings screen is opened. Time, Date, Modbus
address, display brightness and the five internal time schedules can be
adjusted from this page. Also the firmware version is show here, and click-
sounds can be en-/disabled, the orientation of the display can be changed
and the precision of the screen can be adjusted by selecting “finger
mode”.
Here the five internal time schedules can also be accesses and
modified.
Note that you can also create your own graphics for the internal time
schedules (see the Internal Time Schedules section).
It is possible to disable the settings page or certain parameters through a Modbus register. It is also possible to
change settings through Modbus registers. Registers are explained in the “Display parameters” paragraph.
Opening the settings page and starting the calibration can also be done by creating a link on your pages. See
the “Links” section in this document.

Fidelix FX-RP multiDISPLAY Programming manual page 6 of 38
Updating the firmware of the FX-RP multiDISPLAY
The firmware of the FX-RP multiDISPLAY can be updated using the module update feature (Programming
Module versions) on an FX-controller. The firmware updating procedure is like uploading graphics to the internal
memory of the FX-RP multiDISPLAY except that new firmware files should be copied to the \hdisk\fidelix\bin\hex
folder instead of the \hdisk\fidelix\data folder. The firmware can also be uploaded to the FX-RP multiDISPLAYs
connected to the sub-bus of a multi24 module. The file name for a pass-through updating should be for example
PASSTH-12-MULTI-DISP.hex-0173, where 12 is the Modbus address of the FX-RP multiDISPLAY.
The firmware can also be updated by the display itself. Copy the file “RDFW.BIN” you can download from our
partner page to the root of the μSD-card. With power off, insert the μSD-card into the display. Power on the
display. The “DIAG” LED on the back of the display will blink rapidly during the time the firmware is being
updated, and the screen will light up but stay blank during the updating process. The file “RDFW.BIN” will be
renamed to “RDFW_LOADED.BIN” to avoid reloading the firmware every time the display is powered on again.
If there already is a file called “RDFW_LOADED.BIN”, the renaming of the original file will fail without error
message. (This means the next time a display is powered on with that μSD-card inserted, that display will update
the firmware, regardless of the fact that it might have done so on the previous boot.)
You can purposely keep the “RDFW.BIN” file to update several displays consecutively, by naming the file
“RDFWKEEP.BIN”. (Basically, this has the same effect as having both the “RDFW.BIN” and the
“RDFW_LOADED.BIN” file on the μSD-card.)
Using the FX-RP multiDISPLAY with the Fidelix multi24 room controller module
The FX-RP multiDISPLAY can be connected to the multi24’s external bus either using the RJ12 connector or
via the P2, G0, EA and EB contacts. The converter will generate a sample IEC-code to be used on the multi24.
It is highly recommended to use this sample code at least as a starting point. Sample IEC-files suitable to use
directly with your project are stored in the \UserFiles\IEC folder in the same folder the converter is located.
Demo projects
Fidelix provides a file with demo projects for the FX-RP multiDISPLAY. These demo projects are a good starting
point for learning how to use the FX-RP multiDISPLAY. Note that these are sometimes incomplete, and in no
way cover the totality of functionalities the FX-RP multiDISPLAY offers. They are, however, a valuable source
of inspiration and are very useful as examples.
Software
Overview
To make projects for the FX-RP multiDISPLAY, two programs are needed, that can both be downloaded from
our partner page. The usual work flow will be as follows:
- Create pages to be loaded onto the FX-RP multiDISPLAY with the Fidelix Graphics Editor (.htm file format)
- Convert those pages with the HTML to Display converter program
- Copy the “UserFiles” folder generated by the Converter program to a µSD card
- Start up the FX-RP multiDISPLAY with the µSD card in it and wait for the project to be loaded into the internal
memory
- Power off the FX-RP multiDISPLAY, remove the µSD memory card and power the display up again; your
project is now loaded into the display and ready to be used

Fidelix FX-RP multiDISPLAY Programming manual page 7 of 38
Installation
Our software is designed for Windows, and uses a lot of its embedded features. It also doesn’t have an
installation wizard where a User Account Control check could be done to give administrative rights to the
programs, which is why all our programs need to be granted sufficient rights in another way. There are two ways
to do this:
The first is by unblocking the downloaded files (in the file properties dialog box) in Windows file explorer as
follows:
NOTE: This needs to be done for all programs, as well as for all files!
The second way to achieve the same goal is by following the steps below carefully; sometimes, the unblocking
doesn’t seem to be enough, and then the following method needs to be used:
1. Unzip the program (preserving the subfolder structure!) and save the folder on your local hard drive.
2. Delete the downloaded zip-file.
3. Re-zip the whole folder you just unzipped locally and save the new zip-file on your local hard drive
4. Delete the previously unzipped folder (the folder unpacked from the downloaded zip-file).
5. Now, from the locally generated zip-file, unzip again the same folder (again, preserving the subfolder
structure!) and save the folder on your local hard drive.
6. Delete the locally created zip-file.
7. Do the same for all software AND the example folders. (IMPORTANT!)

Fidelix FX-RP multiDISPLAY Programming manual page 8 of 38
Fidelix Graphics Editor
What you should know before you edit pages
The Fidelix Graphics editor is not only used for making graphics for the multiDISPLAY. It is also used to make
pages for our larger controllers; the FX-line and Spider, for our multiLINK protocol converter, and our webVision
SCADA software. This means that some of the features in the graphics editor are not used for the multiDISPLAY
(and that is also why we first make HTML pages to subsequently convert them to a format that the multiDISPLAY
can read).
To open pages with the graphics editor, make sure your project folder structure is similar to this: all .htm files in
1 folder where there is also a folder called “Symbols”.
In the “EditPoint” dialog box, following features are NOT recognised by the multiDISPLAY: CSS file, CSS Class,
User level, Show info, Image rotation, Image Front colour and Symbol Front colour. All other features can be
used as with the other products.
The border-lines you see changing at different editing sizes (640, 800, 1024) are not used for the multiDISPLAY.
For the multiDISPLAY, the easiest way to mark the available graphics area is to put an element without pointID
at 320 (X) and 240 (Y) pixels like in the example files.
Important to know is also that the project folder and the graphics editor program folder have to be on the same
logical Windows drive (e.g. C:\) because of the same Windows rights reasons the editor needed to be unblocked.
With the editor, a set of .htm pages can be made. Links can be made between pages. Any number of elements
can be placed on the plane, keeping in mind the 320x240 pixel size of the display itself. This means that any
element positioned outside these boundaries will be ignored by the converter.
Make sure to read through the cheat sheet page that pops up when you
click the question mark next to the three flags. It contains useful tips for
working with the graphics editor.
Choose “ShowPoints” in the left menu or click right on an empty spot in your
page with no element selected and select “Show Points” for a fast way to
batch change multiple points in your page; for instance, if you need to make
5 identical pages for 5 devices, you can very quickly rename the points for
device 1 as 11, 12, 13 … 19, for device 2 as 21, 22, 23 … 29 etc.
Make sure to click the “Arrange” button in the
bottom left corner of the screen to have access
to some other very useful features of the
graphics editor.

Fidelix FX-RP multiDISPLAY Programming manual page 9 of 38
The FXINDEX page
After you have opened at least one page from the project folder, you can click the “Load” button in the middle
column of the program. This will load the file called “FDXINDEX.HTM” to the centre column. This page is loaded
from your project folder. You can also open this page to easily add links to other pages you make yourself. This
menu is nowhere visible on the multiDISPLAY, it is just a faster way to navigate through the pages in your project
folder.
Be careful when switching from page to page through the menu; any unsaved changes will be lost, and there is
NO popup box to remind you to save changes!
Caution! Trying to load the FXINDEX page
without it being present in your working
folder will cause an error like this to pop up,
and will cause the editor to completely
freeze or get stuck in an endless loop of
error report popups.
The reason for this is because the graphics
editor uses Internet Explorer scripts for its
base functionality (that is why it is so small)
that cannot be stopped from outside of
Internet Explorer,
So, make sure you have the file present
in your working folder before loading it!

Fidelix FX-RP multiDISPLAY Programming manual page 10 of 38
Editing pages (a few pointers)
- Once a page is opened inside the Graphics editor, you can drag elements around with the mouse or with the
keyboard as you like (shift+arrow = 10px movements).
- To open the EditPoint window, double click an element or press Ctrl+E.
- Note the “border” images at X=320 and Y=240 in many of the example files to indicate how big the
multiDISPLAY is. As they are outside the 320x240 drawing area, the converter will simply ignore them.
- Any graphical element can be used, but the naming should follow the conventions like in the “symbols” folder
inside your project folder. (e.g. Filename-0-640.jpg, Filename-1-640.jpg, Filename-2-640.jpg, …)
Graphical elements have to be either .bmp, .gif (dynamic gifs don’t work on the display), .jpg, .jpeg or .png.
- Display points are referenced by their pointID; POINT1 through to POINT250.
Modbus master points are defined by using “MODBUS:” followed by the configuration of the point in the
pointID input field.
- If you want to use a multi-stage image (like the power buttons in the example pages), enter the desired values
through which to toggle separated by spaces in the “Fixed value” field of the EditPoint dialog box:
- Showing the value of a point is done by either selecting a
“Number field” type element, or by ticking the “Show point
value” tick box of a “Text” type element.
- Showing text based on the value of a point (like for instance on/off, day/night or off / startup / slow / fast /
error) is done by selecting a text type element and writing the desired values and corresponding texts in the
yellow box inside the EditPoint dialog box.

Fidelix FX-RP multiDISPLAY Programming manual page 11 of 38
- Making “+” or “-” buttons can be done using
symbols and putting the step value, minimum
and maximum value in the “Fixed value” field
For more detailed instructions on how to use the Fidelix Graphics editor, consult the graphics editor’s own
reference manual on our partner webpage, and read further in this manual on the FX-RP multiDISPLAY specific
syntax in the detailed programming section.
HTML to Multi Display / Room Display Converter
The program’s UI
The “Open file” button is used to start the process. Select the .htm page that you want to use as a start page
each time the display is powered on. Also, any links inside your project to “CLOSE”, will direct the user to this
page.
The converter can also be used to check how much memory a single image will take after conversion. Instead
of opening an .htm file you simply open the image and the converter will check how much memory will be needed
using different packing methods. The best packing method is automatically selected during the conversion.

Fidelix FX-RP multiDISPLAY Programming manual page 12 of 38
-The “Send to uSD-card” button copies the conversion result to a removable memory device containing a
“UserFiles” folder.
NOTE: When using an empty µSD card for the first time, a folder called “UserFiles” must be created manually,
or the “UserFiles” folder, generated by the converter must be copied manually.
NOTE: The converter program searches for a Windows removable memory drive that has a folder called
“UserFiles” in its root alphabetically. This means that, for instance, if there is a drive “G:” that contains another
memory card which also has a “UserFiles” folder, this folder will be overwritten.
-The “uSD-card” tick box should only be selected (ticked) if you want to use the project from a μSD memory
card. When not ticked, the project size is limited to 768 kB (256 kB for V1 displays) and all project files will
be copied into the FX-RP multiDISPLAY’s internal memory upon startup of the display. A μSD-card can be
used for projects that are bigger than the internal memory, in which case only the font files need to fit into the
internal memory of the FX-RP multiDISPLAY. By checking the µSD-Card checkbox, the converter will not
make one file of the project, to be loaded into the internal memory, but instead, will generate a file containing
only the used fonts.
During development, it is recommended to use the “µSD-card” feature. This will speed up the starting of the
display as only fonts need to be loaded into the memory.
During commissioning the tick box should not be ticked. Make a final conversion and copy the project
onto a µSD card. Now, simply put the µSD card in the display, power up the display and wait for a few seconds
while the project is loaded into the internal memory. Now, take the power off the display, remove the µSD
card, and power up the display. You are now running your project from the internal memory.
-The “Use Transparency for Images” selection defines if you want to have transparent background for images.
The loading of images takes more time if a transparent background is used. If not selected then instead of
transparency, the page’s background colour is used.
-The “Use Transparency for Text” selection defines if you want to have transparent background for text. The
loading of text takes more time if a transparent background is used. If not selected then instead of
transparency, the page’s background colour is used.
-The “No Warnings” selection discards some not so important warning messages during the conversion
process.
-The “Use Same Background for All Pages” selection is used if you want to have the same background image
for all pages. This saves memory and helps to keep project size under 768kB. When using this feature, you
have to define all objects as active object, because all static objects are discarded in this case. This means
that for example you may define the page title as text object having pointID “Title”, in which case it is generated
as an active object, but not linked to any physical register.
-The “Large Memory (STM32F405)” tick box should be ticked when you are converting a project for a V2
display (so, purchased later then 2016). This will allow for the full memory to be used. If you are converting a
project to be used with a V1 display, which only has 256 kB of memory available for projects, make sure the
box is unticked.
Converting HTML files to the DISPLAY format
The HTMLtoDisplay program is used to convert HTML files to the format supported by the FX-RP multiDISPLAY.
Conversion is started by opening the .htm file of the project’s main page. This is the page that will show up when
the display is power up, or when a link pointing to “CLOSE” is used. The converter will go through the links in
the page and any linked page. This means the converter needs to be started only once. If any dead links are
found, the process will be aborted. During conversion, the results will be stored into \UserFiles folder.
This means that if you want to have pages that are forced to show up by the Modbus master, but that cannot be
accessed through the normal UI, you have to include a “hidden” link somewhere in the project. This hiding can

Fidelix FX-RP multiDISPLAY Programming manual page 13 of 38
be done -for instance- by having a password protected settings page with on it a 1x1 pixel link that uses the
“Hiding” feature. This way the chances of accidentally opening that page are reduced to almost none.
Windows zoom settings and the converter
The converter works in such a way, that it loads each page, and then takes a screenshot of your actual computer
screen. This means that during conversion, no other windows are allowed inside or on top of the converter
window, as whatever is placed on top, will be visible on the display.
Make sure to set the Microsoft Windows zoom or scale factor to 100% in the Windows settings:
Having the wrong zoom factor will result in a converter
window looking like this:

Fidelix FX-RP multiDISPLAY Programming manual page 14 of 38
Troubleshooting the converter
The converter works using a lot of embedded Windows and Internet Explorer features. This unfortunately also
means that it is recommended to do only 1 single conversion, and then close the program. You will easily
encounter program crashes when doing multiple very similar conversions. IN that case, it might happen that an
instance of the program stays in the computer memory, even while visually closed. In such a case, start the
Windows task manager and manually stop the “BMPconvert” process:
Getting projects on the multiDISPLAY
Projects can either be loaded into the internal memory of the multiDISPLAY, or be stored on a µSD card. The
advantage of the internal memory is its speed, the advantage of the µSD card is its size. Most projects will easily
fit into the internal memory of the FX-RP multiDISPLAY, but for complex, extensive graphics with many pages,
if might be necessary to use a µSD memory card.
We recommend using the internal memory as long as this is possible, because this will limit the number of read
operation from the µSD card and thus guarantee a longer life span of your project.
Loading projects into the FX-RP multiDISPLAY’s internal memory
Make sure that when you want to use the graphics from the FX-RP multiDISPLAY’s internal memory, the “uSD-
card” tick box is NOT ticked. When the box is not ticked, the converter will generate 1 file that contains the whole
project and that will be copied into the display’s internal memory. When the box is ticked, the same file will only
contain the used fonts of the project, and links to the files on the µSD card.
With an FX-controller
From an FX-Controller it is possible to load the generated binary file to the FX-RP multiDISPLAY through the
module update feature on the controller ( > Programming > Module versions). In order to see the graphics in the
list, copy the generated “MULTI-DISP.dat-xxxx” file you will find inside the “UserFiles” folder on your PC to the
\HDisk\Fidelix\DATA folder on the FX. Note that this folder is different than the one used for firmware updates.
The module update feature can also be used to update graphics of FX-RP multiDISPLAYs connected to a
multi24’s external bus. This feature is called “pass-through”. To enable the pass-through feature, the “MULTI-
DISP.dat-xxxx” file name has to be changed to have the PASSTH-XX- prefix, where XX is FX-RP
multiDISPLAY’s Modbus address on the external bus. For example, when uploading a project to an FX-RP
multiDISPLAY, connected to the external bus of a multi24 on address 10, the file name should be “PASSTH-10-
MULTI-DISP.dat-xxxx”. New files copied to the \hdisk\fidelix\data folder will automatically show in the firmware
selection frame.

Fidelix FX-RP multiDISPLAY Programming manual page 15 of 38
With a multi24 module and a PC
Using the multi24 programming tool, the same “.dat-xxx” files can be selected in the “Display graphics” section.
The program will then ask the Modbus address of the display and the multi24 will be used as pass-through
handler.
With a µSD memory card
It is possible to update the internal memory from a μSD-card. During the power up sequence, the FX-RP
multiDISPLAY will check if a “MULTI-DISP.dat-xxxx” file is found on the μSD-card and if found the file is copied
into the internal memory. After that, the μSD-card can be removed, and the display restarted (power off and
back on). From then on, the internally stored pages are used. The advantage over using the graphics from the
µSD card is the obvious lower number of reads from the µSD card, but mainly the speed.
Make sure to verify if your FX-RP multiDISPLAY is of the first generation or the second, as the available memory
is tripled in the V2 displays. In the converter, you can tick the “Large Memory (STM32F405)” tick box when you
have a V2 display so the converter will allow you to convert larger projects.
Using graphics from a μSD-Card
During the development stage of graphics or when your project doesn’t fit the internal memory, you can use a
μSD-card to store graphics. To do so, tick the “uSD-card” tick box in the converter and copy the generated
“UserFiles” folder to the μSD-card using a memory card reader. Insert the card into the memory card slot of the
FX-RP multiDISPLAY and reboot the FX-RP multiDISPLAY.
By using a μSD-card you can quickly test if graphics are working as expected without the need to load images
into the internal memory of the FX-RP multiDISPLAY. A μSD-card also needs to be used if more than 768 kB
storage space is needed.
When using a µSD memory card, please make sure you are using cards of good quality from a trustworthy
manufacturer. SDXC cards are not readable by the FX-RP multiDISPLAY.
A good reference list for memory cards’ quality can be found here: https://elinux.org/RPi_SD_cards.
Minimizing binary file size
If your project does not fit into the 768kB (or 256 for V1 displays) reserved for internal data storage, you may
either use a μSD-card for data storage or try to optimise your project to use less memory. Here are some tips to
keep your total project size as small as possible:
-Do not use more than 255 colours in images. The easiest way to accomplish this, is to convert your images.
The embedded compression of the converter only works with < 255 colours. Any images using more than
255 colours will not be compressed at all.
-Do not change the image size using object properties. Instead use the real height and width of the image.
-Minimise the colour count in pictures. Large areas using a single colour will not take much memory. Even if
the colour count is less than 255, more memory is needed if more colours are used.
-For dynamic objects, use Text size 12. The “bold” option can be used. Font size 12 is embedded in the
firmware, all other font sizes will take up space from the internal memory.
-If a larger font size is needed, keep in mind that a larger font size takes more memory than a smaller. So do
not use larger fonts than needed.
-Minimise different font sizes used. Every different font size uses some space of the memory.
-Try to have only “active” elements; this will make the background image easier and thus smaller. You can
make an element active by giving it a PointID. Make sure not to use a significant one already in use, like
“POINTxx”, “LINK”, but rather go for something like “UNUSED_ELEMENT” or “IMAGE”.

Fidelix FX-RP multiDISPLAY Programming manual page 16 of 38
Multiple projects on one μSD-Card
Multiple graphic projects can be stored on a single
μSD-Card. This feature is useful if you have many
language versions of the same project or for
demonstration purposes. Links to a different
project folder can be defined with
“PATH:UserFiles_xxx” syntax in the link field as
shown on the right.
The folder name should be “UserFiles_xxx” where
xxx can be anything you want. The last character
of the folder name is loaded into register 3013, so
the Modbus master can detect which project is
loaded. The FX-RP multiDISPLAY demo projects
folder contains an example project folder named
“multi language example” which will help you on
your way.
Additionally, instead of using
“PATH:UserFiles_xxx”,
“LOCKPATH:UserFiles_xxx” can be used. The difference is that with “LOCKPATH”, the folders on the µSD card
get renamed. The original “UserFiles” folder will be named “UserFiles_orig”, and the folder in the link will be
renamed “UserFiles”. Note that because of this, you can only use “LOCKPATH” once with each µSD card.
The main use of the “LOCKPATH” feature is to be able to send out displays with µSD cards and only choose on
site what program wil be loaded. If the selectable projects are compiled to fit in the internal memory of the FX-
RP multiDISPLAY, selecting them will load the desired project into the memory, and the µSD card can then be
removed, making this a very useful feature for situations where you don’t know in advance with what equipment
the FX-RP multiDISPLAY is going to be used.
Uploading a project via Modbus
Graphical pages stored on the FX-RP multiDISPLAY’s internal memory or on the µSD can be updated through
Modbus registers 65278 – 65343 by any Modbus master:
65278 - 65341
64 data registers
65342
statusCPU
status from substation
65343
statusDISP
status to substation
1)
To start a transfer, the master sets statusCPU register to 0xAAAA (upload request)
2)
statusDISP receives 0x0000 from the display and the display will read "Loading data..." (ready for
download)
3)
Modbus master sends the first 128 bytes of the bin file and sets statusCPU to 0x0001 (uploading
part 1)
4)
statusDISP receives 0x0001 from the display (download part 1 completed)
5)
Modbus master sends the next 128 bytes of the bin file and sets statusCPU to 0x0002 (uploading
part 2)
6)
statusDISP receives 0x0002 from the display (download part 2 completed)
…)
... (repeat until the file is sent)
n-1)
Modbus master sets statusCPU to 0xBBBB to signal that file is sent (upload completed)
n)
statusDISP receives 0x2222 from the display (download completed)
statusCPU
(written by master)
0xAAAA
Initiate a file transfer (requested upload)
0x00**
Counter for which part we are sending (uploading part x)
0xBBBB
Last part of the file was sent (upload completed)
statusDISP
(written by Display)
0x0000
ready to receive the file (ready for download)
0x00**
counter for which part was received completely (downloading part x)
0x2222
finished receiving the file (download completed)

Fidelix FX-RP multiDISPLAY Programming manual page 17 of 38
Detailed programming
Introduction
The .htm pages that will constitute your FX-RP multiDISPLAY project consist of so called “active elements” and
background images. Any element (text or image) you place inside the 320 by 240 pixels available space that
doesn’t have a PointID (= “Unknown”) is considered and treated as background image.
To see the pointID of any element in the
Fidelix Graphics Editor, either double click
the element, or press CTRL+E.
Any element that does have a PointID
(keywords mentioned later, or freely chosen
by yourself) will be placed on top of that
generated background image.
When used as Modbus slave, each of the
250 available points will look something like
the image on the right.
The text used in the yellow part is to 1)
define the number of decimals and the unit
displayed, 2) help to get the graphics correct
during design.
Ticking “Show point value” will enable the
displaying of the actual value of the point or register mentioned in the PointID field.
When not ticked, the middle column needs to contain the texts that will be shown, when the point has the
corresponding value specified in the left column (see “Status texts”).
Many projects will have more than 1 page. A link can then be made to other pages (see “Links”). Only “text” or
“Symbol” elements can be used to link to other pages by adding the name of the target page. In the “LINK” box
of an active element. A link can only be used from an active element, so if your element has no other functionality,
you can simply use “LINK” as PointID.
When used as Modbus master, the pointID will be used as the field to enter the correct parameters for each of
the slave registers. The syntax is described later in this document.

Fidelix FX-RP multiDISPLAY Programming manual page 18 of 38
Visualisation customisation
Any field of “text” or “Number field” type can be used to set values. In order to do so, “Controller set value” has
to be selected in the EditPoint dialog box to make a point’s value editable from the FX-RP multiDISPLAY.
A number keypad will appear when the field is clicked, and the selected value is then attributed to the point.
The functionalities described
hereunder are to be used by
appending the according tag behind
the “POINTxx” identifier in the
pointID field of the EditPoint dialog box (as shown on the image). Features (and thus the ‘tags’) can be freely
combined in any order.
NOTE: The content of any register can also be shown by using the point ID “REGxxxx”.
-You can choose to show the value of a point, or to display a text according to the point’s value. Showing the
actual value is done by either selecting a “Number field” type element, or by ticking the “Show point value”
tick box of a “Text” type element. Ticking the “Controller set value ?” tick box will generate a popup on the
display when the value is clicked. Note that the user can now enter any desired value, so it is up to the
connected controller to evaluate this user entered value.
Showing text based on the value of a point (like for instance
on/off, day/night or off / startup / slow / fast / error) is done
by selecting a text type element and writing the desired
values and corresponding texts in the yellow box inside the
EditPoint dialog box.
More details can be found in the “Status texts” section later
in this document.
-To use a multi-stage image (like an “on/off” power button), enter the desired values through which to toggle
separated by spaces in the “Fixed value” field of the EditPoint dialog box:
-#UNIT:xx where xx is the unit that is used to show the point. These units can either be programmed by the
Modbus master (like it is done if the FX-RP multiDISPLAY is used with an FX controller or a multi24), or can
be defined in the EditPoint dialog box in the graphics editor.
For text type fields, the unit can also be defined in the “Text” field, in which case the unit is parsed from the
end of the text. For example, “21.0°C” will define one decimal precision and degrees Celsius as unit.
NOTE: A unit cannot be freely selected. The FX-RP multiDISPLAY firmware has a predefined list of units that
can be used. If you need a unit that is not listed please contact us, and the needed unit can be added to our
next firmware release. List of currently available units: "°C", "Pa", "bar", "V", "l/s", "m3/h", "%", "m3", "l", "mA",
"Wh", "kWh", "MWh", "ppm", "K", "s", "min", "h", "Hz", "W", "kW", "MW", "Lx", "km/h", "°", "°/s", "l/h", "l/100km",

Fidelix FX-RP multiDISPLAY Programming manual page 19 of 38
"%Rh", "ohm", "N", "kg", "ms", "hPa", "W/m2", "mm", "cm", "km", "m", "€", "€/kWh", "A", "°F", "CFM", "GPM",
“%LIE”, “%LEL”, “%vol”, “m3/s”, “rpm”, “m/s”
-#UNITSPACE can be added to put a space between the value and the unit. The default setting has the unit
directly concatenated behind the point’s value.
-#DIVIDER:xx where xx is used divider. 10
for 1 decimal, 100 for 2 decimals, 1000 for 3
decimals.
REMINDER: For text type fields, the unit
can also be defined in the “Text” field, in
which case the divider is parsed from the
end of the text. For example, “21.0°C” will
define one decimal precision and degrees
Celsius as unit.
-#DIGITS:xx, where xx is maximum 15. It defines the number of digits before the decimal sign. If the value is
bigger than the number of digits specified, the full value will be displayed.
-#MIN:xx where xx defines the minimum allowed value for the point. It is useful if for example a set point’s
minimum value needs to be defined. Note that this value is before division, for example if one decimal is in
use and you need to limit the minimum value to 10.0, use parameter “#MIN:100”.
-#MAX:xx where xx defines maximum allowed value for the point. It is useful if for example set point’s
maximum value needs to be defined. Note that this value is before division. For example, if one decimal is in
use and you need to limit the maximum value to 100.0, use parameter “#MAX:1000”.
-#NOSCALE hides the low, middle and high values for a “Bar Display” point. You can use for example text
objects to define the scale, or leave the scaling out completely. The hiding is particularly useful when your
value has decimals, as the Low, Middle and High values are before division, for example if one decimal is in
use and you need to limit minimum value to 10.0 use parameter “#MIN:100”. The Middle value can be omitted,
and even HAS to be omitted when using this combined with the “#NOEDIT” tag.
-#NOEDIT makes a Bar Display element only show a value, whereas by default, a bar display element can
also be used as a slider to get a set value from the user. When this tag is used, the middle value of the Bar
Display element needs to stay empty, as it is being used as container for the returned value, so #NOEDIT
should always be used in combination with #NOSCALE.
-#INFO:xx, where xx is free text that will be added as a comment into the IEC code file that the converter
generates. This will only make the IEC code file easier to read, there is no real functionality connected.
-#BYTE1, #BYTE2, #BYTE3, #BYTE4 gives access to the different bytes of the point’s value. As each point
has two registers for its value (see below for more detailed register structure), BYTE1 represents the least
significant byte, BYTE4 the most significant. Values are displayed as decimal values from 0 to 255.
-#BIT0, …, #BIT31 gives direct access to each bit of the point’s value. BIT0 represents the least significant
bit, BIT31 the most significant.
-#BITGROUPxx:yy, where xx is the number of bits (2..6) you want to visualise and yy is the first bit of that
group (0..30). The groups are allowed to overlap
Example: POINT1#BITGROUP3:0 will show the three lowest bits of POINT1 (bit2, bit1 and bit0)
Example: POINT2#BITGROUP5:14 will show five bits, beginning at bit 14 of POINT2 (bit18, bit17, bit16, bit15
and bit14)

Fidelix FX-RP multiDISPLAY Programming manual page 20 of 38
-#MOMENTARY:xx can be used to send out ‘impulses’ of ‘xx’
seconds from a Modbus slave display. This should be used
in combination with the ‘fixed value’ box in the EditPoint
dialog box. Pushing the button in the example will set
POINT2 to ‘1’ for 7 seconds, after which the first value, ‘0’ will
be set back to POINT2. Be aware that there is no checking
done if the master has received the impulse; the display
merely sets the value for the defined time. This function is
only available during slave mode operation.
IEEE-754 Floating Point format
Normal points on the display are represented as 32-bit values covering two consecutive registers. If the
connected Modbus master is however sending out values as floating point values, the aforementioned
“REGxxxx” syntax can be used with addition of “:FLOAT” or “REV_FLOAT”, where “REV_FLOAT” is used when
the registers are in reversed order. The register number in the pointID is the first of two consecutive registers
used for the floating-point value.
Pay close attention to the registers attributed to POINTS in the display; you can use a mix of POINTx and
REGyyyy pointID’s, but each POINT uses three registers (see the register structure later in this document).
NOTE: when using floating point values, the values shown are READ-ONLY and no other graphical elements
can be attributed to it. So only the actual received value can be visualised.
Increment, Decrease, Minimum & Maximum
When a symbol or button is selected, this
can be used to increment or decrease the
value of a point. For this, the pointID just
contains the point name (e.g. POINT145),
and in the “Fixed value” field, 3 numbers,
separated by spaces, define the
incrementation or decrementation step, the
minimum value and the maximum value a
push on the symbol will trigger (e.g. writing
“+1 0 100” means you will increment the
point’s value with steps of 1 to a maximum
of 100). #MIN and #MAX in the pointID field have no influence here, and are ignored, so it best to omit them
completely. Note however that the minimum and maximum value you define in the “fixed value” field must not
only be adjusted to the point’s #DIVIDER (so it is the value before division), but will also overrule any #MIN and
#MAX value you define in the actual displaying of the point’s value.
Special symbols can be defined for points with #MIN and/or #MAX values defined in the pointID field of the
EditPoint dialog box: the symbol with name formatted as “NameOfTheSymbol-min-640.gif” will be displayed
when the point’s value = #MIN, the symbol with name formatted as “NameOfTheSymbol-max-640.gif” will be
displayed when the point’s value = #MAX, the symbol with name formatted as “NameOfTheSymbol-0-640.gif”
will be displayed when the point’s value = zero (this image will be shown if #MIN or #MAX = zero), and the
symbol with name formatted as “NameOfTheSymbol-mid-640.gif” will be displayed when the point has any value
other than #MIN, #MAX or zero.
This manual suits for next models
4
Table of contents
Popular Control Panel manuals by other brands
Pulsar
Pulsar AWO 300 Assembly instructions

CLARCOR
CLARCOR UAS DPM owner's manual
Gardsman
Gardsman IC2020 user manual
GE Security
GE Security 1501 Installation and operation manual
Crowcon
Crowcon Gasmaster 1 Installation, commissioning and maintenance instructions
LOVATO ELECTRIC
LOVATO ELECTRIC FFLRA200 installation manual
