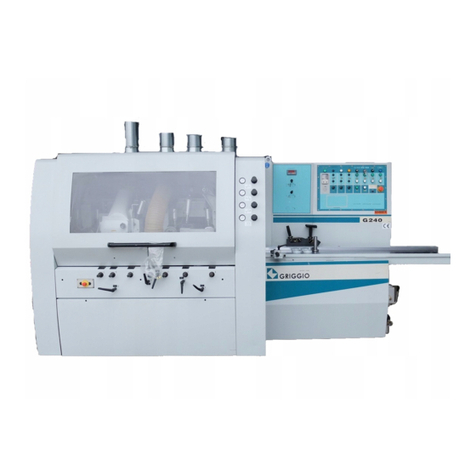
fine SMART FAC-5700 TC Series User manual

SMART
™
CHECK WEIGHER
FINE MECHATRONICS CO., LTD.
Operation Manual
( FAC-5700 TC series )
Copyright ® 2010 by FINE Mechatronics Co.,Ltd All Rights Reserved. Version : 2010, January

1
CONTENTS
Chapter 1. Overview
1.1 Introduction 3
1.2 Features 4
1.3 Pre-cautions 5
1.4 Installation and Function Check 6
Chapter 2. Screen Composition
2.1 Basic Screen Composition 7
2.2 Driving and Stopping of Conveyor 8
2.3
Modification of Measurement
Screen 8
2.4 Product Number 9
2.5 Product Name 10
2.6 Tare 11
2.7 Icon Display 11
2.8 Determined Value Display 11
2.9 Weight Display Mode 12
2.10 Base Weight Value Input Setting 12
2.11 Function Selection Button 12
Chapter 3. Screen Selection
3.1 Basic Screen 13
3.2 OFF Screen 13
3.3 Level Screen 13
3.4 Weight Screen 14
3.5 Average Screen 14
3.6 Summary Screen 14

2
Chapter 4. Setting Screen
4.1 Product Item Setting 16
4.2 User Setting 19
4.3 Time Setting 20
4.4 Weight Adjustment 21
4.5 Selector Setting 23
4.6 System Setting 24
Chapter 5. System Setting
5.1 Communication 25
5.2 A/C Run test 27
5.3 A/C Setting 30
5.4 A/D Run test 30
5.5 Touch 31
5.6 Upgrade 31
5.7 Data Deletion 32
5.8 Data Backup & Date File 33

3
Chapter 1. Overview
1.1. Introduction
Above all, thank you for purchasing FAC-5700TC.
FAC-5700TC, installed at the end of manufacturing line to be used for production instrument
and automatic packing machine etc in general, is used in total enumeration and selection of
produced products. This instrument determines excess or deficiency of the quantity of
products in a bundle based on the standard weight value of the product, or identifies whether
any component or accessory lacks or not. In addition, this instrument prevents shipping of
defects like insufficient or excessive weight by determining product weight, and manages
produced quantity by analyzing measured values or feeds back calibrated value to production
equipment. Through such processes, this instrument ensures efficient management of
production process and prevention of raw material loss while simultaneously protecting
consumers from defective products.
FAC-5700TC can be applied to production of various product groups like food, confectionary,
drinks, detergents organic chemicals and sintered products and more. In addition, the
instrument can also be applied to various package conditions like pouch, carton box, PE, non-
pack etc, and can be used in the measurement and selection of products.
This USER MANUAL describes the functions and using method of FAC-5700TC. Peruse this
USER MANUAL before using the instrument for proper operation of the instrument.
☞The specification of this product and the contents of this MANUAL may change without
notice for improvement of the performance and functions.
☞The contents of this USER MANUAL may not be reproduced, duplicated or translated in
part or as a whole without prior permission.
☞Our company does not take any responsibility for problem occurring due to use of
consumable or accessory other than specified standard item.

4
1.2. Features
1) 7 inch 16.7M color TFT LCD (resolution: 800 x 480)
2) Convenient touch screen style
3) Various screen compositions and graphics display method
4) Arbitrary setting of range of use through absolute value and deviation measuring method
5) Embedded with the function of double back-up of data in case of power outage
6) Auto calibration of span and weight
7) Auto zero tracking function
8) Operation with 2 speed transmission using inverter with differentiated 1 speed and 2
speeds)
9) Embedded with temperature change and noise compensating circuit
10) Saves and calls the weight set values by the items(999 items)
11) Printing function <OPTION>
: Mounted with printed, the instrument can print out data.
12) Interlink with external devices <OPTION>
: Communicate with various external devices through data port
13) Metal detection <OPTION>
: With metal detector installed, the instrument can sort out metallic substance while
simultaneously measuring weight.
14) Easy for data analysis and summarizing
: Check the production status by the items through summary screen
Utilize summarized data by using Microsoft Excel software
15) Saves data to USB memory and update the data
: Copy the data on produced products to USB memory
Performs simple update using SD memory card

5
1.3. Pre-cautions
1.3.1 Touch Screen Related Pre-cautions
1) Since the instrument is of touch type, take caution not to let LCD screen stained with
foreign matters while using.
(In case of pollution, mal-operation may occur.)
2) Do NOT press the screen forcefully.
3) Use the instrument by touching the screen with fingertip.
(Do NOT use sharp auger or nail etc on the screen. Otherwise, the product may be
damaged.)
4) Do NOT arbitrarily paint color or attach sticker etc on the screen.
5) Wipe LCD screen lightly with soft cloth.
(Do NOT use chemical or detergent etc to wipe.)
1.3.2.Instrument Related Pre-caution
1) Do not measure instrument of excessive weight or size beyond standard.
2) Maintain the instrument clean always.
3) If voltage fluctuates severely, measurement error may occur. Use stable power source.
4) Measurement part is installed on weight sensor. Do not apply shock or load beyond
standard.
5) In case of modifying the structure of measurement part arbitrarily, measurement
precision may drop. Do NOT remodel measurement part.
6) For safety, driving and stopping of conveyor and opening and closing of control box can
be done only by designated manager.
7) Check the weight with standard balance before production.

6
1.4. Installation and Functional Check
1) Maintain the conveyor of automatic weight sorting device level with ground by all means.
For adjustment to level condition, tighten up fixing nut to prevent shaking while
adjusting the four legs mounted at the bottom of automatic weight sorting device to level
condition.
2) Vibration and wind etc may cause measurement error. Take caution to keep off such
elements.
3) For smooth entrance and discharge of measured object, place each conveyor in cascade
style. For stable measurement, place entrance part conveyor 0.5 to 1.0mm above
measurement part. If the height is low, shock may be applied to measurement part when
measured object enters followed by weight measurement error and reduction of weight
sensor lifespan.
4) Used Voltage: Single phase AC220V 50/60Hz ±10% (For other specification, contact head
office.)
* Install the instrument in separation from power.
* Install ground by all means.
4) Optimum Temperature: 5℃~35℃[41℉~95℉], ±2℃/hr
5) Optimum Humidity: 35%~ 85%RH
6) Function Check
①Perform checking of functions frequently as well as test-driving and re-installation.
②Check for presence of abnormality of lamp, motor, air solenoid valve and boozer.
③Keep conveyor clean off foreign matters.

7
Chapter 2. Screen Composition
2.1 Composition of Basic Screen
This section describes the basic screen composition of FAC-5700TC.
①Driving and stopping of conveyor (☞P.8)
: This function drives or stops conveyor.
②Product Number (☞P.9)
: Checks product name in the previously entered product names list and selects product number.
③Product name (☞P.10)
: Check product name in the previously entered product names list and selects product number.
④Tare value (☞P.11)
: Sets and checks Tare value.
⑤Icon (☞P.11)
: Checks present condition.
⑥Determined weight value (☞P.11)
: Displays actually measured value. At this time, At this time, background color changes
depending on determination(Under limit, Pass amount, Over limit).
⑦Weight/Offset (☞P.12)
: Determines whether to display measured value in actual weight value or to display as offset
over base weight.
⑧Weight set value, determined quantity (☞P.12)
: Sets under limit, pass amount and over limit base values, and displays determined quantity.
⑨Function selection (☞P.12)
: Executes various functions.
③Product name②Product No. ④Tare value
⑥Determined
weight value
⑧Weight set value
Determined quantity
⑤Icon
⑦Weight/deviation
⑨Function selection
①Conveyor
driving/stopping

8
2.2 Driving and Stopping of Conveyor
If this button is pressed, conveyor is driven or stopped.
When stopped: Red arrow is
stopped.
When driven: The mark "RUN" is displayed as red arrow
moves.
2.3 Modification of Measurement Screen
2.3.1 Modifying Method 1
: This button selects desired item like base, level, average and weight from screen
selectionby pressing “Screen” at the bottom.
2.3.2 Modifying Method 2
: Modifies sequentially by dragging determined weight value display.
Basic Screen
Level Screen
Weight Screen
Average Screen
* Restoration to previous or initial screen
: Returns to the immediately previous screen.
: Returns to measurement screen(base, level, average, weight).
If determined value display is
dragged, measurement
screen changes sequentially.

9
2.4 Product Number
Checks or selects the weight set value of other previously set product number from 1 through
999.
Step 1
Press button.
Step 2
After entering the product number to check,
press .
The weight set value of the selected product
number is displayed on the left.
* To cancel in case of input error, press .
Step 3
If is pressed, the product number to be
measured is modified.
If or is pressed instead of ,
product number is not modified, but the
screen returns to previous screen.
Step 4
Product number and product name will
change followed by the change of weight set
value.

10
2.5 Product Name
Checks product name and selects product number from previously entered product name list.
Step 1
Press the part where product name is
displayed.
Step 2
Sorting Method: or
Selecting Method:
1) Select directly from the list
2) Move row by row by pressing .
3) Move screen by screen by pressing .
Step 3
After selecting the product name desired to be
modified, Press .
If or is pressed instead of ,
product number is not modified, but the
screen returns to immediately previous screen
or initial measurement screen.
Step 4
Product number and product name are
modified.

11
2.6 Tare
Displays Tare value. Values are modified in measurement screen(base, level, weight and
average) and product item setting screen.
2.7 Icon Display
Displays various conditions in the form of icon. All the icons change in color to yellow during
operation.
Determined value is held on the screen while being set.
Stable sensing (Displays measurement part is stable.)
Zero point sensing (Indicates that zero point is automatically restored
during production.)
Metal detection (Indicates that metal signal is put in from outside.)
Indicates that printer is in operation.
Checks whether weight sorting device is normal or no
t. (OR: double
entrance, CE: continuity defect)
* CE: If the icon is pressed again in case continuity defect occurs, the icon disappears.
2.8 Determined Value Display
Displays the weight value of produced product. Depending on determination, background color
may change.
Stopped
Green
Driven(Under limit)
Red
Driven(passed amount)
Blue
Driven(Over limit)
Yellow

12
2.9 Weight Display Mode
Weight: Displays measured actual weight
Offset: Displays the value that subtracted actual weight value
from the input base value.
2.10 Base Weight Value Input Setting (Under weight, Pass weight, Over weight)
Checks and modifies the weight set value(Under weight, Pass weight and Over weight) of
produced product.
In addition, this menu checks the determined quantity by set value real time.
Determination of under weight: Value not more than 73.8
Determination of pass weight: Value no less than 73.8 and no more than 74.6
Determination of over weight: Value exceeding 74.6
2.11 Function Selection Button
In case no product is present in the measurement part of weight sorting device
and weight display does not show “0”, this button calibrates the value to ‘0’g
forcefully.
This button prints out the actual
weight(determined weight) of produced product
continuously. Actual weight is printed out as
shown on the right when printer is mounted.
INDIVIDUAL PRINT
*********************************
PART SER. G. WEIGHT
1 411 P 70.6
1 412 P 70.2
1 413 P 70.4
1 414 P 70.4
1 415 P 40.2
1 416 P 70.0
1 417 U 69.6
1 418 P 70.2
1 419 P 70.0
1 420 P 70.4
1 421 O 71.0
1 422 O 70.8
1 423 P 70.6
1 424 U 68.4
1 425 P 70.2
Delete button deletes the screen display for the
product number in current operation.
(☞P.29)
Screen button modifies the screen to be suitable
for user convenience. (For detail, see Chapter
3.)
Setup button moves
to user system setting
mode. (☞P.23)
Applicable value
Determined quantity

13
Chapter 3. Screen Selection
3.1 Basic Screen
For detail, see Chapter 2.
3.2 OFF Screen
This mode converts to a condition
where only screen is turned OFF.
If any spot on the screen is pressed,
the screen restores to measurement
screen.
*
The mode is converted to OFF
condition
only while conveyor is
stopped.
3.3 Level Screen
This screen displays under weight, pass weight and over weight on the level bar, and shows
the relative location of measured actual weight value.

14
3.4 Weight Screen
Displays weight determined value on the screen in large numeric.
3.5 Average Screen
Displays the scope of weight value(under weight, pass weight and over weight) in bar
graph, and shows quantity and percentage(%).
Displays the average of measured values in the unit of Xn that user sets in graph.
3.6 Summary Screen
Displays the accumulated data for the weight value of the products produced by the
pduct numbers and distribution of determined weights
(For details, see the next page).

15
P : Displays the sum of fixed
amount
product weights
and percentage over total
weights
x:
Average weight value of
fixed amount products
SD: Standard deviation
Displays the quantity of
each class and the
percentage over all the
quantity.
+> : Upper limit
○> : Fixed amount
-> : Lower limit
Expands or reduces the
value of one graduation of
the vertical section of bar
graph.
Lower limit set value mark
line
Upper limit set value mark
line
Deletes the data on the screen
for present product number.
However, the data on internal
memory are left behind.
Prints out summarized data to printer as below:
TOTAL PRINT
************************
PART = 1 *Product No.
DATE =
2010-01-30
*Data
START = 08:40:19
*Starting time
END = 18:30:29 *Completion time
UNDER = 69.8 *Under limit weight sum
COUNT = 2
*Under limit quantity sum
AVG = 69.5 *Under limit average
RATIO = 22.22 %
*Under limit ratio
PASS = 70.2
*Pass amount weight sum
COUNT = 7 *Pass amount quantity sum
AVG = 70.0
*Pass amount average
RATIO = 77.77 % *Pass amount ratio
SD = 0.17725
*Standard deviation
OVER = 70.6
*Over limit weight sum
COUNT = 0 *Over limit quantity sum
AVG = 0.0
*Over limit average
RATIO = 0.00 % *Over limit ratio
TARE = 0.0 *Tare set value
OVERRUN =
RATIO =
METAL =
RATIO =
0
0.00%
0
0.00%
*Metal detection
TOTAL
COUNT = 9 *Total quantity
WEIGHT = 6993.3
*Total weight value
AVERAGE = 629.4 *Total average
**********************
* If Screen Print is pressed
, the contents are
saved as picture file of bmp format in the
“Capture” folder of SD memory card as shown in
summary screen.
Th
e weight area included in
the bar graph:
Example) 0.4
is a value
exceeding 0.3
and no more
than 0.5.
Displays measured value and
determined value.
Backup button saves all the summary information
gathered since previous backup so far in the "Backup"
folder of SD or USB memory. Note that at this time,
the data inside the memory are deleted.
For instance, if "Yes" is pressed, the date and time of
the saved moment are specified as file name as shown
below:
Backup\201012995242_as_db.csv
(weight determination list)
( Jan. 29, 2010, 09 hour 52 minute 42 second)
Note: the file structure within SD memory
Backup\201012995242_as_db.csv(weight
determination list)
Capture\2010217102352.bmp
AssortList.csv (product item list)
At this time, the data of 'csv' file can be checked from
Microsoft Excel software in PC. In addition, product
item list also can be used in PC after editing.
_

16
Chapter 4. Setting Screen
4.1 Product Item Setting
Step 1
Press Setting button.
Step 2
Press Product Setting button.
Step 3
Put in set values like product number,
product name, etc and press Confirm
button.
For description by the items, see the next page.

17
4.1.1 Dynamic Calibration Constant
Dynamic calibration constant is the constant that calibrates the value measured during
conveyance in case the weight value measured as product is conveyed during conveyor
operation and that of the product at standstill differ.
Weight value during conveyance
X dynamic calibration constant(n.nnnnn) ≒1 that is, Dynamic
calibration
constant
(n.nnnnn)
≒Weigh tvalue at
standstill
Weight value at standstill Weight value
during conveyance
Dynamic calibration constant can be obtained in two methods: the method calculating by
theoretic expression and that of obtaining through experiment after putting in arbitrary
Measured value and determined
value display
Product Name Input
Product Name 1
Esc F1 F2 F3 F4 F5 F6 F7 F8 F9 F10 F11 F12 Ins Del
~ ` ! 1
@ 2 # 3
$ 4 % 5 ^ 6 & 7
* 8 ( 9 ) 0 _ - + =
←Bspc PgUp
Tab Q W E R T Y U I O P { [ } ]
| \ PgDn
Caps A S D F G H J K L :
; “
‘ Enter Home
Shift Z X C V B N M <
, >
. ?
/ Shift End
Ctrl Fn Alt ←↑↓→한/영
*CAUTION:
The product name will be included in the product item setting
list(P.10) only if product name is put in. Press Enter key after putting
in product name. To cancel the input, press ESC key.
Product No. input
Pass weight input
Over weight
set value
input
Under weight
set value
input
Sequential search of
product No.
+: Over weight offset input
- Under weight offset input
Tare value input
Selection of speed 1, 2
Dynamic calibration constant
value input
(See the description below)

18
dynamic calibration constant. Let’s look into each method through the following example.
Example)
The method of obtaining dynamic calibration constant in case weight at standstill
is 1,000g and the average weight during conveyance is 1,004g
Method 1) Method of calculating by theoretic expression
Dynamic
calibration
constant ≒Weight value at standstill (1,000g) ≒0.99601
(n.nnnnn)
Weight value during conveyance (1,010g)
Method 2) Method of calculating through experiment value
Put in arbitrary dynamic calibration constant with default value of 1.00000, and
compare the weight value during conveyance and that at standstill. And to eliminate
the difference value, repeat the process of modifying dynamic calibration constant
value and checking the change of difference value. At this time, if the weight value
during conveyance is greater than that at standstill, lower dynamic calibration
constant below previous value. If the weight value during conveyance is less than
that at standstill on the contrary, raise dynamic calibration value above previous
value.
Since initial calibration value is 1.00000 and the weight value during conveyance is
greater than that at standstill 1,000g, lower the value of dynamic calibration
constant to about 0.99500. And repeat the process of modifying the value of
dynamic calibration constant by raising or lowering it after comparing the weight
value at standstill and that during conveyance.
At first, adjust the value by the unit of 0.00500 through 0.00100, and then adjust
by the unit of 0.0050 through 0.00010.
If 99601 is put in, the screen will display 0.99601.
* The dynamic calibration constant
obtained through
calculation by theoretic expression and that gained through
calculation by experiment value may not be equal.
0.99601

19
4.2 User Setting
Step 1
Press Setting button.
Step 2
Press Setup User button.
Step 3
Enter 4 digit password, and press [Enter].
Step 4
Modify the set value of desired item.
* Time for which determined weight is held
: The time that indicates determined weight on
the screen
This value is renewed once new determined
weight is received.
After elapse of the time, the screen is
converted to general weight display.
* Continuity Defect
: Displays signal in case defect occurs
continuously as many as entered quantity.
* Power ON Operation
: Determines the initial driving condition of
conveyor when power is applied.
* Password Setting
: Enter 4 digit password into the numeric pad
showing up when Setting button is pressed,
and press [Enter] key.
Table of contents
