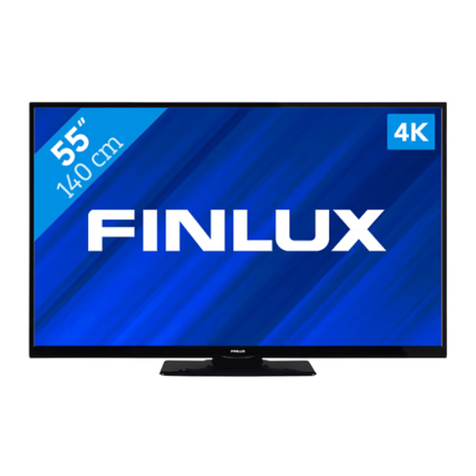
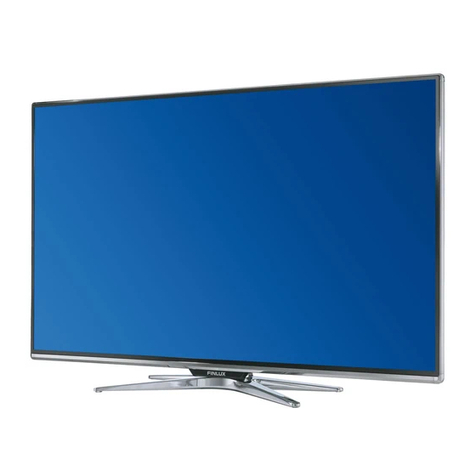
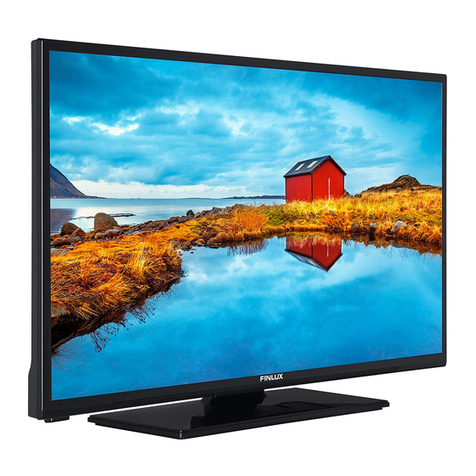
Finlux 55-FUG-9070 User manual


ýHãWLQD
9ORåHQtEDWHULtGRGiONRYpKRRYODGDþH
2SDWUQČ]YHGQČWHNU\WMHOL]DMLãWČQãURXEHPRGãURXEXMWHMHM9ORåWHGYČEDWHULH9YHOLNRVWL
$$$8MLVWČWHVHåHDR]QDþHQtVRXKODVtGEHMWHQDVSUiYQRXSRODULWX1HPtFKHMWHVWDUpDQRYp
EDWHULH9\PČĖXMWHSRX]H]DVWHMQêQHERHNYLYDOHQWQtW\S1DVDćWHNU\W]SČWD]DMLVWČWHMHM]DMLãĢRYDFtP
ãURXENHP âURXEHN E\O EXć QDPRQWRYiQ YRYODGDþL MLå ] YêURE\ D QHER MH SĜLEDOHQ VDPRVWDWQČ
YSODVWRYpPViþNX
3ĜLSRMHQt
$QWpQD
3ĜLSRMWH NDEHO RG DQWpQ\ QHER SĜtSRMN\ NDEHORYp
WHOHYL]H GR NRQHNWRUX $17 NDEHO RG VDWHOLWX
SĜLSRMXMWHGRNRQHNWRUX/1%
3ĜLSRMHQt+'0,
+'0,NRQHNWRU\MVRXQD
]DGQtVWUDQČDERNX79
3ĜLSRMHQtGDOãtFK]DĜt]HQtNWHOHYL]RUX
&KFHWHOLSĜLSRMLWH[WHUQt]DĜt]HQt
QHMSUYH]NRQWUROXMWHåHWHOHYL]RUL
SĜLSRMRYDQp]DĜt]HQtMVRXY\SQXW\
3URSURSRMHQt]DĜt]HQtSRXåLMWHSĜtVOXãQêNDEHO
3URYêEČUSRåDGRYDQpKRYVWXSXVWLVNQČWHWODþtWNR
6RXUFH QD GiONRYpP RYODGDþL QHER SRXåLMWH
WODþtWNR QD WHOHYL]RUX 3RGOH W\SX WHOHYL]RUX EXć
SRVWXSQČVWODþXMWHVWĜHGRYOiGDFtKRWODþtWNDGRNXG
VHQH]REUD]t9VWXS\1HER6WLVNQXWtPRYOiGDFtKR
WODþtWND ]REUD]tWH QDEtGNX IXQNFt QiVOHGQČ
Y\EHUHWH =GURM 3RGUåWH WODþtWNR SR GREX
VHNXQG\SURDNWLYDFLWpWRYROE\DSRWpSURFKi]HMWH
GRVWXSQpYVWXS\VWLVNQXWtPWODþtWND
3ĜLSRMHQtNHOHNWULFNpVtWL
'ģ/(ä,7e7HOHYL]RUMHXUþHQNSRXåLWtVQDSČWtP
9$& SĜL +] 'ĜtYH QHå SĜtVWURM
SĜLSRMtWH GR VtWČ Y\þNHMWH Då SR Y\EDOHQt ]tVNi
SRNRMRYRXWHSORWX
=DSRMWH QDSiMHFt NDEHO GR ]iVXYN\ QDSiMHQt YH
]GL
=DSQXWtWHOHYL]RUX
7HOHYL]RU ] SRKRWRYRVWQtKR UHåLPX PĤåHWH
]DSQRXW GiONRYêP RYODGDþHP 6WLVNQČWH WODþtWNR
6WDQGE\þtVHOQpWODþtWNRQHERWODþtWNR3URJUDP
QDGiONRYpPRYODGDþL1HERWODþtWNHPQDWHOHYL]RUX
3RGOHW\SXWHOHYL]RUXVWLVNQČWHVWĜHGRYOiGDFtKRWODþtWNDXPtVWČQpKRQD]DGQtOHYpVWUDQČWHOHYL]RUXQHER
QDOHYpVSRGQtþiVWLWHOHYL]RUX
3ĜLSRMHQtNLQWHUQHWX
0ĤåHWH QDVWDYLW WHOHYL]RU WDN DE\ ]tVNDO SĜtVWXS N ,QWHUQHWX SURVWĜHGQLFWYtP ORNiOQt VtWČ /$1
SRPRFt NDEHORYpKR QHER EH]GUiWRYpKR SĜLSRMHQt 1iVOHGXMHWH SRN\Q\ QD REUD]RYFH Y3UĤYRGFL
~YRGQtPQDVWDYHQtP
3R]QiPND2EUi]N\MVRXXUþHQ\SRX]HSUR]Qi]RUQČQt

ýHãWLQD
'iONRYêRYODGDþ5&
6WDQGE\9\StQiQt]DStQiQtWHOHYL]RUX
6WLVNQČWHDSRGUåWHWODþtWNR6WDQGE\DåVHQD
REUD]RYFH ]REUD]tQDEtGNDY\SQXWtQDVWDYWHQD
2. D SRWp VWLVNQČWH WODþtWNR 2. 7HOHYL]RU VH
Y\SQHGRSRKRWRYRVWQtKRUHåLPX
.UiWNêPVWLVNQXWtPDXYROQČQtPY\SQHWH
WHOHYL]RUGRU\FKOpKRSRKRWRYRVWQtKRUHåLPX
QHERWHOHYL]RU]DSQHWH
6WDQGE\3RKRWRYRVWQtUHåLP=DStQi9\StQi79
ýtVHOQi WODþtWND 3ĜHSQH NDQiO Y UHåLPX /LYH 79
]DGiþtVORQHERStVPHQRYWH[WRYpPSROLQDREUD]RYFH
-D]\N =REUD]XMH D MHOL NGLVSR]LFL YtFH PRåQRVWt
PČQtMD]\N]YXNRYpKRGRSURYRGX/LYH79
+ODVLWRVW=HVLOXMH=HVODEXMHKODVLWRVW
0LNURIRQ$NWLYXMHPLNURIRQQDGiONRYpPRYODGDþL
+RPH2WHYĜHKODYQtVWUDQX'RPRYVNRXREUD]RYNX
*XLGH3UĤYRGFH=REUD]t HOHNWURQLFNê SURJUDPRYê
SUĤYRGFH]NDQiOĤSR]HPQtKRþLVDWHOLWQtKRY\VtOiQt
2. 3RWYU]XMH YêEČU\ YVWXSXMH GR SRGPHQX 9
UHåLPX/LYH79]REUD]tVH]QDPNDQiOĤ
=SČW1iYUDW 9UiWt VH R NURN ]SČW ]DYĜH RWHYĜHQi
RNQDYUHåLPX/LYH79]DYĜHWHOHWH[W
1HWIOL[6SXVWtDSOLNDFL1HWIOL[
3ULPH9LGHR6SXVWtDSOLNDFH3ULPH9LGHR
0HQX9UHåLPX/LYH79]REUD]tPHQXSURODGČQt
NDQiOĤ WHOHYL]QtKR Y\VtOiQt D RVWDWQt PRåQRVWL SUR
QDVWDYHQt WHOHYL]RUX 9UHåLPHFK DSOLNDFt ]REUD]t PHQX
GRVWXSQêFKQDVWDYHQtWHOHYL]RUXREUD]]YXN
3ĜHWRþLWY]DG3ĜHVXQREUD]X]SČWXPpGLtILOP\
6WRS=DVWDYtSĜHKUiYiQtPpGLDXNRQþtQDKUiYiQt
1DKUiYiQt1DKUiYiSURJUDP\YUHåLPX/LYH79
%DUHYQiWODþtWND)XQNFHGOHSRN\QĤQDREUD]RYFH
3DX]D 3ĜHKUiW 6SRXãWt SĜHKUiYiQt PpGLD
SR]DVWDYXMH SĜHKUiYiQt PpGLD VSRXãWt QDKUiYiQt V
þDVRYêPSRVXQHPYUHåLPX/LYH79
7H[W2WHYtUiD]DYtUiWHOHWH[WYUHåLPX/LYH79
3ĜHWRþLWYSĜHG3RVXQREUD]XYSĜHGXPpGLtILOP\
6RXUFH=GURM=REUD]tGRVWXSQp]GURMHYVWXS\
*RRJOH3OD\6SXVWtDSOLNDFL*RRJOH3OD\
<RX7XEH6SXVWtDSOLNDFL<RX7XEH
([LW8NRQþt]REUD]HQtQDEtGN\SĜHSQHQD/LYH79
6PČURYi WODþtWND 3RK\E YPHQX SRK\E Y (3* D
GDOãtSRGOHSRN\QĤQDREUD]RYFH
,QIR=REUD]XMHLQIRUPDFHRREVDKXQDREUD]RYFH
3URJUDP3ĜHSQXWtNDQiOXYUHåLPX/LYH79
0XWH=WOXPLW9\StQi]DStQi]YXN79
7LWXON\ =DStQi Y\StQi WLWXON\ SRNXG MVRX N
GLVSR]LFL
-HOLWDWRIXQNFHSRGSRURYiQDYDãtP79

ýHãWLQD
3UĤYRGFH~YRGQtPQDVWDYHQtPY\KOHGiQtSURJUDPĤWHOHYL]QtKRY\VtOiQt
6SiURYiQtGiONRYpKRRYODGDþHVWHOHYL]RUHP
3ĜLSUYQtP]DSQXWtVHSĜHG]DKiMHQtP~YRGQtKRQDVWDYHQtSURYHGHKOHGiQtSĜtVOXãHQVWYt3RGOHLQIRUPDFt
QD REUD]RYFH VSiUXMWHGiONRYp RYOiGiQt D GDOãt EH]GUiWRYp SĜtVOXãHQVWYt V WHOHYL]RUHP 3UR VSiURYiQt
GiONRYpKR RYODGDþH VWLVNQČWH D SRGUåWH WODþtWNR 6RXUFH QD SĜLEOLåQČ VHNXQG D Y\þNHMWH LQIR R
VSiURYiQt6WLVNQXWtP([LWXNRQþtWHSĜLGiYiQtSĜtVOXãHQVWYtDVSXVWtWH3UĤYRGFH~YRGQtPQDVWDYHQtP
ÒYRGQtQDVWDYHQt
1DXYtWDFt REUD]RYFHY\EHUWH YiãMD]\NDVWLVNQČWHWODþtWNR2.3URQDVWDYHQt79 DQDVWDYHQtNDQiOĤ
SRVWXSXMWH SRGOH SRN\QĤ QD REUD]RYFH 3UĤYRGFH LQVWDODFt YiV SURYHGHSURFHVHP QDVWDYHQtSĜLSRMHQt
WHOHYL]RUXNLQWHUQHWXY\KOHGiQtPWHOHYL]QtFKNDQiOĤYUHåLPXSĜtMPXWHOHYL]QtKRY\VtOiQt/LYH79
9HãNHUi QDVWDYHQt PĤåHWH NG\NROL ]UXãLW D ]QRYX VH YUiWLW NQDEtGFH 3RþiWHþQtKR QDVWDYHQt SRPRFt
PRåQRVWL 2EQRYLW Y QDEtGFH 1DVWDYHQt! 3ĜHGYROE\ ]DĜt]HQt 'R QDEtGN\ 1DVWDYHQt VH GRVWDQHWH
]'RPRYVNp REUD]RYN\ NWHURX Y\YROiWH VWLVNQXWtP WODþtWND +RPH QD RYODGDþL D QHER SRNXG MVWH
YUHåLPX/LYH79WDN]QDEtGN\0RåQRVWL79NWHURXY\YROiWHVWLVNQXWtPWODþtWND0HQX
9\KOHGiQtSURJUDPĤWHOHYL]QtKRY\VtOiQt
3R QDVWDYHQt SĜLSRMHQt NLQWHUQHWX D NRQILJXUDFL YDãHKR ~þWX YiP SUĤYRGFH LQVWDODFt QDEtGQH PRåQRVW
Y\KOHGiQtSURJUDPĤWHOHYL]QtKRY\VtOiQt1HMSUYH]YROtWHW\SWXQHUX
6DWHOLW
3RNXGY\EHUHWHPRåQRVW6DWHOLWWHOHYL]RUY\KOHGiSURJUDP\GLJLWiOQtKRVDWHOLWQtKRY\VtOiQt
9\EHUWHW\S6DWHOLWX±3UHIHURYDQêQHER2EHFQê&KFHWHOLLQVWDODFL6N\OLQN0YROWH3UHIHURYDQêD
YGDOãtYROEČ6N\OLQN
9\KOHGiYiQt /1% ± SR YROEČ 9\KOHGDW WHOHYL]RU ]MLVWt PRåQRVWL SĜLSRMHQp VDWHOLWQt DQWpQ\ WM MDNp MVRX
YDQWpQČSĜLSRMHQp/1%DMDNpVDWHOLWQtGUXåLFHSĜLMtPDMt9êVOHGHNY\KOHGiYiQtVH]REUD]tYWDEXOFH
3UR LQVWDODFL 6N\OLQN GRSRUXþXMHPH WXWR PRåQRVW VStãH SĜHVNRþLW WtP SiGHP VH ]REUD]t ]iNODGQt
WRYiUQtQDVWDYHQt/1%WDNWR'UXåLFH$675$ 'L6(T&$$675$ 'L6(T&%
1DNDåGpGUXåLFL]NRQWUROXMWHNYDOLWXD~URYHĖVLJQiOXQDQi]YXGUXåLFHVWLVNQČWHWODþtWNR2.DYH
YêSLVXYODVWQRVWtMHćWHãLSNXGROĤDåQDĜiGN\.YDOLWDVLJQiOXDÒURYHĖVLJQiOX
=SČWVHYUiWtWHVWLVNQXWtPWODþtWND%DFN=NRQWUROXMWHREČGUXåLFH
3RNXG QD MHGQp QHER RERX GUXåLFtFK QHQt GRVWDWHþQi ~URYHĖ D NYDOLWD VLJQiOX ]MLVWČWH X VSUiYFH þL
LQVWDODþQt ILUP\ VSUiYQRX NRQILJXUDFL /1% D 'L6(T& ]DSRMHQt D W\WR KRGQRW\ SDN QDVWDYWH YWDEXOFH
SDUDPHWUĤGUXåLFGRNXGQHPiWH~URYHĖDNYDOLWXYSRĜiGNXQHPiVP\VOSRNUDþRYDWGiOHYHY\KOHGiYiQt
-HOL VLJQiO QD RERX GUXåLFtFK YSRĜiGNX VWLVNQČWH WODþtWNR â,3.$ 935$92 D QD REUD]REYFH
$XWRPDWLFNpY\KOHGiQtNDQiOĤ]YROWH9\KOHGDWDYGDOãtYROEČ RSČWWODþtWNHPâ,3.$935$92VSXVWtWH
Y\KOHGiYiQt3UĤEČKY\KOHGiYiQtDLQIRUPDFHRGRNRQþHQtVH]REUD]XMtQDREUD]RYFH
$QWpQD
3RNXGY\EHUHWHPRåQRVW$QWpQDWHOHYL]RUY\KOHGiSR]HPQtGLJLWiOQt'9%7DDQDORJRYpY\VtOiQt1D
GDOãtREUD]RYFH]YêUD]QČWHPRåQRVW6FDQ6NHQRYDWDVWLVNQXWtPWODþtWND2.VSXVĢWHY\KOHGiYiQtQHER
Y\EUiQtPPRåQRVWL6NLS6FDQ3ĜHVNRþLWVNHQRYiQtSRNUDþXMWHEH]SURYHGHQtY\KOHGiYiQt
.DEHO
3RNXGMHY\EUiQDPRåQRVW.DEHORYi79WHOHYL]RU Y\KOHGiGLJLWiOQtNDEHORYpDDQDORJRYpY\VtOiQt3R
QDVWDYHQtYãHFKSDUDPHWUĤY\EHUWH6FDQ6NHQRYDWDVWLVNQXWtPWODþtWND2.VSXVĢWHY\KOHGiYiQtQHER
Y\EUiQtPPRåQRVWL6NLS6FDQ3ĜHVNRþLWVNHQRYiQtSRNUDþXMWHEH]SURYHGHQtY\KOHGiYiQt
6H]QDP\NDQiOĤSĜHStQiQtPH]LUHåLP\VDWHOLWQtSR]HPQtDNDEHORYpWY
7HOHYL]RUĜDGtXORåHQpVWDQLFHWYDUR]KODVRYpKRY\VtOiQtYVH]QDPXNDQiOĤ6H]QDP\MVRXSUR
NDåGê5HåLPLQVWDODFHVDPRVWDWQp6WLVNQXWtPWODþtWND2.YUHåLPX/LYH79RWHYĜHWH6H]QDPNDQiOĤ
.DQiO\NWHUpMVRXXYHGHQ\YVH]QDPXPĤåHWHSURFKi]HWSRPRFt6PČURYêFKWODþtWHNQDKRUX GROĤ
GiONRYpKRRYODGDþHFKFHWHOLQD]YêUD]QČQêNDQiOSĜHSQRXWVWLVNQČWHWODþtWNR2.
6WLVNQXWtP þHUYHQpKR ]HOHQpKR WODþtWND PĤåHWH NURNRYDW Y VH]QDPX SR VWUiQNiFK QDKRUX GROĤ
6WLVNQXWtP åOXWpKR WODþtWND ]REUD]tWH GDOãt PRåQRVWL MDNR MVRX 9\EUDW W\S 6HĜDGLW D 1DMtW &KFHWHOL
ILOWURYDWNDQiO\]YêUD]QČWHPRåQRVW9\EUDWW\SDVWLVNQČWHWODþtWNR2.3URILOWURYiQtVH]QDPXMHQČNROLN
PRåQRVWtYROED9\VtOiQt]REUD]tYãHFKQ\QDLQVWDORYDQpNDQiO\YUiPFLDNWXiOQtKRUHåLPX

ýHãWLQD
ÒSUDY\VH]QDPXNDQiOĤPĤåHWHSURYpVWSRYROEČ1DVWDYHQt!.DQiO!.DQiO\NGHMVRXNGLVSR]LFL
DNWXDOL]DFHNDQiOĤDWDNpPRåQRVWL3ĜHVNRþHQtěD]HQt3RVXQXWtÒSUDYDNDQiOXD9\PD]iQtVH]QDPX
0RåQRVWL~SUDYPRKRXEêWRPH]HQpY]iYLVORVWLQDSRþiWHþQtPQDVWDYHQtYROEČRSHUiWRUDXVDWHOLWXD
Y]iYLVORVWLQDDNWLYDFL/&11DVWDYHQt/&1PĤåHWHY\SQRXWYQDEtGFH1DVWDYHQt!.DQiOSURWRåHEUiQt
~SUDYiPNDQiOĤ7DWRPRåQRVWPĤåHEêWYHYêFKR]tPQDVWDYHQtQDVWDYHQDQD2Q=DSQXWRY]iYLVORVWL
QD]HPLY\EUDQpEČKHPSRþiWHþQtKRQDVWDYHQt
3ĜHStQiQtPH]LUHåLP\VDWHOLWQtSR]HPQtDQHERNDEHORYpWHOHYL]H
3RYROEČ1DVWDYHQt!.DQiO!5HåLPLQVWDODFHNDQiOX]YêUD]QČWHSRåDGRYDQêUHåLP$QWpQD6DWHOLW
.DEHOSRWYUćWHMHMWODþtWNHP2.DSRWpWODþtWNHP(;,7RSXVĢWHPHQX]REUD]tVHQDSRVOHG\VOHGRYDQê
NDQiOYSUiYČ]YROHQpPUHåLPX
6SUiYDVH]QDPĤREOtEHQêFKNDQiOĤ
0ĤåHWH Y\WYRĜLW þW\ĜL UĤ]Qp VH]QDP\ 9DãLFK REOtEHQêFK NDQiOĤ 7\WR VH]QDP\ REVDKXMt SRX]H NDQiO\
NWHUpMVWH XUþLOLY\ 6WLVNQXWtPWODþtWND2.]REUD]WHVH]QDPNDQiOĤ3RWpVWLVNQXWtP PRGUpKR WODþtWND
SĜHMGČWHQDVH]QDPREOtEHQêFK9\EHUWHSRåDGRYDQêVH]QDPDVWLVNQČWHWODþtWNR2.=YêUD]QČWHNDQiO
YVH]QDPXDVSXVĢWHVOHGRYiQtVWLVNQXWtPWODþtWND2.
7YRUEDVH]QDPXREOtEHQêFK
&KFHWHOL SĜLGDW DNWXiOQČ VOHGRYDQê NDQiO GR VH]QDPX REOtEHQêFK VWLVNQČWH WODþtWNR 2. D ]REUD]WH
VH]QDP NDQiOĤ 3RWp VWLVNQXWtP PRGUpKR WODþtWND SĜHMGČWH QD VH]QDP REOtEHQêFK D VWLVNQČWH WODþtWNR
0HQX QD GiONRYpP RYODGDþL 3RWp SĜHMGČWH GR QDEtGN\ .DQiO\ ]YêUD]QČWH PRåQRVW 3ĜLGDW GR PêFK
REOtEHQêFK SRORåHN D VWLVNQČWH2. .DQiO EXGHSĜLGiQ GR Y\EUDQpKR VH]QDPX REOtEHQêFK&KFHWHOL
WHQWR NDQiO ]H VH]QDPX RGHEUDW RWHYĜHWH VH]QDP REOtEHQêFK NDQiOĤ ]YêUD]QČWH NDQiO D VWLVNQČWH
PRGUpWODþtWNR7tPWR]SĤVREHPPĤåHWHSĜLGDWQHERRGHEUDWSRX]HSUiYČVOHGRYDQêNDQiO
6OHGRYiQtVDWHOLWQtKRSR]HPQtKRQHERNDEHORYpKRY\VtOiQtUHåLP/,9(79
6WLVNQXWtPWODþtWND+RPH ]REUD]tWH'RPRYVNRXREUD]RYNXVQDEtGNRXDSOLNDFtDVOXåHE
3UR VOHGRYiQt SURJUDPĤ VDWHOLWQtKR SR]HPQtKR QHER NDEHORYpKR Y\VtOiQt QDMHćWH QD RNQR DSOLNDFH
/LYH 79 D VWLVNQČWH 2. 'R UHåLPX /LYH 79 VH PĤåHWH SĜHSQRXW WDNp YêEČUHP PRåQRVWL .DQiO\Y
QDEtGFH9VWXS\QDKRUQtOLãWČ'RPRYVNpREUD]RYN\QHERVWLVNQXWtPWODþtWHN(3*QHER6RXUFH
0H]LSURJUDP\PĤåHWHSĜHStQDWSRPRFtWODþtWHN3URJUDPQHERSRPRFt6PČURYêFKWODþtWHNãLSND
QDKRUXGROĤDQHERSĜtPRXYROERX1XPHULFNêPLWODþtWN\QDGiONRYpPRYODGDþL
3URJUDPRYêSUĤYRGFH
3URVWĜHGQLFWYtP (3* (OHNWURQLFNê SURJUDPRYê SUĤYRGFH PĤåHWH SURFKi]HW SOiQ XGiORVWt
QDLQVWDORYDQêFKNDQiOĤ=iYLVtQDY\VtOiQt]GDMHIXQNFHSRGSRURYiQDQHERQH&KFHWHOLQD'RPRYVNp
REUD]RYFHDQHERYUHåLPX/LYH79VSXVWLW(3*VWLVNQČWHQDGiONRYpPRYODGDþLWODþtWNR(3*
3RPRFt6PČURYêFKWODþtWHNPĤåHWHSURFKi]HW SUĤYRGFHP7ODþtWN\ QDKRUXGROĤQHER3URJUDP
PĤåHWH SĜHStQDW QD SĜHGFKR]t QiVOHGXMtFt NDQiO Y VH]QDPX SUDYêP D OHYêP VPČURYêP WODþtWNHP
Y\EHUHWHSRåDGRYDQRXXGiORVWDNWXiOQČ]YêUD]QČQpKRNDQiOX1DREUD]RYFHVH]REUD]tFHOêQi]HYþDV
DGDWXP]DþiWNXDNRQFHåiQUDVWUXþQpLQIRUPDFHRXGiORVWLSRNXGMVRXNGLVSR]LFL
0RGUêPWODþtWNHPPĤåHWHILOWURYDWXGiORVWL äOXWp]REUD]tSRGUREQpLQIRUPDFH8GiORVWLSĜHGFKR]tKRD
QiVOHGXMtFtKRGQH]REUD]tþHUYHQpD]HOHQpWODþtWNR3RVWXSXMWHSRGOHLQIRUPDFtQDREUD]RYFH
3UĤYRGFHQHO]H]REUD]LWSRNXGMH]GURMYVWXSQtKRVLJQiOX79]DEORNRYiQYQDEtGFH1DVWDYHQt!.DQiO!
5RGLþRYVNiNRQWUROD!%ORNRYiQtYVWXSĤYUHåLPX/LYH79QHERQD'RPRYVNpREUD]RYFHDQHERSRNXG
QHQtYUHåLPX/LYH79QDODGČQåiGQêNDQiO
3ĜHKUiYDþPXOWLPpGLt
1D'RPRYVNpREUD]RYFHSĜHMGČWHGRĜiGNX$SOLNDFHY\EHUWHSRORåNX0XOWL0HGLD3OD\HU003D
VSXVĢWHVWLVNQXWtPWODþtWND2.
1DKODYQtREUD]RYFHSĜHKUiYDþHPpGLtY\EHUWHW\SPpGLD0RGUêPWODþtWNHPPĤåHWHSĜHStQDWPH]LW\S\
]REUD]HQt MDNR =REUD]HQt VH]QDPXD0ĜtåNRYp]REUD]HQt 3RNXG MH QDVWDYHQR =REUD]HQt VH]QDPX
WDNSĜLSURFKi]HQtYLGHtVHYRNQČQDOHYpVWUDQČREUD]RYN\]REUD]tQiKOHG]YêUD]QČQpKRYLGHD
=SĜLSRMHQpKR86%
0ĤåHWH SURKOtåHW IRWRJUDILH WH[WRYp GRNXPHQW\ SĜHKUiYDW KXGEX D YLGHR VRXERU\ QDLQVWDORYDQp QD
SĜLSRMHQpP 86% ]DĜt]HQt =DSRMWH 86% SDPČĢRYp ]DĜt]HQt GR MHGQRKR ] 86% YVWXSĤ WHOHYL]RUX 1D
KODYQt REUD]RYFH SĜHKUiYDþH PpGLt Y\EHUWH SRåDGRYDQê W\S PpGLD 1D GDOãt REUD]RYFH ]YêUD]QČWH

ýHãWLQD
Qi]HYVRXERUXYVH]QDPXGRVWXSQêFKVRXERUĤPpGLtDVWLVNQČWHWODþtWNR2.3RVWXSXMWHSRGOHSRN\QĤ
QDREUD]RYFHD]tVNHMWHGDOãtLQIRUPDFHRGDOãtFKGRVWXSQêFKIXQNFtFKWODþtWHNGiONRYpKRRYODGDþH
'ģ/(ä,7e 3ĜHG SĜLSRMHQtP N WHOHYL]RUX ]iORKXMWH VRXERU\ QD 86% SDPČĢRYêFK ]DĜt]HQtFK 9êUREFH
QH]RGSRYtGi]DSRãNR]HQtQHER]WUiWXGDW-HPRåQpåHQČNWHUi86%]DĜt]HQtQDSĜ03SĜHKUiYDþH
QHER86%+'')/$6+QHEXGRXVWRXWR79NRPSDWLELOQt79SRGSRUXMH)$7D17)6IRUPiWGLVNX
3R]QiPND 3RþNHMWH FKYLONX SĜHG NDåGêP SĜLSRMHQtP D RGSRMHQtP SURWRåH SĜHKUiYDþ PĤåH MHãWČ þtVW
VRXERU\1HGRGUåHQtWRKRWRSRN\QX PĤåH]SĤVRELWI\]LFNpSRãNR]HQt86%SĜHKUiYDþH D86% ]DĜt]HQt
%ČKHPSĜHKUiYiQtVRXERUX86%SDPČĢQHY\WDKXMWH
=PRELOQtKR]DĜt]HQtSĜHV'05
8MLVWČWHVHåHYDãHPRELOQt]DĜt]HQtMHSĜLSRMHQRNHVWHMQpVtWLMDNRWHOHYL]RU6SXVĢHDSOLNDFL0XOWL0HGLD
3OD\HU1DKODYQtREUD]RYFHSĜHKUiYDþHPpGLtY\EHUWHW\SPpGLD1DGDOãtREUD]RYFHPRGUêPWODþtWNHP
SĜHSQČWHUR]YUåHQtQD =REUD]HQtVH]QDPX3RWpVWLVNQČWHWODþtWNR%DFN=SČW 0H]L PRåQRVWPL W\SĤ
PpGLt VH ]REUD]t PRåQRVW '05 'LJLWDO 0HGLD 5HQGHUHU =YêUD]QČWH PRåQRVW '05 D VWLVNQČWH 2.
7HOHYL]RU MH SĜLSUDYHQ SĜLMtPDW PHGLiOQt VRXERU RGHVODQê ] YDãHKR PRELOQtKR ]DĜt]HQt 1D PRELOQtP
]DĜt]HQtRWHYĜHWHVRXERUNWHUêFKFHWHVGtOHWDNOHSQČWHQDLNRQXVGtOHQtQHERQDVRXYLVHMtFtPRåQRVW]
QDEtGN\ PRELOQtKR ]DĜt]HQt =REUD]t VH GRVWXSQi ]DĜt]HQt =H VH]QDPX Y\EHUWH 79 1i]HY ]DĜt]HQt
WHOHYL]RUXMHXYHGHQYQDEtGFH1DVWDYHQt!1DVWDYHQt]DĜt]HQt!2DSOLNDFL3RNXGMHSĜLSRMHQt~VSČãQČ
QDYi]iQRY\EUDQêVRXERUPpGLDVHSĜHKUDMH]REUD]tQDYDãHPWHOHYL]RUX
1DKUiYiQtQD86%
3URQDKUiYiQtSURJUDPXSĜLSRMWH86%GLVN]DWtPFRMH79Y\SQXWi&KFHWHOLQDKUiYDW+'SURJUDP\MDNR
MVRXILOP\GRSRUXþXMHVHSRXåtYDW86%SHYQpGLVN\+''3RNXGVLSĜHMHWHPĤåHWHQDKUiYN\XNOiGDW
NRStURYDWGRSRþtWDþH6RXERU\YãDNQHEXGHPRåQRQDSRþtWDþLSĜHKUiYDW1DKUiYN\O]HSĜHKUiYDWSRX]H
SRPRFt YDãt 79 1DKUiYiQt ] UiGLD QHQt SRGSRURYiQR 1HQtOL U\FKORVW SĜLSRMHQpKR 86% ]DĜt]HQt
GRVWDWHþQi QDKUiYiQt VH QHPXVt SRGDĜLW D IXQNFH þDVRYpKR SRVXQX QHPXVt EêW GRVWXSQi %ČKHP
QDKUiYiQtQHY\WDKXMWH86%+''PĤåHWRSRãNRGLWSĜLSRMHQêGLVN1ČNWHUpVWUHDPRYpEORN\VHQHPXVt
QDKUiWNYĤOLSUREOpPĤPVHVLJQiOHP]WRKRWRGĤYRGXPĤåHYLGHRQČNG\EČKHPSĜHKUiYiQt]PU]QRXW
2NDPåLWpQDKUiYiQt
3UR RNDPåLWp QDKUiYiQt VOHGRYDQpKR SURJUDPX VWLVNQČWH WODþtWNR 1DKUiYiQt 3UR ]UXãHQt RNDPåLWpKR
VWLVNQČWHWODþtWNR6WRS%ČKHPUHåLPXQDKUiYiQtQHO]HSĜHSQRXWQDMLQêNDQiO
1DKUiYiQt]þDVRYDþH
3RPRFt QDEtGN\ 6H]QDP SOiQĤ PĤåHWH SĜLGDW SĜLSRPHQXWt QHER QDKUiW þDVRYDþH 6H]QDP SOiQĤ MH
SĜtVWXSQê ]QDEtGN\ 1DKUiW Y UHåLPX /LYH 79 =YêUD]QČWH PRåQRVW 6H]QDP SOiQĤ D VWLVNQČWH 2.
=REUD]tVHGĜtYHQDVWDYHQpþDVRYDþHSRNXGMVRXNGLVSR]LFL.G\åMHQDREUD]RYFH]REUD]HQDQDEtGND
6H]QDPSOiQĤVWLVNQXWtPWODþtWND1DKUiYiQtSĜLGiWHGDOãtXGiORVW
8GiORVW GR6H]QDPX SOiQĤPĤåHWH WDNp SĜLGDWSĜtPêP]DGiQtP](3* 9\YROiWH(3* QDMHGHWH QD
XGiORVW NWHURX FKFHWH QDKUiYDW D VWLVNQHWH WODþtWNR 1DKUiYiQt ]REUD]t VH WDEXOND ]DGiQt XGiORVWL GR
6H]QDPXSOiQĤSURSRWYU]HQtþL~SUDYXSDUDPHWUĤXGiORVWL
6OHGRYiQtQDKUiYHN
9\EHUWH QDEtGNX 6H]QDP QDKUiYHN ] QDEtGN\ 1DKUiW Y UHåLPX /LYH 79 D VWLVNQČWH WODþtWNR 2. =H
VH]QDPX Y\EHUWH QDKUDQRX SRORåNX E\ODOL GĜtYH QDKUiQD 6WLVNQXWtP WODþtWND 2. VSXVĢWH VOHGRYiQt
6WLVNQXWtPWODþtWND6WRSQHER=SČW1iYUDW]DVWDYWHSĜHKUiYiQt
8SR]RUQČQt3ĜL SRXåLWtQRYpKRSDPČĢRYpKR86%VH GRSRUXþXMH QHMSUYHMHMQDIRUPiWRYDWSRPRFt
PRåQRVWL 1DIRUPiWRYDW Y QDEtGFH 1DKUiW ! ,QIRUPDFH R ]DĜt]HQt Y UHåLPX /LYH 79 )RUPiWRYiQt
Y\PDåHYãHFKQDGDWDQD86%]DĜt]HQtDMHKRVRXERURYêV\VWpPEXGHSĜHYHGHQQD)$79HYČWãLQČ
SĜtSDGĤEXGRXSURYR]QtFK\E\SRIRUPiWRYiQtRGVWUDQČQ\DOH]WUDWtWHYãHFKQDGDWD
1DVWDYHQt]QDNRYpVDG\NOiYHVQLFH
3RNXGSĜLY\KOHGiYiQtNOiYHVQLFHQDREUD]RYFH]REUD]XMHQHVSUiYQRX]QDNRYRXVDGX]PČQtWHMLWDNWR
6WLVNQXWtP WODþtWND+RPH ]REUD]WH 'RPRYVNRX REUD]RYNXY\EHUWH1DVWDYHQt ! 3ĜHGYROE\
]DĜt]HQt!.OiYHVQLFH!1DVWDYHQtDSOLNDFH*ERDUG!-D]\N\
9QDEtGFH-D]\N\MHSRWĜHED
9\SQRXWIXQNFLÄ3RXåtWV\VWpPRYpMD]\N\³±=DSQRXW$OSKDEHW±9\SQRXWQHVSUiYQRXVDGX
3RWpWODþtWNHP(;,7Y\VWXSWH]PHQX

ýHãWLQD
=DKUQXWpSĜtVOXãHQVWYt
'iONRYp2YOiGiQt
%DWHULH[$$$
3ĜtUXþNDSURU\FKOêVWDUW
3URGXNWRYêOLVW
3ĜHKOHGIXQNFt
0XOWL0HGLD3OD\HU
3URFKi]HMWH PXOWLPHGLiOQt REVDK XORåHQê QD
86% ]DĜt]HQtFK SĜLSRMHQêFK N WHOHYL]RUX QHER
QD PRELOQtFK ]DĜt]HQtFK SĜLSRMHQêFK NH VWHMQp
VtWLMDNRWHOHYL]RUSRPRFtDSOLNDFH003
5R]KUDQtGLJLWiOQtKRSĜLMtPDþH
'HNyGXMWH ãLIURYDQp GLJLWiOQt WHOHYL]Qt NDQiO\
SRPRFt PRGXOX &$0 D NDUW\ NWHURX SRVN\WXMH
SRVN\WRYDWHOVOXåHEGLJLWiOQtWHOHYL]H
1DKUiYiQtSRPRFt86%
1DKUDMWHVYpREOtEHQpWHOHYL]QtSURJUDP\
(OHNWURQLFNêSURJUDPRYêSUĤYRGFH
=REUD]tSOiQRYDQpGLJLWiOQtWHOHYL]QtSURJUDP\
>&(&@
2YOiGi SĜLSRMHQp +'0,&(& NRPSDWLELOQt
DXGLRYLGHR]DĜt]HQtSRPRFtRYODGDþHWHOHYL]RUX
+EE79
3ĜtVWXSN+EE79VOXåEiPMVRXOLGRVWXSQp
$SOLNDFH
=DMLãWČQtSĜtVWXSXNDSOLNDFtPQDLQVWDORYDQêPY
WHOHYL]RUXDSĜLGiQtGDOãtFK]WUåLãWČ
*RRJOH&DVW&KURPHFDVWEXLOWLQ
'tN\YHVWDYČQpWHFKQRORJLL*RRJOH&DVWPĤåHWH
SĜHQiãHW REVDK ] PRELOQtKR ]DĜt]HQt SĜtPR GR
WHOHYL]RUX
+ODVRYpY\KOHGiYiQt
+ODVRYp Y\KOHGiYiQt PĤåHWH ]DþtW SRPRFt
YHVWDYČQpKRPLNURIRQXGiONRYpKRRYODGDþH
%OXHWRRWK3ĜLSRMWHEH]GUiWRYêP]SĤVREHP
N WHOHYL]RUX DXGLR ]DĜt]HQt QHER GiONRYp
RYODGDþH
8OWUD+'8+'
9iãWHOHYL]RUSRGSRUXMHUHåLP8OWUD+'8OWUD
+LJK'HILQLWLRQ]QiPRWpåSRGR]QDþHQtP.
NWHUêSRVN\WXMHUR]OLãHQt[..7R
RGSRYtGiQiVREQpPXUR]OLãHQt)XOO+'
WHOHYL]RUXGtN\]GYRMQiVREHQtSRþWXSL[HOĤ)XOO
+'79DWRMDNYHYRGRURYQpPWDNYH
YHUWLNiOQtPVPČUX2EVDK+'MHSRGSRURYiQ
SURVWĜHGQLFWYtPQDWLYQtFKDSRUWiORYêFKDSOLNDFt
+'0,YVWXSĤ86%D]Y\VtOiQt'9%7D6
9\VRNêG\QDPLFNêUR]VDK+'5+\EULGQt
ORJJDPD+/*
3RPRFt WpWR IXQNFH WHOHYL]RU GRNiåH
UHSURGXNRYDW YČWãt G\QDPLFNê UR]VDK
VYČWHOQRVWL ]DFK\FHQtP D QiVOHGQRX NRPELQDFt
QČNROLND UĤ]QêFK H[SR]LF +'5+/* SĜLQiãt
SRKOHG R GRVDåHQt NWHUpKR VH YêUREFL ILOPX
VQDåLOL XPRåĖXMtFt VNU\Wp REODVWL WPDYêFK VWtQĤ
D VOXQHþQtKR VYČWOD V SOQRX MDVQRVWt EDUHY D
GHWDLOĤ 2EVDK\ +'5+/* MVRX SRGSRURYiQ\
SURVWĜHGQLFWYtPQDWLYQtFKDSRUWiORYêFKDSOLNDFt
+'0, YVWXSĤ 86% D SĜHV Y\VtOiQt '9%6
3RNXGFKFHWHVOHGRYDWREVDK+'5+/*SRNXG
MH REVDK +'5+/* SĜLMtPiQ SURVWĜHGQLFWYtP
+'0, YVWXSX QDVWDYWH VRXYLVHMtFt +'0, YVWXS
MDNR (',' QHER $XWR (',' ] PRåQRVWL
+'0, (',' 9HUVLRQ Y QDEtGFH 1DVWDYHQt!
1DVWDYHQt ]DĜt]HQt! 9VWXS\ 9 WRPWR SĜtSDGČ
E\ ]GURMRYp ]DĜt]HQt PČOREêW WDNp NRPSDWLELOQt
VDOHVSRĖ+'0,
'ROE\9LVLRQ
'ROE\ 9LVLRQ SĜLQiãt SR]RUXKRGQê YL]XiOQt
]iåLWHN ~åDVQê MDV YêMLPHþQê NRQWUDVW D åLYp
EDUY\ NWHUp YDãt ]iEDYČ YGHFKQRX åLYRW 7XWR
VNYČORX NYDOLWX REUD]X GRVDKXMH Y\XåtYiQtP
+'5 WHFKQRORJLH D WHFKQRORJLH ãLURNR~KOpKR
EDUHYQpKR ]REUD]RYiQt =YêãHQtP MDVX
SĤYRGQtKR VLJQiOX D SRXåLWtP Y\ããtKR UR]VDKX
G\QDPLN\ EDUHY D NRQWUDVWX SRVN\WXMH 'ROE\
9LVLRQ ~åDVQp PQRåVWYt GHWDLOĤ NWHUp MLQp
WHFKQRORJLH SRVWSURFHVVLQJX RVWDWQtFK
WHOHYL]RUĤ QHGRNiåt Y\WYRĜLW 'ROE\ 9LVLRQ MH
SRGSRURYiQ SURVWĜHGQLFWYtP QDWLYQtFK D
SRUWiORYêFK DSOLNDFt +'0, D 86% YVWXSĤ
3RNXG FKFHWH VOHGRYDW REVDK 'ROE\ 9LVLRQ
SRNXG MH REVDK 'ROE\ 9LVLRQ SĜLMtPiQ
SURVWĜHGQLFWYtP +'0, YVWXSX QDVWDYWH
VRXYLVHMtFt +'0, YVWXS MDNR (',' QHER
$XWR (',' ] PRåQRVWL +'0, (',' 9HUVLRQ Y
QDEtGFH 1DVWDYHQt! 1DVWDYHQt ]DĜt]HQt!
9VWXS\ 9 WRPWR SĜtSDGČ E\ ]GURMRYp ]DĜt]HQt
PČOREêWWDNpNRPSDWLELOQtVDOHVSRĖ+'0,
3RNXG H[LVWXMH REVDK 'ROE\ 9LVLRQ EXGRX Y
PHQX 6HWWLQJV ! 'HYLFH 3UHIHUHQFHV !
3LFWXUH ! 3LFWXUH 0RGH N GLVSR]LFL GYD
SĜHGGHILQRYDQpUHåLP\REUD]X
'ROE\9LVLRQ%ULJKWD'ROE\9LVLRQ'DUN2ED
XPRåĖXMtDE\VLXåLYDWHOpY\FKXWQDOLREVDKWDN
MDNSĤYRGQČWYĤUFH]DPêãOHOVUĤ]QêPLRNROQtPL
VYČWHOQêPL SRGPtQNDPL 3ĜL VOHGRYiQt REVDKX
'ROE\ 9LVLRQ SURVWĜHGQLFWYtP DSOLNDFH
LQWHUQHWRYpKR Y\VtOiQt QHEXGHWH PtW SĜtVWXS GR
QDEtGN\2EUD]DNQDVWDYHQt5HåLPREUD]X


ýHãWLQD
%H]SHþQRVWQtLQIRUPDFH
=DH[WUpPQtKRSRþDVtERXĜHEOHVN\DGORXKp
REGREtQHþLQQRVWLRGMH]GXQDGRYROHQRX
RGSRMWHWHOHYL]RURGHOHNWULFNpVtWČ
6tĢRYi ]iVWUþND VORXåtN RGSRMHQt79 ]H VtWČ D
SURWRPXVt]ĤVWDWVQDGQRSĜtVWXSQi
3RNXGWHOHYL]RUQHQtRGSRMHQRGHOHNWULFNpVtWČ
]DĜt]HQt VWiOH RGHEtUi HQHUJLL SUR YãHFKQ\
VLWXDFH L NG\å MH WHOHYL]RU Y SRKRWRYRVWQtP
UHåLPXQHERMHY\SQXWê
3R]QiPND 3UR REVOXKX SĜtVOXãQêFK IXQNFt
QiVOHGXMWHSRN\Q\QDREUD]RYFH
'ģ/(ä,7e3ĜHG]DKiMHQtPLQVWDODFHD
SRXåtYiQtVLSURVtPSHþOLYČSĜHþWČWHQiYRGN
SRXåLWt
832=251ċ1Ë
7HQWR SĜtVWURM MH XUþHQ SUR SRXåLWt
RVREDPL YþHWQČ GČWt NWHĜt MVRX
VFKRSQL]NXãHQt SURYR]RYiQt WDNRYpKR
]DĜt]HQt EH] GR]RUX SRNXG QHMVRX SRG
GRKOHGHP QHER MLP QHE\O\ SRVN\WQXW\
LQVWUXNFHWêNDMtFtVHSRXåLWtSĜtVWURMHRVRERX
]RGSRYČGQRX]DMHMLFKEH]SHþQRVW
3RXåtYHMWHWHQWRWHOHYL]RUYQDGPRĜVNpYêãFH
PHQãt QHå PHWUĤ QDG PRĜHP Y VXFKêFK
PtVWHFKDYREODVWHFKVPtUQêPQHERWURSLFNêP
SRGQHEtP
7HOHYL]RU MH XUþHQ SUR GRPiFt D SRGREQp
YãHREHFQp SRXåLWt DOH PĤåH EêW SRXåtYiQ L QD
YHĜHMQêFKPtVWHFK
3UR ]DMLãWČQt YHQWLODFH NROHP WHOHYL]RUX
QHFKWHDOHVSRĖFPYROQpKRSURVWRUX
1H]DEUDĖXMWH YČWUiQt ]DNU\WtP QHER
EORNRYiQtPYČWUDFtFKRWYRUĤSĜHGPČW\MDNRMVRX
QRYLQ\XEUXV\]iYČV\DWG
6tĢRYê NDEHO E\ PČO EêW VQDGQR SĜtVWXSQê
1HSRNOiGHMWHQDVtĢRYêNDEHOQiE\WHN79QHER
MLQpYČFL3RãNR]HQêVtĢRYêNDEHOPĤåH]SĤVRELW
SRåiU QHER HOHNWULFNê ãRN .DEHO RGSRMXMWH
Y\WDåHQtP ]D ]iVWUþNX QLNROL ]DWDåHQtP ]D
NDEHO 1LNG\ QHVDKHMWH QD VtĢRYê NDEHO
PRNUêPDUXNDPDPĤåHWR ]SĤVRELW]NUDWQHER
HOHNWULFNê ãRN 1LNG\ NDEHO QHX]OXMWH QHER
QHYDåWH V MLQêPL NDEHO\ 3RNXG MH NDEHO
SRãNR]HQê PXVt EêW Y\PČQČQ 7RWR PXVt EêW
SURYHGHQRNYDOLILNRYDQRXRVRERX
1HY\VWDYXMWH WHOHYL]RU NDSDMtFtP QHER
VWĜtNDMtFtP WHNXWLQiP D QD QHER SRG 79
QHSRNOiGHMWH QiGRE\ QDSOQČQp WHNXWLQRX MDNR
MVRX QDSĜtNODG Yi]\ VNOHQLFH DWG QDSĜ QD
SROLFtFKQDG]DĜt]HQtP
1HY\VWDYXMWH WHOHYL]RU SĜtPpPX VOXQHþQtPX
]iĜHQt QHER QHXPLVĢXMWH ]GURMH RWHYĜHQpKR
RKQČ MDNR MVRX ]DSiOHQp VYtþN\ QD YUFK QHER
GREOt]NRVWLWHOHYL]RUX
1HSRNOiGHMWH åiGQp ]GURMH WHSOD HOHNWULFNp
RKĜtYDþHUDGLiWRU\DWGGREOt]NRVWLWHOHYL]RUX
1HVWDYWHWHOHYL]RUQDSRGODKXDãLNPpSORFK\
$E\VWH SĜHGHãOL QHEH]SHþt XGXãHQt LJHOLWRYp
ViþN\ GUåWH PLPR GRVDK NRMHQFĤ GČWt D
GRPiFtFK]YtĜDW
2SDWUQČ SĜLSRMWH SRGVWDYHF N WHOHYL]RUX
3RNXGMHVWRMDQRSDWĜHQãURXE\SHYQČXWiKQČWH
ãURXE\ DE\ VH ]DEUiQLOR QDNOiQČQt WHOHYL]RUX
âURXE\SĜtOLãQHSĜHWDKXMWHD ĜiGQČQDPRQWXMWH L
VWRMDQRYpJXP\
1HYKD]XMWH EDWHULH GR RKQČ QHER PH]L
QHEH]SHþQpQHERKRĜODYpPDWHULiO\
832=251ċ1Ë
%DWHULH VH QHVPt Y\VWDYRYDW QDGPČUQp
WHSORWČMDNRQDSĜVOXQFLRKQLDSRGREQČ
1DGPČUQi KODGLQD ]YXNX ]H VOXFKiWHN PĤåH
]SĤVRELW]WUiWXVOXFKX
3ě('(9âË0 ± 1,.'< QHQHFKiYHMWH QLNRKR
SĜHGHYãtP GČWL WODþLW QHER XGHĜLW QD
REUD]RYNXYVXQRYDWQČFRGRGČUNRQHNWRUĤ
QHERGDOãtFKRWYRUĤQDWHOHYL]RUX
2]QDþHQtQDSURGXNWX
1iVOHGXMtFt V\PERO\ MVRX SRXåLW\ QD SURGXNWX
MDNR LQGLNiWRU\ RPH]HQt D EH]SHþQRVWQt
RSDWĜHQt D EH]SHþQRVWQt SRN\Q\ .DåGp
Y\VYČWOHQt MH SODWQp SRX]H SUR Y]WDKXMtFt VH
PtVWR R]QDþHQt QD SURGXNWX 'EHMWH QD W\WR
LQIRUPDFH]EH]SHþQRVWQtFKGĤYRGĤ
3URGXNW RFKUDQQp WĜtG\ ,, 7HQWR
VSRWĜHELþ MH QDYUåHQ WDN åH
QHY\åDGXMHEH]SHþQRVWQtHOHNWULFNpX]HPQČQt
1HEH]SHþQêWHUPLQiOSRGSURXGHP
2]QDþHQêp WHUPLQiO\ MHMVRX ]D
QRUPiOQtFK SURYR]QtFK SRGPtQHN SRG
SURXGHPåLYRWXQHEH]SHþQp
3R]RU YL] 1iYRG N REVOX]H 9 R]QDþHQpP
SURVWRUX VH QDFKi]t PLQFRYp QHER
NQRIOtNRYp EDWHULH Y\PČQLWHOQp
XåLYDWHOHP
/DVHURYê SURGXNW WĜtG\ 7HQWR SURGXNW
REVDKXMH ODVHURYê ]GURM 7ĜtG\
NWHUê MH EH]SHþQê ]D UR]XPQČ
SĜHGYtGDWHOQêFKSRGPtQHNSURYR]X

ýHãWLQD
9$529È1Ë
'HMWH SR]RU DĢ EDWHULH QHVSRONQHWH KUR]t
QHEH]SHþtFKHPLFNpKRSRSiOHQt7HQWRYêUREHN
QHER MHKR SĜtVOXãHQVWYt GRGiYDQp V YêURENHP
PĤåHREVDKRYDWNQRIOtNRYRXPLQFRYRXEDWHULL
'RMGHOLNSRåLWtEDWHULHPĤåHWR]SĤVRELWYiåQp
YQLWĜQt SRSiOHQLQ\ EČKHP KRGLQ D PĤåH WR
YpVWNHVPUWL
8GUåXMWH QRYp D SRXåLWp EDWHULH PLPR GRVDK
GČWt3RNXGþiVWVEDWHULtQHQtPRåQpEH]SHþQČ
X]DYĜtWSĜHVWDĖWHYêUREHNSRXåtYDWDRGORåWHKR
PLPR GRVDK GČWt 3RNXG VL P\VOtWH åH EDWHULH
E\O\ VSRONQXW\ QHER YORåHQ\ GR MDNpNROLY þiVWL
WČODRNDPåLWČY\KOHGHMWHOpNDĜVNRXSRPRF
±±±±±±±±±±±±
79 PĤåH VSDGQRXW D ]SĤVRELW YiåQp ]UDQČQt
QHER VPUW 9HONpPX PQRåVWYt ]UDQČQt KODYQČ
GČWt MH PRåQp VH Y\KQRXW MHGQRGXFKêPL
RSDWĜHQtPL
9ä'< SRXåtYHMWH VNĜtĖN\ SRGVWDYFH D
]SĤVRE\PRQWiåHGRSRUXþHQpYêUREFHPWY
9ä'< SRXåtYHMWH QiE\WHN NWHUê SRVN\WXMH
EH]SHþQRXRSRUXSURWHOHYL]RU
9ä'< VH XMLVWČWH DE\ WHOHYL]RU QHSĜHVDKRYDO
SĜHVKUDQ\SRGSĤUQpKRQiE\WNX
9ä'<XþWHGČWLRQHEH]SHþtY\Op]WQDQiE\WHN
QDWHOHYL]RUQHERQDMHKRRYOiGDFtSUYN\
9ä'<QDVPČUXMWHYHGHQtDNDEHO\SĜLSRMHQpN
WHOHYL]RUX DE\VWH R QČ QHPRKOL ]DNRSQRXW
SURWiKQRXWMHQHER]DFK\WLW
1,.'<QHVWDYWHWHOHYL]RUQDQHVWDELOQtPtVWD
1,.'< QHXPtVĢXMWH WHOHYL]RU QD Y\VRNê
QiE\WHN QDSĜtNODG VNĜtQČ D NQLKRYQ\ EH]
XNRWYHQtQiE\WNXLWHOHYL]RUXNYKRGQpSRGSRĜH
1,.'< QHXPLVĢXMWH WHOHYL]RU QD WNDQLQ\ QHER
MLQp PDWHULiO\ NWHUp PRKRX EêW XPtVWČQ\ PH]L
WHOHYL]RUHPDSRGSĤUQêPQiE\WNHP
1,.'< QHXPLVĢXMWH SĜHGPČW\NWHUp E\ PRKO\
GČWLOiNDWMDNR MVRXKUDþN\DGiONRYpRYODGDþH
QDKRUQtþiVWWHOHYL]RUXQHERQiE\WHNQDNWHUê
MHWHOHYL]RUXPtVWČQ
=DĜt]HQt MH YKRGQp SRX]H N PRQWiåL YH
YêãNiFKGRP
3ĜL SĜHPtVWČQt YDãHKR VRXþDVQpKR WHOHYL]RUX
E\VWHPČOLVWHMQČSRXåtWYêãHXYHGHQiRSDWĜHQt
±±±±±±±±±±±±
3ĜtVWURM SĜLSRMHQê N RFKUDQQpPX X]HPQČQt
LQVWDODFH EXGRY\ SURVWĜHGQLFWYtP SĜLSRMHQt GR
(/(.75,&.e VtWČ QHER N MLQpPX SĜtVWURML V
SĜLSRMHQtP N RFKUDQQpPX X]HPQČQt D N
WHOHYL]QtPX GLVWULEXþQtPX V\VWpPX SRPRFt
NRD[LiOQtKR NDEHOX PĤåH ]D XUþLWêFK RNROQRVWt
SĜHGVWDYRYDWUL]LNRSRåiUX1DSRMHQtQDV\VWpP
WHOHYL]QtFK UR]YRGĤ PXVt EêW SURWR SURYHGHQR
SURVWĜHGQLFWYtP ]DĜt]HQt NWHUêFK HOHNWULFNi
L]RODFH VSDGi GR XUþLWpKR IUHNYHQþQtKR SiVPD
JDOYDQLFN\L]ROiWRU
3RXåtYiQt WČFKWR VSHFLiOQtFK IXQNFt NH ]PČQČ
YHOLNRVWL ]REUD]RYDQpKR REUD]X QDSĜ ]PČQD
SRPČUXYêãNDãtĜNDSUR~þHO\YHĜHMQpSURGXNFH
QHER NRPHUþQtKR ]LVNX PĤåH QDUXãRYDW
DXWRUVNi SUiYD=REUD]RYDFt /&' SDQHO\ MVRX
Y\UiEČQ\H[WUpPQČSĜHVQRX WHFKQRORJLtRYãHP
QČNG\ VH PĤåH VWiW åH QD QČNWHUêFK PtVWHFK
REUD]RYN\ EXGH FK\EČW þiVW REUD]X QHER VH
EXGRX Y\VN\WRYDW VYČWOi ERG\ 7RWR QHQt
]iYDGD3ĜtVWURM E\ PČO EêW QDSiMHQê SRX]H ]H
]iVXYN\ VH VWĜtGDYêP SURXGHP 9
+] 8MLVWČWH VH åH WHOHYL]RU QHVWRMt QD
HOHNWULFNpPYHGHQt1LNG\QHRGVWUDĖXMWH
]iVWUþNX QD NDEHOX X ]DĜt]HQt REVDKXMH
VSHFLiOQt ILOWU UDGLRYpKR UXãHQt MHKRå RGHEUiQt
E\PRKORPtWYOLYQDYêNRQ]DĜt]HQt7RWRO]H
Y\PČQLW SRX]H VSUiYQČ RKRGQRFHQêP D
SRWYU]HQêP W\SHP 32.8' 0È7(
32&+<%1267, 325$Ć7( 6( 6
.9$/,),.29$1é0(/(.75,.Èě(0
832=251ċ1Ë3ě,0217Èä,1$=(Ć
3ĜHG PRQWiåt WHOHYL]RUX QD ]Hć VL SĜHþWČWH
SRN\Q\
6DGDSURPRQWiåQDVWČQXMHYROLWHOQi3RNXG
QHQt VRXþiVWt GRGiYN\ WHOHYL]RUX PĤåHWH ML
]tVNDWRGPtVWQtKRSURGHMFH
1HLQVWDOXMWHWHOHYL]RUQDVWURSQHERQDãLNPRX
VWČQX
3RXåLMWH SRX]H YVDGČ SĜLORåHQp ãURXE\ SUR
PRQWiåQDVWČQXDGDOãtSĜtVOXãHQVWYt
3HYQČ XWiKQČWH ãURXE\ QD PRQWiå QD VWČQX
DE\VWH ]DEUiQLOL SiGX WHOHYL]RUX âURXE\
QHSĜHWDKXMWH
2EUi]N\DLOXVWUDFHYWRPWRQiYRGXPDMtSRX]H
LQIRUPDWLYQt FKDUDNWHU D PRKRX VH OLãLW RG
VNXWHþQpKR Y]KOHGX YêURENX 'HVLJQ D
WHFKQLFNp SDUDPHWU\ SURGXNWX PRKRX EêW
]PČQČQ\EH]SĜHGFKR]tKRXSR]RUQČQt

ýHãWLQD
/LFHQFH
+'0, +'0, +LJK'HILQLWLRQ 0XOWLPHGLD
,QWHUIDFH D +'0, ORJR MVRX UHJLVWURYDQêPL
REFKRGQtPL ]QiPNDPL +'0, /LFHQVLQJ //& YH
6SRMHQêFKVWiWHFKDMLQêFK]HPtFK
'ROE\ 'ROE\ 9LVLRQ 'RO\ $XGLR D V\PERO
GYRMLWpKR ' MVRX RFKUDQQp ]QiPN\ VSROHþQRVWL
'ROE\ /DERUDWRULHV /LFHQVLQJ &RUSRUDWLRQ
9\UREHQRYOLFHQFL'ROE\/DERUDWRULHV'ĤYČUQp
QHSXEOLNRYDQp SUiFH &RS\ULJKW
'ROE\/DERUDWRULHV9ãHFKQDSUiYDY\KUD]HQD
*RRJOH $QGURLG $QGURLG 79 &KURPHFDVW
*RRJOH3OD\D<RX7XEHMVRXRFKUDQQp ]QiPN\
VSROHþQRVWL*RRJOH//&
3UR SDWHQW\ '76 YL] KWWSSDWHQWVGWVFRP
9\UREHQR Y OLFHQFL VSROHþQRVWL '76 /LFHQVLQJ
/LPLWHG '76 6\PERO '76 D 6\PERO
GRKURPDG\ '76+' D ORJR '76+' MVRX
UHJLVWURYDQp RFKUDQQp ]QiPN\ QHER RFKUDQQp
]QiPN\ VSROHþQRVWL '76 ,QF Y 86$ DQHER Y
MLQêFK ]HPtFK '76 ,QF 9ãHFKQD SUiYD
Y\KUD]HQD
=QDþND %OXHWRRWK D ORJD MVRX UHJLVWURYDQp
RFKUDQQp ]QiPN\ YODVWQČQp VSROHþQRVWt
%OXHWRRWK 6,* ,QF D QD MDNpNROL SRXåLWt WČFKWR
]QDþHN VSROHþQRVWt 9HVWHO (OHNWURQLN 6DQD\L YH
7LFDUHW $6 VH Y]WDKXMH OLFHQFH 2VWDWQt
RFKUDQQp ]QiPN\ D REFKRGQt Qi]Y\ MVRX
PDMHWNHPSĜtVOXãQêFKYODVWQtNĤ
'9% MH UHJLVWURYDQi RFKUDQQi ]QiPND '9%
3URMHFW
>@ 6PČUQLFH (,$&($' VH WêNi SĜHQRVX
QHNRPSULPRYDQpKR GLJLWiOQtKR YLGHD V +LJK
EDQGZLGWK GLJLWiOQt RFKUDQX REVDKX NWHUê MH
VWDQGDUGL]RYiQ SUR SĜtMHP KLJKGHILQLWLRQ YLGHR
VLJQiOĤ3URWRåHWRMHUR]YtMHMtFtVHWHFKQRORJLH
MHPRåQpåHQČNWHUi]DĜt]HQtQHPXVtVSUiYQČV
WHOHYL]RUHPIXQJRYDW
7HQWR SURGXNW REVDKXMH WHFKQRORJLH SRGOpKDMtFt
SUiYĤP GXãHYQtKR YODVWQLFWYt VSROHþQRVWL
0LFURVRIW 3RXåLWt QHER GLVWULEXFH WpWR
WHFKQRORJLHPLPRWHQWRSURGXNWMHEH]SĜtVOXãQp
OLFHQFHtRGVSROHþQRVWL0LFURVRIW]DNi]iQD
9ODVWQtFLREVDKXSRXåtYDMtWHFKQRORJLLSĜtVWXSXN
REVDKX0LFURVRIW3OD\5HDG\NRFKUDQČVYpKR
GXãHYQtKR YODVWQLFWYt YþHWQČ REVDKX
FKUiQČQpKR DXWRUVNêPL SUiY\ 7RWR ]DĜt]HQt
SRXåtYiWHFKQRORJLL
3OD\5HDG\ SUR SĜtVWXS N 3OD\5HDG\
FKUiQČQpPX REVDKX DQHER N :0'50
FKUiQČQpPX REVDKX 9 SĜtSDGČ åH SĜtVWURM
SĜHVWDQH VSUiYQČ SURVD]RYDW RPH]HQt WêNDMtFt
VH SRXåtYiQt REVDKX YODVWQtFL REVDKX PRKRX
Y\åDGRYDW SR VSROHþQRVWL 0LFURVRIW RGYROiQt
VFKRSQRVWL ]DĜt]HQt QD VSRWĜHEX 3OD\5HDG\
FKUiQČQpKR REVDKX 2GYROiQt E\ QHPČOR PtW
YOLY QD QHFKUiQČQê REVDK DQL REVDK FKUiQČQê
MLQêPL WHFKQRORJLHPL 9ODVWQtFL REVDKX PRKRX
Y\åDGRYDW DNWXDOL]DFL 3OD\5HDG\ SUR SĜtVWXS N
MHMLFK REVDKX 3RNXG DNWXDOL]DFL RGPtWQHWH
QHEXGHWH PRFL SĜLVWXSRYDW N REVDKX NWHUê
Y\åDGXMHDNWXDOL]DFL/RJRÄ&,3OXV³MHRFKUDQQi
]QiPND VSROHþQRVWL &, 3OXV //37HQWR SURGXNW
MH FKUiQČQ XUþLWêPL SUiY\ GXãHYQtKR YODVWQLFWYt
VSROHþQRVWL 0LFURVRIW &RUSRUDWLRQ3RXåLWtQHER
GLVWULEXFH WDNRYp WHFKQRORJLH PLPR WHQWR
SURGXNW MH EH] OLFHQFH RG VSROHþQRVWL 0LFURVRIW
QHER RG DXWRUL]RYDQp GFHĜLQp VSROHþQRVWL
0LFURVRIW]DNi]iQR
9ODVWQRVWLEH]GUiWRYpKR/$1Y\VtODþH
2PH]HQtY]iYLVORVWLQD]HPL
3RåDGDYN\ SUR NWHUpNROL ]HPČ PRKRXL EêW
NG\NROL ]PČQČQ\ 'RSRUXþXMH VH DE\ XåLYDWHO
QD PtVWQtFK ~ĜDGHFK ]NRQWURORYDO DNWXiOQt VWDY
YQLWURVWiWQtFK SUiYQtFK SĜHGSLVĤ SUR *+]
EH]GUiWRYpVtWČ/$1

ýHãWLQD
,QIRUPDFHROLNYLGDFL
(YURSVNi8QLH
7\WRV\PERO\R]QDþXMtåHHOHNWULFNpD
HOHNWURQLFNpSĜtVWURMHDEDWHULHVWtPWR
V\PEROHPQHVPtEêWY\KR]HQ\VEČåQêP
GRPiFtPRGSDGHPQDNRQFLMHMLFKåLYRWQRVWL
0tVWRWRKRSURGXNWVWHMQČMDNRLEDWHULHE\PČO\
EêWSĜHGiQ\QDVEČUQêFKPtVWHFKSURUHF\NODFL
HOHNWULFNêFKDHOHNWURQLFNêFK]DĜt]HQt]GĤYRGX
VSUiYQpKR]SUDFRYiQtY\XåLWtDUHF\NODFHY
VRXODGXVYDãLPLYQLWURVWiWQtPLSUiYQtPL
SĜHGSLV\D6PČUQLFH(8D
(86SUiYQRXOLNYLGDFtWČFKWRYêURENĤ
SRPiKiWH]DFKRYDWSĜtURGQt]GURMHD]DPH]LW
SRWHQFLiOQtPQHJDWLYQtPYOLYĤPQDåLYRWQt
SURVWĜHGtDOLGVNp]GUDYtNHNWHUêPE\MLQDN
PRKORGRMtWQiVOHGNHPQHYKRGQpKR]DFKi]HQtV
WtPWRSURGXNWHPSĜLOLNYLGDFL3URYtFHLQIRUPDFt
RVEČUQêFKFHQWUHFKDUHF\NODFtWČFKWR
SURGXNWĤNRQWDNWXMWHYiãPtVWQt~ĜDGVOXåE\
SURY\YiåHQtRGSDGXQHERREFKRGYHNWHUpP
MVWHYêUREHN]DNRXSLOL=DQHVSUiYQRXOLNYLGDFL
WRKRWRRGSDGXO]HREGUåHWSRNXWXY]iYLVORVWLQD
VWiWQtOHJLVODWLYČ
3URSRGQLNDWHOH3RNXGVLWHQWRSURGXNWSĜHMHWH
Y\KRGLWGRRGSDGXNRQWDNWXMWHVYpKR
GRGDYDWHOHDSĜHþWČWHVLYãHREHFQpREFKRGQt
SRGPtQN\NXSQtVPORXY\
'DOãt]HPČPLPR(YURSVNRX8QLL7\WR
V\PERO\MVRXSODWQpSRX]HY(YURSVNp8QLL3UR
LQIRUPDFHRWRPMDNOLNYLGRYDWDUHF\NORYDW
NRQWDNWXMWHPtVWQt~ĜDG9êUREHNLREDORGQHVWHN
UHF\NODFL1ČNWHUpVEČUQ\SĜLMtPDMtYêUREN\
]GDUPD
3R]QiPND=QDN3ESRGV\PEROHP]QDPHQi
åHEDWHULHREVDKXMHRORYR
3URGXNW\
%DWHULH


English - 1 -
Audio ...............................................................32
Picture .............................................................34
Subtitle.............................................................34
Specification........................................................ 36
Licences.............................................................. 36
Disposal Information ...........................................37
Table of Contents
Safety Information................................................. 2
Accessories Included ............................................ 4
Features................................................................ 4
Stand Installation & Wall Mounting .......................5
Antenna Connection..............................................5
Other Connections ................................................ 6
Turning On/Off the TV........................................... 7
TV Control & Operation......................................... 7
Remote Control..................................................... 8
Initial Setup Wizard ...............................................9
Home Screen ...................................................... 11
Live TV Mode Menu Content ..............................12
Channels ........................................................12
TV Options.......................................................12
Record.............................................................14
Settings ............................................................... 14
Network & Internet...........................................14
Channel ...........................................................14
Accounts & Sign In ..........................................17
Apps ................................................................17
Device Preferences .........................................17
Remote & Accessories ....................................22
Channel List ........................................................ 22
Programme Guide............................................... 22
Connecting to the Internet................................... 23
Multi Media Player...............................................24
From USB Connection.....................................26
USB Auto Play Feature....................................26
USB Recording ...................................................26
Instant Recording ............................................27
Watching Recorded Programmes ..................27
Timeshift Recording.........................................27
Disk Format .....................................................27
Schedule List...................................................27
CEC.....................................................................27
Google Cast ........................................................ 28
HBBTV System ................................................... 29
Quick Standby Search ........................................29
Software Update .................................................29
Troubleshooting & Tips .......................................29
HDMI Signal Compatibility .................................. 30
Supported File Formats for USB Mode............... 31
Video Decoder.................................................31
Video Encoder.................................................32
English - 2 -
Safety Information
CAUTION
RISK OF ELECTRIC SHOCK
DO NOT OPEN
CAUTION: TO REDUCE THE RISK OF ELECTRIC SHOCK DO
NOT REMOVE COVER (OR BACK).
NO USER-SERVICEABLE PARTS INSIDE. REFER
SERVICING TO QUALIFIED SERVICE PERSONNEL.
Note: Follow the on screen instructions for operating the
related features.
In extreme weather (storms, lightning) and long inactivity
periods (going on holiday) disconnect the TV set from the
mains.
The mains plug is used to disconnect TV set from the mains
and therefore it must remain readily operable. If the TV set is
not disconnected electrically from the mains, the device will
still draw power for all situations even if the TV is in standby
PRGHRUVZLWFKHGRႇ
IMPORTANT - Please read these
instructions fully before installing or
operating
WARNING: This device is intended to be
used by persons (including children) who are
capable / experienced of operating such a device
unsupervised, unless they have been given
supervision or instruction concerning the use of
the device by a person responsible for their safety.
Use this TV set at an altitude of less than 5000 metres
above the sea level, in dry locations and in regions
with moderate or tropical climates.
The TV set is intended for household and similar
indoor use but may also be used in public places.
For ventilation purposes, leave at least 5cm of free
space around the TV.
The ventilation should not be impeded by covering
or blocking the ventilation openings with items, such
as newspapers, table-cloths, curtains, etc.
The power cord/plug should be easily accessible. Do
not place the TV, furniture, etc. on the power cord.
$GDPDJHGSRZHUFRUGSOXJFDQFDXVH¿UHRUJLYH
you an electric shock. Handle the power cord by the
plug, do not unplug the TV by pulling the power cord.
Never touch the power cord/plug with wet hands as
this could cause a short circuit or electric shock.
Never make a knot in the power cord or tie it with
other cords. When damaged it must be replaced, this
VKRXOGRQO\EHGRQHE\TXDOL¿HGSHUVRQQHO
Do not expose the TV to dripping or splashing of
OLTXLGVDQGGRQRWSODFHREMHFWV¿OOHGZLWKOLTXLGV
such as vases, cups, etc. on or over the TV (e.g. on
shelves above the TV).
Do not expose the TV to direct sunlight or do not
SODFHRSHQÀDPHVVXFKDVOLWFDQGOHVRQWKHWRSRI
or near the TV.
Do not place any heat sources such as electric
heaters, radiators, etc. near the TV set.
'RQRWSODFHWKH79RQWKHÀRRURULQFOLQHGVXUIDFHV
7R DYRLG GDQJHURI VXႇRFDWLRQ NHHS SODVWLFEDJV
out of the reach of babies, children and domestic
animals.
Carefully attach the stand to the TV. If the stand is
SURYLGHGZLWK VFUHZVWLJKWHQ WKH VFUHZV¿UPO\ WR
prevent the TV from tilting. Do not over-tighten the
screws and mount the stand rubbers properly.
Do not dispose of the batteries in fire or with
KD]DUGRXVRUÀDPPDEOHPDWHULDOV
WARNING
Batteries must not be exposed to excessive heat
VXFKDVVXQVKLQH¿UHRUWKHOLNH
Excessive sound pressure from earphones or
headphones can cause hearing loss.
ABOVE ALL - NEVER let anyone, especially
children, push or hit the screen, push anything
into holes, slots or any other openings in the TV.
Caution Serious injury or death
risk
Risk of electric shock Dangerous voltage risk
Maintenance Important maintenance
component
Markings on the Product
The following symbols are used on the product as
a marker for restrictions and precautions and safety
LQVWUXFWLRQV(DFKH[SODQDWඈRQ VKDOO EHFRQVඈGHUHG
ZKHUHWKHSURGXFWEHDUVUHODWHGPDUNඈQJRQO\ 1RWH
such information for security reasons.
Class II Equipment: This appliance is
designed in such a way that it does not require
a safety connection to electrical earth.
Hazardous Live Terminal: The marked
terminal(s) is/are hazardous live under normal
operating conditions.
Caution, See Operating Instructions: The
marked area(s) contain(s) user replaceable
coin or button cell batteries.
Class 1 Laser Product: This
product contains Class 1 laser
source that is safe under rea-
sonably foreseeable condi-
tions of operation.

English - 3 -
WARNING
Do not ingest the battery, Chemical Burn Hazard
This product or the accessories supplied with the prod-
uct may contain a coin/button cell battery. If the coin/
button cell battery is swallowed, it can cause severe
internal burns in just 2 hours and can lead to death.
Keep new and used batteries away from children.
If the battery compartment does not close securely,
stop using the product and keep it away from children.
If you think batteries might have been swallowed or
placed inside any part of the body, seek immediate
medical attention.
– – – – – – – – – – – –
A television may fall, causing serious personal injury
or death. Many injuries, particularly to children, can be
avoided by taking simple precautions such as:
ALWAYS use cabinets or stands or mounting
methods recommended by the manufacturer of the
television set.
ALWAYS use furniture that can safely support the
television set.
ALWAYS ensure the television set is not overhanging
the edge of the supporting furniture.
ALWAYS educate children about the dangers of
climbing on furniture to reach the television set or
its controls.
ALWAYS route cords and cables connected to your
television so they cannot be tripped over, pulled or
grabbed.
NEVER place a television set in an unstable location.
NEVER place the television set on tall furniture
(for example, cupboards or bookcases) without
anchoring both the furniture and the television set
to a suitable support.
NEVER place the television set on cloth or other
materials that may be located between the television
set and supporting furniture.
NEVER place items that might tempt children to
climb, such as toys and remote controls, on the top
of the television or furniture on which the television
is placed.
The equipment is only suitable for mounting at
KHLJKWVP
If the existing television set is going to be retained and
relocated, the same considerations as above should
be applied.
– – – – – – – – – – – –
Apparatus connected to the protective earthing of the
building installation through the MAINS connection or
through other apparatus with a connection to protective
earthing – and to a television distribution system using
FRD[LDOFDEOHPD\LQVRPHFLUFXPVWDQFHVFUHDWHD¿UH
hazard. Connection to a television distribution system
has therefore to be provided through a device providing
electrical isolation below a certain frequency range
(galvanic isolator).
WALL MOUNTING WARNINGS
Read the instructions before mounting your TV
on the wall.
The wall mount kit is optional. You can obtain from
your local dealer, if not supplied with your TV.
Do not install the TV on a ceiling or on an inclined
wall.
8VHWKHVSHFL¿HGZDOOPRXQWLQJVFUHZVDQGRWKHU
accessories.
7LJKWHQWKHZDOOPRXQWLQJVFUHZV¿UPO\WRSUHYHQW
the TV from falling. Do not over-tighten the screws.
Figures and illustrations in these operating
instructions are provided for reference only and
PD\GLႇHUIURP WKH DFWXDOSURGXFW DSSHDUDQFH
3URGXFWGHVLJQDQGVSHFL¿FDWLRQVPD\EHFKDQJHG
without notice.
English - 4 -
Introduction
Thank you for choosing our product. You’ll soon be
enjoying your new TV. Please read these instructions
carefully. They contain important information which will
help you get the best from your TV and ensure safe
and correct installation and operation.
Accessories Included
Remote Control
Batteries: 2 x AAA
Operating Instructions
Features
Remote controlled colour TV
AndroidTM operating system
Google Cast
Voice Search (optional)
Fully integrated digital terrestrial/cable/satellite TV
(DVB-T-T2/C/S2)
HDMI inputs to connect other devices with HDMI
sockets
USB input
Stereo sound system
Teletext
Headphone connection
Automatic programming system
Manual tuning
Sleep timer
2Q2ႇWLPHU
6ZLWFKRႇWLPHU
3LFWXUHRႇIXQFWLRQ
1RVLJQDODXWRSRZHURႇIXQFWLRQ
Ethernet (LAN) for Internet connectivity and service
802.11 a/b/g/n/ac built in WLAN Support
HbbTV
Ultra HD (UHD)
7KH79VXSSRUWV8OWUD+'8OWUD+LJK'H¿QLWLRQDOVR
known as 4K) which provides resolution of 3840 x
2160 (4K:2K). It equals 4 times the resolution of Full
HD TV by doubling the pixel count of the Full HD TV
both horizontally and vertically. Ultra HD content is
supported via native and market applications, HDMI,
some of the Over-the-Top (OTT) services, USB inputs
and over DVB-T2 and DVB-S2 broadcasts.
High Dynamic Range (HDR) / Hybrid Log-
Gamma (HLG)
Using this feature the TV can reproduce greater
dynamic range of luminosity by capturing and then
FRPELQLQJVHYHUDOGLႇHUHQW H[SRVXUHV +'5+/*
promises better picture quality thanks to brighter, more
realistic highlights, more realistic colour and other
LPSURYHPHQWV,WGHOLYHUV WKH ORRNWKDW ¿OPPDNHUV
intended to achieve, showing the hidden areas of
dark shadows and sunlight with full clarity, colour
and detail. HDR/HLG content is supported via native
and market applications, HDMI, USB inputs and
over DVB-S broadcasts. When the input source is
set to the related HDMI input press the Menu button
and set the HDMI EDID Version option in the TV
Options>Settings>Device Preferences>Inputs
menu as EDID 2.0 or Auto EDID in order to watch
HDR/HLG content, if the HDR/HLG content is received
through an HDMI input. The source device should also
be at least HDMI 2.0a compatible in this case.
Dolby Vision
Dolby Vision™ delivers a dramatic visual experience,
astonishing brightness, exceptional contrast, and vivid
colour, that brings entertainment to life. It achieves this
stunning image quality by combining HDR and wide
colour gamut imaging technologies. By increasing the
brightness of the original signal and using a higher
dynamic colour and contrast range, Dolby Vision
presents amazing true-to-life images with stunning
detail that other post-processing technologies in the
TV aren’t able to produce. Dolby Vision is supported
via native and market applications, HDMI and USB in-
puts. When the input source is set to the related HDMI
input press the Menu button and set the HDMI EDID
Version option in the TV Options>Settings>Device
Preferences>Inputs menu as EDID 2.0 or Auto EDID
in order to watch Dolby Vision content, if the Dolby
Vision content is received through an HDMI input.
The source device should also be at least HDMI 2.0a
compatible in this case. In the Picture Mode menu
three predefined picture modes will be available
if Dolby Vision content is detected: Dolby Vision
Bright,Dolby Vision Dark and Dolby Vision Vivid.
All allow the user to experience the content in the way
WKHFUHDWRURULJLQDOO\LQWHQGHGZLWKGLႇHUHQWDPELHQW
lighting conditions. To change the Picture Mode setting
press the Menu button while watching the Dolby Vision
content and go to Picture menu. While watching Dolby
Vision Content via an application, except YouTube,
1HWÀL[DQG0XOWL0HGLD3OD\HU\RXZLOOQRWEHDEOHWR
access the Picture menu and set the Picture Mode.

English - 5 -
Stand Installation &
Wall Mounting
Assembling / Removing the pedestal
Preparations
Take out the pedestal(s) and the TV from the packing
case and put the TV onto a work table with the screen
panel down on a clean and soft cloth (blanket, etc.).
8VHDÀDWDQG¿UPWDEOHELJJHUWKDQWKH79
Do not hold the screen panel part.
Make sure not to scratch or break the TV.
Assembling the pedestal
1. Place the pedestal(s) on the mounting pattern(s)
on the rear side of the TV.
2. Insert the screws provided and tighten them gently
XQWLOWKHSHGHVWDOVLVDUHSURSHUO\¿WWHG
Removing the pedestal from the TV
Be sure to remove the pedestal in the following way
when using the wall mount bracket or repacking the TV.
Put the TV onto a work table with the screen panel
down on a clean and soft cloth. Leave the pedestal(s)
protruding over the edge of the surface.
8QVFUHZWKHVFUHZVWKDW¿[WKHSHGHVWDOV
Remove the pedestal(s).
When using the wall mount bracket
Your TV is also prepared for a VESA-compliant wall
mount bracket. If it is not supplied with your TV, contact
your local dealer to purchase the recommended wall
mount bracket.
Holes and measurements for the wall mount bracket
installation;
VESA WALL MOUNT MEASUREMENTS
,ŽůĞWĂƩĞƌŶ
Sizes (mm)
WH
200 200
^ĐƌĞǁ^ŝnjĞƐ
>ĞŶŐƚŚ;yͿ min. (mm) 10
max. (mm) 13
dŚƌĞĂĚ;zͿ M6
Antenna Connection
Connect the aerial or cable TV plug to the AERIAL
INPUT (ANT) socket located on the left side of the TV
or satellite plug to the SATELLITE INPUT (LNB) socket
located on the rear side of the TV.
Left side of the TV
$17
Rear side of the TV
/1%
If you want to connect a device to the TV, make
VXUHWKDWERWKWKH79DQGWKHGHYLFHDUHWXUQHGRႇ
before making any connection. After the connection
is done, you can turn on the units and use them.
English - 6 -
Other Connections
,I\RXZDQWWRFRQQHFWDGHYLFHWRWKH79PDNHVXUHWKDWERWKWKH79DQGWKHGHYLFHDUHWXUQHGRႇEHIRUHPDNLQJ
any connection. After the connection is done, you can turn on the units and use them.
Connector Type Cables Device
HDMI
Connection
(back&side)
SPDIF SPDIF
(Optical Out)
Connection
(back)
HEADPHONE Headphone
Connection
(back)
USB
Connection
(side)
CI
Connection
(side)
CAM
module
LAN Ethernet
Connection
(back) LAN / Ethernet Cable
When using the wall mounting kit
(contact your dealer to purchase one,
if not supplied), we recommend that
you plug all your cables into the back
of the TV before mounting on the
wall. Insert or remove the CI module
only when the TV is SWITCHED
OFF. You should refer to the module
instruction manual for details of the
settings. The USB inputs on the
TV support devices up to 500mA.
Connecting devices that have current
value above 500mA may damage
your TV. When connecting equip-
ment using a HDMI cable to your
79WRJXDUDQWHHVXFLHQWLPPXQLW\
against parasitic frequency radiation
and trouble-free transmission of high
GH¿QLWLRQ VLJQDOV VXFK DV . FRQ-
tent, you have to use a high speed
shielded (high grade) HDMI cable
with ferrites.

English - 7 -
Turning On/Off the TV
Connect power
IMPORTANT: The TV set is designed to operate on
220-240V AC, 50 Hz socket.
After unpacking, allow the TV set to reach the ambient
room temperature before you connect the set to the
mains.
Plug the power cord to the mains socket outlet. The
TV will switch on automatically.
To switch on the TV from standby
If the TV is in standby mode the standby LED lights
up. To switch on the TV from standby mode either:
Press the Standby button on the remote control.
Press the control button on the TV.
The TV will then switch on.
To switch the TV into standby
The TV cannot be switched into standby mode via
control button. Press and hold the Standby button on
the remote control. 3RZHURႇdialogue will appear on
the screen. Highlight OK and press the OK button. The
TV will switch into standby mode.
7RVZLWFKRႇWKH79
To power down the TV completely, unplug the power
cord from the mains socket.
Quick Standby Mode
In order to switch the TV into quick standby mode
either;
Press the Standby button on the remote.
Press again to go back to operating mode.
Press the control button on the TV.
Press the control button again to go back to operating
mode.
Your TV continues to operate in the quick standby
mode state, as it regularly checks for updates. This is
not a malfunction, it meets the requirements for energy
consumption. In order to minimise energy consumption
switch your TV into standby mode as explained above.
TV Control & Operation
The control button allows you to control the Quick
Standby-On function of the TV.
Note: 7KHSRVLWLRQRIWKHFRQWUROEXWWRQPD\GL௺HUGHSHQGLQJ
on the model.
7RWXUQWKH79Rႇ4XLFN6WDQGE\Press the control
button to turn the TV into quick standby mode.
7RWXUQ WKH 79 Rႇ6WDQGE\The TV cannot be
switched into standby mode via control button.
To turn on the TV: Press the control button, the TV
will turn on.
Note: Live TV settings menu OSD in Live TV mode cannot be
displayed via the control button.
Operation with the Remote Control
Press the Menu button on your remote control to
display Live TV settings menu when in Live TV mode.
Press Home button to display or return to the Home
Screen of the Android TV. Use the directional buttons
to move the focus, proceed, adjust some settings and
press OK to make selections in order to make changes,
set your preferences, enter a sub-menu, launch an
application, etc. Press Back/Return to return to the
previous menu screen.
Input Selection
Once you have connected external systems to your
79\RXFDQVZLWFKWRGLႇHUHQWLQSXWVRXUFHV3UHVVWKH
Source button on your remote control consecutively
or use the directional buttons and then press the OK
EXWWRQWRVZLWFKWRGLႇHUHQWVRXUFHVZKHQLQ/LYH79
mode. Or enter the Inputs menu on the Home Screen,
select the desired source from the list and press OK.
Changing Channels and Volume
You can adjust the volume by using the Volume
+/- buttons and change the channel in Live TV mode
by using the Programme +/- buttons on the remote.
English - 8 -
Remote Control
Inserting the Batteries into the Remote
The remote may have a screw that secures the battery
compartment cover onto the remote control (or this may
be in a separate bag). Remove the screw, if the cover
is screwed on previously. Then remove the battery
compartment cover to reveal the battery compartment.
Insert two 1.5V - size AAA batteries. Make sure the (+)
and (-) signs match (observing correct polarity). Do not
mix old and new batteries. Replace only with same or
equivalent type. Place the cover back on. Secure the
cover again with the screw, if any.
To pair remote with the TV
:KHQWKH79LVWXUQHGRQIRUWKH¿UVWWLPHDVHDUFK
for accessories will be performed after the initial setup
starts. You will need to pair your remote control with
your TV at this point.
Press and hold the Source button on the remote until
the LED on the remote starts to blink, then release
the Source button. That means the remote is in
pairing mode.
1RZ\RXZLOOZDLWIRUWKH79WR¿QG\RXUUHPRWH6HOHFW
the name of your remote and press OK when it appears
on the TV screen.
When the pairing process is successful, the LED on
WKHUHPRWHZLOOJRRႇ,IWKHSDLULQJSURFHVVIDLOVWKH
remote will enter sleep mode after 30 seconds.
In order to pair your remote later on, you can go to
Settings menu, highlight Remotes & Accessories
option and press OK to start a search for accessories.
1. Standby: Quick Standby / Standby / On
2. Numeric buttons: Switches the channel in Live TV
mode, enters a number or a letter in the text box on
the screen
3. Language: Switches among sound modes (analogue
TV), displays and changes audio language (digital TV,
where available)
4. Volume +/-
5. Microphone: Activates the microphone on the remote
6. Home: Opens the Home Screen
7. Guide: Displays the electronic programme guide in
Live TV mode
8. OK: Confirms selections, enters sub-menus, views
channel list (in Live TV mode)
9. Back/Return: Returns to previous menu screen, goes
one step back, closes open windows, closes teletext (in
Live TV-Teletext mode)
10. 1HWÀL[/DXQFKHVWKH1HWÀL[DSSOLFDWLRQ
11. Prime Video: Launches the Amazon Prime Video
application
12. Menu: Displays Live TV Settings menu (in Live TV
mode), displays available setting options such as sound
and picture
13. Rewind: Moves frames backwards in media such as
movies
14. Stop: Stops the media being played
15. Record: Records programmes in Live TV mode
16. Coloured Buttons: Follow the on-screen instructions for
coloured button functions
17. Pause: Pauses the media being played, starts timeshift
recording in Live TV mode
Play: Starts to play selected media
18. Text: Opens and closes teletext (where available in
Live TV mode)
19. Fast forward: Moves frames forward in media such
as movies
20. Source: Shows all available broadcast and content
sources, is also used in pairing process of the remote.
21. Google Play: Launches the Google Play Store appli-
cation
22. YouTube: Launches the YouTube application
23. Exit: Closes and exits from Live TV Settings menus,
closes the Home Screen, exits from any running
application or menu or OSD banner, switches to last
set source
24. Directional buttons: Navigates menus, setting options,
moves the focus or cursor, etc. sets record time and
displays the subpages in Live TV-Teletext mode when
pressed Right or Left. Follow the on-screen instructions.
25. Info: Displays information about on-screen content
26. Programme +/-: Increases/Decreases channel number
in Live TV mode
27. Mute:&RPSOHWHO\WXUQVRႇWKHYROXPHRIWKH79
28. Subtitles:7XUQVVXEWLWOHVRQDQGRႇZKHUHDYDLODEOe)
Standby Button
Press and hold the Standby button on the remote
control. 3RZHURႇdialogue will appear on the screen.
Highlight OK and press the OK button. The TV will
VZLWFKLQWRVWDQGE\PRGH3UHVVEULHÀ\DQGUHOHDVH
to switch the TV into quick standby mode or to switch
on the TV when in quick standby or standby mode.

English - 9 -
Initial Setup Wizard
Note: Follow the on-screen instructions to complete the initial
setup process. Use the directional buttons and the OK button
RQWKHUHPRWHWRVHOHFWVHWFRQ¿UPDQGSURFHHG
:KHQWXUQHGRQIRUWKH¿UVWWLPHDZHOFRPHVFUHHQ
will be displayed. Select your language and press OK.
Follow the on-screen instructions to setup your TV
and install channels. The installation wizard will guide
you through the setup process. You can perform initial
setup anytime using the Factory reset option in the
Settings>Device Preferences>About menu. You can
access the Settings menu from the Home screen or
from the TV options menu in Live TV mode.
1. Welcome Message and Language Selection
“Welcome” message will be displayed along with
the language selection options listed on the screen.
Select the desired language from the list and press
OK to continue.
2. Region/Country
In the next step select your region or country from the
list and press OK to continue.
3. Initial Setup
After the region/country selection you can start the
initial setup wizard. Highlight Continue and press OK
to proceed. You will not be able go back and change
the language and region/country once you proceed. If
you need to change your language or region/country
selection after this step, you will have to switch the TV
into standby mode so the setup process starts from the
beginning when you next switch on the TV. In order to
do this, press and hold the Standby button. A dialogue
will be displayed. Highlight OK and press OK.
4. Search for accessories
A search for accessories will be performed after
the initial setup has started. Follow the on-screen
instructions to pair your remote control (depends on
the model of the remote control) and other wireless
accessories with your TV. Press Back/Return button
to end adding accessories and proceed.
5. Quick Setup
If you didn’t priorly connect your TV to the Internet via
Ethernet a screen will be displayed where you can
transfer your Android phone’s WLAN network and
Google Account to your TV. Highlight Continue and
press OK to proceed. Follow the on-screen instructions
on your TV and your phone to complete the process.
You can also skip this step by selecting Skip option.
Some steps may be skipped depending on the settings
made in this step.
If you did priorly connect your TV to the Internet via
Ethernet a message will be displayed stating that you
are connected. You can choose to continue with wired
connection or change the network. Highlight Change
network and press OK if you want to use wireless
connection instead of wired connection.
6. Network Connection
You will be directed to the next step automatically, if
you connect your TV to the Internet via Ethernet at
this point. If not, available wireless networks will be
searched and listed on the next screen. Select your
WLAN network from the list and press OK to connect.
Enter the password using the virtual keyboard if the
network is password protected. Select the Other
network option from the list, if the network that you
want to connect has hidden SSID.
If you prefer not to connect to the Internet at this point
you can skip this step by selecting Skip option. You
can connect to the Internet later using the Network
& Internet menu options in the Settings menu from
the Home Screen or from the TV options menu in
Live TV mode.
This step will be skipped if internet connection has
been established in the previous step.
7. Network Privacy Policy
Network Privacy Policy screen will be displayed next.
Read the related explanations displayed on the screen.
You can use Up and Down directional buttons to scroll
through and read the entire text. Highlight Accept and
press OKRQWKHUHPRWHWRFRQ¿UPDQGSURFHHG<RX
can change this setting later using Network Privacy
Policy option in the Settings>Network & Internet
menu.
This step will be skipped if no internet connection has
been established in the previous step.
8. Sign in to your Google account
If connection succeeds, you can sign in to your Google
account on the next screen. You need to be signed in
to a Google account in order to use Google services.
This step will be skipped if no internet connection has
been established in the previous step or if you already
signed in to your Google account in Quick Setup step.
By signing in, you will be able to discover new
apps for videos, music and games on Google Play;
get personalised recommendations from apps like
YouTube; buy or rent the newest movies and shows on
Google Play Movies & TV; access your entertainment
and control your media. Highlight Sign In and press
OK to proceed. You can sign in to your Google account
by entering your e-mail address or phone number and
your password, or create a new account.
If you prefer not to sign in to your Google account at this
point you can skip this step by selecting Skip option.
9. Terms of Service
Terms of Service screen will be displayed next. By
continuing, you will agree to the Google Terms of
Service, the Google Privacy Policy and the Google
Play Terms of Service. Highlight Accept and press
English - 10 -
OKRQWKHUHPRWHWRFRQ¿UPDQGSURFHHG<RXFDQ
also view Terms of Service,Privacy Policy and
Play Terms of Service on this screen. To display the
content an internet connection is needed. A message
will be displayed mentioning the web site address on
which this information can also be viewed, in case
internet access is not available.
10. Google Services
Select each to learn more about each service, such as
KRZWRWXUQLWRQRURႇODWHU'DWDZLOOEHXVHGDFFRUG-
ing to Google’s Privacy Policy. Highlight Accept and
press OK WRFRQ¿UP\RXUVHOHFWLRQRIWKHVH*RRJOH
services settings.
Use location
You can allow or disallow Google and third party apps
to use your TV’s location information. Highlight Use
location and press OK to view detailed information
DQGWXUQWKLVIHDWXUH RQRURႇ<RXFDQFKDQJHWKLV
setting later using Location status option in the Set-
tings>Device Preferences>Location menu.
Help improve Android
Automatically send diagnostic information to Google,
like crash reports and usage data from your device and
apps. This information won’t be used to identify you.
Highlight Help improve Android and press OK to view
GHWDLOHGLQIRUPDWLRQDQGWXUQWKLVIHDWXUHRQRURႇ<RX
can change this setting later using the Settings>De-
vice Preferences>Usage & Diagnostics menu.
Services and your privacy
Google Assistant sends services you talk to a unique
code. That way, services can remember things like
your preferences during conversations. You can view,
manage and reset the data sent to services on each
service’s page in the Explore section of the Assistant
mobile app. Learn more at g.co/assistant/idreset.
Information on Google services and some features of
your TV will be displayed next. If you have signed in
to your Google account in the previous steps, you can
also turn on personal results for Assistant by choosing
the related option when prompted. Press OK consec-
utively to proceed.
11. Password
Depending on the country selection you made in the
HDUOLHUVWHSV\RX PD\ EHDVNHG WR GH¿QHDGLJLW
password (PIN) at this point. Press OK to proceed.
The selected PIN cannot be ‘0000’. This PIN will be
required in order to access some menus, content or
to release locked channels, sources, etc. You will have
to enter it if you are asked to enter a PIN for any menu
operation later.
12. Select TV Mode
In the following step of the initial setup, you can set
the TV’s operation mode either as Home or as Store.
Store RSWLRQZLOOFRQ¿JXUH\RXU79¶VVHWWLQJVIRUVWRUH
environment. This option is intended only for store
use. It is recommended to select Home for home use.
13. Chromecast built-in always available
Select your chromecast availability preference. If set as
On your TV will be detected as a Google Cast device
and allow Google Assistant and other services to wake
your TV up to respond to Cast commands, even when
RQVWDQGE\PRGHDQGWKHVFUHHQLVRႇ
14. Tuner Mode
The next step is the selection of the tuner mode. Select
your tuner preference to install channels for Live TV
function. Antenna,Cable and Satellite options are
available. Highlight the option that corresponds to your
environment and press OK or Right directional button
to proceed. If you don’t want to perform a tuner scan
highlight Skip and press OK.
When the channel scan with the selected tuner is
completed, the installation wizard will bring you back
to this step. In case you want to continue scanning
channels with another tuner, you can proceed as
explained below.
Antenna
If Antenna option is selected, you can choose to
search for digital terrestrial and analogue broadcasts.
On the next screen highlight the option you prefer and
press OK to start the search or select Skip Scan to
continue without performing a search.
Note: If the country selected does not have analogue
broadcasts, analogue channels may not be searched.
Cable
If Cable option is selected, you can choose to search
for digital cable and analogue broadcasts. If any,
available operator options will be listed on the Select
Operator screen. Otherwise this step will be skipped.
You can select only one operator from the list. Highlight
the desired operator and press OK or the Right
directional button to proceed. On the next screen
highlight the option you prefer and press OK to start
the search or select Skip Scan to continue without
performing a search. If one of the digital channel
VHDUFKRSWLRQVLVVHOHFWHGDFRQ¿JXUDWLRQVFUHHQZLOO
be displayed next. Scan Mode,Frequency (KHz),
Modulation,Symbol Rate (Ksym/s),Network ID
options may need to be set. To perform a full scan
set the Scan Mode as Full or Advanced if available.
Depending on the selected operator and/or Scan
Mode some options may not be available to be set.
Note: If the country selected does not have analogue
broadcasts, analogue channels may not be searched.
Once you are done with setting available options,
press the Right directional button to proceed. The TV
will start to search available broadcasts.
Satellite

English - 11 -
If Satellite option is selected, Antenna Type screen
will be displayed next. If you have a Direct satellite
system, you can proceed to the next step quickly by
selecting the Next option here. Highlight More and
press OK to set the antenna type manually. Single,
Tone Burst,DiSEqC and Unicable options are
available. Highlight the antenna type that corresponds
to your satellite system and press OK or the Right
directional button to proceed to the next step.
Next screen will be Select Operator screen. You
can select only one operator from the list. Highlight
the desired operator and press OK or the Right
directional button to proceed. Some of the options in
the following steps may be preset and/or additional
steps may be added or some steps may be skipped
depending on the selected operator in this step. Check
the parameters in each step before proceeding and
adjust if necessary. You can highlight General and
press OK or Right directional button to proceed with
normal satellite installation.
LNB List screen will be displayed next. You may be
DEOHWRVHW XS GLႇHUHQWVDWHOOLWHV GHSHQGLQJ RQWKH
selected country, antenna type and operator in the
previous steps. Highlight the desired satellite option
and press OK or the Right directional button to set
the parameters. The Satellite Status of the first
satellite option will be set as On. In order to enable
channel scan on the satellite, this option should be
set as On¿UVW
Following satellite parameters will be available. You
may not be able to change all settings depending on
the previous selections.
Satellite Status: Set the status option to On to
enable channel search on the selected satellite.
Highlight this option and press OK to change the
status.
Satellite Selection: Select the satellite on which you
want to perform a channel search.
Scan Mode: Set your scan mode preference. Full
and Network options will be available. If you are
going to perform a network scan, make sure that
you have adjusted the Frequency,Symbol Rate
(Ksym/s) and Polarisation parameters under the
Transponder option accurately.
Scan Type: You can perform a scan for free or
encrypted channels only. If the Free option is
selected encrypted channels will not be installed.
Select All to scan all channels.
Store Type: You can select to store TV channels
(referred to as ‘Digital Channels’ in the menu) or
radio channels only. Select All to store all channels.
Transponder: Adjust the Frequency,Symbol Rate
(Ksym/s) and Polarisation parameters for the
selected satellite if necessary.
/1%&RQ¿JXUDWLRQVSet the parameters for LNB.
For DiSEqC antenna type select the correct DiSEqC
port corresponding to your satellite system. Set other
parameters in accordance with your satellite system
if necessary.
Signal Quality: The signal quality status is displayed
as a percentage.
Signal Level: The signal level status is displayed
as a percentage.
Press the Back/Return button and select next satellite
\RXZDQWWRVHW$IWHU\RXFRPSOHWHGWKHFRQ¿JXUDWLRQ
changes, highlight Next on the LNB List screen and
press OK or Right directional button to proceed.
If Load Preset List option is selected in the previous
step next steps will be skipped and the preset channel
list installation will start. If the correct satellite has not
been selected for SatcoDX installation, a warning
dialogue will be displayed on the screen. The satellite/s
that can be selected will be listed. Press OK to close
the dialogue and then set the satellite accordingly.
Channel Scan screen will be displayed next. Select
Skip Scan to proceed without performing a scan
and complete the initial setup. Select Only digital
channels and press OK or the Right directional button
to start the search. While the search continues you can
press the Back/Return button, highlight Skip Scan
and press OK or Right directional button to stop the
search. The channels that have already been found
will be stored in the channel list.
When the initial setup is completed a message will be
displayed. Press OKWR¿QLVKWKHVHWXS
You will be asked to give your consent to the
collection of your data. Read the text on the screen
for detailed information. Highlight Accept and press
OK to give your consent and proceed. To skip
without giving your consent, select Skip. You can
change this setting later using the Settings>Device
Preferences>Manufacturer Usage & Diagnostics
menu.
Home Screen will be displayed. You can press the Exit
button on the remote to switch to Live TV mode and
watch TV channels.
Home Screen
7RHQMR\WKHEHQH¿WVRI\RXU$QGURLG79\RXU79PXVW
be connected to the Internet. Connect the TV to a
home network with a high-speed Internet connection.
You can connect your TV wirelessly or wired to your
modem/router. Refer to the Network & Internet
and Connecting to the Internet sections for further
information on how to connect your TV to the Internet.
The Home menu is the centre of your TV. From the
Home menu, you can start any application, switch to a
TV channel, watch a movie, or switch to a connected
device. Press the Home button to display Home
English - 12 -
Screen. You can also select the Android TV Home
option from the Inputs menu to switch to Home
Screen. To open the Inputs menu, press the Source
button on the remote or press the Menu button on the
remote when the TV is in Live TV mode, highlight the
Source option in the TV options menu, and press
OK. Depending on your TV setup and your country
selection in the initial setup, the Home menu may
FRQWDLQGLႇHUHQWLWHPV
The available options of the Home Screen are posi-
tioned in rows. To navigate through the Home Screen
options use the directional buttons on the remote.
Apps, YouTube, Google Play Movies & TV, Google
Play Music and Google Play related rows and rows of
the applications you have installed might be available.
Select a row then move the focus to the desired item
in the row. Press OK button to make a selection or to
enter a sub-menu.
On the upper left of the screen, search tools will be
located. You can choose either to type a word to start
a search via the virtual keyboard or try voice search
option if your remote has a built-in microphone.
Move the focus to the desired option and press OK
to proceed.
On the upper right of the screen, 1RWL¿FDWLRQV,Inputs,
Network & Internet (will be named as Connected or
Not Connected according to the current connection
status), Settings and the current time will be displayed.
<RX FDQ FRQ¿JXUH\RXU GDWH DQGWLPHSUHIHUHQFHV
using the Date & Time menu options from the
Settings>Device Preferences menu.
First row will be the Apps row. Live TV and Multi
Media Player apps will be available alongside with
other favourite apps. If not, highlight Add app to
favourites option (plus sign) on the Apps row and
press OK. Then select the app you want to add
and press OK. Repeat this procedure for each app.
Highlight Live TV and press OK or press the Exit
button on the remote to switch to Live TV mode. If
the source was set to an option other than Antenna,
Cable,Satellite or ATV previously, press the Source
button and set one of these options to watch live TV
channels. Highlight Multi Media Player and press OK
to browse the connected USB devices and play/display
the installed media content on the TV. The audio can be
played through the speakers of the TV or through the
speaker systems connected to the TV. To browse the
Internet, you will need an internet browser application.
Make a search or launch the Google Play Store app,
¿QGDEURZVHUDQGGRZQORDGLW
For some countries, the Home Screen will be organised
into several tabs. Home,Discover and Apps tabs will
be available. You can scroll through the tabs using
the directional buttons. Each tab will have a featured
content row at the top. In the Home tab, there will be
rows for favourite apps, recent Live TV programmes
and recommendations from streaming apps. In the
Discover tab recommendations from streaming
services will be displayed. In the Apps tab, all the
apps installed on your TV will be displayed and you
can install more from Play Store using the related
option. Depending on your TV setup and your country
selection in the initial setup, the tabs on the Home
6FUHHQPD\FRQWDLQGLႇHUHQWLWHPV
Live TV Mode Menu Content
6ZLWFKWKH79WR/LYH79PRGH¿UVWDQGWKHQSUHVV
the Menu button on the remote to see Live TV menu
options. To switch to Live TV mode you can either press
the Exit button or highlight the Live TV app from the
Apps row on the Home Screen and press OK. For
some countries, the Live TV app will be situated in the
Home tab on the Home Screen and the row with this
app will be named as Favourite Apps.
Channels
Programme Guide: Open the electronic programme
guide. Refer to the Programme Guide section for
detailed information.
Channel Export/Import: Export this TV’s satellite
channel list data to a connected USB storage device,
or import a previously exported data from a connected
USB storage device to this TV. The Channel Export
and Channel Import options will be available. Connect
a USB storage device (*) to the TV, highlight the option
you want to continue with and press OK. The Channel
Export/Import option will not be available if the input
source is not set to Satellite.
(*) The USB storage device must be formatted with the FAT32
¿OHV\VWHP
Channel: Open the Channel menu. You can use
the Channels menu options to search for broadcast
channels. Refer to the Channel section for more
information.
TV Options
Source: Display the list of input sources. Select the
desired one and press OK to switch to that source.
Picture: Open the Picture menu. Refer to Device
Preferences section for detailed information.
Sound: Open the Sound menu. Refer to Device
Preferences section for detailed information.
Power
Sleep Timer: 'H¿QHDWLPHDIWHUZKLFK\RXZDQW
your TV to enter sleep mode automatically. Set as
2ႇto disable.
3LFWXUHRႇ6HOHFWWKඈV RSWඈRQ DQGSUHVV OK to
WXUQWKHVFUHHQRႇ3UHVVDEXWWRQRQWKHUHPRWH
or on the TV to turn the screen on again. Note that
you can not turn the screen on via the Volume +/-,

English - 13 -
Mute and Standby buttons. These buttons will
function normally.
1R6LJQDO$XWR3RZHU2ႇSet the behaviour of
the TV, when no signal is detected from the currently
set input source. 'H¿QHDWLPHDIWHUZKLFK\RXZDQW
\RXU79WRWXUQLWVHOIRႇRUVHWDV2ႇto disable.
Auto Sleep: 'H¿QHDQ LGOH WLPHDIWHU ZKLFK\RX
want your TV to enter sleep mode automatically. 4
Hours,6 Hours and 8 Hours options are available.
Set as Never to disable.
CI Card: Display available menu options of the CI card
in use. This item may not be available depending on
the input source setting.
Advanced Options
The options of this menu may change and/or appear
as greyed out depending on the selected input source.
Audio Channel: Set your Audio Channel
preference.
Audio Language: Set your language preference for
audio. This item may not be available depending on
the input source setting.
2nd Audio Language: Set one of the listed
language options as second audio language
preference.
Sound Tracks: Set your sound track preference,
if any available.
Blue Mute:7XUQWKLVIXQFWLRQRQRႇDFFRUGLQJWR
your preference. When turned on, blue background
will be displayed on the screen when no signal is
available.
Default Channel: Set your default startup channel
preference. When the Select Mode is set as
User Select,Show Channels option will become
available. Highlight and press OK to see channel
list. Highlight a channel and press OK to make a
selection. Selected channel will be displayed, every
time the TV is turned back on from any standby
mode. If the Select Mode is set as Last Status, the
last watched channel will be displayed.
Interaction Channel: Turn the Interaction Channel
IXQFWLRQRQRURႇ7KLVIHDWXUHLVXVHIXOLQWKH8.
and Ireland only.
MHEG PIN Protection: Turn the MHEG PIN
SURWHFWLRQIXQFWLRQRQRURႇ7KLVVHWWLQJHQDEOHVRU
disables access some of the MHEG applications.
Disabled applications can be released by entering
the right PIN. This feature is useful in the UK and
Ireland only.
HBBTV Settings
HBBTV Support: Turn the HBBTV function on
RURႇ
Do Not Track: Set your preference regarding the
tracking behaviour for HBBTV services.
Cookie Settings: Set your cookie setting
preference for HBBTV services.
Persistent Storage: Turn the Persistent Storage
IXQFWLRQRQRU Rႇ ,IVHW DV On cookies will be
stored with an expiry date in the persistent
memory of the TV.
Block Tracking Sites: Turn the Block Tracking
6LWHVIXQFWLRQRQRURႇ
Device ID:7XUQWKH'HYLFH,'IXQFWLRQRQRURႇ
Reset Device ID: Reset the device ID for HBBTV
VHUYLFHV&RQIÕࡆUPDWÕࡆon dialogue will be displayed.
Press OK to proceed, Back to cancel.
Subtitle
Analogue Subtitle: Set this option as 2ႇ,On
or Mute. If Mute option is selected, the analogue
subtitle will be displayed on the screen but the
speakers will be muted simultaneously.
Digital Subtitle: Set this option as 2ႇor On.
Subtitle Tracks: Set your subtitle track preference,
if any available.
Digital Subtitle Language: Set one of the listed
ODQJXDJHRSWLRQVDV¿UVWGLJLWDOVXEWLWOHODQJXDJH
preference.
2nd Digital Subtitle Language: Set one of the
listed language options as second digital subtitle
language preference. If the selected language
in the Digital Subtitle Language option is not
available, the subtitles will be displayed in this
language.
Subtitle Type: Set this option as Normal or
Hearing Impaired. If Hearing Impaired option
is selected, it provides subtitle services to deaf
and hard of hearing viewers with additional
descriptions.
Telet ext
Digital Teletext Language: Set the teletext
language for digital broadcasts.
Decoding Page Language: Set the decoding
page language for teletext display.
BISS Key: “Click To Add Biss Key” message will
be displayed. Press OK button to add a biss key.
Frequency,Symbol Rate (KSym/s),Polarisation,
Programme ID and CW Key parameters will be
available to be set. Once you are done with the
settings highlight Save Key and press OK to save
and add the biss key. This option will not be available
if the input source is not set as Satellite. Available
RSWLRQVZLOOGLႇHUGHSHQGLQJRQWKHselected country
during the initial setup process.
System Information: Display detailed system
information on the current channel such as Signal
Level,Signal Quality,Frequency, etc.
English - 14 -
Record
Record List: The recordings will be displayed if any
available. Highlight a recording of your choice and
press the Yellow button to delete it or press the Blue
button to view detailed information. You can use Red
and Green buttons to scroll the page up and down.
Device Info: Connected USB storage devices will
be displayed. Highlight the device of your choice and
press OK to see available options.
Set TimeShift: Tag the selected USB storage
device or a partition on it for time shift recording.
Set PVR: Tag the selected USB storage device or
a partition on it for PVR.
Format: Format the selected USB storage
device. Refer to USB Recording section for more
information
Speed Test: Start a speed test for the selected USB
storage device. The test result will be displayed
when completed.
Schedule List: Add reminders or record timers using
the Schedule List menu.
Time Shift Mode: Enable or disable timeshift recording
feature. Refer to USB Recording section for more
information.
Settings
You can access the Settings menu from the Home
Screen or from the TV options menu in Live TV mode.
Network & Internet
<RXFDQ FRQ¿JXUH\RXU79¶VQHWZRUNVHWWLQJV XVLQJ
the options of this menu. You can also highlight the
Connected/Not Connected icon on the Home screen
and press OK to access this menu.
Network Privacy Policy: Display network privacy
policy.You can use Up and Down directional buttons
to scroll through and read the entire text. Highlight
Accept and press OK to give your consent.
Wi-Fi: Turn the wireless LAN (WLAN) function on
DQGRႇ
Available networks
When the WLAN function is turned on, available
wireless networks will be listed. Highlight See all and
press OK to see all networks. Select one and press OK
to connect. You may be asked to enter a password to
connect to the selected network, in case the network
is password protected. Additionally you can add new
networks by using the related options.
Other options
Add new network: Add networks with hidden SSID’s.
Scanning always available: You can let the location
service and other apps scan for networks, even when
:/$1IXQFWLRQLVWXUQHGRႇ3UHVVOK to turn it on
DQGRႇ
Wow:7XUQWKLVIXQFWLRQRQDQGRႇ7KLVIXQFWLRQDOORZV
you to turn on or awaken your TV via wireless network.
Wol:7XUQWKLVIXQFWLRQRQDQGRႇ7KLVIXQFWLRQDOORZV
you to turn on or awaken your TV via network.
Ethernet
Connected/Not connected: Displays the status of
the internet connection via Ethernet, IP and MAC
addresses.
Proxy settings: Set a HTTP proxy for browser manu-
ally. This proxy may not be used by other apps.
IP settings:&RQ¿JXUH\RXU79¶V,3VHWWLQJV
Channel
The content of this menu may change depending on
the selected input source and whether the channel
installation is completed.
Channels
Options of this menu may change or become inactive
depending on the input source and on the Channel
Installation Mode selection.
Input Source - Antenna
Channel Scan: Start a scan for digital terrestrial
channels. You can press the Back/Return button to
cancel the scan. The channels that have already been
found will be stored in the channel list.
Update Scan: Search for updates. Previously added
channels will not be deleted, but any newly found
channels will be stored in the channel list.
Single RF Scan: Select the RF Channel by using
the Right/Left directional buttons. Signal Level and
Signal Quality of the selected channel will be shown.
Press OK to start scan on the selected RF channel.
The found channels will be stored in the channel list.
Manual Service Update: Start a service update
manually.
LCN: Set your preference for LCN. LCN is the Logical
Channel Number system that organises available
broadcasts in accordance with a recognisable channel
number sequence (if available).
Channel Scan Type: Set your scan type preference.
Channel Store Type: Set your store type preference.
Favourite Network Select: Select your favourite
network. This menu option will be active, if more than
one network is available.
Channel Skip: Set channels to be skipped when
switching the channels via Programme +/- buttons

English - 15 -
on the remote. Highlight the desired channel/s on the
list and press OK to select/unselect.
Channel Swap: Replace the positions of the two
selected channels in the channel list. Highlight the
desired channels on the list and press OK to select.
When the second channel is selected, the position of
this channel will be replaced with the position of the
¿UVWVHOHFWHGFKDQQHO<RXFDQSUHVVWKHYellow button
and enter the number of the channel you want to select.
Then highlight OK and press OK to go to that channel.
You may need to set the LCN option to 2ႇin order to
enable this feature.
Channel Move: Move a channel to the position of
another channel. Highlight the channel you want to
move and press OK to select. Then do the same for a
second channel. When the second channel is selected,
you can press the BlueEXWWRQDQGWKH¿UVWVHOHFWHG
channel will be moved to the position of that channel.
You can press the Yellow button and enter the number
of the channel you want to select. Then highlight OK
and press OK to go to that channel. You may need to
set the LCN option to 2ႇin order to enable this feature.
Channel Edit: Edit channels in the channel list. Edit
the name of the selected channel and display Network
Name,Channel Type and Frequency information
related to that channel if available. Depending on the
channel other options may also be editable. Press OK
or the Yellow button to edit the highlighted channel.
You can press the Blue button to delete the highlighted
channel.
Channel Delete: Highlight the desired channel/s on
the list and press OK or the Yellow button to select/
unselect. Then press the Blue button to delete the
selected channel/s.
Clear Channel List: Delete all channels stored in the
FKDQQHOOLVW$GLDORJXHZLOOEHGLVSOD\HGIRUFRQ¿UPD-
tion. Highlight OK and press OK button to proceed.
Highlight Cancel and press OK to cancel.
Input Source - Cable
Channel Scan: Start a scan for digital cable channels.
If available, operator options will be listed. Select the
desired one and press OK.Scan Mode,Frequency
and Network ID options may be available. The options
may vary depending on the operator and the Scan
Mode selections. Set the Scan Mode as Full if you
don’t know how to set up other options. Highlight Scan
and press OK or the Right directional button to start
the scan. You can press the Back/Return button to
cancel the scan. The channels that have already been
found will be stored in the channel list.
Single RF Scan: Enter the Frequency value. Signal
Level and Signal Quality of the selected Frequency
will be shown. Highlight the Scan option and press OK
or the Right directional button to start scan. The found
channels will be stored in the channel list.
LCN: Set your preference for LCN. LCN is the Logical
Channel Number system that organises available
broadcasts in accordance with a recognisable channel
number sequence (if available).
Channel Scan Type: Set your scan type preference.
Channel Store Type: Set your store type preference.
Favourite Network Select: Select your favourite net-
work. This menu option will be active, if more than one
network is available. This option may not be available
depending on the selected country during the initial
setup process.
Channel Skip: Set channels to be skipped when
switching the channels via Programme +/- buttons
on the remote. Highlight the desired channel/s on the
list and press OK to select/unselect.
Channel Swap: Replace the positions of the two
selected channels in the channel list. Highlight the
desired channels on the list and press OK to select.
When the second channel is selected, the position of
this channel will be replaced with the position of the
¿UVWVHOHFWHGFKDQQHO<RXFDQSUHVVWKHYellow button
and enter the number of the channel you want to select.
Then highlight OK and press OK to go to that channel.
You may need to set the LCN option to 2ႇin order to
enable this feature.
Channel Move: Move a channel to the position of
another channel. Highlight the channel you want to
move and press OK to select. Then do the same for a
second channel. When the second channel is selected,
you can press the BlueEXWWRQDQGWKH¿UVWVHOHFWHG
channel will be moved to the position of that channel.
You can press the Yellow button and enter the number
of the channel you want to select. Then highlight OK
and press OK to go to that channel. You may need to
set the LCN option to 2ႇin order to enable this feature.
Channel Edit: Edit channels in the channel list. Edit
the name of the selected channel and display Network
Name,Channel Type,Frequency,Modulation and
Symbol Rate information related to that channel.
Depending on the channel other options may also be
editable. Press OK or the Yellow button to edit the
highlighted channel. You can press the Blue button
to delete the highlighted channel.
Channel Delete: Highlight the desired channel/s on
the list and press OK or the Yellow button to select/
unselect. Then press the Blue button to delete the
selected channel/s.
Clear Channel List: Delete all channels stored in the
FKDQQHOOLVW$GLDORJXHZLOOEHGLVSOD\HGIRUFRQ¿UPD-
tion. Highlight OK and press OK button to proceed.
Highlight Cancel and press OK to cancel.
Input Source - Satellite
Satellite Re-scan: Start a satellite scan beginning
with the antenna selection screen. When this scanning
English - 16 -
RSWLRQLVSUHIHUUHGVRPHVFDQQLQJFRQ¿JXUDWLRQVZLOO
not be available and thus the preferences you made
during the initial setup process may not be changed.
For the General Satellite channel installation mode
SatcoDX Scan option may also be available here.
&RS\WKHUHOHYDQWVG[¿OHLQWRWKHURRWGLUHFWRU\RIDQ
USB storage device and connect it to your TV. Highlight
this option and press OK.Download SatcoDX option
will be highlighted, press OK to continue. Select the sdx
¿OHIURPWKHFRQQHFWHG86%VWRUDJHGHYLFHRQWKHQH[W
screen and press OK. Satellite selection screen will
EHGLVSOD\HG7KHVWDWXVRIWKH¿UVWVDWHOOLWHRSWLRQZLOO
appear as On. Highlight that satellite option and press
OK. Set the parameters corresponding to your system
and correct satellite and press the Back/Return button
to return to the satellite selection screen. Highlight Next
and press OK to proceed with the SatcoDX channel
list installation. If the selected satellite is not correct
for SatcoDX installation, a warning dialogue will be
displayed on the screen. The satellite/s that can be
selected will be listed. Press OK to close the dialogue
and press Back/Return to return to satellite selection
screen. Then set the satellite accordingly.
Satellite Add: Add satellite and perform a satellite
scan. This menu option will be active, if Channel
Installation Mode is set to General Satellite.
Satellite Update: Search for any updates by repeating
the previous scan with the same settings. You will also
EHDEOHWRFRQ¿JXUHWKHVHVHWWLQJVEHIRUHWKHVFDQ If
Channel Installation Mode is set to Preferred Satel-
liteWKLVRSWLRQPD\EHQDPHGGLႇHUHQWO\GHSHQGLQJRQ
the available services. Highlight the satellite and press
OKEXWWRQWRFRQ¿JXUHGHWDLOHGVDWHOOLWHSDUDPHWHUV
Then press the Back/Return button to return to the
satellite selection screen. Highlight Next and press
OK to proceed.
Satellite Manual Tuning: Start a manual satellite scan.
Highlight the satellite and press OKEXWWRQWRFRQ¿JXUH
detailed satellite parameters. Then highlight Next and
press OK to proceed.
Favourite Network Select: Select your favourite net-
work. This menu option will be active, if more than one
network is available. This option may not be available
depending on the selected country during the initial
setup process.
Channel Skip: Set channels to be skipped when
switching the channels via Programme +/- buttons
on the remote. Highlight the desired channel/s on the
list and press OK to select/unselect.
Channel Swap: Replace the positions of the two
selected channels in the channel list. Highlight the
desired channels on the list and press OK to select.
When the second channel is selected, the position of
this channel will be replaced with the position of the
¿UVWVHOHFWHGFKDQQHO<RXFDQSUHVVWKHYellow button
and enter the number of the channel you want to select.
Then highlight OK and press OK to go to that channel.
Channel Move: Move a channel to the position of
another channel. Highlight the channel you want to
move and press OK to select. Then do the same for a
second channel. When the second channel is selected,
you can press the BlueEXWWRQDQGWKH¿UVWVHOHFWHG
channel will be moved to the position of that channel.
You can press the Yellow button and enter the number
of the channel you want to select. Then highlight OK
and press OK to go to that channel.
Channel Edit: Edit channels in the channel list. Edit
the name and channel number of the selected channel
and display Network Name,Channel Type and Fre-
quency information related to that channel if available.
Depending on the channel other options may also be
editable. Press OK or the Yellow button to edit the
highlighted channel. You can press the Blue button
to delete the highlighted channel.
Channel Delete: Highlight the desired channel/s on
the list and press OK or the Yellow button to select/
unselect. Then press the Blue button to delete the
selected channel/s.
Clear Channel List: Delete all channels stored in the
FKDQQHOOLVW$GLDORJXHZLOOEHGLVSOD\HGIRUFRQ¿UPD-
tion. Highlight OK and press OK button to proceed.
Highlight Cancel and press OK to cancel.
Note: Some options may not be available and appear as
greyed out depending on the operator selection and operator
related settings.
Channel Installation Mode
Set this option as Preferred Satellite or General
Satellite. The channel list will also change depending
on the selected option here. In order to watch the
channels on the satellite you want, this option should
be selected accordingly. Set to Preferred Satellite
to watch operator channels, if you have performed
an operator installation. Set to General Satellite to
watch other satellite channels, if you have performed
a normal installation.
Auto Channel Update
7XUQWKHDXWRFKDQQHOXSGDWHIXQFWLRQRQRURႇ
Channel Update Message
7XUQWKHFKDQQHOXSGDWHPHVVDJHIXQFWLRQRQRURႇ
Parental Controls
7RHQWHUWKLVPHQX3,1VKRXOGEHHQWHUHG¿UVW8VHWKH3,1
WKDW\RXKDYHGH¿QHGGXULQJWKHLQLWLDOVHWXSSURFHVV,I\RXKDYH
changed the PIN after the initial setup use that PIN. If you didn’t
set a PIN during the initial setup, you can use the default PIN.
The default PIN is 1234. Some options may not be available or
vary depending on the country selection during the initial setup.
The content of this menu may not be displayed if the channel
installation is not completed and no channels are installed.
Other Finlux TV manuals

Finlux
Finlux 47FLSY170LHD User manual

Finlux
Finlux 16FLY910LVD User manual

Finlux
Finlux FL4922 User manual

Finlux
Finlux 26FLHD846 User manual

Finlux
Finlux 32H7072-DT User manual

Finlux
Finlux 55-FQF-9460 User manual

Finlux
Finlux FL2222 User manual

Finlux
Finlux FX32551S38YXD User manual

Finlux
Finlux 50F8090-T User manual

Finlux
Finlux 32-FFE-5760 Series User manual

Finlux
Finlux 20-FMA-4210 User manual

Finlux
Finlux 32F6030-T User manual

Finlux
Finlux 24-FMC-5660 User manual

Finlux
Finlux 55FME242S-T User manual

Finlux
Finlux FL4310CB User manual

Finlux
Finlux FLD2430WK User manual

Finlux
Finlux 32-FFF-4020 User manual

Finlux
Finlux 50FME242B-T User manual

Finlux
Finlux FL3224 User manual

Finlux
Finlux 26FLHYR910LHU User manual