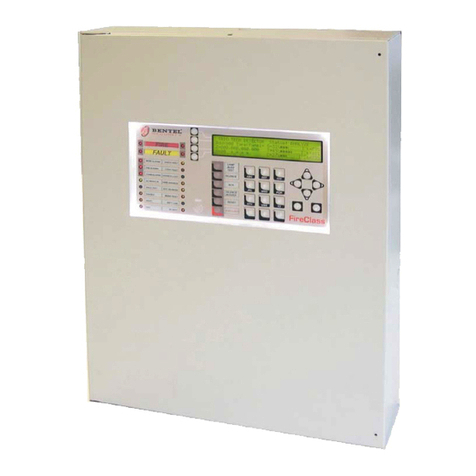
Fire Burglqry XL STAR 4612 User manual

4612
a
NOTE: Owners manual not to be
removed by anyone but the occupant.
Owners Manual
163 Eileen Way Syosset NY 11791
FI-2654Vl 9191
01991, FBX

1. INTRODUCTION
Congratulations on your decision to protect your home or business with the STAR
XL461 2 security system. You have chosen a reliable, state of the art security system
that is remarkably easy to operate. Your system has been professionally installed by
your iocal Security Company who can explain the specifics of your system within your
location.
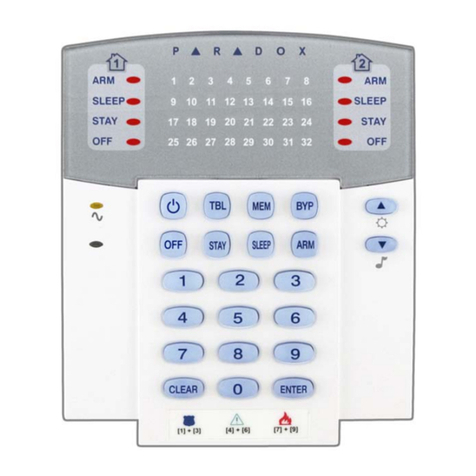
The keypad Is the arming statlon for the STAR XL4612. There are three different
versions available;
XL4612RM Metal plate keypad containing indicator lights for each of the 12 zones
(areas of protection). This keypad can be flush mounted into your wall or surface
mounted in a back box.
XL4600LED Plastic cased keypad containing indicator lights to show the status of
each of the zones. The zone indicator lights are located behind the plastic sliding door
of the keypad (left hand sfde). NOTE: This keypad displays zone status indication lights
for 16 zones.
XL46OOLCD Plastic cased keypad containing a two line LCD (Ilquid crystal displa
with a two line readout.
Please identify the keypad(s) present on your system from the diagrams shown in the
sections that follow.

2.
KEYPAD LAYOUT XL4612RM
XL461 2RM KEYPAD
1) ZONE STATUS INDICATORS - displays the current zone status as follows;
ALARM
Fast
blinking.
BYPASS
Slow blinking low intensity.
TROUBLE
Slow pulse
NOT
READY
Solid ON
READY OFF
2) ARM/DISARM INDICATOR -Shows whether the system is currently armed (ON) or
disarmed (OFF).
ff the system la armed (ARMED indfcator ON) then the RDY light will Indicate the
arming mode (see item 3 below)
3) AClLOW BAlTERY - shows whether the system is running on AC (ON) or backup
battery (OFF). Ifthe light Is blinking slowly then the battery is low, If it is blinking rapidly
then there is a telephone line failure detected.
4) READY Indicates whether the system is ready for arming (ON = Ready, OFF = Not
Ready).
In addition, the RDY light shows the arming status if the ARMED LED is ON as follows:
OFF = Armed in Away mode
Slow Blink = Armed in STAY mode (interior zones bypassed)
Fast Blink = Armed in INSTANT mode (exit/entry delay elimi nated)
Fast & Slow Blink = Armed In STAY-INSTANT mode
5) NUMERICAL KEYPAD operates in a similar manner to a calculator or telephone
wlth the digits 0 - 9 and
l
I clearfy marked.

3.
KEYPAD LAYOUT XL4800LCD XL4800LED
1
/
f -- -.-_.. - - +L
L
j4
3
-7
9
/\ f-l
\i
/
The XL4800LED contains Indicator lights for the zone status, and the XL4800LCD
keypad contains a two line English language display.
1) ZONE STATUS INDICATORS - Your protected location has been divided into areas
of protection known as zones. The zone indicators are located behind the sliding plastic
door and displays the current status of each zone as follows:
ALARM Fast blinking.
BY PASS Slow blinking low intensity.
TROUBLE Slow pulse
NOT READY Solid ON
READY OFF
2) READY Indicates whether the system is ready for arming.
3) ARM/DISARM INDICATOR -Shows whether the system is currently armed (ON) or
disarmed (OFF).
4) STAY- shows the system has been armed wlth the Interior zones bypassed.
5) INSTANT - shows whether the system has been ARMED with all delay zones
instant
6) AC - shows whether the system is running on AC (ON) or backup battery (OFF).
7) BAT - Indicates low battery condition. Slow pulse = low battery, OFF = Normal n
8) COM lndlcates a ocimmunlcatfons failure wlth the Central station
Q) NUMERICAL KEYPAD operates h a similar manner to a calculator or telephoho /
with the digits 0 - 9 and
l
# clearfy marked.
10) DISPLAY AREA - This section of the LCD keypad displays the current system
status in this two line by twelve character display. The second line of this display can
be programmed by your installer to contain customized descriptors for the areas of
protection within your lo&on.

4.
KEYPAD CONVENTIONS
Throughout this users manual the following conventions are used to display the
keystrokes required to perform the functions.
BYPASS
Key labeled BYPASS on keypad.
INSTANT
Key labeled INSTANT on keypad.
STAY
Key labeled STAY on keypad.
CODE
Key labeled CODE on keypad
[USER]
Four digit user code:
5. ARMING THE SYSTEM
ARMING the system will activate all portions of your Security System. Arming can
only be performed if ail zones are READY. For example, if a protected door is open the
system cannot be armed.
SYSTEM READY
The system Is ready to be armed if the READY indicator light ON.
On LCD keypads the following display will appear:
PYSTEU
if the system is ready, ARMING can be performed as follows;
ARMING PROCEDURE:
1. Enter your four digit user code into the keypad:
WERj
The ARMED indicator light will now be lit and if you are leaving the home you may
exit through a door designated by your installer as an exit/entry zone for a fixed time
period known as the exit delay.
The entry exit times for your system are as follows;
ENTRY: seconds- EXIT: seconds
LCD keypads will display the following message;
fmy
NOTE: The system can be armed without the backup battery connected.
SYSTEM NOT READY
if the system is not ready to be armed the READY indicator will be OFF. On LED
based keypads the zone indicator lights will display the zones which are currently not
ready. The condition of each zone indicator reflects the status of each zone as follows;
ALARM Fast blinking.
BYPASS Slow blinking low intensity.
TROUBLE Slow pulse
NOT READY Solid ON
The LCD keypad a display will appear indicating that the system is not ready followed
by displays showing the zone number and description of the zone or zones which are
not ready. For example: t!2mmiy
In this example, the front door is not ready (Zone 1).
in order to make the system ready determine which zones are not ready by observing
the zone indicator lights, or the display section of the LCD keypad. From the zone
number you can find out which area of protection is not ready.

For example, assume the zone 1 is not ready. Typically this might mean that a
protected door or window Is open.
>>
Once the problems with each zone have been resolved the READY light
will appear and the system can be armed.
To ARM the system when the system is NOT READY one of the following actions
are necessary;
- Make the zone(s) ready. Determine which zones are not ready and perform what
is necessary to ready the zone(s) (example, close the door or window, etc.),or
- Bypass the zone(s) not ready. Bypassing should only be performed if the zone
cannot be made ready or intentionally will remain not ready. Remember, zones that
are bypassed are not protected when the system is armed.
6.
DISARMING
Disarming the security system will deactivate the burglary portions of the system.
This procedure can also be used to reset your system if you accidentally set off the
system ( example, opened a window while the system was armed, or excessive
amount of smoke activated fire protection system).
DISARM PROCEDURE:
[USER] s
‘\
Enter your user code.
IF NO ALARMS HAVE TAKEN PLACE
Upon disarming the ARMING indicator will go off.
The system display will reflect the current status. LCD keypads should display the
SYSTEM READY display.
IF ALARMS HAVE TAKEN PLACE
if alarms or other conditions such as system troubles have taken place since the
initial system arming, they will appear on the display. The conditions that have occurred
appear in the zone display section of the keypad. LED based keypads will reflect the
current system status through the indicator lights as follows;
ALARM Fast blinking.
BYPASS Slow blinking low intensity.
TROUBLE Slow pulse
NOT READY Solid ON
Burglary alarms will be indicated with a STEADY sound through the keypad while
FIRE alarms will generate a pulsing sound.
LCD keypads will show the alarm conditions with a display as follows:
p!Ly
This display shows the zones in alarm. After entry of your four digit user code the
following display will appear:
r,,,,
if an intrusion has taken place while you were away, do not enter until the location
has been secured!!!.
>>
To clear the display of the alarm or trouble conditions and silence thl3
audible signal enter
[USER]
again.

7.
STAY
The STAY mode is another way to ARM your system while you remain in the
location. The STAY mode will deactivate any interior protection zones which means
that you w/Ii be free to walk throughout your location without activating the alarm
system.
In order to enter the STAY mode, the system must be READY. (see previous
description).
STAY PROCEDURE:
STAY [USER]
Depress the STAY key followed by your user code.
After a successful STAY arming the ARMED indicator will be lit. In addition, on the
XL461 2RM keypad the RDY indicator will slowly blink. On the XL4800LED keypad the
STAY indicator wlli be lit.
On the XL48OOLCD keypad the following display will appear:
m
in the STAY mode only the external or perimeter burglary protection is active. You are
free to walk around the residence without activating any of the interior protection zones
>> .
Remember, you must DISARM the system to when you want to leave the
premise.
Note: The STAY option will automatically be reset after the system is disarmed.
8.
INSTANT
The INSTANT mode arms the system and eliminates the entry time delay interval.
This mode could be used so that if anyone enters through an entry/exit zone the alarm
system will instantly activate.
The system must be ready to select the INSTANT option.
INSTANT PROCEDURE:
INSTANT [USER]
Depress the INSTANT key followed by your user code.
Upon successful INSTANT ARMING of the system the ARMED indicator will be lit.
in addition, the XL461 2RM keypad the RDY light will blink (NOTE: This blink is slightly
faster than the indication for the STAY mode). On the XL4800LED keypads the instant
indicator will be ON.
The XL48OOLCD keypad will contain the following message;
Note: The INSTANT option will automatically be reset after the system is disarmed.
9. INSTANT - STAY
The INSTANT STAY mode will arm the system with the characteristics of both the
INSTANT and STAY modes. The system will be armed with the interior portions
bypassed and the entry delay will be suspended.
The system must be READY in order to enter this mode.
PROCEDURE:
INSTANT STAY [USER]
my LTANT [USER]
Depress the INSTANT and STAY keys in any order followed by your user code.
After a successful INSTANT STAY arming the ARMED indicator will be lit.

in addition, the RDY light on XL4612RM keypads wlil blink slowly then rapldly in
successlon. On the XL4800LED keypads both the INSTANT and STAY lights will be
ON-The XUBOOLCD keypad will contain the following message;
>>
You cannot exit the presise through an exit/entry zone while the system is
armed in this mode.
10. BYPASS
Bypasses are performed to eliminate burglary zones that are not ready or faulty
from activating the security system.
BYPASS PROCEDURE:
BYPASS [USERJ ZN
Depress the BYPASS key followed by your user code and zone number (l-6) to be
bypassed.
Example: BYPASS [USER] 2 Will bypass zone 2.
lf the zone has already been bypassed, the sequence wlli unbypass the zone except
If the system is armed and the unbypassed zone is still not ready. Unbypass means
that the zone returns as an active burglary zone.
After the bypass (or unbypass) command has been accepted the unit will emit a
continuous beep and zone or zones that have been bypassed will appear in a slow
blinking mode in the zone status area on the XL4612RM or XL4800LED keypads.
The XL4800LCD keypad will display the zone bypasses as a secondary display after
the SYSTEM READY or SYSTEM NOT READY as shown below:
BFYRPOANSTSDOOZ::]
if multiple zones are bypassed then more than one display will appear.
11. UNBYPASS
The UNBYPASS function removes an existing bypass from a currently bypassed
zone. After UNBYPASSING a zone, the bypass indication will be removed for that zone
on either the LCD or LED keypad.
The procedure is similar to a bypass.
UNBYPASS PROCEDURE:
BYPASS [USERJ ZN
See bypass description.
12.
USER DEFINITION
Users can be entered or modified directly through the keypad. The STAR XL-461 2
security system can have up to thirty different users. Users number 1 8 number 2 are
known as the master users and are the only users allowed to modify other users.
USER DEFINITION PROCEDURE:
CODE [USER] [US number] [USERID]
where;
g:pl Is the master user code [User number 1 or User number 2, four
p&mber ] User number (01-30)
New user ID (0000 - QQQQ).
Note: (‘) if ambush code capability has been enabled by your installing company then
user number 30 wlil be used asthe system ambush code. if an arming only code (maid
code) has been defined by your installer then user number 29 can only arm the system.

if a single user door strike code has been created by your installer then user number
28 is dedicated to that function.
Please check with your installer to determine whether any of these spedal purpose
users codes exist.
Example,
To create user number 13, with a user access code of 4567, (assume a master user
code of 1234), enter;
CODE 1234 13 4667
Any error detected during the USER definition process will cause the
keypad to beep rapidly four times. If an error is detected retry the entire
command.
13.
USER DELETION
Removal of users from the panel can be performed as follows;
USER DELETION PROCEDURE:
CODE [USER] [User number ] #
Where:
[USER] Master user code
[User number ] Represents the user number being deieted.(03-30). Note: Master
users (User number 1 or number 2) cannot be deleted.
# is the # key from the keypad.
Example, Delete user number 26 (assume master user code of 6789)
CODE 6769 26 I
14.
KEYPAD EMERGENCY CONDITIONS
The XL461 2 can also initiate three separate emergency conditions directly through
the keypad. These conditions must be activated by your installer and can be initiated
through simultaneous depression of two keys as follows:
DFSCRIPTION KEYSTROW
Panic
l #
Fire 7 9
Aux. 1 3
For example, to initiate a keypad panic signal press the
l
and # keys at the same time.
Consult with your alarm installer to determine the operation of these conditions within
your system.
15. DURESS
The STAR XL4612 system has capability to send an emergency signal to the
a
Central Station if you are forced to enter the premise. This ambush capability can be
programmed by your installer. lf active, then user code number 30 will be your ambush
code.
16.
ARM-ONLY (MAID1 CODE
Another option selectable by your installer is an arm only code. Ifselected then user
code number 29 can only arm the system. This could be useful for a maid or
maintenance worker to allow them to activate the security system as they leave.

17.
DOOR STRIKE USER CODE
In certain installations there may be a door (or other device) which is programmed to
.be activated through entry 01 a user code. II conflgured by your installer user code
number 28 can be dedicated for this purpose. It programmed In this manner then entry
01user number 28 will not arm and disarm the system as the other codes, but activate
an external device such as a door strike.
18.
KEYPAD TAMPER
II 21 characters have been entered into the keypad without a valid user code or
command being entered then the keypad will beep continuously. To silence the keypad
enter a valid user code.
1% QUICK ARMING (# 1)
II selected by your installer a quick arming ( # 1) command is available. This command
will arm the system without entry of a user code. NOTE: System disarming will
a user code.
To quick arm enter:
#l
20.
QUICK FORCED ARM (# 2)
II selected by your installer the quick forced arm command (i 2) will arm the system
without the need for entry 01a user code and will bypass any burglary protection zones
that are not ready.
To quick forced arm enter:
#2
2tSETTlMkOFDAY(#3)
The XL4612 system contains a real-time clock for the auto-arming and system test
capability. The time 01 day can be set through any keypad using the following
command:
# 3 [USER] HR MN
Time entry is performed in 24 hour time (military time). For example to set the clock for
10:25PM (assume a user code 014567) enter:
#345672025
NOTE: IIthe system clock needs to be reset, the XL4612RM or XL4600LED keypads
will blink rapidly in succession every 30 seconds. The XL46OOLCD keypad will display
a message. This could occur 01the time has never been set or if total system power
(AC and battery) was removed for a prolonged period 01time.
NOTE: Consult your installer to determine whether your user code is necessary for
setting the time.
22.
ZONE DIRECTORY t# 4 1
To view a listing of the zone descriptors from the XL46OOLCD keypad enter:
#4
This will scroll the zone descriptors on the keypad display. i”
‘_ /’

23.
SET AUTO-ARM TIME (#5)
Another option selectable by your installer is auto arming. This feature means that the
system can be programmed to arm at a preprogrammed time every day. This will occur
at the selected time if the system is not already armed. For example, if you have an
1130 PM auto-arming time programmed and fall asleep without arming the system,
the panel will automatically arm at 11:30.-I
WARNING INDICATOR
II programmed by your installer a warning signal can be selected to provide an audible
warning two minutes prior to the auto- arming time. This warning will repeat every 30
seconds until the auto arming time. II you hear the warning signal and do not want the
system to auto-arm for that day only, simply enter your four digit user code. The keypad
will emit a beep and the indicator lights on LED based keypads will blink rapidly in
succession to acknowledge that you have removed the auto-arming time for the day.
HOW TO CHANGE THE AUTO-ARMING TIME
To modify the everyday auto-arming time enter the following command:
#5 [USER] HR MN
For example to change the auto-arming time to 11:45 PM (assume a user code 015678
enter:
#556782345
NOTE: All times are entered in 24 hour (military) time.
24.
CHIME MODE (#6)
The XL4612 system contains an optional chime mode which causes the keypad
sounder to activate for one second every time selected zones such as the entrance
door are opened while the system is disarmed. For example, this could inform you each
time the front door was opened while you were at home. To activate the chime function
press # 6 from the keypad. II the chime feature has already been turned on, another
#6 will turn the feature off.
25.
DOOR STRIKE COMMAND (# 9 )
II enabled by your installer a valid user can activate any 01the system door strikes
through the following command:
# 9 [USER] [door strike number]
For example to activate door strike 3 (assume a user code 012466) enter:
# 9 2468 3

26.
INSTALLATION LAYOUT
Early warning fire detection is best achieved by the installation 01 fire detectfon
equipment the location as lollows;
Typical Smoke Delector Layout
P-1
Preparation of an evacuation plan is 01prime importance in fire prevention. Establish
a household emergency evacuation plan In the event of fire.
1- Evaluate possible escape routes from your home.
2- Select 2 escape routes from each room.
3- Rooms on the second floor should have a rope ladder. Be sure it will reach the
ground.
4- Draw a rough sketch 01your escape plan so everyone is familiar with it.
5- Practice your escape plan to assure that everyone knows what to do.
6- Establish a meeting place outside where your family Is to report. Once you have
evacuated the house do not return to a burning house.
7- Advise
the lccal fire authority that you have installed a fire alarm system.
8. When the fire alarm signals, LEAVE IMMEDIATELY. Do not stop for belonglngs.
9. II afire occurs Jest the door. lf hot, use your alternate route. IIthe door is cool, brace
your shoulder against it and open It cautiously. Shut the door to help prevent the fire
and smoke from spreading. Crawl through smoke, holding your breath.
10. Contact the Fire Department from a neighbor’s telephone.
11 Everyone lndudlng neighbors should be lamlllar with the Fire and Burglary signals.
In this installation the Fire Alarm signal is The Burglary Alarm signal is

27.
SYSTEM TESTING
Thls control unit was manufactured under rigid quality standards. Maintenance is best
performed by your installing company with trained service personnel.
Installing Company:
Telephone Number:
It is recommended that you test your system once a week using the following
procedure:
Note: if your XL4612 system Is monitored by a Central Statlon then contact them prior
to performing this test.
l- Arm your security system.
2- Activate the system by opening a protected zone (example, window, or door).
3- Confirm that the alarm sounding device (bell or siren) activates. tt your system is
connected to a Central Station then the keypad will emit a ringback sound to confirm
that the signal was received.
4- Disarm the system to silence the system and return to normal status.
BATTERY TEST
In order to test the backup battery the following procedure should be performed;
l- Remove the AC transformer from the AC outlet by removing the restraining screw
which secures the transformer to the wall. (Note: the scTew Is not present in rodeIs
sold in Canada).
2. Observe that the AC light goes off on the keypad.
3- Activate your alarm system using steps 14 listed above.
4- Replace the AC transformer to the AC outlet and secure using the retaining saew
(Note: The retaining screw is not present in models sold in Canada).
The National Fire Protection Assodation publishes a standard for household fire
warning equipment. N.F.P.A. #74. Further information can be obtained by contacting;
NFPA Public Affairs Dept., Batterymarch Park, Quincy,MA 02269.
lf you have any further questions about the operation 01 your system, call your
installer.

SUMMARY
I
i
PROCEDURE
ARMSYSTEM
STAY
INSTANT
INSTANT-STAY
SEQUENCE
I
[USER]
STAY[USER]
INSTANT[USER]
INSTANTSTAY[USEA]or STAYINSTANT
BYPASS
UNBYPASS
DISARM
USERDEFINITION
USERDELETION
KEYPADEMERGENCYCONDITIONS
PWliC
Fire
Aux.
QUICKCOMMANDS:
DOORSTRIKE
QUICKARM
QUICKFORCEDARM
TIMESET
ZONEDIRECTORY
SET AUTO-ARMINGTIME
CHIMEMODE
[USER]
BYPASS[USER][ZN]
BYPASS[zw If zone already bypawed
[USER]
CODE[USER][USERNUMBER]VSID]
CODE[USER][USER NUMBER]
’ #
7 9
1 3
0 0 [USER][trigger number]
#l
#2
# 3 [USER]
HHMM
#4
# 5 [USER]
HHMM
#6

OWNERS INFORMATION
NAME:
ADDRESS:
CITY, STATE, ZIP:
TELEPHONE NUMBER:
Date of Installation:
FIRE DEPARTMENT:
POLICE DEPARTMENT:
NEIGHBOR:
GAS/ELECTRIC DEPT:
DOCTOR:
HOSPITAL:
EMERGENCY
SERVICE INFORMATION:
ALARM INSTALLING COMPANY:

FIRE BURGLARY INSTRUMENTS, INC.
ONE YEAR LIMITED WARRANTY
Fire Burglary Instruments, Inc. a subsidiary of Pittway Corporation, and its divisions,
subsidiariesand affiliates(‘Seller”), 163EileenWay, Syosset,New York 11791,a subsidiaryof
Pittway Corporation,warrants its security equipment (the “product”)to be free from defects in
materialsand workmanshipfor one year from date of original purchase,under normal use and
service. Seller’s obligation is limited to repairing or replacing, at its option, free of charge for
parts, labor, or transportation, any part proven to be defective in materials or workmanship
under normal use and service. Seller shall have no obligationunderthis warrantyor otherwise
if the product is altered or improperly repairedor serviced by anyone other than the Seller. In
case of defect, contact the security professional who installed and maintains your security
system orthe Sellerfor productrepair.
This one year LimitedWarrantyis in lieuof all otherexpresswarranties,obligationsor liabilities.
THERE ARE NO EXPRESSWARRANTIESWHICH EXTEND BEYONDTHE FACE HEREOF. (
ANY IMPLIED WARRANTIES, OBLIGATIONS OR LIABILITIES MADE BY SELLER IN
CONNECTION WITH THIS PRODUCT, INCLUDING ANY IMPLIED WARRANTY OF
MERCHANTABILITY,OR FITNESS FOR A PARTICULARPURPOSEOR OTHERWISE,ARE
LIMITED IN DURATION TO A PERIOD OF ONE YEAR FROM THE DATE OF ORIGINAL
PURCHASE, ANY ACTION FOR BREACH OF ANY WARRANTY, INCLUDING BUT NO
LIMITED TO ANY IMPLIED WARRANTY OF MERCHANTABILITY, MUST BE BROUGHT
WITHIN 18 MONTHS FROM DATE OF ORIGINAL PURCHASE. IN NO CASE SHALL
SELLER BE LIABLE TO ANYONE FOR ANY CONSEQUENTIAL OR INCIDENTAL
DAMAGES FOR BREACH OF THIS OR ANY OTHER WARRANTY, EXPRESS IMPLIED,OR
UPON ANY OTHER BASIS OF LIABILITY WHATSOEVER, EVEN IF THE LOSS OR
DAMAGE IS CAUSED BY THE SELLERS OWN NEGLIGENCEOR FAULT. Some statesdo
not allow limitation on how long an implied warranty lasts or the exclusion or limitation of
incidentalorconsequentialdamages,so the abovelimitationorexclusionmay notapplyto you.
Seller does not representthat the product may not be compromised or circumvented;that the
productwill preventany personalinjury or propertyloss by burglary,robbery,fire or otherwise;
or that the productwill in all cases provideadequatewarning or protection.Buyer understands
that a properly installedand maintainedalarm may only reducethe risk of a burglary, robbery
or fire occurringwithout providingan alarm, but it is not insuranceor a guaranteethat suchwill
not occur or that there will be no personal injury or property loss as a result. CONSE-
QUENTLY, SELLER SHALL HAVE NO LIABILITY FOR ANY PERSONAL INJURY,
PROPERTY DAMAGE OR OTHER LOSS BASED ON A CLAIM THE PRODUCT FAILED TO
GIVE WARNING. However,if Seller is held liable,whetherdirectly or indirectly,for any loss or
damage arisingunderthis LimitedWarrantyor otherwise,regardlessof causeor origin,Seller’s
maximum liability shall not in any case exceed the purchase price of the product, which shall
be the complete and exclusive remedy against Seller. This warranty gives you specific legal
rights,and you may also have other rightswhich vary from state to state. No increaseof alter-
ation,writtenor verbal,to this warrantyis authorized.
A Subsidiary of Pittway Corp.

