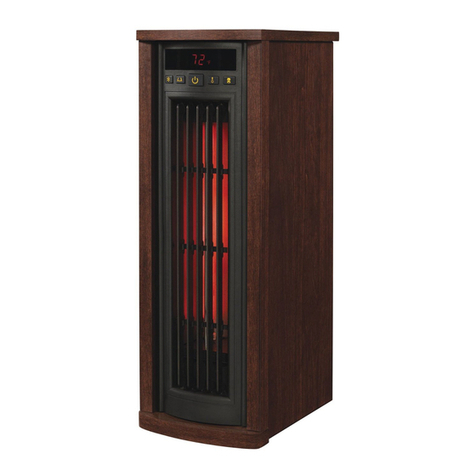
Fired Up Corporation Sola SPH-15AA User manual

FUI0126_V1_020823
*This manual is used for a variety products. Please make sure you follow
the appropriate product guide lines. Illustrations are for reference only.
Electric Radiator
www.firedupcorporation.com/manual
When the heater is turned on for the first time or when it has not been
used for some time, it may release a slight, harmless odour. This odour is
a normal occurrence caused by the initial heating of the internal heating
elements and will disappear with use
INSTRUCTION MANUAL
CH-10TP CH-20TP AmbaSPH-15AA Sola
This manual is for the following models:

CONTENTS
Safety Instructions 03-04
Installation
SPH-15AA 04-05
CH10-TP / CH20-TP 06
Display & Control Panels 06
Icons 07
Operation
SPH-15AA 07-09
CH10-TP / CH20-TP 09-10
Connecting to WiFi - SPH-15AA Only 10-14
Care & Cleaning 14
Specification 14
Technical Parameters 15
Conformity 16
Guarantee & Contacts 16
02
Read ALL the instructions before use.
These instructions are for your safety. Please read
through them thoroughly before use and retain for
future reference. Failure to follow them could
cause injury and/or property damage.

SAFETY INSTRUCTIONS
• Read ALL the instructions before using this product.
• Check that the heater and all supplied accessories are present and intact.
• Always check your mains supply is the same as that indicated on the product before
connecting.
• Always disconnect the heater from the electrical supply before carrying out cleaning or
maintenance. To disconnect the heater, switch controls to OFF then remove plug from the
outlet.
• Always unplug the heater if it is going to be out of use for long periods of time.
• Never leave children unsupervised in a room where the fire is ON and unguarded.
• Never insert or force items into the grills on the heater.
• Do not use the heater near flammable or explosive materials.
• Do not use the heater if the casing, wire or plug are damaged.
• Do not use outdoors. Home and indoor use only.
• Do not use an external controller with the heater. The heater must not be set to switch on
when unattended.
• Avoid the use of an extension cord which may overheat and cause risk of fire. If an extension
cord is necessary, it must be rated above the maximum rated power of the appliance. Care
must be taken to arrange the cord so that it cannot be pulled or be tripped over.
• This appliance can be used by children aged from 8 years and above and persons with
reduced physical, sensory or mental capabilities or lack of experience and knowledge if
they have been given supervision or instruction concerning use of the appliance in a safe
way and understand the hazards involved.
• If the supply cord is damaged, it must be replaced by the manufacturer, its service agent or
similarly qualified persons in order to avoid a hazard.
WARNING: In order to avoid overheating,
DO NOT COVER THE HEATER
• The heater must not be located immediately below a socket outlet.
• Children of less than 3 years should be kept away unless continuously supervised.
• Children aged from 3 years and less than 8 years shall only switch on/off the appliance
03

provided that it has been placed or installed in its intended normal operating position and
they have been given supervision or instruction concerning use of the appliance in a safe
way and understand the hazards involved. Children aged from 3 years and less than 8
years shall not plug in, regulate and clean the appliance or perform user maintenance.
• CAUTION: Some parts of this product can become very hot and cause burns.
Particular attention has to be given where children and vulnerable people are present.
• This heater is hot when in use. To avoid burns, do not touch hot surfaces such as surfaces
around the grille in front of the heater. Never let bare skin touch hot surfaces.
• Do not use this heater in the immediate surroundings of a bath, a shower or a swimming
pool.
• Do not use this heater if it has been dropped or if there are visible signs of damage.
This manual covers the installation for multiple products. Please follow the installation process
relevant to your product.
Please ensure the minimum distances from the floor, ceiling, walls and front of the heater are
observed and adhered to.
INSTALLATION
Minimum Distances
>50cm
>50cm >60cm>50cm
>10cm
Sola / SPH-15AA
1. Push the bracket to the top of the
heater until it clicks.
It is recommended that the heater is carefully placed face down to remove the bracket.
2. Use a screwdriver to open the clip
and release the bracket
04

1. 2.
3. Push the bracket back to unhook
the tabs.
5. Mark the wall according the dimensions below
and drill approx. 35mm deep and insert the
wall plugs. Then mount the bracket to the
wall using the screws provided.
4. Tilt the bracket back and remove
according to the arrows.
A 218mm
218mm
402mm
B
C
A
B
C
Click
into
Position
6. Hook the bottom
tabs into the heater.
7. Rotate the heater backwards
until the top tabs are in the holes.
8. Firmly push down on the
heater until the clip clicks into
position.
05

1. Using the brackets and screws
provided, hook the 3 x wall mounting
brackets into the holes on the back
of the heater and screw in to secure.
2. Using the dimensions provided for (A), ensuring they
are level, drill 2 x 8mm holes approx. 35mm deep and
insert the wall plugs.
3. Screw the screws into the wall plugs, leaving 5mm of
the screw visible so the heater can be mounted.
4. Hook the heater onto the screws and, following
the direction on arrows 1 and 2, slide the heater
down and to the right to secure in position.
NOTE: Only 2 screws are needed to mount the heater.
The bottom bracket is used to provide support and
stand the heater off the wall.
CH-10PT / CH-20TP
A
CH-10TP CH-20TP
A (mm) 244 395
1.
2.
DISPLAY & CONTROL PANELS
Sola / SPH-15AA
Amba / CH-10TP / CH-20TP
Control Panel
Comfort
Mode
Time
ECO Mode
Temperature
MON
°C
TUES WEDTHUR FRI SATSUN
P
04812
16 20
Comfort
Mode
Temperature
ECO Mode
Time
°C
P
04812
16 20
%
h
%
06
This Way Up

P
MON
Standby
On/Off
Timer
Setting
Weekly Timer
Program
Up/Down
Keys
Select
Mode
Comfort
Mode
Open Window
Function
ECO
Mode
Day Indicator Child Lock
Or
Or
Heating
Icon
Silent Mode Icon
*(N/A on all models)
Anti-Frost
Mode
Weekly Timer
Indicator
Wi-Fi
*(if applicable)
ICONS
OPERATION - Sola / SPH-15AA
Press the Standby key to turn the heater on or off.
Setting the Day and Time
Follow the steps below to set the day and time. Press until Pis shown on screen then
proceed with the following sequence:
• Press - Day Nowill flash. Use or to select day 1-7. (1 = Monday - 7 = Sunday)
• Press - Hour will flash. Use or to select the hour.
• Press - Minutes will flash. Use or to select the minute.
• Press to confirm day and time.
Temperature Setting
The default screen shows the desired temperature. Press the Up or Down key to
adjust the temperature up or down. The temperature range is 5-45°C. The temperature of
Comfort Mode and ECO Mode can be adjusted.
Comfort Mode = 5-45°C
ECO Mode = Can be adjusted independently but is always AT LEAST 1°C less than Comfort Mode.
Anti-Frost Mode = 8°C. Cannot be adjusted.
Selecting the Mode
Press the Select Mode key to cycle through Comfort Mode, ECO Mode, Anti-Frost Mode
and Weekly Timer program P.
Countdown Mode
Press the Timer Setting key whilst in Comfort , ECO or Anti-Frost mode to select the
countdown function. Press the Up or Down keys to select desired time period, in hours, for the
heater to be on. The heater will turn off after the duration is over.
Weekly Timer
This timer allows a different program to be set every day of the week. Each program consists of 24
hourly slots where you can set Comfort , ECO or Anti-Frost mode for each hour.
Ensure the day and time is set before programming the weekly timer. See ‘Setting the Day and Time’
above. 07
P

Press the Select Mode key until theWeekly Program Mode Pis selected.
• Press , Pwill flash.
• Press to change the day of the week. MON-SUN
• Press to select Comfort , ECO or Anti-Frost mode.
• Use or to move through each hour and set a working mode for that hour. The bars across
the bottom of the screen will change to relfect the chosen mode.
• Press to move to the next day.
= The heater will work in Comfort Mode for the chosen hour.
= The heater will work in ECO Mode for the chosen hour.
= The heater will work in Anti-Frost Mode for the chosen hour.
The previous days program can be copied over by pressing and holding the Weekly Timer Program
key . Repeat this process until all 7 days are programmed. Exit the Weekly Timer Program by pressing
the Weekly Timer Program key .
Note: The device will exit the Weekly Timer Mode if there is no action for 10 seconds.
Child Lock
To enable the Child Lock, press and hold the Standby key until the Lock icon appears on the
screen. Press and hold the Standby key again to unlock.
Heating
When the device is heating, the Heating icon will appear.
Open Window Detection
When the Open Window function is active, the heater will turn off if the room temperature drops 5°C.
When this happens the Open Window icon will flash. The heater can be turned back on by
pressing and holding the Select Mode key .
To activate the Open Window function, press and hold the Select Mode key until the Open
Window icon appears on the screen.
Repeat this process to deactivate the function.
Temperature Compensation
This heater allows users to maually compensate for any discrepency between the room temperature
and the temperature detected by the heater. For instance, if the room temperature is 22°C but the
heater is detecting 19°C, a compensation of 3°C will offset the difference. This discrepency can be
caused by the heater being placed in a hot or cold spot in a room e.g. in a draughty area.
To access the Temperature Compensation, press and hold the Timer Setting key , then use the
Up and Down keys to adjust the compensation. The temperature compensation can be
adjusted between 9 and -9°C.
048121620
ECO Mode
Anti-Frost Mode
Comfort Mode
08

Silent Mode
To put the heater in Silent Mode, press and hold the Up key until the Silent Mode icon appears
on the screen. Press and hold the Up key again to deactivate Silent Mode.
Factory Reset
Press and hold the Up and Down keys simultaniously for 5 seconds to factory reset the heater.
OPERATION - Amba / CH-10TP / CH-20TP
Press the Standby key to turn the heater on or off.
Setting the Day and Time
Follow the steps below to set the day and time. Press until Pis shown on screen then
proceed with the following sequence:
• Press - Day Nowill flash. Use or to select day 1-7. (1 = Monday - 7 = Sunday)
• Press - Hour will flash. Use or to select the hour.
• Press - Minutes will flash. Use or to select the minute.
• Press to confirm day and time.
Temperature Setting
The default screen shows the desired temperature. Press the Up or Down key to
adjust the temperature up or down. The temperature range is 5-50°C.
Comfort Mode = 10-50°C
ECO Mode = Always 5°C less than Comfort Mode.
Anti-Frost Mode = 6°C. Cannot be adjusted.
Selecting the Mode
Press the Select Mode key to cycle through Comfort Mode, ECO Mode, Anti-Frost Mode
and Weekly Timer program P.
Countdown Mode
Press the Timer Setting key whilst in Comfort , ECO or Anti-Frost mode to select the
countdown function. Press the Up or Down keys to select desired time period, in hours, for the
heater to be on. The heater will turn off after the duration is over.
Weekly Timer
This timer allows a different program to be set every day of the week. Each program consists of 24
hourly slots where you can set Comfort , ECO or Anti-Frost mode for each hour.
Ensure the day and time is set before programming the weekly timer. See ‘Setting the Day and Time’
above.
Press the Select Mode key until the Weekly Program Mode (P) is selected.
• Press , Pwill flash. The number next to Pindicates the day of the week.
• Press to change the day of the week.
• Press to select Comfort , ECO or Anti-Frost mode.
• Use or to move through each hour and set a working mode for that hour. The bars across
the bottom of the screen will change to relfect the chosen mode.
• Press to move to the next day.
09

= The heater will work in Comfort Mode for the chosen hour.
= The heater will work in ECO Mode for the chosen hour.
= The heater will work in Anti-Frost Mode for the chosen hour.
Repeat this process until all 7 days are programmed. Exit the Weekly Timer Program by pressing the
Weekly Timer Program key .
Note: The device will exit the Weekly Timer Mode if there is no action for 10 seconds.
Child Lock
To enable the Child Lock, press and hold the Up key until the Lock icon appears on the
screen.
To disable the Child Lock, press and hold the Up key until the Lock icon disappears.
Heating
When the device is heating, the Heating icon will appear.
Open Window Detection
When the Open Window function is active, the heater will turn off if the room temperature drops 5°C.
When this happens the Open Window icon will flash. The heater can be turned back on by
pressing and holding the Select Mode key .
To activate the Open Window function, press and hold the Select Mode key until the Open
Window icon appears on the screen.
Repeat this process to deactivate the function.
THIS MODEL IS NOT COMPATIBLE WITH WIFI
Smart Life - Smart Living
CONNECTING TO WIFI - Sola / SPH-15AA ONLY
In order to connect the heater to WiFi, the Smart Life app must be downloaded onto your
smartphone or tablet. The app can be found by scanning the QR code below, or searching
“Smart Life” on Google Play or the App Store.
10
048121620
ECO Mode
Anti-Frost Mode
Comfort Mode

If you already have a Smart Life account, log in using your details. If you don’t have a Smart Life
account, one will need to be created by pressing ‘Sign Up’ and following the instructions on screen.
Put the heater into WiFi Mode by pressing and holding the Up key until the WiFi icon is
flashing. If the WiFi icon is not flashing, put the heater into Standby and press and hold the Down
key for 3 seconds and try again.
Once the WiFi icon is flashing, press ‘Add Device’ on the app home screen, or press the + button
in the top right corner and press ‘Add Device’. Select the device type [Small Home Appliances >
Heater (Wi-Fi)] and when prompted, enter your WiFi password. This allows the app to find devices on
your local network.
The connecting screen will then be shown on the app. If the heater is failing to connect, press and
hold the Up key on the heater for 3 seconds. The heater will switch to its secondary connection
mode.
The heater has 2 connection modes, the first is indicated by the WiFi icon flashing slowly (once
per second), the second is indicated by the WiFi icon flashing faster (3 times per second). Most
devices will connect on the fast flashing mode.
The heater will beep and the WiFi icon will stop flashing and remain on when it has connected to
the app, the app will also confirm that the heater has connected successfully. The device can now
be named on the app, shared with other members of the household and a schedule for the heating
can be set.
Using the Smart Life App
The app can be used to control multiple devices. The status of the device is shown on the device
list.
• Offline (device is turned off at the wall)
• Turned Off (device is in standby mode)
• Turned On (device is on)
When the heater is online, tap the device name to go to the control interface. When the heater is
offline, it will not be able to be controlled with the app.
Controlling the Heater
On the control interface, the heaters current temperature, set temperature and current mode is
diplayed can be changed by pressing the mode button. The modes temperature can be changed
by using the +and -buttons.
Press the Settings button on the control interface to go to the Settings page. From here the child
lock can be activated, silent mode can be turned on/off, the open window detection can be turned
on/off and the temperature compensation can be altered.
The Schedule for the heater can also be set from the settings page.
11

Scheduling the Heating
The schedule interface displays the day of the week and shows an hourly calendar for the day.
Press the hour slot you wish to program, the ‘Add’ page will be shown.
From here a ‘Begin Time’ and ‘End Time’ can be set, as well as the working mode (Comfort, ECO or
Frost).
Continue this until the whole day and week is programmed. The schedule will be automatically
saved as soon as it is selected.
Ensure the heater is set to ‘Schedule’ Mode on the app (or Weekly Timer Mode Pon the heater) to
use the set Weekly Timer (schedule).
Scenes
Scenes are customisable commands and scenarios that bring multiple devices together to perform
set actions. They appear on the ‘Scene’ tab on the app which can then be triggered on or off by
pressing the action or turing the slider on. They offer a quick and easy way to coordinate your heating.
As many heaters as desired can be linked to a Scene. Any device controlled by the Smart Life
app can be connected to a Scene.
There are two types of Scene that can be created. ‘Automation’ or ‘Tap-to-Run’. Automation allows
the user to set up actions that are triggered by external events, such as the weather, temperature,
humidity, sunset, sunrise and your location. For example, the heaters can be set to come on at 30°C
if it starts snowing.
Tap-to-Run actions allow the user to control the heater and carry out a number of actions at the press
of a button. For example, a ‘Heat Boost’ scene could be created where, when pressed, all
connected heaters would turn on at Comfort Mode at a set temperature (30°C for example).
To create a new Tap-to-Run, press the + button while on the Scenes tab, then, on the ‘Create Scene’
page, select ‘Launce Tap-to-Run’. Next, press the + button next to ‘Then’ to add a task. From here, you
12

can control whether the heater(s) switch on or off, what mode they run on and what temperature
they are set to. Press ‘Save’ and name the Tap-to-Run. These will be displayed as tiles under the
‘Tap-to-Run’ sub-tab. Press the Tap-to-Run command to activate/deactive it.
To create a new Automation, press the + button whilst on the Scenes tab. Then, on the ‘Create Scene’
page, select any of the available options excluding the ‘Launch Tap-to-Run’ to create the
parameters for the Automation to begin. Next, press the + button next to ‘Then’ to add tasks for the
heater to perform when the parameters are met.
Press ‘Save’ and name the Automation. They will be displayed on the Automation sub-tab of the
Scenes page. Press the slider on the Automation to turn it on or off.
13

Smart Speakers
Smart Life is compatible with both Amazon Alexa and Google Home.
To connect, download the Smart Life skill onto the Alexa or Google Home app. Then link the Alexa or
Google Home app with the Smart Life app. Depending on the device/app, devices may be
discovered automatically or they may have to prompt the app to find them.
Once enabled on the smart devices and linked to the Smart Life app, notifications will be given
whenever a new heater is connected or a new Scene (either Automation or Tap-to-Run) is created.
The notification will state what is to be said to Alexa or Google Home to control the heater or Scene.
Quick Guides and FAQs to help connect to Alexa and Google Home in the Smart Life app.
‘ > FAQ & Feedback’.
Example commands:
• Alexa/OK Google, turn on Glass Heater*
• Alexa/OK Google, switch Glass Heater to 25 degrees
• Alexa/OK Google, turn on Comfort**
*where Glass Heater is the name of the device on the Smart Life app.
**where Comfort is the name of the Scene in the Smart Life app.
Sharing
Contol of connected devices can be shared with members of the same household.
Go to > Home Management > My Home.. (if one is not set up already) > Add Member.
Members can be invited using any of the options presented by the app. Other users must have a
compatible smartphone or tablet.
FAQs
For FAQs or troubleshooting, use the apps FAQs section found here: > FAQ & Feedback .
Me
Me
Me
SPECIFICATION
SPH-15AA CH-10TP CH-20TP
Supply Voltage - 230V~50/60Hz - 230V~50/60Hz - 230V~50/60 Hz
Rated Power - 1500W - 1000W - 2000W
Class - II - I - I
Before cleaning, ensure the device is switched off and allow to completely cool.
Use a damp cloth to clean the housing of the device. Do not use abrasive cleaners.
Clean grilles and air outlets regularly to prevent damage.
Never immerse in water or allow water to enter the device.
CARE & CLEANING
14

TECHNICAL PARAMETERS
15
[yes/no]
1
1
kW
Item ItemSymbol Value
1kW | 1.5kW | 2kW Unit Unit
[yes/no]
[yes/no]
[yes/no]
[yes/no]
[yes/no]
[yes/no]
[yes/no]
[yes/no]
[yes/no]
[yes/no]
[yes/no]
[yes/no]
[yes/no]
[yes/no]
[yes/no]
Information requirements for electric local space heaters
The Seasonal space heating energy efficiency of all local space heaters except commercial local space heaters ηS (%): 38
Name and address of the manufacturer or its authorised representative. (on Back Page)
with black bulb sensor
with working time limitation
with adaptive start control
with distance control option
room temperature control, with open window
detection
room temperature control, with presence
detection
Contact details
In standby mode
At minimum heat
output
At Nominal heat
output
Maximum contin-
uous heat output
Minimum heat
output (indicative)
Nominal heat out-
put
Heat output
Auxiliary electri-
city consumption
Type of heat output/room temperature control (select
one)
Other control options (multiple selections possible)
Electronic room temperature control plus
week timer
Electronic room temperature control plus day
timer
with electronic room temperature control
with mechanic thermostat room temperature
control
Two or more manual stages, no room temper-
ature control
single stage heat output and no room tempera-
ture control
fan assisted heat output
electronic heat charge control with room
and/or outdoor temperature feedback
manual heat charge control with room and/or
outdoor temperature feedback
manual heat charge control, with integrated
thermostat
Type of heat input, for electric storage local space
heaters only (select one)
kW
kW
kW
kW
kW
N/A
N/A
elmax
Pmax, c
Pmin
Pnom
elmin
elSB
N/A
0
1.5 2
1.5 2

www.firedupcorporation.com
Fired Up Corporation Ltd
Fired Up Buildings
HD1 3LF, UK
Fired Up Corporation
(Ireland) Ltd
71, D02 P593, Dublin
AFFIX RECEIPT OR PROOF
OF PURCHASE HERE
CONFORMITY WITH DIRECTIVES
Conforms with relevant European Directives
ENVIRONMENTAL PROTECTION
• (WEEE) Waste Electrical and Electronic Equipment
Waste electrical products should not be disposed of with household waste.
Please recycle where facilities exist. Check with your Local Authority or retailer
for recycling advice.
CUSTOMER HELPLINE
GUARANTEE
For your convenience, you are not required to complete a form and return it to us in
order to validate your guarantee. However, please ensure that you retain your
receipt which will act as both proof of purchase and a guarantee validation docu
ment.We recommend that you attach your receipt to this documentation.
Your product carries a 12 month guarantee from the date of original purchase (or as
otherwise provided in writing at point of purchase). If your product fails to operate to
its specification, due to faulty workmanship or materials during the guarantee period,
we will either repair or replace the product. We will use our discretion to determine
whether to offer a repair or provide a replacement. The product will not be covered
by the guarantee if it has been misused, transformed, modified or altered in any way.
If your product fails within the guarantee period please ensure that you have all
necessary documentation available including proof or purchase (receipt or invoice
with serial number, location and date of purchase) in addition to all original undam-
aged packaging and leaflets etc. It is strongly recommended that you inspect your
product carefully before it is used or installed. For full details of your product you
should refer to the instruction manual which accompanies the product. You are
strongly advised to read this manual carefully in its entirety and to retain it for future
reference.
This product guarantee does not affect your statutory rights.
16
This manual suits for next models
2
Table of contents
Other Fired Up Corporation Electric Heater manuals
Popular Electric Heater manuals by other brands

Dimplex
Dimplex ZHE 050 Installation and operating instructions

Harbor Freight Tools
Harbor Freight Tools 67121 Set up and operating instructions

DeLonghi
DeLonghi HM25E Important instructions
Haverland
Haverland RCWave 2022 Instruction & installation manual
Jevi
Jevi EFF Installation, operation and maintenance manual
MGI
MGI 31559 instruction manual
