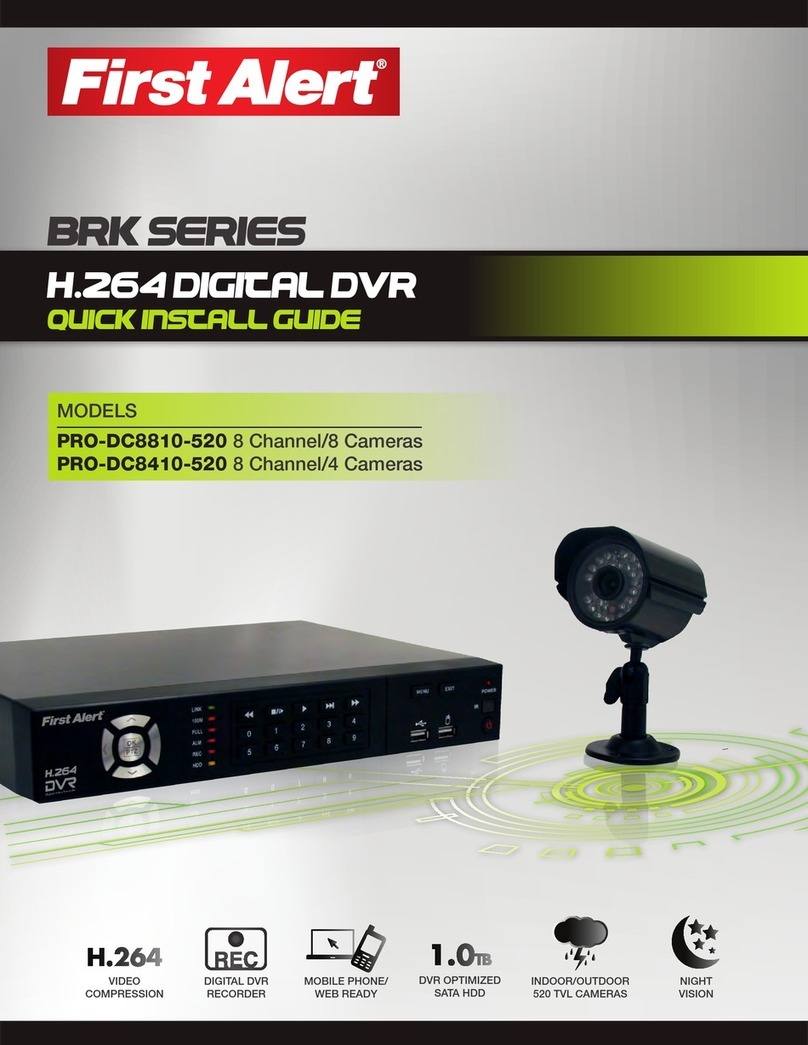
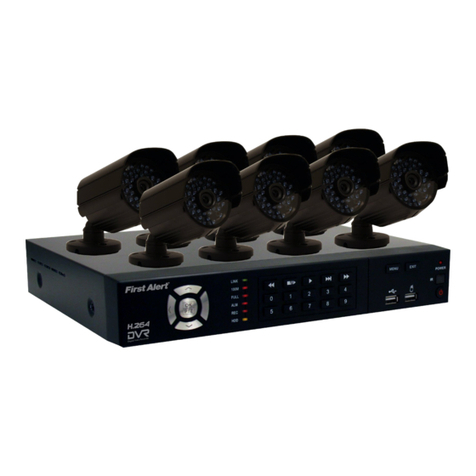
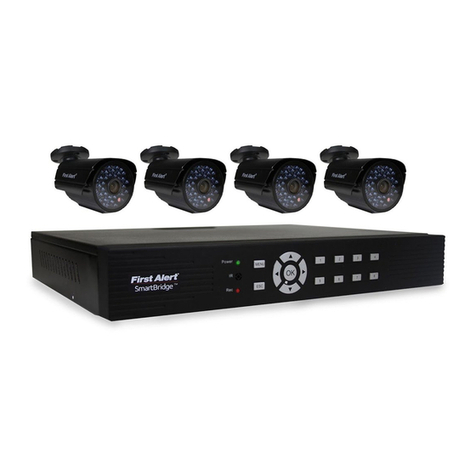
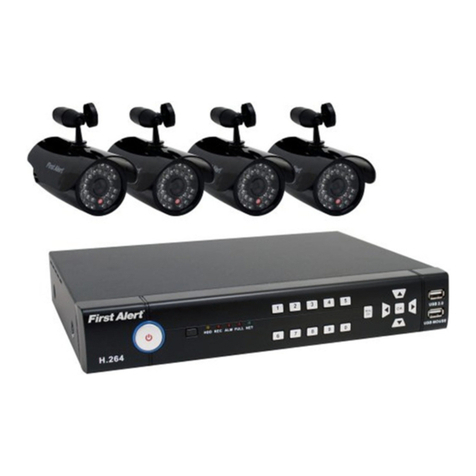
First Alert DVRAHD-0810 User manual

USER MANUAL
HD-TVI Digital Video Recorder
DVRAHD-0810 | DVRAHD-0820 | DVRAHD-1620

Page 2
INTRODUCTION
Thank You
Thank you for choosing First Alert for your security needs!
For more than half a century, First Alert has made the home-safety and security products that make
your life easier. Our products are built to the highest standard which has earned us a leadership role
in the home-safety and security product categories. We are committed to serving our customers,
from the professionals who install our products, to the families and businesses who count on them.
First Alert has been helping families and businesses stay safe for over 50 years. By having a First
Alert Security System, you’re taking the first step in protecting your home or business from damage
or theft.
This manual is written for the HD-TVi DVRAHD-0810, DVRAHD-0820, DVRAHD-1620 Digital Video
Recorders. It was accurate at the time it was completed. However, because of our ongoing effort
to constantly improve our products, additional features and functions may have been added since
that time and on-screen displays may change. We encourage you to visit our website at www.
firstalert.com to check for the latest manuals (English and Spanish), firmware updates, downloads,
other security camera products and announcements.
Welcome
© 2015 BRK Brands, Inc. All rights reserved. Distributed by BRK Brands, Inc., Aurora, Illinois 60504. BRK Brands, Inc. is a subsidiary of Jarden
Corporation (NYSE: JAH). First Alert™and SmartBridge™are trademarks of the First Alert Trust. Due to continuing product development, the prod-
uct inside the packaging may look slightly different than the one on the package. In order to obtain warranty service, contact the Consumer Affairs
Division at 1-800-323-9005, 7:00 AM - 7:00 PM Central Standard Time, Monday through Friday and 8:00 AM - 6:00 PM Central Standard Time,
Saturday and Sunday.
For more information and updates, please visit www.firstalert.com
Made in China
• Windows and Windows mark are trademarks or registered trademarks of Microsoft Corporation in the United States and/or other countries.
• HDMI, HDMI mark and High-Definition Multimedia Interface are trademarks or registered trademarks of HDMI Licensing LLC.
• The products contained in this manual are authorized by HDMI Licensing LLC with the use right of the HDMI technology.
• VGA is the trademark of IBM.
• UPnPTM is a certification mark of the UPnPTM Implementers Corporation.
• Other names of companies and product contained in this manual may be trademarks or registered trademarks of their respective owners
Trademarks and Registered Trademarks

Page 3
INTRODUCTION
Key Product Features
Thank you for purchasing our product. If there is any question or request, please do not hesitate to
contact dealer. The figures in this manual are for reference only.
This manual is applicable to the models listed in the following table.
Series Model Type
DVRAHD-XX
DVRAHD-0810
Network DVRDVRAHD-0820
DVRAHD-1620
Eight or sixteen channel H.264 digital video recorder with Internet remote surveillance, motion
detection, PTZ and alarm control suitable for applications such as high-end residential - new or
remodel, light commercial, small business/retail, small warehouse or small grocery.
• Auto IP connection capability
• H.264 Compression & Virus free Linux O/S
• Record, playback, mobile phone live view, backup, control, & remote access
• 1 TB or 2TB SATA hard drive installed depending on model
• Supports smart phone live view
• User-friendly interface: DVR capable of providing 16 bit true color,
semi-transparent GUI with notes for selected menu items
• Advanced motion detection activated recording
• 24/7 Scheduled Recording
• Network monitoring through internet access
• Supports USB or external DVD backup
• Hi-speed backup/upgrade/record via USB2.0
• PTZ camera control
• HDMI Video Out
Main Description
Product Features

Page 4
INTRODUCTION
Table of Contents
Section DeScription page #
1Introduction 2-5
2Safety 6
3
Product Overview
Package Contents 7
Camera Power Connections 8
Front Panel 9
IR Remote Control Operation 10
USB Mouse Operation 11
Input Method Description 12
Rear Panel 13
4
Initial Setup
Start Up and Shut Down 14
Setup Wizard 15-16
Adding and Connecting IP Cameras 17-18
Editing Connected IP Cameras and Configuring 19
5
Live View
Introduction of Live View 20
Operations in Live View Mode 21
Using the Mouse in Live View 21
Quick Setting Toolbar in Live View Mode 22
Adjust Live View Settings 23
Manual Video Quality Diagnostics 23
User Logout 23
6
PTZ Controls
PTZ, Configuring PTZ Settings 24
Setting PTZ Presets, Patrols & Patterns 24-27
PTZ Control Panel 28
7
Recording Settings
Configuring Encoding Parameters 29
Configuring Record Schedule 30-31
Configuring Motion Detection Record 31
Configuring Alarm Triggered Record 32
Manual Record 33
Configuring Holiday Record 33
Configuring Redundant Recording 34
Configuring HDD Group for Recording 35
Files Protection 36-37
8
Playback
Playing Back Record Files 38-42
Auxiliary Functions of Playback 43-44
9
Backup
Backing Up Record Files 45-50
Managing Backup Devices 51

Page 5
INTRODUCTION
Table of Contents
Section DeScription page #
10
Alarm Settings
Setting Motion Detection 52
Detecting Video Loss 53
Detecting Video Tampering 54
Setting All-day Video Quality Diagnostics 55
Handling Exceptions 56
Setting Alarm Response Actions 57-58
11
Network Settings
Configuring General Settings 59
Configuring Advanced Settings 59-67
Checking Network Traffic 67
Configuring Network Detection 68-69
12
HDD Management
Initializing HDDs 70
Managing Network HDD 71
Managing eSATA 72
Managing HDD Group 72-73
Configuring Quota Mode 74
Checking HDD Status 74
Checking S.M.A.R.T. Information 75
Detecting Bad Sector 75
Configuring HDD Error Alarms 76
13
Camera Settings
Configuring OSD Settings 77
Configuring Privacy Mask 77
Configuring Video Parameters 78
14
DVR Management and Maintenance
Viewing System Information 79-80
Searching and Exporting Log Files 81-82
Importing/Exporting IP Camera Info 82
Importing/Exporting Configuration Files 83
Upgrading System 84
Restoring Default Settings 84
15
Others
Configuring General Settings 85
Configuring DST Settings 86
Configuring More Settings 86
Managing User Accounts 87-89
Logging out/Shutting down/Rebooting Device 89
16 Mobile App 90
17
Appendix
Hard Drive Removal and Installation 91
Specifications 92
FAQ’s/Glossary 93-94
Troubleshooting 95-96
Warranty 97
Notes 98

Page 6
SAFETY
Caution Statements
Safety Precautions
• Do not drop, puncture, or disassemble the cameras or DVR.
• Do not tug on the power adapter. Use the plug to remove it from the wall.
• Do not expose the cameras or DVR to high temperatures.
• For your own safety, avoid using the DVR when there is a storm or lightning in your area.
• Use the cameras and DVR with care. Avoid pressing hard on the cameras or DVR body.
• Do not use power cable if it is damaged or crushed.
Instructions For Use
• Always purchase the correct size and grade of battery most suitable for the intended use.
• Replace all batteries of a set at the same time.
• Clean the battery contacts and also those of the device prior to battery installation.
• Ensure the batteries are installed correctly with regard to polarity (+ and -).
• Remove batteries from equipment that is not to be used for an extended period of time.
FCC Compliance Class B Digital Device
This equipment has been tested and found to comply with the limits for a Class B digital device, pursuant to Part 15 of the FCC rules. These limits are
designed to provide reasonable protection against harmful interference in a residential installation. This equipment generates, uses and can radiate radio
frequency energy and, if not installed and used in accordance with the instructions, may cause harmful interference to radio communications.
However, there is no guarantee that the interference will not occur in a particular installation. If this equipment does cause harmful interference to radio or television reception,
which can be determined by turning the equipment off and on, the user is encouraged to try to correct the interference by one or more of the following measures:
• Reorient or relocate the receiving antenna.
• Increase the separation between the equipment and receiver.
• Connect the equipment into an outlet on a circuit different from that of the receiver.
• Consult the dealer or an experienced radio or TV technician for help.
Notice: Only peripherals complying with FCC class B limits may be attached to this equipment. Operation with non-compliant peripherals or
peripherals not recommended by First Alert / BRK Brands, Inc. is likely to result in interference to radio and TV reception. Changes or modications
to the product, not expressly approved by First Alert / BRK Brands, Inc., could void the user’s authority to operate the equipment.
Important: The information shown in the FCC Declaration of Conformity paragraph below is a requirement of the FCC and is intended to supply you with information regarding the
FCC approval of this device. The phone number listed below is for FCC related questions only and not intended for questions regarding the connection or operation for this device.
FCC Declaration of Conformity for devices with the FCC logo. Responsible Party: First Alert / BRK Brands, Inc., 3901 Liberty Street Rd.,
Aurora, IL. 60504-8122. Telephone: (630) 851 - 7330. Product / Model: DVRAHD-04XX, DVRAHD-08XX, and DVRAHD-16XX.
We, First Alert / BRK Brands, Inc. declare under our sole responsibility that the device to which this declaration relates: Complies with
Part 15 of the FCC Rules. Operation is subject to the following two conditions: (1) this device may not cause harmful interference, and
(2) this device must accept any interference received, including interference that may cause undesired operation.
FCC Certification (if applicable)
This device contains a radio transmitter. Accordingly, it has been certied as compliant with 47 CFR Part 15 of the FCC
Rules for intentional radiators. Products that contain a radio transmitter are labeled with an FCC ID.
FCC Compliance
These symbols indicate that it is prohibited to
dispose of these batteries in the household
waste. Take spent batteries that can no longer
be charged to the designated collection points
in your community.
Disposal
Fire and Electric Shock Hazard Statement
Caution!
When working with electrostatic sensitive
devices such as hard disk or DVR unit, make
sure you use a static-free workstation. Any
electrostatic energy coming in contact with the
hard disk or DVR can damage it permanently.
CAUTION: TO REDUCE THE RISK OF ELECTRIC SHOCK.
UNPLUG ALL POWER SOURCES, INCLUDING CAMERAS FROM
THE DVR BEFORE REMOVING COVER. FAILURE TO DO SO CAN
RESULT IN DAMAGE TO THE DVR OR ITS COMPONENTS AS
WELL AS INJURY OR DEATH.
The lightning ash with arrowhead symbol, within an equilateral
triangle, is intended to alert the user to the presence of un-insulated
“dangerous voltage” within the product’s enclosure that may be of
sufcient magnitude to constitute a risk of electric shock.
The exclamation point within an equilateral triangle, is intended to
alert the user to the presence of important operating and maintenance
(servicing) instructions in the literature accompanying the appliance.
WARNING: TO PREVENT FIRE OR SHOCK HAZARD, DO NOT
EXPOSE THIS DVR UNIT TO RAIN OR MOISTURE
CAUTION: TO PREVENT ELECTRIC SHOCK, MATCH WIDE
BLADE OF THE PLUG TO THE WIDE SLOT AND FULLY INSERT
CAUTION
RISK OF ELECTRIC SHOCK

Page 7
PRODUCT OVERVIEW
Package Contents
What,s in the Box*
You will Need...
• Monitor or Television with
HDMI or VGA inputs
• VGA cable (If not using
included HDMI cable)
USB Mouse IR Remote ControlEthernet Cable Quick Start Guide
Screws &
Mounting Parts
BNC Cable with
Video and Power
Protected by First
Alert Stickers (3)
Power Splitter(s)
16-2 | 4/8-1
HDMI Cable
DVR Device
PC Software IR Bullet Camera* 12V AC Adapter(s) &
Power Cord(s)
IR Dome Camera *
*Camera(s) only included if purchased as kit

Page 8
RS-485 Device
VGA Cable
HDMI Cable
PRODUCT OVERVIEW
Camera and Power Connections
IR Dome Camera
USB Mouse
Ethernet to
Internet
BNC Cable with
Video & Power
Additional Cameras can
be Connected from Power
Splitter with BNC Cables
Tablet & Smartphone App
Installing Cameras
Follow this diagram to make device connections. Note, some
devices are not included with this kit. See “What’s in the Box” for
included devices.
Connecting Devices
Installing Cable-Safe Mounting Bracket
Decide if the camera is to be wall or ceiling mounted and if cable will be
fed through mounting surface hidden directly behind the bracket or fed
through the side of the bracket so cable is exposed. Mark area where
you will drill your hole. The Cable-Safe Mounting Bracket has three
Adjusting Points. 1) Rotates Bracket 360° relative to mounting surface, 2)
Adjusts bracket hinge 180° and 3) Rotates camera body 360° to
level image.
Step 1: Select the position for the camera and drill your hole for the
cable. Feed cable through mounting surface. Mount bracket to surface.
Step 2: Aim camera at target and using Adjusting Points 1 and 2 in
tandem position camera. Tighten Ring and Thumb Screw.
Step 3: Rotate camera body using Adjusting Point 3 to the proper view
angle making sure the Camera Shield is always on top and parallel to
the ground so the image is level in the Live View Screen. See “Camera
Orientation” Info box. Tighten screw.
Step 4: Attach proper length of cable and run from camera to DVR
location. Note: Power cable ends are different. Be sure the correct
power connector end matches “To Camera” or “To DVR”. Tip - Connect
cable at camera end before running cable to verify orientation is correct.
Also, see Information box on “Longer Cable Runs”.
Step 5: Check camera orientation via the Live View screen.
Adjust as required.
Use First Alert
Power Supply
Only
Power
Splitter
Power
Splitter
Use First Alert Cameras Only
RCA Audio Out to
Powered Speakers
(Not included)
RCA Audio In from Audio
Cameras or Powered
Microphone (Not included)
PTZ & Alarm Connections
(Cameras not included)

Page 9
PRODUCT OVERVIEW
Front Panel
Tx/Rx
STATUS
POWER
21 3 5
item Function DeScription
1Power Displays yellow when power is on
2Status Blinks red when data is being read from or written to HDD
3Tx/Rx Blinks yellow when network connection is functioning properly
4IR Receiver Receiver for IR remote
5USB Interfaces Universal Serial Bus (USB) ports for additional devices such as USB mouse and USB Hard Disk
Drive (HDD).
4

Page 10
PRODUCT OVERVIEW
Remote Control
The remote control provided requires two (2) AAA batteries. Install batteries
before operating.
item Function DeScription
1Power Power on or off
2DEV Enable/disable remote control
3Alphanumeric Buttons Same as alphanumeric buttons on front panel
4MENU Same as MENU button on front panel
5ESC Same as ESC button on front panel
6REC Same as REC button on front panel
7PLAY Same as PLAY button on front panel
8Direction/Enter Same as direction buttons on front panel
9PTZ Same as PTZ button on front panel
10 PREV Same as PREV button on front panel
DEV
1 2 3
4 5 6
7 8
0
9
ESC
REC PLAY
PTZ PREV
MENU
Troubleshooting Remote Control
Make sure batteries are properly installed and that the remote is aimed directly at the IR
receiver on the front panel. If remote still does not work properly, take the following steps:
1. Go into Menu > Settings > General > More Settings by operating the front control panel or
the mouse.
2. Check and remember DVR ID#. The default ID# is 255. This ID# is valid for all IR remote
controls.
3. Press the DEV button on the remote control.
4. Enter the DVR ID# in step 2.
5. Press the ENTER button on the remote.
If the Status indicator on the front panel turns blue, the remote control is operating properly.
If the Status indicator does not turn blue and there is still no response from the remote,
please check the following:
1. Batteries are installed correctly and the polarities of the batteries are not reversed.
2. Batteries are fresh and not out of charge.
3. IR receiver is not obstructed.
If the remote still cannot function properly, please change the remote and try again, or
contact the device provider.
3
1 2
45
7
10
6
9
8

Page 11
PRODUCT OVERVIEW
USB Mouse
1Left-Button:
• Click to select channel, show quick set menu in Live View, menu select and menu enter.
• Double-click in Live View to switch between single-screen and multi-screen.
• Click and drag in PTZ Control to pan, tilt, and zoom.
• Click and drag to select target area in Video Tampering, Privacy Mask, and Motion Detection.
• Click and drag to select target area in Digital Zoom.
• Click and drag to drag channel/time bar in Live View.
2Right-Button:
• Click to show menu in Live View.
• Click to exit current menu to upper-level menu.
3Scroll-Wheel:
• Scroll up in Live View to go to previous screen.
• Scroll up in any menu to go to previous item.
• Scroll down in Live View to go to next screen.
• Scroll down in menu to go to next item.
A standard three-button (left/right/scroll-wheel) USB mouse can
be used with this DVR. To use a USB mouse, simply plug the USB
mouse into one of the USB interfaces on the front panel.
NOTE:The DVR will automatically detect a compatible mouse.
Follow the steps below to operate the USB mouse.
Mouse Button
Operation
1
3
2

Page 12
PRODUCT OVERVIEW
Input Method Description
To enter text or numerical data, the system uses a virtual keypad. In fields
where letters or numbers can be entered, you can switch between various
formats — numbers, upper case letters (ABC), and lowercase letters (abc).
icon DeScription
English
Numbers
Lowercase / Uppercase
Space
Exit
Capital English
Symbols
Backspace
Enter
Soft Keyboard

Page 13
PRODUCT OVERVIEW
item Function DeScription
1Video In BNC interface for TVI and analog video input.
2Audio In RCA connector
3Audio Out RCA connector
4VGA DB15 connector for VGA output. Display local video output and menu.
5HDMI HDMI video output connector.
6USB Port Universal Serial Bus (USB) port for additional devices.
7Network Interface Connector for network
8RS-485 Interface PTZ Controls
9Power Supply DC 12V in from power splitter / power supply.
10 Power Switch Switch for turning on/off the device.
11 GND Ground
Rear Panel
HDMI VGA LAN D+ D-
RS-485 12V
POWER
OUT
AUDIO
IN
8
16
7
15
6
14
5
13
4
12
3
11
2
10
1
9
VIDEO IN
VIDEO OUT
1 6 3
2 10
5 4 7 8 9 11

Page 14
Proper Startup
Proper startup and shutdown procedures are crucial to expanding the life of the DVR. Check that the voltage of
the extra power supply is the same with the DVR’s requirement, and the ground connection is working properly.
INITIAL SETUP
Starting Up
1. Check the power supply is plugged into an electrical outlet. It is HIGHLY
recommended that an Uninterrupted Power Supply (UPS) be used in
conjunction with the device.
2. Turn on the power switch on the rear panel, and the Power indicator LED
should turn on indicating that the unit begins to start up.
3. After startup, the Power indicator LED remains on
Shutting Down
1. Menu > Shutdown
2. Shutdown
3. Yes
4. Turn off the power switch on the rear panel
when the note appears.
Start Up and Shut Down

Page 15
INITIAL SETUP
Setup Wizard
To login to the Setup Wizard, enter the default admin password 12345. Check the New Admin Password box. Enter and confirm
a new password and then click Next to set the date and time.
Set the correct time zone.
Choose from the dropdown menu to set preferred date format.
DS-7204HGHI-SH DS-7208HGHI-SH/ DS-7216HGHI-SH
Click on the calendar icon to set the current system date.
Click on the clock icon to set the current system time and then
click Next to set the network parameters.
Quick Startup
After the initial system power up, the Setup Wizard will automatically launch. Please select the system language in the drop-
down list on your demand.
To skip the Setup Wizard temporarily, click the “Cancel” button.
Click “Next” in the Wizard screen to enter the “Login” window.

Page 16
INITIAL SETUP
Network Wizard
Click Next button after you having
configured the network parameters, which
will take you to the Advanced Network
Setup Wizard window.
Set the parameters of port No., ezviz Cloud,
Auto UPnP or DDNS if required.
Click Next button after configuring the
advanced network parameters, which will
take you to the HDD
HDD Management
After the network has been configured,
the HDD needs to be initialized in order to
activate the HD. Click Init and then Next.
Click Copy to copy the recording setting to
other cameras.
Click OK to save the settings and exit the
wizard.

Page 17
INITIAL SETUP
Adding and Connecting the IP Cameras
The main function of the DVR is to connect the network cameras and record
the video got from it. So before you can get a live view or record of the video,
you should add the network cameras to the connection list of the device.
Before you start:
Ensure the network connection is valid and correct. For detailed
checking and configuring of the network, please see Chapter 9.
Up to 2-ch IP cameras can be connected.
NOTE:
OPTION 1:
1. Right-Click the mouse when
you are in the Live View Mode
to show the Right-Click Menu.
2. Select Add IP Camera in the
pop-up menu to enter the IP
Camera Management interface.
3. The online cameras with
same network segment will be
displayed in the camera list.
Click the button to
add the camera.
Or you can click the Add
All button to add all the
detected online IP cameras.
icon DeScription
Edit basic parameters of the camera
The camera is connected.
Delete the IP camera
Update the IP camera
Add the detected IP camera.
The camera is disconnected; you can click the icon to
get the exception information of camera.
Advanced settings of the camera.

Page 18
INITIAL SETUP
4. To add other IP cameras:
1) Click the Custom Adding button to pop up
the Add IP Camera (Custom) interface.
2) You can edit the IP address, protocol, management
port, and other information of the IP camera to be added.
3) Click Add to add the camera
OPTION 2:
1. Enter the Camera Management interface.
Menu> Camera> Camera
2. Repeat the step 3 and 4 of OPTION 1 to add the camera.
3. (For the encoders with multiple channels only) check the
checkbox of Channel No. in the pop-up window, as shown
in the following figure, and click OK to finish adding
icon DeScription
Edit basic parameters of the camera
The camera is connected. You can click the icon to get
the live view of the camera.
Delete the IP camera
Update the IP camera
Add the detected IP camera.
The camera is disconnected; you can click the icon to
get the exception information of camera.
Advanced settings of the camera.

Page 19
INITIAL SETUP
Customized Protocols
After the adding of the IP cameras, the basic information of the camera
lists in the page, you can configure the basic setting of the IP cameras.
1. Click the icon to edit the parameters; you can edit
the IP address, protocol and other parameters.
Channel Port: If the connected device is an encoding device
with multiple channels, you can choose the channel to connect
by selecting the channel port No. in the dropdown list.
2. Click OK
3. (For the encoders with multiple
channels only) check the checkbox of
Channel No. in the pop-up window,
as shown in the following figure,
and click OK to finish adding
Editing the Connected IP Cameras and Configuring
To edit advanced parameters:
1. Drag the horizontal scroll bar to the
right side and click the icon.
2. Edit the network information and
the password of the camera.
3. Click Apply to save the settings and click OK

Page 20
LIVE VIEW
Live View Introduction
What is Live View?
Live view shows you the video image from each camera in real time. The DVR will automatically enter
Live View mode when powered on. It is also at the very top of the menu hierarchy, thus hitting the ESC
many times (depending on which menu you’re on) will bring you to the Live View mode.
Live View Icons
In the live view mode, there are icons at the right top of the screen for each channel, showing the status of the record and alarm
in the channel, so that you can know whether the channel is recorded, or whether there are alarms occur as soon as possible.
icon DeScription
Alarm (video loss, video tampering, motion detection, or sensor)
Record (manual record, schedule record, motion detection or alarm triggered record)
Alarm and Record
Event/Exception (motion detection, sensor alarm or exception information) For details, see Chapter on Handling Exceptions.)
This manual suits for next models
2
Table of contents
Other First Alert DVR manuals

First Alert
First Alert DVR0805 User manual

First Alert
First Alert PRO-D1610 User manual

First Alert
First Alert PRO-DC8810-520 User manual

First Alert
First Alert PRO-DC8810-600 User manual

First Alert
First Alert PRO-DC8810-520 User manual

First Alert
First Alert PRO-D1610 User manual

First Alert
First Alert SmartBridge DVRAD0405 User manual

First Alert
First Alert DVR0405 User manual

First Alert
First Alert DC4405-420 User manual

First Alert
First Alert PRO-DC8810-600 User manual