manuals.online logo
Brands
  1. Home
  2. •
  3. Brands
  4. •
  5. Fisher & Paykel
  6. •
  7. Range
  8. •
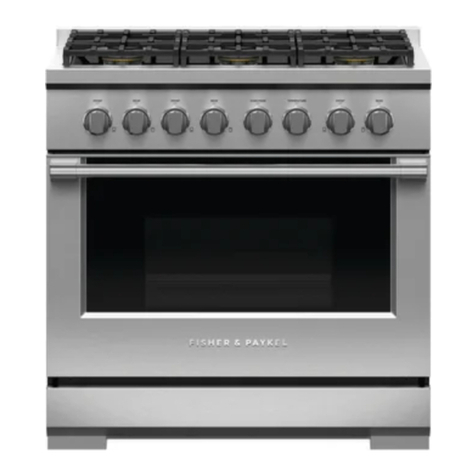
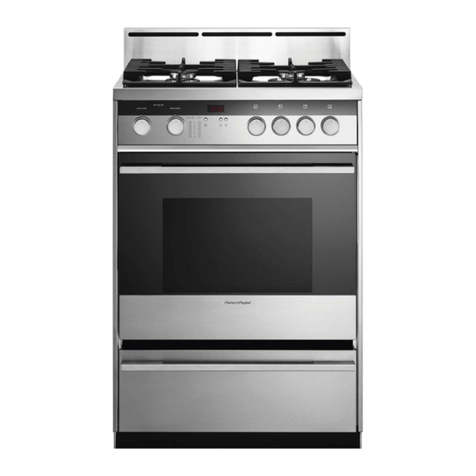
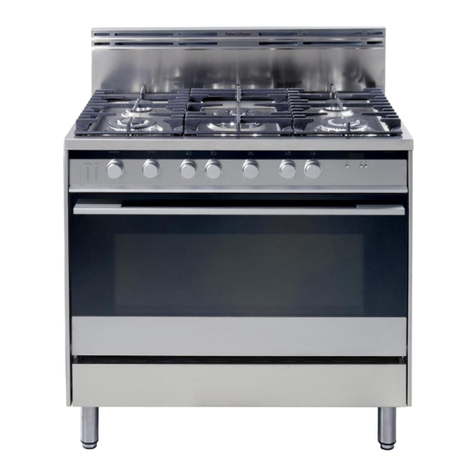
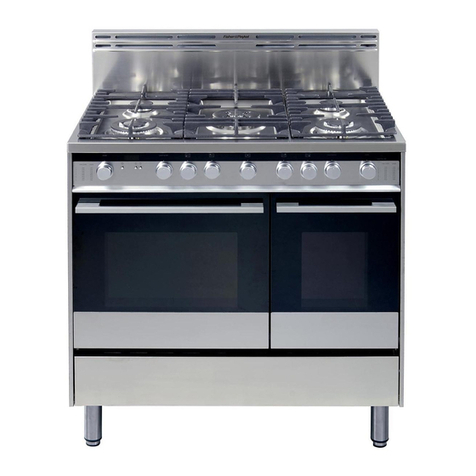
  9. Fisher & Paykel 6102 Series Installation instructions

Fisher & Paykel 6102 Series Installation instructions

Other manuals for 6102 Series

1

This manual suits for next models

4

Other Fisher & Paykel Range manuals

Fisher & Paykel 7 Series User manual

Fisher & Paykel

Fisher & Paykel 7 Series User manual

Fisher & Paykel 6102 Series Owner's manual

Fisher & Paykel

Fisher & Paykel 6102 Series Owner's manual

Fisher & Paykel RA535 Series Owner's manual

Fisher & Paykel

Fisher & Paykel RA535 Series Owner's manual

Fisher & Paykel RDV3-488 User manual

Fisher & Paykel

Fisher & Paykel RDV3-488 User manual

Fisher & Paykel 7 Series User manual

Fisher & Paykel

Fisher & Paykel 7 Series User manual

Fisher & Paykel RGV2 Series User manual

Fisher & Paykel

Fisher & Paykel RGV2 Series User manual

Fisher & Paykel OR36SDPWGX1 User manual

Fisher & Paykel

Fisher & Paykel OR36SDPWGX1 User manual

Fisher & Paykel OR24SDMBGX User manual

Fisher & Paykel

Fisher & Paykel OR24SDMBGX User manual

Fisher & Paykel OR24SDMBGX2 User manual

Fisher & Paykel

Fisher & Paykel OR24SDMBGX2 User manual

Fisher & Paykel Freestanding range User manual

Fisher & Paykel

Fisher & Paykel Freestanding range User manual

Fisher & Paykel OR30SDPWGX User manual

Fisher & Paykel

Fisher & Paykel OR30SDPWGX User manual

Fisher & Paykel RDV2304LN User manual
Fisher & Paykel

Fisher & Paykel RDV2304LN User manual

Fisher & Paykel OR30SDPWIX1 User manual

Fisher & Paykel

Fisher & Paykel OR30SDPWIX1 User manual

Fisher & Paykel OR120DDWGFX2 User manual

Fisher & Paykel

Fisher & Paykel OR120DDWGFX2 User manual

Fisher & Paykel OR24SDPWSX User manual

Fisher & Paykel

Fisher & Paykel OR24SDPWSX User manual

Fisher & Paykel RDV2 Series User manual

Fisher & Paykel

Fisher & Paykel RDV2 Series User manual

Fisher & Paykel OR36SDBMX User manual

Fisher & Paykel

Fisher & Paykel OR36SDBMX User manual

Fisher & Paykel OR24SDPWSX User manual

Fisher & Paykel

Fisher & Paykel OR24SDPWSX User manual

Fisher & Paykel RDV3 Series User manual

Fisher & Paykel

Fisher & Paykel RDV3 Series User manual

Fisher & Paykel OR24SDPWSX User manual

Fisher & Paykel

Fisher & Paykel OR24SDPWSX User manual

Fisher & Paykel RDV2304LN User manual

Fisher & Paykel

Fisher & Paykel RDV2304LN User manual

Fisher & Paykel RA535 Series Owner's manual

Fisher & Paykel

Fisher & Paykel RA535 Series Owner's manual

Fisher & Paykel RDV3366N User manual

Fisher & Paykel

Fisher & Paykel RDV3366N User manual

Fisher & Paykel OR30SCG6W1 User manual

Fisher & Paykel

Fisher & Paykel OR30SCG6W1 User manual

Popular Range manuals by other brands

Maytag MGR5875QDW - 30 Inch Gas Range Use and care guide

Maytag

Maytag MGR5875QDW - 30 Inch Gas Range Use and care guide

Frigidaire FFGF3024SS use & care

Frigidaire

Frigidaire FFGF3024SS use & care

Capital Precision Series GCR484W Specifications

Capital

Capital Precision Series GCR484W Specifications

Officine Gullo GGS8P Installation and use instruction

Officine Gullo

Officine Gullo GGS8P Installation and use instruction

LG LSD4913 Series owner's manual

LG

LG LSD4913 Series owner's manual

Kenmore 4101 - Elite 30 in. Slide-In Electric Range installation instructions

Kenmore

Kenmore 4101 - Elite 30 in. Slide-In Electric Range installation instructions

Moffat Blue Seal Evolution G576 Technical data sheet

Moffat

Moffat Blue Seal Evolution G576 Technical data sheet

CornuFé C1NF user guide

CornuFé

CornuFé C1NF user guide

GE JGS650SEFSS Dimensions and installation information

GE

GE JGS650SEFSS Dimensions and installation information

LG LDG3015ST Manual De Propietario

LG

LG LDG3015ST Manual De Propietario

Whirlpool RF350PXP Use and care guide

Whirlpool

Whirlpool RF350PXP Use and care guide

Samsung FCQ321HTUW Service manual

Samsung

Samsung FCQ321HTUW Service manual

Kenmore 790.45712 Use & care guide

Kenmore

Kenmore 790.45712 Use & care guide

Wolf CHR CHSSR owner's manual

Wolf

Wolf CHR CHSSR owner's manual

Smeg Built-in Microwave Oven Instructions for the user

Smeg

Smeg Built-in Microwave Oven Instructions for the user

Zanussi ZCG054G user manual

Zanussi

Zanussi ZCG054G user manual

GE JCSS630 quick start guide

GE

GE JCSS630 quick start guide

Samsung NX58M9960P series installation manual

Samsung

Samsung NX58M9960P series installation manual

manuals.online logo
manuals.online logoBrands
  • About & Mission
  • Contact us
  • Privacy Policy
  • Terms and Conditions

Copyright 2025 Manuals.Online. All Rights Reserved.

Freestander Ranges
6102 Series
Introduction Safety Instructions 2
First Use 2
Side Mounted Power Outlets 3
Accessories 3
Clocks & Timers Ringer Timer Model 4
Analogue Clock Model 4
Automatic Cooking Using the Analogue Clock 5
Features and Functions Main Oven Features 6
Cooking Guide Cooking Guide 7
Roasting Guide Roasting Guide 8
Cooktops Radiant Cooktops 9
Cleaning Cleaning your Range 10
Cleaning your Cooktop 10
Installation Instructions Installing Your Product 11
Warranty Manufacturer's Warranty 12
Product Details & Customer Care 13
Customer Care 14
1CONTENTS
2
INTRODUCTION
Congratulations
Safety Instructions
Warning
First Use
Congratulations on the purchase of your new
Freestander Range.
We strongly recommend that you read these Use
and Care Instructions carefully to take full
advantage of the features offered by this product.
This books covers operational instructions for the
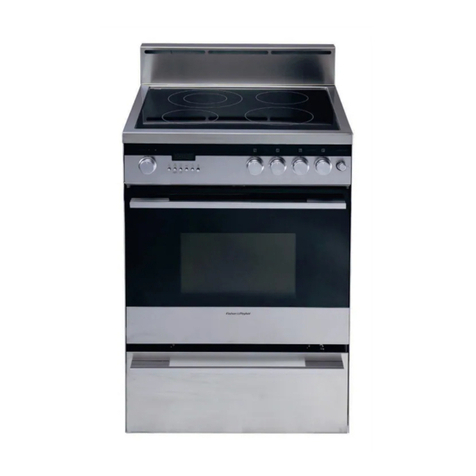
RA6102 Series Freestander Range - 'Thyme',
'Tamarind', 'Paprika' and 'Sage'.
1. Household appliances are not intended to be
played with by children.
2. Children or persons with a disability that may
limit their ability to use the appliance, should
have a competent person instruct them in its
use. This person should be satisfied that they
can then use the appliance without danger to
themselves or their surroundings.
3. This appliance should be connected to a circuit
which incorporates an isolating switch
providing full disconnection from the power
supply.
4. If your Range is placed on a base to align it
with the bench, take measures to prevent the
base of the Range from slipping.
During use this appliance becomes hot.
Care should be taken to avoid touching heating
elements inside the oven.
Accessible parts may become hot when the grill is
in use. Children should be kept away.
We do not advise placing aluminium foil or dishes
with reflective qualities on the oven bottom. This
will cause a heat build up, which will result in
irreversible damage to the enamel.
Remove accessories and condition the oven by
running at bake, 200°C for one hour before using.
There will be a distinctive smell, this is normal but
make sure your kitchen is well ventilated during
the conditioning period.
3INTRODUCTION
The two side mounted power outlets are internally
fused with one 10 amp fuse. Care should be taken
not to overload them.
If required the fuse can be repaired by following
these steps:
1. Turn the power to the oven off. Extra care
should be taken to make sure there is no power
to the oven before repairing the fuse.
2. Pull the oven out from the wall os the back is
accessible and locate the fuse cover on the
right-hand side.
3. Using a Phillips style screwdriver, remove the
screw holding the fuse cover in place and
remove the fuse cover.
4. Remove the fuse carrier from its base and
replace the blown fuse wire with a new 10 amp
fuse wire. 10 amp is the maximum allowable
fuse wire that can be used in this fuse.
5. Refit the fuse and the fuse cover.
Your Range will be supplied with some of the
features/accessories listed depending on the model
you have purchased.
1 Roast Dish
1 or 2 Non Stick Bake Trays
2 Oven Racks
1 Grill Rack
Warmer Drawer or Storage Drawer
Best cooking results are achieved using the
accessories provided with your Range. Shiny/
aluminium trays will affect performance,
particularly browning and cooking time.
Side Mounted Power
Outlets
(New Zealand Only)
Accessories
4CLOCKS & TIMERS
Ringer Timer Model
Setting the Ringer
Timer
Analogue Clock Model
Setting The Analogue
Clock
Setting the Minute
Timer
This has a manual timer which can be set for up to
55 minutes.
The timer can be used at any time even if the
oven is not in use. The timer can be set for up to
55 minutes.
If the oven is in use, the timer does not turn the
oven off.
1. To use the timer, turn the timer control knob
clockwise to the 55 minute mark, then turn
back to show the number of minutes you want.
2. The timer will count down and will ring when
the set time is reached.
This clock has an analogue display and an
automatic function.
To set the clock push the Cook Time knob in and
turn anti clockwise until the clock shows the
correct time. Make sure the shows. Press and
turn the Start Time knob anti clockwise until the
red triangle clicks into alignment with the hour
hand.
The Timer can be used at any time even if the
oven is not in use, however if the oven is in use it
will turn the oven off when the set time has
elapsed.
To set the Timer, turn the Cook Time knob anti
clockwise until you have the number of minutes
you want in the centre of the display window.
When the time you have set is finished, the Timer
will ring and the oven will turn off, if it is on.
To turn the timer bell off, turn the left hand knob
to . The Timer will continue to ring until
turned off. Make sure the oven is returned to
manual mode by turning the Cook Time knob until
the shows.
5CLOCKS & TIMERS
Automatic Cooking
Using the Analogue
Clock
To Turn the Oven Off,
and/or Cancel
Automatic Cooking
Using Your Oven
Fan Grill Models
Check that the clock shows the correct time.
Choose the Function and Temperature that you
want. The oven indicator light will glow and the
elements will come on.
Decide when you want the oven to come on.
This is the time you want the oven to turn off,
minus the cooking time you have set.
Turn Cook Time knob anti clockwise until you
have the number of minutes you want to cook for
in the centre of the display window.
Press and turn the Start Time knob anticlockwise
until the red triangle is pointing to the time you
want to start cooking. The indicator light will go
out.
The oven is now set for automatic cooking.
Turn the cooktime knob until the symbol shows
in the display window, turn the oven to manual
mode. Press and turn the start time knob until the
triangle clicks into alignment with the hour hand.
turn temperature and function to off.
Turn the oven on by selecting the required
temperature. The oven light will come on
automatically. The oven indicator light will glow
until it has reached the set temperature. For
grilling turn the temperature to grill. When you
have finished cooking, turn the oven off.
Select required function using Function knob then
select the temperature you want with the
Temperature knob. The oven light will come on
automatically when a function is selected. The
Oven Indicator Light will glow until the oven has
reached the set temperature.
To use the grill, select Grill on the Function knob.
Set to the required heat by using the Temperature
knob. The hottest temperature is achieved at Hi.
We recommend that this is used for grilling
meats.
When you have finished cooking, turn the oven
off.
6FEATURES & FUNCTIONS
This Range has a concealed lower element and may
require food to be cooked at a lower shelf position.
Warmer drawers have a low powered element and
are useful for keeping hot food warm or for warming
plates and serving dishes. Rotate the knob to turn
the warmer drawer on and off.
Storage drawers do not have an element so cannot
keep food warm.
There are a variety of cooking functions depending
on the model of Range you have purchased. These
include Bake, Grill, Fan Grill and Fan Forced.
For best results when grilling, leave the oven door
open at the first stop position. The grill function
cooks a large area of food by using heat from an
upper element and is suitable for tender cuts of
meat, toasted snack foods and crisping toppings
on many dishes.
Heat comes from the top and bottom of the oven.
For baked products you will achieve a better result
if the oven is pre-heated first. Cooking one tray of
food at a time is preferable. Both elements are
controlled by the thermostat and will cycle on and
off to maintain the set temperature. This is the
traditional method for cooking baked food.
Multi level fan cooking circulates heat from an
element around the fan, throughout the oven. This
function is particularly good for multi tray cooking,
reheating cooked foods and complete oven meals.
Use Fan Forced for casseroles and baked vegetables
and when cooking more than one tray of baking.
The fan circulates heat from the grill element around
the oven. This style of grilling takes the place of a
rotisserie. Fan Grill is suitable for foods you would
normally fry e.g. sausages, chops and meatballs.
Fan grilling is carried out with the oven door closed
and the oven does not need to be preheated.
Main Oven Features
Warmer Drawer
Storage Drawer
Functions
Grill
Bake
Fan Forced
Fan Grill
7COOKING GUIDE
noitcnuFdecroFnaFnoitcnuFekaB
stcudorPdekaBsniM/emiTpmeT °CflehSsniM/miTpmeT °CflehS
ekaCtiurFthgiL 58-57051-541458-080514
ekaCananaB 56-06071-061406-55071-0614
stiucsiB 21-01081-5713&221-01081-5712
senocS 51-015222 51-015222
secilS 52-020613 52-025713
seugnireM 011-090013&2011-090013
egnopS 82-420514 82-425713
)elohW(nekcihC 53-03
g005rep
5714 53-03
g005rep
5714
traTdratsuC
yrtsaP
gnilliF
61-41
53-03/8-6
002-091
051/002
4
4
81-41
53-03/8-6
002-091
051/002
4
4
ediuGllirG
tsaoT ces06-05
edisrep
iH3
segasuaS
*enoDlleW 51-01052-iH2
ediuGllirGnaF
)elohW(nekcihC 571 53-03
g005rep
4
Shelf positions are numbered from the top down. You may need to alter the time to achieve your
desired result.
When multi cooking some products may need to be removed before others.
Important
These times and temperatures are a guide only and are based on the oven being
pre-heated first.
*When grilling thicker items such as
sausages, turn often to ensure even
browning.
8
ROASTING GUIDE
Beef Rare 160-170 30-35 60-65
Medium 160-170 35-45 65-75
Well Done 160-170 45-60 75-80
Mutton Well Done 160-170 45-60 80-85
Hogget / Lamb Medium 160-170 30-40 79-82
Well Done 160-170 45-60 82-85
Pork Well Done 180-185 40-45 78
Chicken Well Done 160-180 25-30
Cervena * Rare 220 31/2 per cm 65-70
thickness
* Brown prior to roasting in an oiled frypan on high heat.
These temperatures and times are a guide only and you may need to increase or
decrease these depending on your preferences.
A large piece of meat requires fewer minutes per 500g than a smaller piece. Roasting
times will be affected by the shape and size of the meat being roasted. Meat with a bone
will cook quicker than a rolled roast.
Do not add water to your roast as this has a steaming affect.
Use a meat thermometer to ensure an accurate result. As the internal temperature of the
meat will continue to rise during standing, please allow for this in your calculation. This
is particularly important if you want a rare or medium rare roast.
Meat Temp Minutes Internal
°C per 500g Temp °C
9COOKTOPS
The radiant coil cooktop has tubular heating
elements. The elements are designed to lift and
rotate allowing easy access to the element bowls
for cleaning. Replacement bowl inserts are
available from the dealer where you purchased
your range.
As the control knob is turned from Lo to Hi, the
heat output is increased. Turn the control knob to
Hi to begin cooking, adjusting as necessary.
The elements are controlled by variable energy
regulators giving infinite temperature control. At
the low setting, delicate warming, melting
chocolate or keeping milk warm at very low
temperatures is able to be carried out. The high
setting is ideal for boiling, simmering or frying.
Once your pan is hot, reduce the temperature to
maintain a steady heat to cook your food through.
Cooking efficiency will vary due to the different
types of cooking utensils used, like heavy based
saucepans. Cooking results are influenced by pot
quality and size. It is essential that pot size
matches the diameter of the cooking zone. Low
heat or slow cooking is often due to incorrect pot
size usage.
To get the best out of your cooktop follow these
simple suggestions. Preheat the cookware on the
cooktop before adding food.
Cookware with a stainless steel sandwich base or
enamelled cast iron will give you the best results.
When food comes to the boil reduce the
temperature setting. Never use plastic or
aluminium dishes on the cooktop.
It is important that the pans are the same size or
slightly larger than the element. A pan with a
flat base will make better contact with the
element resulting in shorter cooking times.
Aluminium and copper cookware can cause a
metallic residue to remain on the cooktop. If left
this becomes difficult to remove. Jagged edges
on saucepans or heavy frypans may scratch the
element.
Round based woks should NOT be used on radiant
elements, as they will damage the element
bowls.
Radiant Cooktops
Control
Utensils