manuals.online logo
Brands
  1. Home
  2. •
  3. Brands
  4. •
  5. Fisher & Paykel
  6. •
  7. Range
  8. •
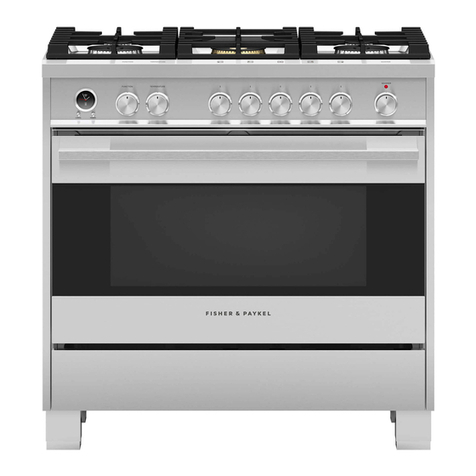
  9. Fisher & Paykel OR36SDBMX1 Operating instructions

Fisher & Paykel OR36SDBMX1 Operating instructions

Other manuals for OR36SDBMX1

1

Other Fisher & Paykel Range manuals

Fisher & Paykel OR24SDMBGX User manual

Fisher & Paykel

Fisher & Paykel OR24SDMBGX User manual

Fisher & Paykel OR24SDMBGX User manual

Fisher & Paykel

Fisher & Paykel OR24SDMBGX User manual

Fisher & Paykel OR36SDPWGX User manual

Fisher & Paykel

Fisher & Paykel OR36SDPWGX User manual

Fisher & Paykel OR90SDBGFX3 User manual

Fisher & Paykel

Fisher & Paykel OR90SDBGFX3 User manual

Fisher & Paykel RGT-305 User manual

Fisher & Paykel

Fisher & Paykel RGT-305 User manual

Fisher & Paykel OR36SDBGX User manual

Fisher & Paykel

Fisher & Paykel OR36SDBGX User manual

Fisher & Paykel RGV2305LN User manual

Fisher & Paykel

Fisher & Paykel RGV2305LN User manual

Fisher & Paykel 7 Series User manual

Fisher & Paykel

Fisher & Paykel 7 Series User manual

Fisher & Paykel OR36S User manual

Fisher & Paykel

Fisher & Paykel OR36S User manual

Fisher & Paykel OR60SDBGFX2 User manual

Fisher & Paykel

Fisher & Paykel OR60SDBGFX2 User manual

Fisher & Paykel OR30S Gas Gas User manual

Fisher & Paykel

Fisher & Paykel OR30S Gas Gas User manual

Fisher & Paykel RGV2 Series User manual

Fisher & Paykel

Fisher & Paykel RGV2 Series User manual

Fisher & Paykel OR24SDMBGX2 User manual

Fisher & Paykel

Fisher & Paykel OR24SDMBGX2 User manual

Fisher & Paykel DCS RGS Series User manual

Fisher & Paykel

Fisher & Paykel DCS RGS Series User manual

Fisher & Paykel DCS RGV2 User manual

Fisher & Paykel

Fisher & Paykel DCS RGV2 User manual

Fisher & Paykel OR24SDMBGX2-N User manual

Fisher & Paykel

Fisher & Paykel OR24SDMBGX2-N User manual

Fisher & Paykel OR36SDBMX Operation instructions

Fisher & Paykel

Fisher & Paykel OR36SDBMX Operation instructions

Fisher & Paykel OR24SDMBGX2 User manual

Fisher & Paykel

Fisher & Paykel OR24SDMBGX2 User manual

Fisher & Paykel RDV2366NN User manual

Fisher & Paykel

Fisher & Paykel RDV2366NN User manual

Fisher & Paykel 6102 Series Installation instructions

Fisher & Paykel

Fisher & Paykel 6102 Series Installation instructions

Fisher & Paykel OR30SDE6 Series User manual

Fisher & Paykel

Fisher & Paykel OR30SDE6 Series User manual

Fisher & Paykel OR36S Gas Gas User manual

Fisher & Paykel

Fisher & Paykel OR36S Gas Gas User manual

Fisher & Paykel OR30SDG User manual

Fisher & Paykel

Fisher & Paykel OR30SDG User manual

Fisher & Paykel RA535 Series Owner's manual

Fisher & Paykel

Fisher & Paykel RA535 Series Owner's manual

Popular Range manuals by other brands

Maytag MGR5875QDW - 30 Inch Gas Range Use and care guide

Maytag

Maytag MGR5875QDW - 30 Inch Gas Range Use and care guide

Frigidaire FFGF3024SS use & care

Frigidaire

Frigidaire FFGF3024SS use & care

Capital Precision Series GCR484W Specifications

Capital

Capital Precision Series GCR484W Specifications

Officine Gullo GGS8P Installation and use instruction

Officine Gullo

Officine Gullo GGS8P Installation and use instruction

LG LSD4913 Series owner's manual

LG

LG LSD4913 Series owner's manual

Kenmore 4101 - Elite 30 in. Slide-In Electric Range installation instructions

Kenmore

Kenmore 4101 - Elite 30 in. Slide-In Electric Range installation instructions

Moffat Blue Seal Evolution G576 Technical data sheet

Moffat

Moffat Blue Seal Evolution G576 Technical data sheet

CornuFé C1NF user guide

CornuFé

CornuFé C1NF user guide

GE JGS650SEFSS Dimensions and installation information

GE

GE JGS650SEFSS Dimensions and installation information

LG LDG3015ST Manual De Propietario

LG

LG LDG3015ST Manual De Propietario

Whirlpool RF350PXP Use and care guide

Whirlpool

Whirlpool RF350PXP Use and care guide

Samsung FCQ321HTUW Service manual

Samsung

Samsung FCQ321HTUW Service manual

Kenmore 790.45712 Use & care guide

Kenmore

Kenmore 790.45712 Use & care guide

Wolf CHR CHSSR owner's manual

Wolf

Wolf CHR CHSSR owner's manual

Smeg Built-in Microwave Oven Instructions for the user

Smeg

Smeg Built-in Microwave Oven Instructions for the user

Zanussi ZCG054G user manual

Zanussi

Zanussi ZCG054G user manual

GE JCSS630 quick start guide

GE

GE JCSS630 quick start guide

Samsung NX58M9960P series installation manual

Samsung

Samsung NX58M9960P series installation manual

manuals.online logo
manuals.online logoBrands
  • About & Mission
  • Contact us
  • Privacy Policy
  • Terms and Conditions

Copyright 2025 Manuals.Online. All Rights Reserved.

How to Use the Top Burners
Gas Burners (Triple-ring and Semi-
rapid)
Gas flow to the burners is adjusted by turning the dials
(illustrated in fig. 2.1) which control the valves.
Turning the dial so that the symbols printed on the dial
point to the mark on the bezel achieves the following
functions:
https://producthelp.fisherpaykel.com/us/Cook/Ranges/Gas/OR36SDBMX1/User_Guide_OR36SDBMX1/04_how_to_use_the_…
Updated: Thu, 11 Nov 2021 19:59:30 GMT
Powered by
1
Fig.
2.1
Dial Position Function Semi-Rapid Burner Triple-Ring Burner
OFF Closed valve
HI
Maximum rate
LO Minimum rate
The maximum dial setting permits rapid boiling of liquids, whereas the
minimum dial setting allows simmer warming of food or maintaining
boiling conditions of liquids.
To reduce the gas flow to minimum, rotate the dial further counter-
clockwise to point the indicator towards the LO position (minimum rate).
Other intermediate operating adjustments can be achieved by
positioning the indicator between the maximum and minimum dial
settings. Never operate the burners with the dial set between the HI and
OFF positions.
https://producthelp.fisherpaykel.com/us/Cook/Ranges/Gas/OR36SDBMX1/User_Guide_OR36SDBMX1/04_how_to_use_the_…
Updated: Thu, 11 Nov 2021 19:59:30 GMT
Powered by
2
When the range is not being used, set the gas dials to their OFF positions. If the range will
not be used for an extended period of time, it is recommended that the gas shut off valve in
the main supply line be closed.
Lighting Gas Burners fitted with Flame Failure
Safety Device (Triple-Ring and Semi-Rapid
Burners)
In order to light the burner, you must:
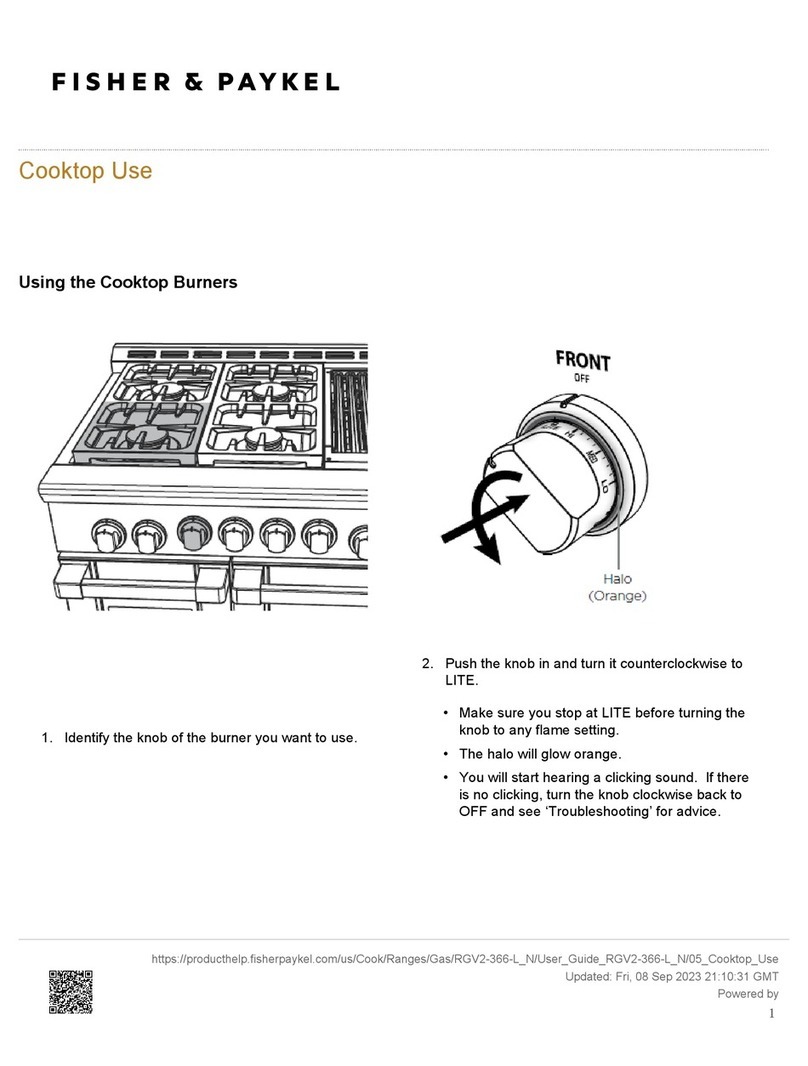
1. Push and turn the dial in an counter-clockwise direction to
the HI position (maximum rate), push in and hold the dial
until the flame has been lit (fig. 2.2).
The sparks produced by the electrode situated inside the
relative burner will light the flame.
In the event that the local gas supply conditions makes it
difficult to light the burner in HI position (maximum rate), try
again with the dial in LO position (minimum rate).
2. Wait for about ten seconds after the gas burner has been lit
before letting go the dial (safety device activation delay).
3. Adjust the gas valve to the desired position.
If there is no mains electrical supply, the burners can be used with
no restriction. In that case, in order to light the burner, you must:
1. Bring a lighted match close to the burner (as per side figure)
and keep it in place until the burner has been ignited.
2. Push and turn the dial in an counter-clockwise direction up to
the HI position (maxi- mum rate), push in and hold the dial
until the flame has been lit (fig. 2.2).
In the event that the local gas supply conditions makes it
difficult to light the burner in HI position (maximum rate), try
again with the dial in LO position (minimum rate).
3. Wait for about ten seconds after the gas burner has been lit
before letting go the dial (safety device activation delay).
4. Adjust the gas valve to the desired position.
If the burner flame should go out for some reason, the safety valve will automatically stop the gas flow.
To re-light the burner, return the dial to the closed OFF position, wait for at least 1 minute and then repeat the lighting
https://producthelp.fisherpaykel.com/us/Cook/Ranges/Gas/OR36SDBMX1/User_Guide_OR36SDBMX1/04_how_to_use_the_…
Updated: Thu, 11 Nov 2021 19:59:30 GMT
Powered by
3
procedure.
If your local gas supply makes it difficult to light the burner with the dial set to maximum, set the dial to minimum and
repeat the operation.
The range becomes very hot during operation. Keep children well out of reach.
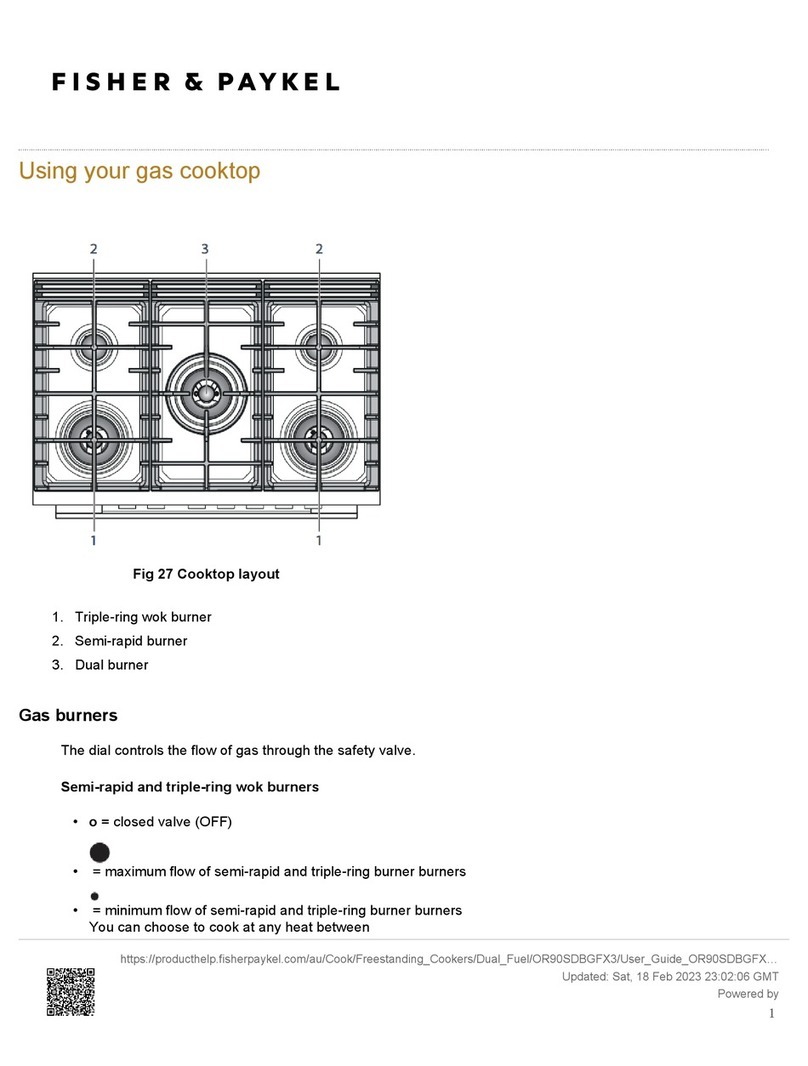
Gas Burners (Dual)
The Dual Burner is a very flexible burner which allows
different regulations for optimal cooking.
It is composed by one inner and one outer crown; the flame
of the inner crown can be regulated separately from the
flames of the outer crown.
The Dual Burner can be used:
• As a high-power burner (all flames produced
simultaneously by inner and outer crown) which can be
adjusted from the maximum (
) to the minimum (
) position.
Intermediate operating adjustments can be achieved by
positioning the indicator between the maximum and
minimum dial settings. Never operate the burner with the
dial set between the and OFF positions.
• As a small burner (flame produced only by the inner
crown) which can be adjusted from the maximum (
) to the minimum (
) position.
https://producthelp.fisherpaykel.com/us/Cook/Ranges/Gas/OR36SDBMX1/User_Guide_OR36SDBMX1/04_how_to_use_the_…
Updated: Thu, 11 Nov 2021 19:59:30 GMT
Powered by
4
Fig. 2.3 Fig. 2.4
Gas flow to the burners is adjusted by turning the dials (illustrated in fig. 2.3) which control the valves.
Turning the dial so that the symbols printed on the dial point to the mark on the bezel achieves the following functions:
https://producthelp.fisherpaykel.com/us/Cook/Ranges/Gas/OR36SDBMX1/User_Guide_OR36SDBMX1/04_how_to_use_the_…
Updated: Thu, 11 Nov 2021 19:59:30 GMT
Powered by
5
Dial
Position Function DUAL Burners
OFF Closed valve
Maximum rate of inner + outer crown (inside and outside
flames in simultaneously at the maximum).
Minimum rate of outer crown and maximum rate of inner
crown.
Maximum rate of inner crown (only inner flame at the
maximum).
Minimum rate of inner crown (only inner flame at the
minimum).
Lighting Gas Burners fitted with Flame Failure Safety Device (Dual Burner)
In order to light the burner, you must:
1. Push and turn the dial in a counter-clockwise direction to the
https://producthelp.fisherpaykel.com/us/Cook/Ranges/Gas/OR36SDBMX1/User_Guide_OR36SDBMX1/04_how_to_use_the_…
Updated: Thu, 11 Nov 2021 19:59:30 GMT
Powered by
6
position (maximum rate of inner + outer crown); push in and hold the dial until the flame has been lit (fig. 2.4).
The sparks produced by the electrode situated inside the relative burner will light the flame.
In the event that the local gas supply conditions makes it difficult to light the burner in position
, try again with the dial in position
.
2. Wait for about ten seconds after the gas burner has been lit before letting go the dial (safety device activation
delay).
3. Adjust the gas valve to the desired position.
If there is no mains electrical supply, the burners can be used with
no restriction. In that case, in order to light the burner, you must:
1. Bring a lighted match close to the burner (as per side
figure) and keep it in place until the burner has been
ignited.
2. Push and turn the dial in a counter-clockwise direction up
to the
position (maximum rate of inner + outer crown); push in
and hold the dial until the flame has been lit (fig. 2.4).
In the event that the local gas supply conditions makes it
difficult to light the burner in position
, try again with the dial in position
.
3. Wait for about ten seconds after the gas burner has been
lit before letting go the dial (safety device activation delay).
4. Adjust the gas valve to the desired position.
If the burner flame should go out for some reason, the safety valve will automatically stop the gas flow.
To re-light the burner, return the dial to the closed OFF position, wait for at least 1 minute and then repeat the lighting
procedure.
If your local gas supply makes it difficult to light the burner with the dial set to maximum, set the dial to minimum and
repeat the operation.
https://producthelp.fisherpaykel.com/us/Cook/Ranges/Gas/OR36SDBMX1/User_Guide_OR36SDBMX1/04_how_to_use_the_…
Updated: Thu, 11 Nov 2021 19:59:30 GMT
Powered by
7
When the range is not being used, set the gas dials to their OFF positions. If the range will
not be used for an extended period of time, it is recommended that the gas shut off valve in
the main supply line be closed.
The range becomes very hot during operation. Keep children well out of reach.
Fig 2.5
Choice of Burner (fig. 2.5)
The symbols or wordings printed on the panel above the gas dials
indicate the correspondence between the dial and the burner.
The most suitable burner is to be chosen according to the diameter and
volume capacity of the container to be warmed.
It is important that the diameter of the pots or pans suitably match the
heating potential of the burners in order not to jeopardize the efficiency of
the burners, bringing about a waste of gas fuel.
A small diameter pot or pan placed on a large burner does not necessarily
mean that boiling conditions are reached quicker.
Diameters of Pans which May be Used on the Hob Burners
Burner Minimum Max.
Semi-rapid 16 cm (6” 19/64) 24 cm (9” 7/16)
Triple-ring and Dual 26 cm (10” 3/16) 28 cm (11” 1/16)
Wok pans min 36 cm (14” 3/16) - max 40 cm (15” 3/4)
Do not use pans with concave or convex bases
https://producthelp.fisherpaykel.com/us/Cook/Ranges/Gas/OR36SDBMX1/User_Guide_OR36SDBMX1/04_how_to_use_the_…
Updated: Thu, 11 Nov 2021 19:59:30 GMT
Powered by
8
Fig 2.6a
Correct Use of Dual Burner (Fig. 2.6a - 2.6b)
The flat-bottomed pans are to be placed directly onto the pan-support.
When using a WOK you need to place the supplied wok support on
the pan support for the burner to avoid any faulty operation of the
Dual burner (Figs. 2.6a - 2.6b).
The special support for wok pans (figs.
2.6b, 2.6c) MUST BE PLACED ONLY
over the pan-rest for the Dual burner.
Fig 2.6c
https://producthelp.fisherpaykel.com/us/Cook/Ranges/Gas/OR36SDBMX1/User_Guide_OR36SDBMX1/04_how_to_use_the_…
Updated: Thu, 11 Nov 2021 19:59:30 GMT
Powered by
9
Fig 2.6b
Ensure that the handles of cookware do not stick out over the edge of the range, to avoid
them being knocked over by accident. This also makes it more difficult for children to reach
the cooking vessels.
https://producthelp.fisherpaykel.com/us/Cook/Ranges/Gas/OR36SDBMX1/User_Guide_OR36SDBMX1/04_how_to_use_the_…
Updated: Thu, 11 Nov 2021 19:59:30 GMT
Powered by
10