Fisher Scientific accumet AE150 User manual

User Manual
Fisher Scientific accumet AE150 pH Benchtop Meter
This user manual provides instructions on operating the Fisher Scientific™
accumet™ AE150 pH benchtop meter. Detailed information on meter setup,
operation and features is provided in the appropriate sections of this user manual.
Please visit www.fishersci.com/accumet for addional information on Fisher Scientific
accumet meters and electrodes.
accumet AE150 pH Benchtop Meter
Revision Date: December 9, 2015
68X000635 Revision A

accumet AE150 pH Benchtop Meter
2 of 28 www.fishersci.com
Table of Contents
Introduction...........................................................................................................................3
Display ..............................................................................................................................4
Keypad..............................................................................................................................5
Rear Instrument Panel.......................................................................................................6
Meter Start Up.......................................................................................................................7
Connecting Electrodes and Accessories............................................................................7
Connecting the Electrode Holder (Optional).......................................................................8
Meter Preparation Prior to Calibration................................................................................9
Meter Setup Functions.....................................................................................................10
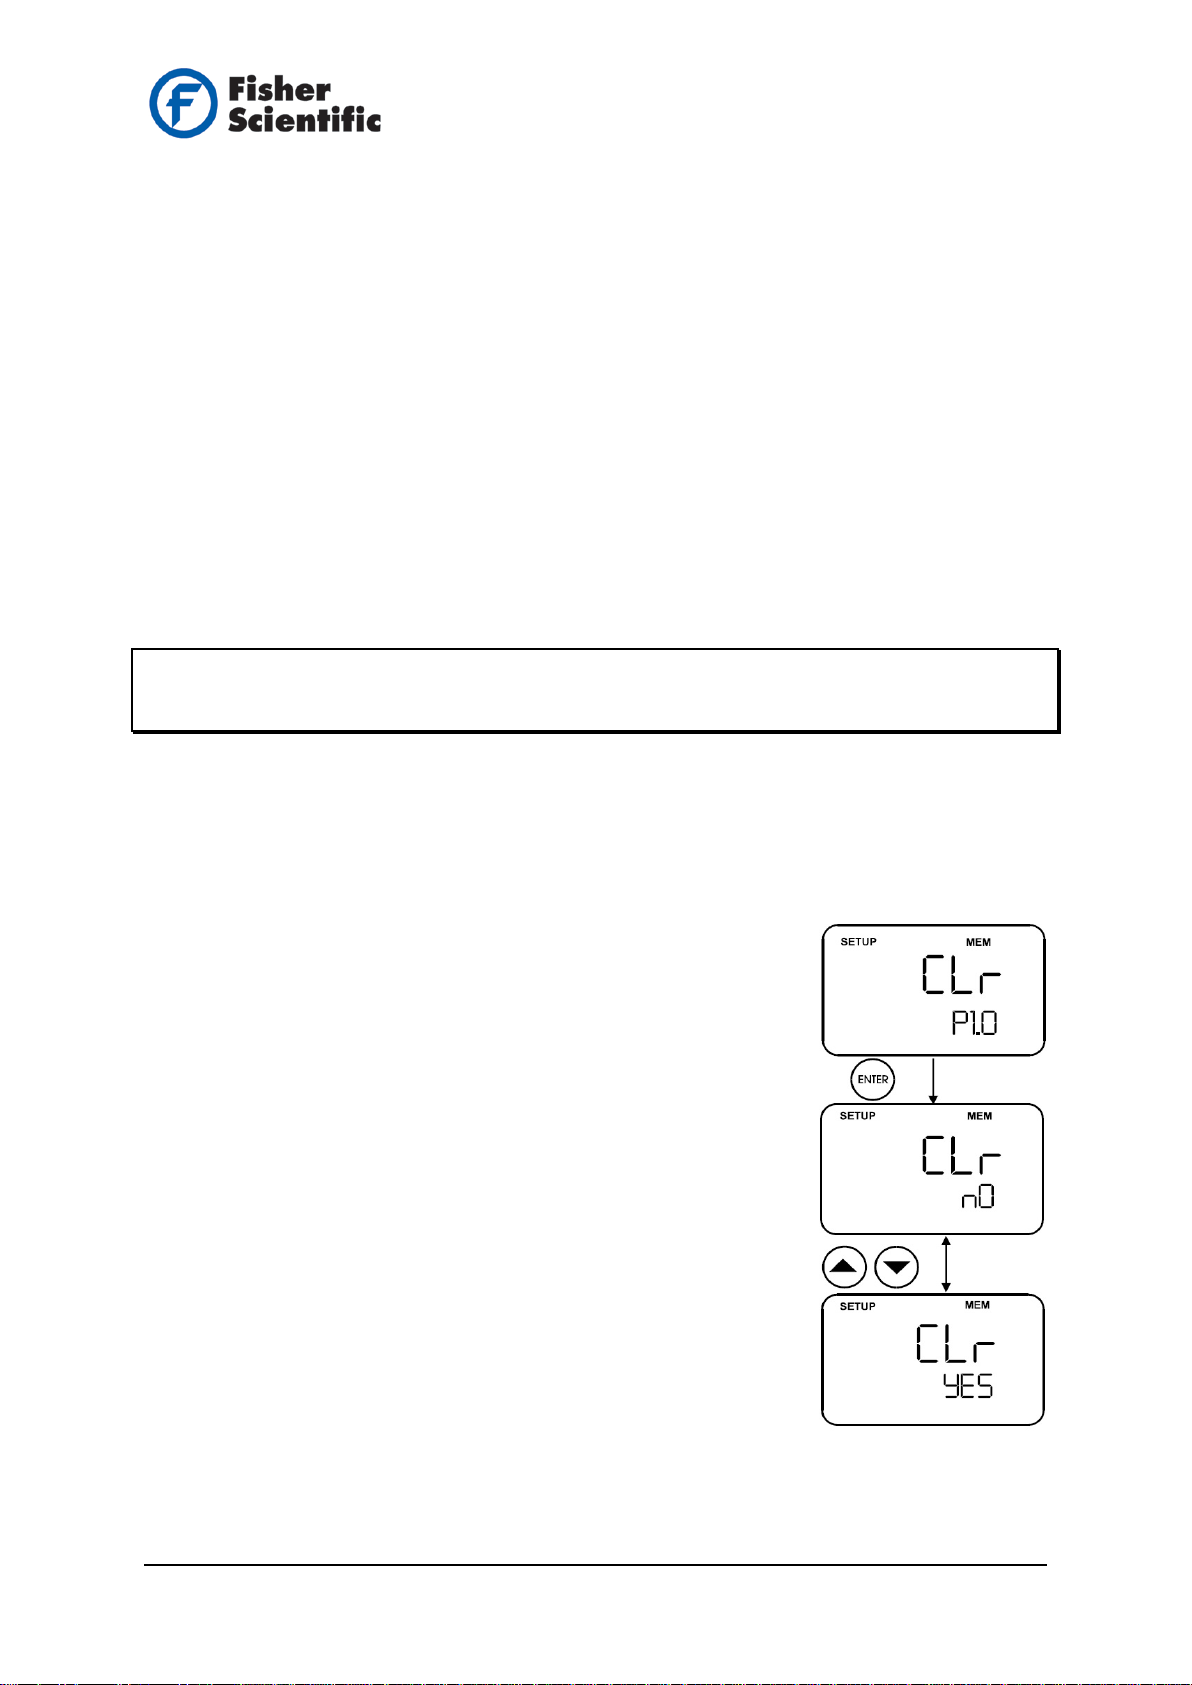
P1.0 Clear Memory Program .......................................................................................10
P2.0 View Electrode Diagnosis Program......................................................................11
P3.0 Select pH Buffer Standard Program.....................................................................12
P4.0 Meter Reset Program ..........................................................................................13
Calibration...........................................................................................................................14
pH Calibration..................................................................................................................14
mV Calibration.................................................................................................................17
Temperature Calibration..................................................................................................18
Measurements....................................................................................................................19
Temperature Compensation............................................................................................19
pH or mV Measurements.................................................................................................20
HOLD Function............................................................................................................20
Storing and Recalling Data from Memory ........................................................................21
pH Electrode Maintenance..................................................................................................22
After Use Storage............................................................................................................22
Electrolyte Replacement (for refillable electrodes only)....................................................22
Electrode Cleaning and Rejuvenation..............................................................................23
Troubleshooting Guide........................................................................................................24
Error Messages...............................................................................................................24
General Troubleshooting.................................................................................................24
Additional Information .........................................................................................................25
pH and Temperature .......................................................................................................25
Use of Standard pH Buffers.............................................................................................25
Standard pH Buffers........................................................................................................25
Meter Specifications........................................................................................................26
Ordering Information........................................................................................................27
Warranty..........................................................................................................................28

accumet AE150 pH Benchtop Meter
3 of 28 www.fishersci.com
Introduction
Thank you for purchasing the Fisher Scientific accumet AE150 benchtop pH meter. Fisher
Scientific accumet essential (AE) meters are designed to provide the key functions needed
for routine measurements without complicated features and processes. AE150 pH benchtop
meters are designed with convenience in mind, offering user-friendly functionality and
storage/recall of up to 100 data sets in the non-volatile memory. As a space saver, a swivel
electrode holder can be attached to either side of meter for holding electrodes during
operation and storage.
The Fisher Scientific accumet AE150 pH benchtop meters are capable of measuring pH, mV
and temperature and are equipped with a LCD (Liquid Crystal Display) with simultaneous
display of pH and temperature measured values or mV and temperature measured values
for efficient sample reading and recording. These meters are designed for routine pH
measurements in laboratory applications.
Meter Features
•One to five point pH calibration with automatic buffer recognition
•Selection of two pH buffer sets
•pH slope and offset display
•One point mV calibration with ±150 mV offset adjustment
•One point ATC temperature probe calibration with ±5 °C offset adjustment
•Automatic or manual temperature compensation
•Measure 0.00 to 14.00 pH with ±0.01 pH relative accuracy
•Measure -1999 to 1999 mV with ±0.2 mV relative accuracy (±199.9 mV)
•Measure 0.0 to 100.0 °C with ±0.3 °C temperature relative accuracy
•Simultaneously display of pH value and temperature or mV value and temperature
•Ready icon indicates measurement stability
•Electrode condition icon indicates electrode status
•100 point data set storage with non-volatile memory
•Connects to analog device through recorder output
Important Notes and Safety Precautions
Please read this manual thoroughly before using your instrument. Any use outside of these
instructions may invalidate the warranty and cause permanent damage to the instrument.
For additional product information, contact your local authorized dealer, local technical sales
representative or contact us using the information on the page back of this manual.
The specifications, descriptions, drawings, ordering information, part numbers and
information presented in this manual are subject to change without notice and do not
represent a commitment on the part of Fisher Scientific.

accumet AE150 pH Benchtop Meter
4 of 28 www.fishersci.com
Display
The Fisher Scientific accumet AE150 pH benchtop meter display has mode indicators for
pH, mV, relative mV (R.mV) and temperature readings.
The primary (upper) display shows the measured values of pH, mV or R.mV and the
secondary (lower) display shows the temperature reading in Celsius or Fahrenheit.
Special indicators such as units of measure, error message, icons and modes are arranged
around the measurements to give a simplified, uncluttered display.
Icon
Description
SETUP The meter is in the setup mode
MEAS
The meter is in the measure mode
CAL
The meter is in the calibration mode
MEM
Data is stored to the memory
READY
The measured value is stable
HOLD The displayed value has been frozen
Prompts user to select buffer during calibration; or indicates buffer error when flashing with
ERR icon
Indicates electrode error when flashing with ERR icon
ERR An error in operation has occurred
ATC
Indicates Automatic Temperature Compensation is activated; when ATC is not displayed,
temperature probe is not connected and manual temperature compensation is activated
Units of Measure
Indicates buffer
values of USA or
NIST buffer set

accumet AE150 pH Benchtop Meter
5 of 28 www.fishersci.com
Keypad
A splash-resistant membrane keypad with tactile feedback is designed to help make the
meter easier to use. Key names and symbols assist with describing the function controls.
Fisher Scientific accumet AE150 pH Benchtop Meter Keypad
Key
Measure and Setup Modes
Calibration Mode
ON/OFF
Powers the meter on and off. When the
meter is switched on, it automatically starts
in the last mode of operation.
Powers the meter on and off.
CAL/MEAS
Toggles between the measurement and
calibration modes of the meter.
In the SETUP mode, pressing the
CAL/MEAS key returns to the
measurement mode.
---
MODE
Toggles between the different measure
modes available: pH, mV and temperature.
Switches from pH to temperature in pH
calibration mode.
HOLD
Freezes a measurement on the display.
Press HOLD key again to update display
with current readings.
---
MR/
MR key recalls measurements from
memory and scrolls through log values.
Down arrow key () scrolls to next
program in the SETUP mode.
Down arrow key () scrolls values in mV
calibration mode and selects temperature
values in calibration mode.
MI/
MI key inputs measurements into memory
and scrolls through log values.
Up arrow key () scrolls to next program
in the SETUP mode.
Up arrow key () scrolls values in mV
calibration mode and selects temperature
values in calibration mode.
ENTER Enter functions in the memory mode.
Confirms and enters the value selected for
calibration.

accumet AE150 pH Benchtop Meter
6 of 28 www.fishersci.com
Rear Instrument Panel
The meter provides a set of connectors for the various accessories. Listed in the table are
the details of the available meter connections.
Connection
Function
ATC
2.5 mm phono jack connection for ATC temperature probe
INPUT
For connection to sensors with BNC connectors; the meter accepts pH or ORP
electrodes with a BNC connector; always ensure that the connector is clean and dry
REF For connection to pin type reference half-cell electrode used with half-cell pH electrode
REC
For connection to strip chart recorders; use subminiature plug with positive tip to
capture raw mV values
GND For connection to the ground earth jack (standard tip connectors)
DC For connection for the AC/DC power adapter

accumet AE150 pH Benchtop Meter
7 of 28 www.fishersci.com
Meter Start Up
Connecting Electrodes and Accessories
Connect the accessory connectors at the rear of the instrument panel. During operation, it is
important that water does not get onto the BNC connector. Also avoid touching the
connector with soiled or wet hands.
Connecting the Sensor Electrode
Slide the electrode connector over the meter BNC socket marked “INPUT”. The meter can
accept a standard pH or ORP electrode with a BNC connector. Align the slot of the electrode
connector with the posts of the socket. Rotate the connector clockwise until it locks. For a
separate reference half-cell electrode, push the reference electrode pin into the meter jack
marked “REF”.
Connecting the ATC Temperature Probe
Insert the temperature probe into the connector marked “ATC”.
Connecting the AC Adapter
Slide the jack of the AC adapter into the meter input marked “DC” until it is firmly seated.
Ensure the power is switched off before installation and the correct voltage adapter is used.
Connecting a Chart Recorder
Chart recorders or external output devices can be connected to the meter for continuous
printout. Plug in the input connector and ground pin of the chart recorder into the ports
marked “REC” and “GND” respectively.

accumet AE150 pH Benchtop Meter
8 of 28 www.fishersci.com
Connecting the Electrode Holder (Optional)
The electrode holder is a useful tool for mounting electrodes during measurement or when
electrodes are being stored. The meter’s base plate (bottom of meter, shown in Figure 1)
has a side metal bar to which a swivel electrode holder can be attached. The electrode
holder can be mounted on either the right or left side of the meter.
Figure 1:
To position the electrode arm:
Use a Phillips screwdriver to remove the screw holding the electrode holder. Slide the side
metal bar until the second screw slot lines up with the original screw hole. Use the screw
removed earlier to secure the electrode holder into position.
Note:The side metal bar is reversible. If desired, remove screw holding electrode holder
base and slide out of brackets, Slide base into brackets on opposite side and tighten screw.
To install the electrode arm to the meter:
To mount the electrode arm into the metal rod on the side bar, align the slot with the metal
rod and base of electrode arm, see Figure 2. Push it downwards until it fully sits into position.
Avoid using excessive force when fixing or removing. The electrode arm is ready for use.
Note: Move the base of the electrode holder to swing the electrode holder about. To prevent
the meter from toppling or causing spills, DO NOT move the body of the electrode holder.
Figure 2:

accumet AE150 pH Benchtop Meter
9 of 28 www.fishersci.com
Meter Preparation Prior to Calibration
Switching the Meter On and Off:
Press the ON/OFF key to power the meter on. All the LCD segments will be displayed for a
few seconds and then the display switches to the last measurement mode. To power the
meter off, press the ON/OFF key again.
Selecting the Measure Mode:
The measurement modes available are pH, mV, R.mV (for ORP) and temperature. Select
the correct mode of operation by pressing the MODE key and each key press toggles to the
next measurement mode. When selecting a particular parameter, the respective mode icon
is shown at the right hand side of primary display; these include “pH” for pH, “°C” for
temperature and “mV” for millivolt.
Meter Reset:
On first use, it is not necessary to reset the meter before calibration. To reset the meter to
factory default, refer to the Meter Setup Functions section.
Note: After the meter is reset, a re-calibration is required before measurement. Likewise, to
prepare a new set of measurements, all the last calibrated pH values can be reset
simultaneously for added convenience.
Caution: All calibration values and memory data will be erased upon meter reset and
calibration is required.
Selecting pH Buffer Standard:
The meter is capable of automatically recognizing either USA or NIST pH buffer standards.
Refer to Meter Setup Functions for details on how to change the USA buffer standard to the
NIST standard on the meter.
•USA Standard Buffer Option: pH 1.68, 4.01, 7.00, 10.01 and 12.45 buffers
•NIST Standard Buffer Option:pH 1.68, 4.01, 6.86, 9.18 and 12.45 buffers

accumet AE150 pH Benchtop Meter
10 of 28 www.fishersci.com
Meter Setup Functions
Use the Setup mode to customize meter preferences and defaults:
•P1.0: Memory Clear (CLr)
•P2.0: View electrode data (ELE)
•P3.0: Select buffer set (bUF)
•P4.0: Reset to factory default settings (rSt)
To Enter the Setup Mode:
1. Turn the meter off by pressing the ON/OFF key.
2. With meter powered off, press and hold the MODE key and press and release the
ON/OFF key. The display will show the “SETUP” indicator.
a. If the display indicates that the meter is in the measurement mode, turn the
meter off and repeat step 2 until the “SETUP” icon is shown.
Note: To exit the Setup mode at anytime without confirming changes, press the CAL/MEAS
key until the measurement mode appears. You may have to press the CAL/MEAS key two
times before the meter reverts to the measurement mode.
P1.0 Clear Memory Program
Use this program to clear all memory values when you need to store a new series of values.
This avoids confusing the old values with the new ones. NO is the default setting.
1. With the meter powered off, press and hold the MODE key
and press and release the ON/OFF key. The display will
show the “SETUP” indicator.
2. The meter will go to program P1.0. “CLr” is shown in the
upper display and “P1.0” is shown in the lower display.
3. Press the ENTER key to access the program P1.0. The
lower display will show either “nO” or “YES” (depending on
last option selected or factory default of nO).
4. Press the or arrow key to toggle between the “nO” or
“YES” setting. Selecting “YES” will erase all memory
values.
5. Press the ENTER key to confirm the selection and return to
the setup mode.
6. To go to the next program, press the or arrow key or
to return to the measurement mode press the CAL/MEAS
key.

accumet AE150 pH Benchtop Meter
11 of 28 www.fishersci.com
P2.0 View Electrode Diagnosis Program
This program allows the electrode parameters to be checked for diagnostic purposes.
Depending on the last display mode, the displayed electrode information will vary. If pH was
the display mode, the electrode offset value in mV and slope in percent will be shown. If mV
was the display mode, the electrode offset value in mV will be shown.
1. With the meter powered off, press and hold the MODE
key and press and release the ON/OFF key. The display
will show the “SETUP” indicator.
2. Press the or arrow key to scroll through the
programs until “ELE” is shown in the upper display and
“P2.0” is shown in the lower display. The electrode icon
will also appear.
3. Press the ENTER key to access the program P2.0. The
lower display will show “P2.1”.
4. The information shown in program P2.0 will depend on
the mode the meter was in prior to powering the meter
off:
a. In the pH measurement mode:
i. P2.1 shows the mV offset of the electrode.
Press the ENTER key to go to P2.2.
ii. P2.2 shows the slope in % of the electrode.
b. In the mV measurement mode:
i. P2.1 shows the mV offset of the electrode.
5. To exit P2.0 program press the ENTER key until “ELE”
is shown in the upper display and “P2.0” is shown in the
lower display.
6. To go to the next program, press the or arrow key
or to return to the measurement mode press the
CAL/MEAS key.

accumet AE150 pH Benchtop Meter
12 of 28 www.fishersci.com
P3.0 Select pH Buffer Standard Program
This program allows for the selection from one of two standard calibration buffer sets,
depending on your requirements. The available buffer sets are USA and NIST.
1. With the meter powered off, press and hold the MODE key
and press and release the ON/OFF key. The display will
show the “SETUP” indicator.
2. Press the or arrow key to scroll through the programs
until “bUF” is shown in the upper display and “P3.0” is
shown in the lower display. The buffer icon will also
appear.
3. Press the ENTER key to access the program P3.0. The
lower display will show either “USA” or “nSt” (depending on
last option selected or factory default of USA).
4. Press the or arrow key to select the desired
calibration buffer set:
a. USA buffers: 1.68, 4.01, 7.00, 10.01, 12.45
b. nSt buffers: 1.68, 4.01, 6.86, 9.18, 12.45
5. To confirm the selected buffer set, press the ENTER key.
The meter will proceed to the selection mode for the
number of calibration points.
6. Press the or arrow key to select the number of
calibration points from 2 to 5.
7. To confirm the selected number of calibration points, press
the ENTER key. All the characters on the display will flash
briefly and then the display will return to P3.0.
8. To go to the next program, press the or arrow key or
to return to the measurement mode press the CAL/MEAS
key.

accumet AE150 pH Benchtop Meter
13 of 28 www.fishersci.com
P4.0 Meter Reset Program
This program gives the option to either reset the calibration data for all parameters (pH and
mV modes) or reset the meter back to the factory default conditions except for the
temperature calibrated value and buffer set selection (NIST or USA).
1. With the meter powered off, press and hold the MODE key
and press and release the ON/OFF key. The display will
show the “SETUP” indicator.
2. Press the or arrow key to scroll through the programs
until “rSt” is shown in the upper display and “P4.0” is shown
in the lower display.
3. Press the ENTER key to access the program P4.0. The
lower display will show “nO”.
4. Press the or arrow key to select “nO” or “YES”.
a. Selecting “YES” will erase all calibration values for
pH and mV modes (CAL) or reset the meter back to
the factory default conditions (FCt).
b. Selecting “nO” will deactivate the reset program.
5. To confirm the reset, make sure “YES” is shown and press
the ENTER key.
6. Press the or arrow key to select “CAL” or “FCt” as the
reset function.
a. Selecting “CAL” will erase all calibration values for
all modes (pH and mV).
b. Selecting “FCt” will reset the meter back to the
factory default conditions except for the
temperature and buffer set selection (NIST or USA).
7. Press the ENTER key to confirm the reset. All the
characters on the display will flash briefly and then the
meter will return to the measurement mode.
Note: Once the reset is complete, calibrate the meter before taking any new measurements.

accumet AE150 pH Benchtop Meter
14 of 28 www.fishersci.com
Calibration
pH Calibration
The Fisher Scientific accumet AE150 pH benchtop meter is capable of performing a one to
five point pH calibration for accuracy across the pH measurement range.
The multi-point calibration offers flexibility of calibrating using either USA or NIST buffer sets
with their fixed calibration points:
•USA Standard Buffer Option: pH 1.68, 4.01, 7.00, 10.01 and 12.45 buffers
•NIST Standard Buffer Option:pH 1.68, 4.01, 6.86, 9.18 and 12.45 buffers
For ATC temperature measurements, attach the temperature probe to the meter. The “ATC”
icon will be shown on the display. Insert the temperature probe into the solution to be
measured so that the sample temperature can be recorded and pH readings automatically
temperature compensated. If manual temperature compensation is preferred, do not plug a
temperature probe into the meter.
DO NOT REUSE SOLUTIONS AFTER CALIBRATION. Contaminants in the solution can
affect the calibration, and eventually the accuracy of the measurements.
A one point calibration (offset calibration) must be performed using pH 7.00 buffer or pH 6.86
buffer; otherwise calibration will not be accepted.
For slope-to-slope calibration (two point calibration), the first calibration point will only be
successfully registered in the meter after the second point calibration has been completed.
It is recommended that you perform at least a two point calibration using buffers that bracket
the expected sample range (one buffer above the sample pH and one buffer below the
sample pH), starting with the pH 7.00 buffer or pH 6.86 buffer first.
All new calibrations will replace the existing stored calibration data.
1. To power the meter on, press the ON/OFF key. All the display segments will be
displayed briefly and then the pH measurement mode will be displayed.
a. If necessary press the MODE key to select the pH measurement mode.
2. The display will indicate the following:
a. “MEAS” icon indicates the meter is in the measurement mode
b. “pH” icon indicates the pH measurement mode is selected
c. “°C” icon indicates the measured temperature reading
d. “ATC” icon indicates automatic temperature compensation is active when a
temperature probe is connected
3. Rinse the pH electrode with deionized water or rinse solution. If using a separate
temperature probe, thoroughly rinse the temperature probe as well.
a. Do not wipe the pH electrode or temperature probe, as this may cause a
build-up of electrostatic charge that may cause measurement instability.

accumet AE150 pH Benchtop Meter
15 of 28 www.fishersci.com
One Point Calibration
4. Select the first pH buffer (pH 7.00 or pH 6.86) and pour the
buffer into a clean container.
5. Immerse the pH electrode and temperature probe into the
first pH buffer.
a. The tip of the pH electrode must be completely
immersed in the buffer. Stir the electrode gently to
create a homogenous solution.
6. Press the CAL/MEAS key to enter the calibration mode.
a. The “CAL” icon will be shown on top of the display
to indicate the meter is in pH calibration mode.
b. The upper display will show the measured reading
and lower display will indicate the pH buffer
standard value, based on the selected buffer set.
7. Wait for the measured pH value to stabilize and the
“READY” icon to be shown on the display.
8. Press the ENTER key to confirm the calibration point.
a. The upper display will flash the calibration value briefly before storing the
calibration point in the meter.
b. The lower display will toggle between the next calibration buffer values, based
on the selected buffer set.
9. Save the calibration or proceed to the next calibration point.
a. If performing a one point calibration, press the CAL/MEAS key to return to the
measurement mode and start taking pH readings.
b. If performing a two to five point calibration, continue to step 10 (do not press
the CAL/MEAS key).
Two to Five Point Calibration
10. Rinse the pH electrode with deionized water or rinse solution. If using a separate
temperature probe, thoroughly rinse the temperature probe as well.
11. Select the second pH buffer (i.e. pH 4.01) and pour the buffer into a clean container.
a. The meter will automatically recognize the buffers in the buffer set selected in
the Setup mode, either USA (pH 1.68, 4.01, 7.00, 10.01 and 12.45 buffers) or
NIST (pH 1.68, 4.01, 6.86 9.18 and 12.45 buffers).
12. Immerse the pH electrode and temperature probe into the second pH buffer.
a. The lower display will update to the pH buffer standard value, based on the
selected buffer set.
13. Wait for the measured pH value to stabilize and the “READY” icon to be shown on
the display.
14. Press the ENTER key to confirm the calibration point.

accumet AE150 pH Benchtop Meter
16 of 28 www.fishersci.com
a. The upper display will flash the calibration value briefly before storing the
calibration point in the meter.
b. The lower display will switch to the next calibration buffer value, based on the
selected buffer set.
15. Save the calibration or proceed to the next calibration point.
a. If performing a two point calibration, press the CAL/MEAS key to return to the
measurement mode and start taking pH readings.
b. If performing a three point calibration, continue to step 16 (do not press the
CAL/MEAS key).
16. Rinse the pH electrode with deionized water or rinse solution. If using a separate
temperature probe, thoroughly rinse the temperature probe as well.
17. Select the third pH buffer (i.e. pH 10.01 or pH 9.18) and pour the buffer into a clean
container.
18. Immerse the pH electrode and temperature probe into the third pH buffer.
a. The lower display will update to the pH buffer standard value, based on the
selected buffer set.
19. Wait for the measured pH value to stabilize and the “READY” icon to be shown on
the display.
20. Press the ENTER key to confirm the calibration.
a. The upper display will flash the calibration value briefly before storing the
calibration point in the meter.
b. The meter will automatically proceed to the measurement mode after a three
point calibration is completed, unless the number of calibration points is set to
4 or 5 using the P3.0 Program in the Setup mode. In this case, repeat steps
15-20 for the four or five point calibration.
Automatic Buffer Recognition Error
During the pH calibration, if the upper measured pH reading is not
within the acceptable buffer value range for automatic buffer
recognition, the “ERR” error icon and electrode icon will flash when
the ENTER key is pressed. Press the CAL/MEAS key to exit the
error calibration condition and return to the measurement mode.
Refer to the Troubleshooting Guide section to verify the pH
electrode performance and repeat the calibration.
Accepted Buffer Value Ranges
Buffer Set Buffer Value Accepted Range Buffer Set Buffer Value Accepted Range
USA
1.68
±1.00
NIST
1.68
±1.00
USA
4.01
±1.00
NIST
4.01
±1.00
USA
7.00
±1.50
NIST
6.86
±1.25
USA 10.01 ±1.00 NIST 9.18 ±1.00
USA
12.45
±1.00
NIST
12.45
±1.00

accumet AE150 pH Benchtop Meter
17 of 28 www.fishersci.com
mV Calibration
If relative mV has never been calibrated or if the meter has been reset, the value shown in
the upper display during the calibration will be the same as the absolute mV value.
The range of adjustment is -1999 mV to +1999 mV with 1 mV resolution or -199.9 mV to
+199.9 mV with 0.1 mV resolution.
1. To power the meter on, press the ON/OFF key. All the
display segments will be displayed briefly and then the pH
measurement mode will be displayed.
a. If necessary press the MODE key to select the pH
measurement mode.
2. Press the CAL/MEAS key to enter the calibration mode.
a. The “CAL” icon will be shown on top of the display to
indicate the meter is in R.mV calibration mode.
b. The upper display will show the relative mV reading
and lower display will indicate the absolute mV value.
3. Rinse the electrode with an appropriate rinse solution. If
using a separate temperature probe, thoroughly rinse the
temperature probe as well.
4. Select a standard and pour the standard into a clean
container.
5. Immerse the electrode and temperature probe into the
standard.
6. Press the or arrow key to set the relative mV value to match the desired
standard value.
7. Press the ENTER key to confirm the reading and the meter will proceed to the
measurement mode. The upper display will show the relative mV reading and the
“R.mV” icon will appear in the upper right hand corner.
Note: New mV calibrations will override existing stored mV calibration data. The meter
retains stored mV calibrations even when the meter is turned off.

accumet AE150 pH Benchtop Meter
18 of 28 www.fishersci.com
Temperature Calibration
To perform the temperature calibration procedure, the temperature probe must be attached
to the meter and “ATC” icon must be shown on the display.
1. Immerse the temperature probe into a solution of known
temperature, such as a temperature bath, for a few minutes
until the temperature probe stabilizes.
2. To perform temperature calibration, you must be in the pH
measurement mode.
a. If necessary press the MODE key to select the pH
measurement mode.
3. Press the CAL/MEAS key to enter the pH calibration mode.
4. Press the MODE key to switch to the temperature calibration
mode.
5. Press the or arrow key to scroll to the correct
temperature value corresponding to the known solution
temperature.
a. The meter allows a limit of ±5 °C variation with 0.1 °C
resolution of the input temperature reading.
6. Once the correct temperature is set, press the ENTER key to
confirm. The meter will automatically proceed to the pH
measurement mode.

accumet AE150 pH Benchtop Meter
19 of 28 www.fishersci.com
Measurements
Temperature Compensation
Automatic Temperature Compensation (ATC):
For ATC measurements, simply attach the temperature probe to the meter and the “ATC”
icon will be shown on the display.
Note:If using a temperature probe, the probe must be submersed in the liquid being
measured so that the sample temperature can be recorded and compensated for (pH
measurement mode only) along with the primary measurement.
Manual Temperature Compensation (MTC):
Important: For manual temperature compensation, the temperature probe must be
disconnected from the meter.
1. Power the meter on by pressing the ON/OFF key.
2. Press the MODE key to select the pH measurement mode.
3. Press the CAL/MEAS key to enter the pH calibration mode.
The “CAL” icon will be shown above the upper display.
4. While in pH calibration mode, press the MODE key to enter
temperature compensation mode.
a. The upper display will show the current temperature
setting and the lower display shows the default value
25.0 °C (if the meter has never been manually set for
temperature) or the last manually set value if the
meter has previously set for MTC. If you have not set
the current temperature setting the upper display will
also show the default value of 25.0 °C.
5. Check the temperature of the sample using an accurate
thermometer.
6. Press the or arrow key to scroll to the temperature
value corresponding to the measured sample temperature.
7. Once the correct temperature is set, press the ENTER key to confirm. The meter will
automatically proceed to the pH measurement mode. The meter will compensate pH
reading for the manually set temperature.

accumet AE150 pH Benchtop Meter
20 of 28 www.fishersci.com
pH or mV Measurements
Note: Remove the protective cap or storage bottle (if any) from the electrode before
proceeding with measurement or calibration. Take care not to exert too much force, as this
may cause damage to the electrode. Whenever the electrode is not in use, put it into storage
bottle or protect the electrode with the cap provided.
1. Rinse the electrode with deionized water or appropriate rinse solution before use to
remove any impurities adhering to the electrode body. If the pH electrode was
dehydrated, soak it for at least 30 minutes in electrode storage solution.
2. Power the meter on by pressing the ON/OFF key.
a. The “MEAS” icon will be shown on the top of the display.
b. The “ATC” icon will appear in the lower right corner of the display if a
temperature probe is connected.
3. Press the MODE key to toggle between the pH or mV measurement mode.
4. Immerse the electrode and temperature probe into the sample.
a. If using a pH electrode, make sure that the glass bulb of the pH electrode is
completely immersed in the sample.
b. Gently stir the electrode to create a homogeneous sample.
5. Wait for the reading to stabilize. When the reading stabilizes, the “READY” icon will
be shown. Record all applicable readings.
a. The “READY” icon is shown when pH readings are stable within a range of
±0.01 pH.
HOLD Function
The hold function allows the value of a measured reading to be
frozen on the display. The hold function can be used at any time
when in the measurement mode, as indicated by the “MEAS” icon.
To hold (freeze) a measurement, press the HOLD key while in
measurement mode. The “HOLD” icon will be shown on the
display.
The held (frozen) reading can be stored by pressing the MI key.
To release (unfreeze) a measurement, press the HOLD key a
second time. The “HOLD” icon will disappear from the display and
the “MEAS” icon will be shown on the display.
Table of contents
Other Fisher Scientific Measuring Instrument manuals

Fisher Scientific
Fisher Scientific Accumet Basic AB30 User manual

Fisher Scientific
Fisher Scientific accumet AP 110 accumet AP 115accumet AP 125 User manual

Fisher Scientific
Fisher Scientific accumet XL150accumet XL200accumet XL250accumet XL500accumet... User manual

Fisher Scientific
Fisher Scientific XL15 User manual

Fisher Scientific
Fisher Scientific Fisherbrand accumet AB330 User manual

Fisher Scientific
Fisher Scientific accumet AB200 User manual

Fisher Scientific
Fisher Scientific Isotemp 228 User manual