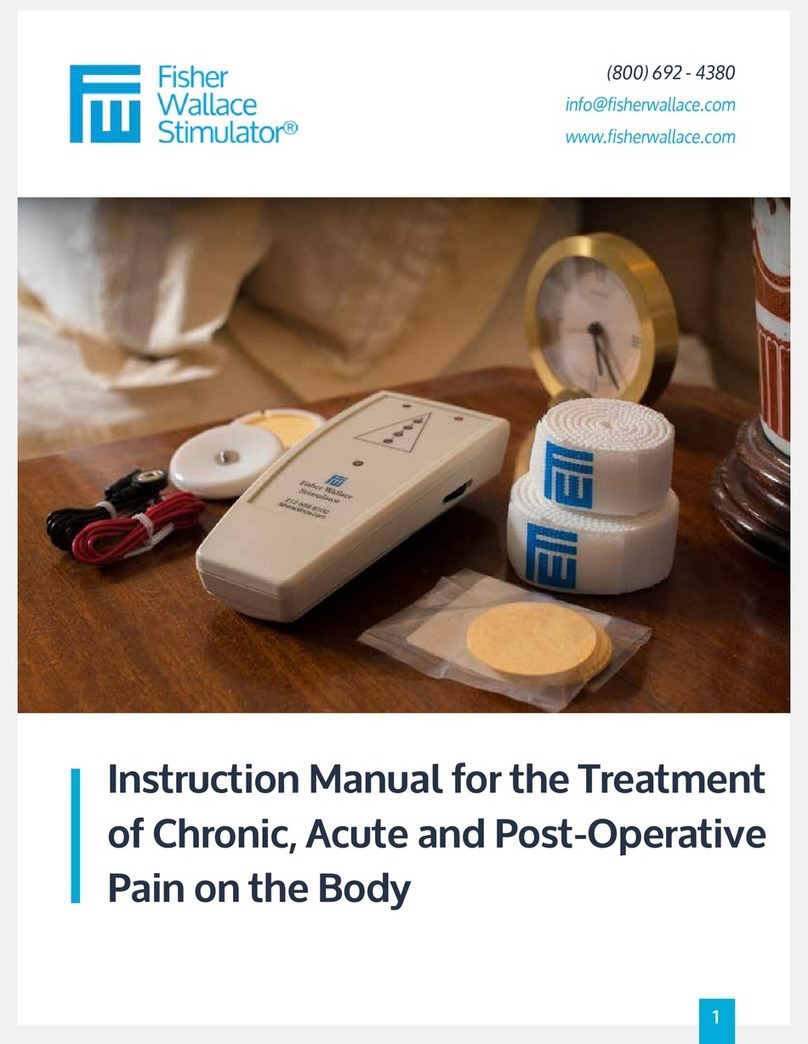
Fisher Wallace Stimulator User manual

For the treatment of depression, anxiety and insomnia.
To get started quickly, watch the “How it Works”video on
FisherWallace.com
User Guide

Box Contents 3
Quick Start 4
Indications for Use 5
Device Assembly and Controls 6
Electrode Preparation 7
Headband and Electrode Placement 8
Start Using the Device on Level 2 9
Treatment Duration and Long Term Use 10
Troubleshooting 11-12
Cleaning the Device 13
Precautions 14
Contraindications and Warnings 15
Federal Labeling 16
Theory of Operation 17
Device Specications 18-20
Limited Warranty 21-22
Extending Your Trial or Returning Your Device 23
Contact Us 24
CONTENTS

3
Carry Case
BOX CONTENTS
Sponge Electrodes
& Wires
Fisher Wallace
Stimulator®
Velcro HeadbandTrial Sponges

4
To get started quickly, please watch the instructional video located in the “How it Works” section of our website:
FisherWallace.com.
Troubleshooting
If you encounter any problems using the device, please consult the Troubleshooting section of this manual (pages 11 – 12) for xes to common issues.
QUICK START

5
The Fisher Wallace Stimulator® is indicated for the treatment of depression, anxiety and insomnia.
INDICATIONS FOR USE

6
For assistance with assembly, please
watch the instructional video located
in the “How it Works” section of our
website (FisherWallace.com).
The Fisher Wallace Stimulator® has a dial that turns the device ON/OFF and adjusts
the level of current. There is a green LED indicator light that ashes when the device
is turned ON. There are four (4) yellow LED indicator lights that ash according
to the level of output. Level 2 (the second yellow light) is recommended for the
treatment of depression, anxiety and insomnia. If Level #2 is not eective after two
weeks of twice daily use, you may increase to Level #3 or #4. The green and yellow
lights will icker when lit.
DEVICE ASSEMBLY DEVICE CONTROLS

7
Clean scalp/hair will minimize any risk of irritation caused
by electrode use. The sponge electrodes, and the scalp/hair
beneath them, must be very wet for the electrodes to work
properly.
After use, sponges will dr y more quickly if removed from the
receptacles. Electrode sponges should be replaced regularly
for optimal performance.
New headsets come with new sponges (dehydrated yellow
disks) already installed in the white plastic sponge receptacles.
The sponges will expand when wet.
After snapping the white sponge receptacles to the wires
and inserting the other ends of the wires into the top of the
device, saturate the sponges with water.
ELECTRODE PREPARATION

8
Place the small Velcro band on the head so that it sits above
the eyebrows. Place each wet electrode (sponges must be wet)
beneath the headband, above the sideburns. The bottom of
the electrode should be in line with the top of your ear. It does
not matter which side the red or black wire electrode is placed.
The sponges and the hair/scalp beneath the sponges must
be suciently wet. Some water dripping down the face may
occur – this is normal.
HEADBAND AND ELECTRODE PLACEMENT
Place electrode
under the headband,
above the sideburn,
on either side
of head

9
Once the green ON light illuminates, continue counterclockwise
rotation until the second (Level #2) indicator light ashes
yellow. You may feel a brief sensation (itching, prickly
sensation, warmth) or see “ashing lights” when it is used on
the head – all of which is normal and safe. You do not need to
experience sensation in order to receive benet.
START USING THE DEVICE ON LEVEL 2
Now that the wet sponge electrodes are securely placed
beneath the headband on your head, and all the wires are
connected, you are ready to turn the device on. While holding
the device, first rotate the dial clockwise, using the thumb, to
be sure the device is in the OFF position. To start the device,
rotate the dial counterclockwise -listen for the click when the
device goes from the OFF position to the ON position. The
green ON light should illuminate. If the green ON light does
not illuminate, replace the batteries.

10
The device has been on the market for more than 20 years and
no risks are associated with long term use. If you experience full
remission of symptoms, you may cease treatment or may use
the device on a maintenance basis, 3-4 times per week. Many
patients who achieve remission use the device for non-
medical benets such as improved focus and concentration.
LONG TERM USE
To reactivate the device for another 20 minutes, turn the dial
clockwise to the OFF position until you hear an audible click,
and then turn the device back on.
After twenty (20) minutes, an audible beep sound will
signal the end of the session, and the device will shut off
automatically.
To treat anxiety, the device should be used for 20
minutes in the morning (ideally, first thing after getting out
of bed) and once again in the evening for 20 minutes
immediately before going to bed.
TREATMENT DURATION

11
If the green “ON” light does not illuminate when the device
is turned ON, rst turn the device completely OFF by rotating
the dial clockwise until you hear a click, then try turning the
device ON again. Replace the batteries with fresh ones if you
still have trouble.
wet. People with thick hair may have more diculty wetting
the hair enough to cause the electrodes to conduct. Some
people with small heads will require a tighter headband to
make the electrodes work properly – adequate pressure is
needed against the electrodes by the headband.
If your device suddenly turns o before the 20 minutes are
up, or when the device is set down on a table or lightly jarred
or tapped, re-insert the batteries.
TROUBLESHOOTING - 1/2
If the yellow indicator lights do not illuminate, be sure the
sponges are new, clean and thoroughly wet. The hair /
skin beneath the sponge electrodes must also be su�ciently

12
To test if the electrodes are working, press the two sponge
electrodes together (like an “Oreo cookie”), turn the device
ON (green light ashing), and, while continuing to squeeze
the sponge electrodes together, continue dialing up
(counterclockwise) until you see the yellow lights illuminate.
If the yellow lights illuminate when you test them but not
when you have them in use on your head, then the wetness of
the sponges / hair / scalp is insucient or the tightness of the
headband holding the electrodes in place may be insucient.
Make sure the headband provides a snug t.
If, after trying the above xes, issues persist with the device,
call Fisher Wallace at 800.692.4380.
TROUBLESHOOTING-2/2
If the headband is not pressing the electrodes rmly enough,
adequate conductivity may not occur.
If yourdevice beepsthroughoutthetreatment session,or
fails to beep at the end of the session, replace the batteries.

13
The device and headset should be thoroughly cleaned every two weeks. To clean the device, remove the black and red wires
from the base unit, remove the old sponges from the sponge electrodes, dampen a cloth or paper towel with alcohol and clean
the inside and outside of the plastic electrode receptacles in a circular motion. Insert a new pair of sponges and dispose of
used sponges. To clean the base unit, dampen a cloth or a paper towel with alcohol and wipe down the base unit. Once clean,
reinsert the wires into the base unit, matching the wire colors to the circles on the base unit. Now you can continue to use the
device.
CLEANING THE DEVICE

14
The Fisher Wallace Stimulator® should not be used on the
throat, neck or eyes. The device should not be used on or near
areas of the body, including the head, that contain implanted
devices, such as stimulators, stents, or active or inactive
implants such as deep brain stimulators and vagus nerve
stimulators. You should avoid using the device near areas of
the body where there is embedded shrapnel or metal plates.
There is no danger in using the device if you have dental
llings. Do not allow water to enter the device. The Fisher
Wallace Stimulator® should not be exposed to environmental
conditions where the system may get wet. Operation in close
proximity (e.g. 1m) to a shortwave or microwave therapy
equipment may reduce the output performance of the device.
PRECAUTIONS

15
The device is contraindicated for use on the body in patients who have
demand or sensing type cardiac pacemakers. This device should not
be used around the Carotid sinus. Patients with known or suspected
heart disease should not be stimulated. Patients who react poorly to
the idea of electrical stimulation of any kind should not use this device.
Patients whose skin is irritated around either electrode site should
discontinue use of this device. This device must be used only for the
purpose for which a physician has prescribed. This device must only
be used by the person for whom the prescription has been written.
Keep the device out of reach of children. Electronic
monitoring equipment (such as ECG monitors, ECG alarms)
may not operate properly when CES stimulation is in use.
High Frequency surgical equipment may not be used when
CES stimulation is in use. Do not operate the CES stimulator
in close proximity to short-wave or microwave therapy
equipment. This device is not suitable for use with oxygen or
in the presence of a ammable anesthetic mixture with air or
oxygen, or with nitrous oxide.
CONTRAINDICATIONS WARNINGS

16
Federal Law (USA) states that this device must only be
purchased by or under the order of a health care practitioner,
licensed in the state in which he/she practices.
FEDERAL LABELING POSSIBLE ADVERSE REACTIONS
Skin irritation may occur at the site of sponge electrode
placement, especially if the sponges deteriorate (sponges
should be replaced regularly) or if contact is made between
the skin and the metal part of the sponge receptacle, or if
the sponges are not thoroughly wet before each use. Amild
headache or dizziness may occur, and should cease after you
stop using the device. Such reactions are very rare.

17
The electronic waveform contains a 15,000Hz square wave carrier which is rectied, varying from zero to a maximum of 4 milliamperes. The rst modulating
signal of 15Hz provides an“ON” time of 50 milliseconds and an “OFF “ time of 16.7 milliseconds. The second modulating signal of 500Hz changes the“ON” time
series of 15,000Hz carrier pulses (750 pulses in 50 milliseconds) into 25 smaller bursts of 15 pulses each of the 15,000Hz carrier signal 375 pulses in the same 50
milliseconds. The subject device is a bipolar version of a TENS device, wherein the rst major burst of energy (50 milliseconds is positive [above the zero axis],
followed by a 16.7 millisecond “OFF “ time, is then followed by a second major burst of energy (50 milliseconds is negative [below the axis]) followed by a 16.7
millisecond “OFF “ time. Thus, the consecutive positive burst and OFF time is followed by an equal and opposite negative burst and OFF time, balancing the
direct current component to zero. c.) The pulse period for the basis carrier waveform of 15,000Hz is 66.7 microseconds (50% duty cycle). d.) The pulse period for
the 1st Modulator of 15Hz is 66.7 milliseconds (75% duty cycle). e.) The pulse period for the 2nd Modulator of 500Hz is 2 milliseconds (50% duty cycle). f.) The
output voltage is variable from zero to 40 volts and then voltage limited, rst positive and then negative. Therefore, load impedances of up to 10,000 ohms will
be able to have a constant current of up to 4 milliamperes. However, beyond 10,000 ohms, the constant current is limited inversely with the load, (ie: A patient
with a 10,000 ohm impedance will be able to receive a maximum of 2 milliamperes).
THEORY OF OPERATION

18
These output parameters are valid for
an impedance load range of 0-700 Ω Parameter Nominal Value
Output Amplitude (milliamperes) 0-4 mA
Rate 15/500/15.000 Hz
Pulse Width 33 microseconds
Maximum Charge per Pulse 0.13 microcoulombs
On Time per Burst 50 milliseconds
O Time per Burst 16.7 milliseconds
Operating temperature range 41 to 95°F (5 to 35°C)
Storage/transport temperature range -13° to 158ºF (-25 to 70ºC)
Operating humidity range 10% to 93% relative humidity, non-condensing
Storage/transport humidity range 15% to 93% relative humidity, non-condensing
DEVICE SPECIFICATIONS - 1/3

2020
70°C
-25°C
93%
15%
2797

20
Replacement Parts and Accessories
Reference Code Description
DR-9002 Replacement Sponge Applicators
DR-9003 Headband
DR-9007 Headset with cables 0.5m ±0.02m
Warning: Use of accessories and cables other than those specied, may result in increased EMISSIONS or
decreased IMMUNITY of the stimulator.
Electromagnetic Compatibility: MEDICAL ELECTRICAL EQUIPMENT needs special precautions regarding
EMC and needs to be used according to the EMC information provided in this manual.There is no signicant
risk of reciprocal interference. Portable and mobile RF (radio frequency) communications equipment can
eect MEDICAL ELECTRICAL EQUIPMENT. Operation in close proximity (less than 1meter) to a shortwave or
microwave therapy ME Equipment may reduce the output performance of the FW-100- C device.
DEVICE SPECIFICATIONS - 3/3
Emissions
Test Description Specications Test Method
Radiated Emissions EN 60601-1- 2:2007 Class B CISPR 11:2009 (Amended by A1:2010)
Radiated Emissions IEC 60601-1- 2:2007 Class B CISPR 11:2009 (Amended by A1:2010)
Radiated Emissions IEC 60601-2- 10, Clause 36 Class B CISPR 11:2009 (Amended by A1:2010)
Radiated Immunity
Test Description Specications Test Method
Radiated Immunity EN 60601-1- 2:2007 IEC 61000-4- 3:2010
Radiated Immunity IEC 60601-1- 2:2007 IEC 61000-4- 3:2010
Radiated Immunity IEC 60601-2- 10, Clause 36 Class B IEC 61000-4- 3:2010
Other manuals for Stimulator
1
Table of contents
Other Fisher Wallace Medical Equipment manuals
Popular Medical Equipment manuals by other brands
Aulisa
Aulisa Guardian Angel GA2000 Series Instructions for use
LINET
LINET Multicare X Instructions for use and Technical description

HeartSine
HeartSine Samaritan PAD 300 User instructions
medi
medi Epicomed E+motion Instructions for use
Mortara
Mortara ELI 380 user manual
ZacUrate
ZacUrate 500BL user manual
