Fission E-K701 User manual

usb cassette tape deck
Model Number: E-K701
User Manual

After Sales Support TEL: 1300 886 649
1Page
Contents
What Your 1 Year Warranty Means ....................................................................................
Important Safety Instructions .............................................................................................
Unit Diagram and Component Names / Functions ............................................................
Basic Operation .................................................................................................................
Listening to a Tape .............................................................................................................
Recording to a Tape (from audio source) ...........................................................................
Audacity Software ..............................................................................................................
Installing theAudacity Software .........................................................................................
Conguring Audacity for Microsoft Windows .....................................................................
Preparing to Export and Save for MP3 Formats ...............................................................
Export and Save for WAV, Ogg or MP3 Formats (After Recording is completed) .............
Recording Operation ..........................................................................................................
Dividing Tracks ..................................................................................................................
Conguring Audacity for Mac ............................................................................................
Troubleshooting Guide ......................................................................................................
Specications ....................................................................................................................
2
3
4
5
6
8
11
14
18
22
25
27
28
32
38
39

After Sales Support TEL: 1300 886 649
2Page
What Your 1 Year Warranty Means
Great care has gone into manufacturing this product and it should therefore provide
you with years of good service when used properly. In the event of product failure
within its intended use over rst year after the date of purchase, we will rectify the
problem as quickly as possible once it has been brought to our attention.
In the unlikely event of such an occurrence, or if you require any information about the
product please contact us via our after sales support services, details of which can be
found in this manual and on the product itself.

After Sales Support TEL: 1300 886 649
3Page
Important safety instructions
TO PREVENTFIRE OR OTHER HAZARDS, DO NOT EXPOSETHISAPPLIANCE TO SUNLIGHT,
RAIN OR MOISTURE.
1. Follow and read these instructions.
2. Keep these instructions in a safe place for future reference.
3. Read all warnings.
4. Do not use this apparatus near water or moisture.
5. Clean only with a dry cloth.
6. Do not block any ventilation opening(s), install in accordance with the manufacturer’s
instructions.
7. Do not install near heat sources such as radiators, stoves, or other apparatus (including
amplifiers) that produce heat.
8. Do not open the cabinet as this might result in damage to the circuitry or result in electrical
shock. If a foreign object should get into the set, contact your dealer.
9. The apparatus shall not be exposed to dripping or splashing and that no objects filled with
liquids, such as vases be placed near or on the apparatus.

After Sales Support TEL: 1300 886 649
4Page
Unit diagram and component names / functions
1. Cassette Tape Door
2. Counter (Tape Revolution) Display
3. Counter Reset Button
4. Power LED Indicator
5. Power Button
6. Line In/Cassette Selection Switch
7. Recording [REC LEVEL] Level +/- Knob
8. Recording [REC] Cr02 Button
9. Play C-120 Button
10. Recording Level Indicator Display
11. Record [REC] Button
12. Play [PLAY] Button
13. Rewind [REW] Button
14. Fast Forward [F.FWD] Button
15. Stop & Eject [STOP/EJ] Button
16. Pause [PAUSE] Button
17. 9 Volt DC PowerAdapter [DC IN =9V]
Connection
18. USB Connection
19. Speaker Monitor Volume +/- Knob
20. Record to [REC INPUT] Connection
21. Play to [PLAYOUTPUT] Connection

After Sales Support TEL: 1300 886 649
5Page
Basic operation
Cassette tape use
Tape handling:
Do not store tapes in the following places:
1. On top of heaters, exposed to direct sunlight or in any other places with high temperatures.
2. Near speakers, on TV sets or amplifiers or where the unit may be exposed to strong magnetic
fields.
3. Where the cassette is subjected to dirt, dust or high humidity.
4. Avoid dropping or subjecting cassettes to excessive shock.
Loading a cassette tape:
1. Use a pencil to turn the cassette hub and
take up any slack in the tape. Note:Avoid
touching the tape as fingerprints attract dust
and dirt.
2. Press the STOP/EJ button to open the
cassette door.
NOTE: The cassette holder cannot be opened
during recording or playback.
3. Load the cassette tape with its open edge
facing down.
4. Gently close the cassette compartment door.

After Sales Support TEL: 1300 886 649
6Page
Maintenance:
The heads and tape path should be cleaned and demagnetised periodically (Cleaning materials not
included).
Cleaning tape path:
Apply the head cleaning fluid to a cotton swab or soft cloth and lightly rub the heads, capstan and all
metal parts in the tape path. The pinch roller may be cleaned using rubber cleaning fluid.
Demagnetizing heads:
Be sure that the power is off when you are demagnetising the heads. (demagnetiser not included).
Listening to a tape
1. Use the CASSETTE / LINE IN switch and select the CASSETTE position.
2. Plug the RCACable into the PLAY OUTPUTjack at the back of the unit. Be sure that the
coloured RCAcables are inserted correctly in to their corresponding colour jacks. Plug the other
ends of the RCACable into the auxiliary input (Aux) on yourTV, home entertainment receiver or
other music system.

After Sales Support TEL: 1300 886 649
7Page
3. Press the STOP/EJ button to open the cassette door and insert a cassette tape. Gently close the
cassette compartment door.
4. Press the COUNTER RESET button, it will show zero and get ready to count the tape’s
revolutions.
5. Press the PLAY ( ) button.
NOTE: If the tape is a C-120 version, select the PLAY C-120 button first, then press the PLAY button.
At the end of the cassette tape, the cassette will stop automatically.
6. Fast forward and rewind.
Press the fast forward or rewind button to advance and rewind the tape.

After Sales Support TEL: 1300 886 649
8Page
7. Pausing the playback.
To pause the tape, press the PAUSE button. Pressing the PAUSE button again resumes tape’s play.
8. Stopping the tape playback.
Recording to a tape (from audio source)
1. Push the CASSETTE / LINE IN to the LINE IN position.
2. Plug the RCACable into the REC INPUTjack at the back of the unit. Be sure that the coloured
RCAcables are inserted correctly in to their corresponding coloured jacks. Plug the other ends
of the RCACable into an external (auxiliary) audio source (ie. MP3 player).
3. Once the unit is on, you can attach an external recorder. Be sure to adjust the speaker monitor
volume on the back of the device.

After Sales Support TEL: 1300 886 649
9Page
4. Press the STOP/EJ button to open the cassette door and insert a cassette tape. Gently close
the cassette door.
5. Press the COUNTER RESET button, it will show zero to count the tape’s revolutions.
6. Press the REC button to start recording.
NOTE: If the tape is a C-120 version, select the REC C-120 button first,
then press REC PLAY button.
When you press the REC button the PLAY ( ) button will also be pressed automatically. At the
end of the cassette tape, the cassette will stop automatically.
7. To adjust the recording level, adjust the REC LEVELknob. Ideal REC level is typically 0 dB.
You can view the REC level through the level indicator.

After Sales Support TEL: 1300 886 649
10Page
8. Fast forward and rewind.
9. Pausing the playback.
You may pause your tape and pause your recording by pressing the PAUSE button. Pressing the
PAUSE button again will resume playing the tape.
10. Stopping the tape playback.
Press STOP/EJ to completely stop the tape and recording.
After Sales Support TEL: 1300 886 649
11Page
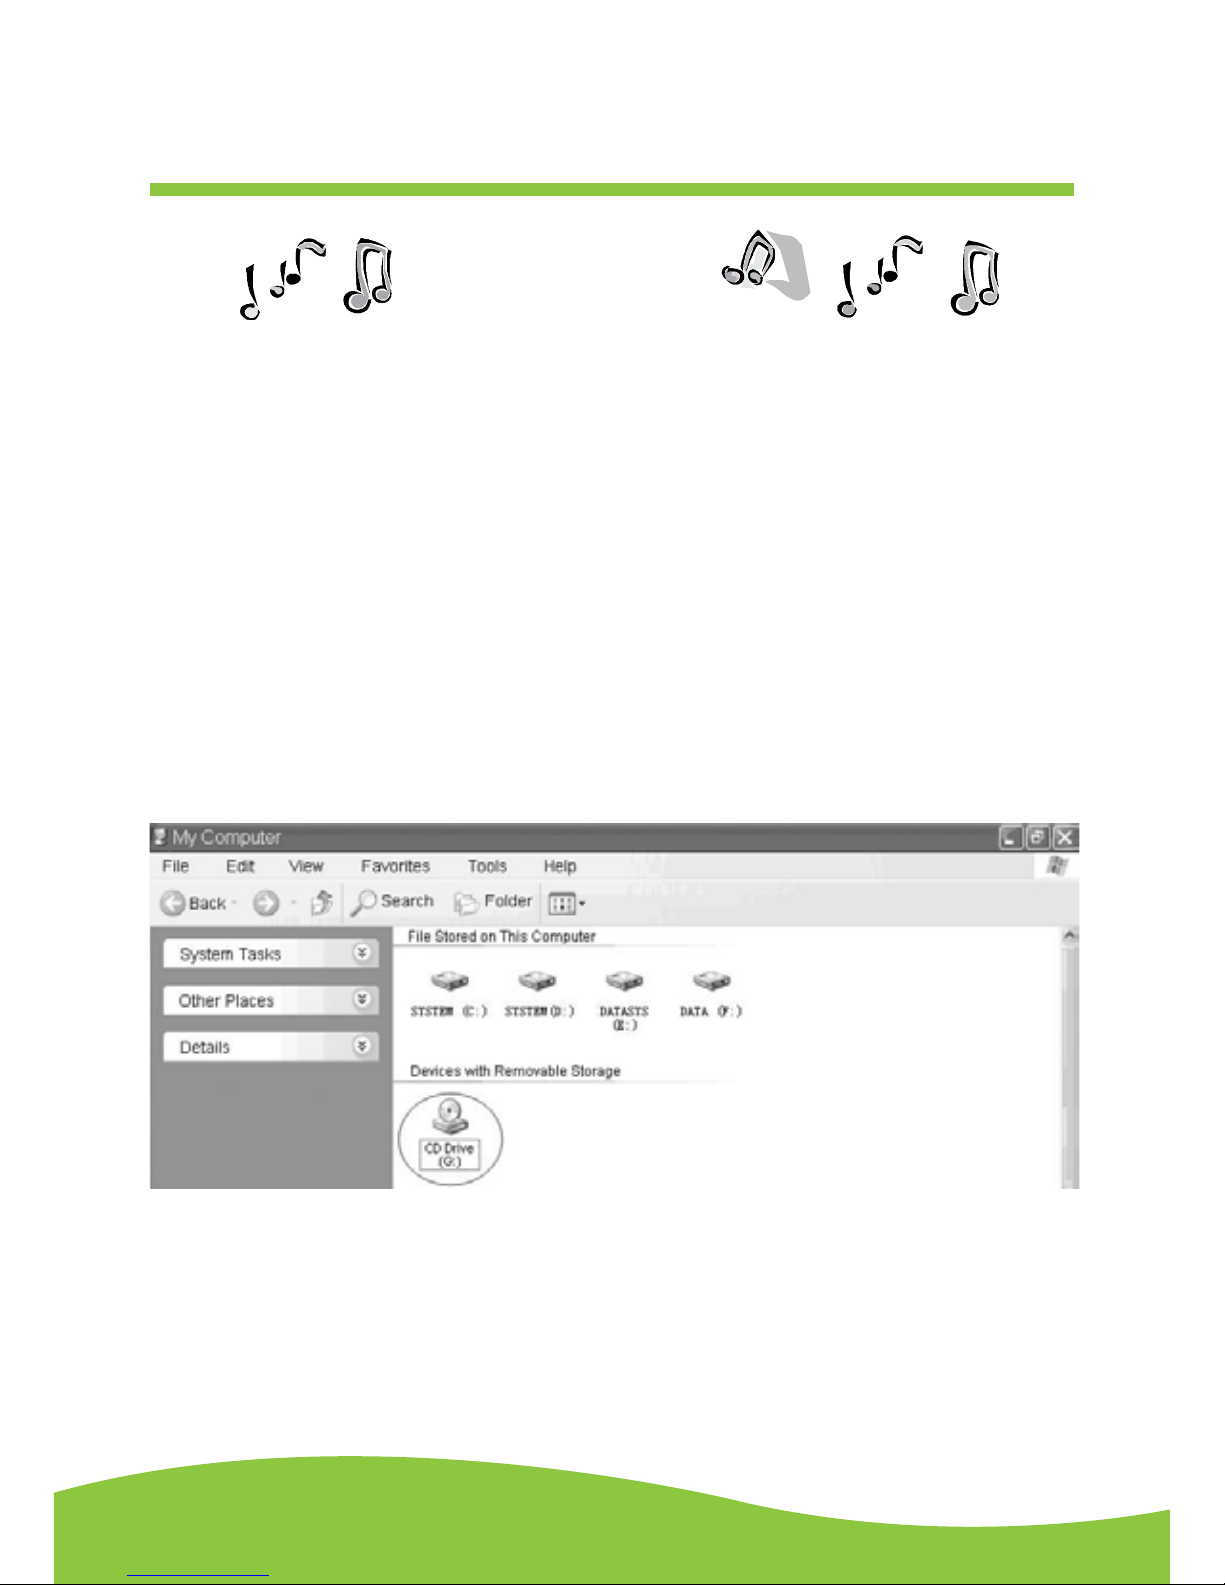
The provided CD disc contains the following software:
• Audacity-src-1.2.6----------For source codes
• Audacity_for_MAC---------For Macintosh
• Audacity_for_WIN----------For Windows
• AUTORUN.INF
• The GNU General Public License.html
The software is compatible with Window 98, 2000, ME, XP, VISTAand Macintosh.
Audacity installation and USB connection
Connect the USB cable to the Cassette Tape Deck and to your computer. Connect theAC cord to the
Cassette Tape Deck. Press the Power button to turn on the CassetteTape Deck.
1. Please insert theAudacity software disk that comes with your unit. Go to My Computer and
double click the CD ROM Drive.
Audacity software
After Sales Support TEL: 1300 886 649
12Page
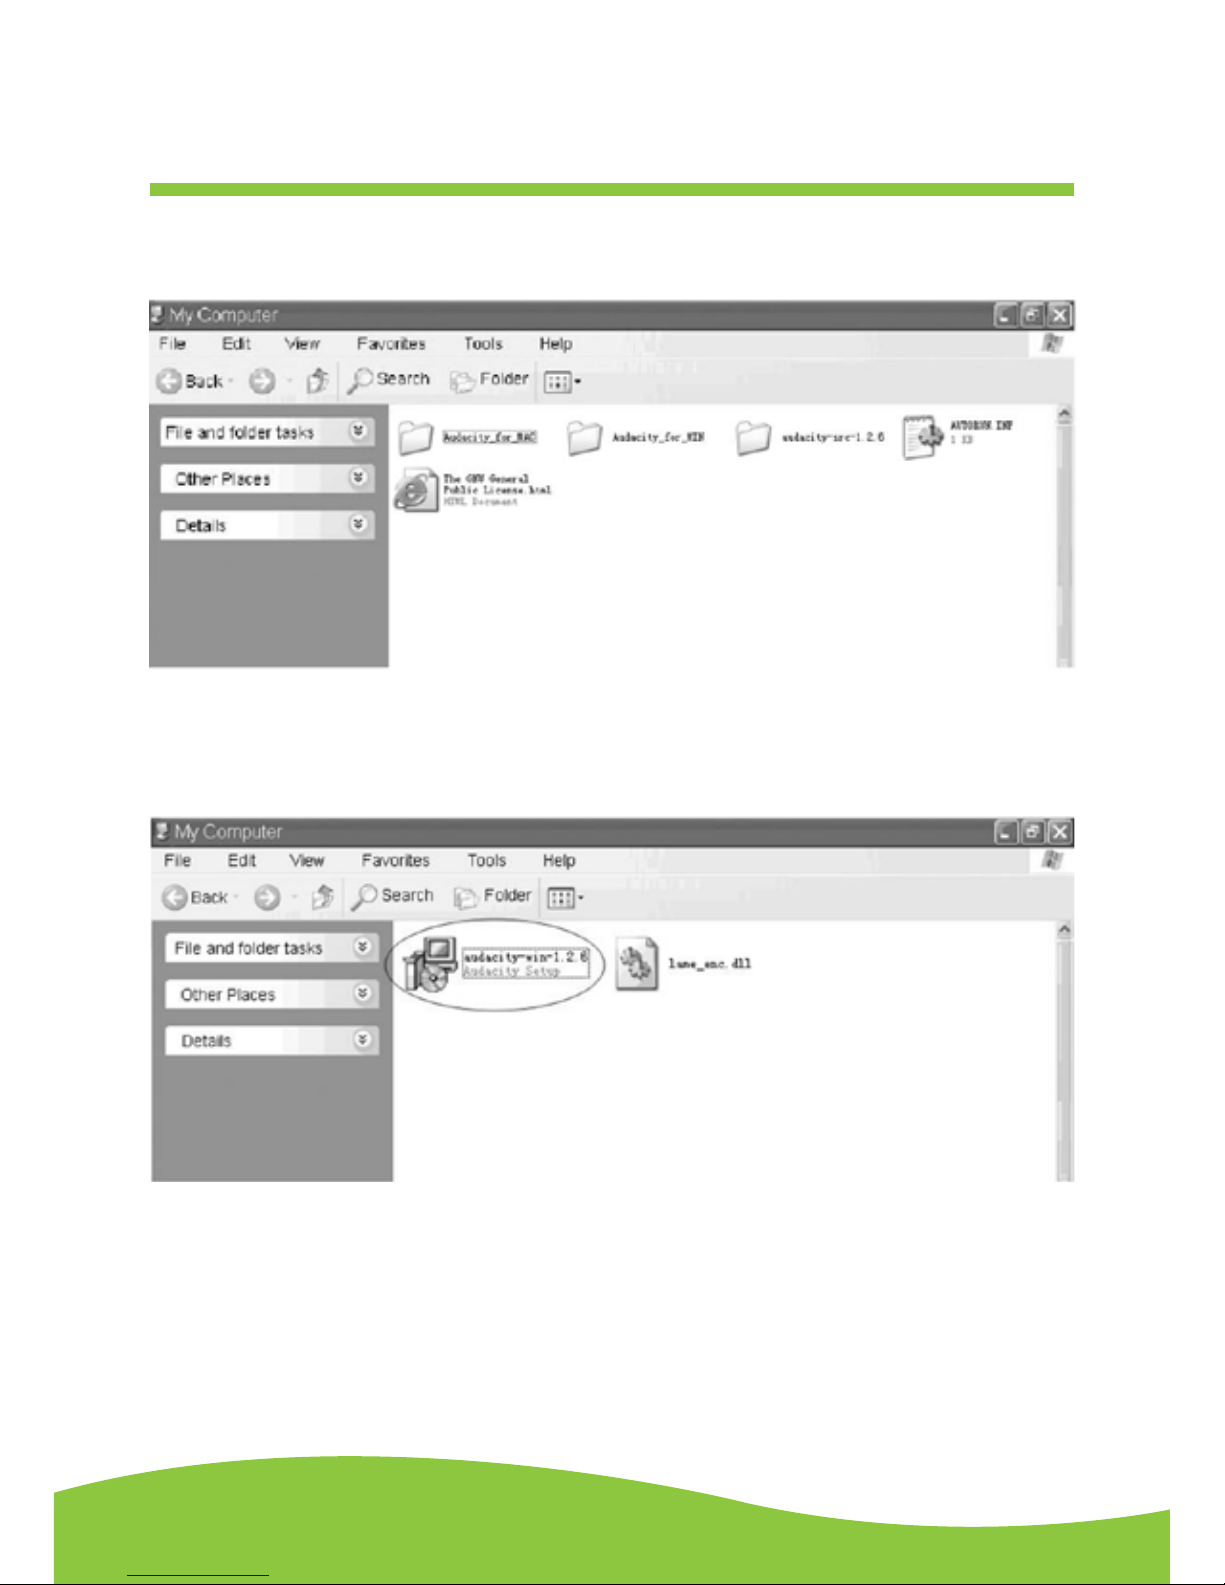
2. There are ve folders in the Audacity disk. Select Audacity_for_WIN for Windows system, and
selectAudacity_for_MAC for Macintosh system.
3. Double click theAudacity_for_WIN for Windows system, and double click the audacity-
win-1.2.6 to install the audacity software.
After Sales Support TEL: 1300 886 649
13Page
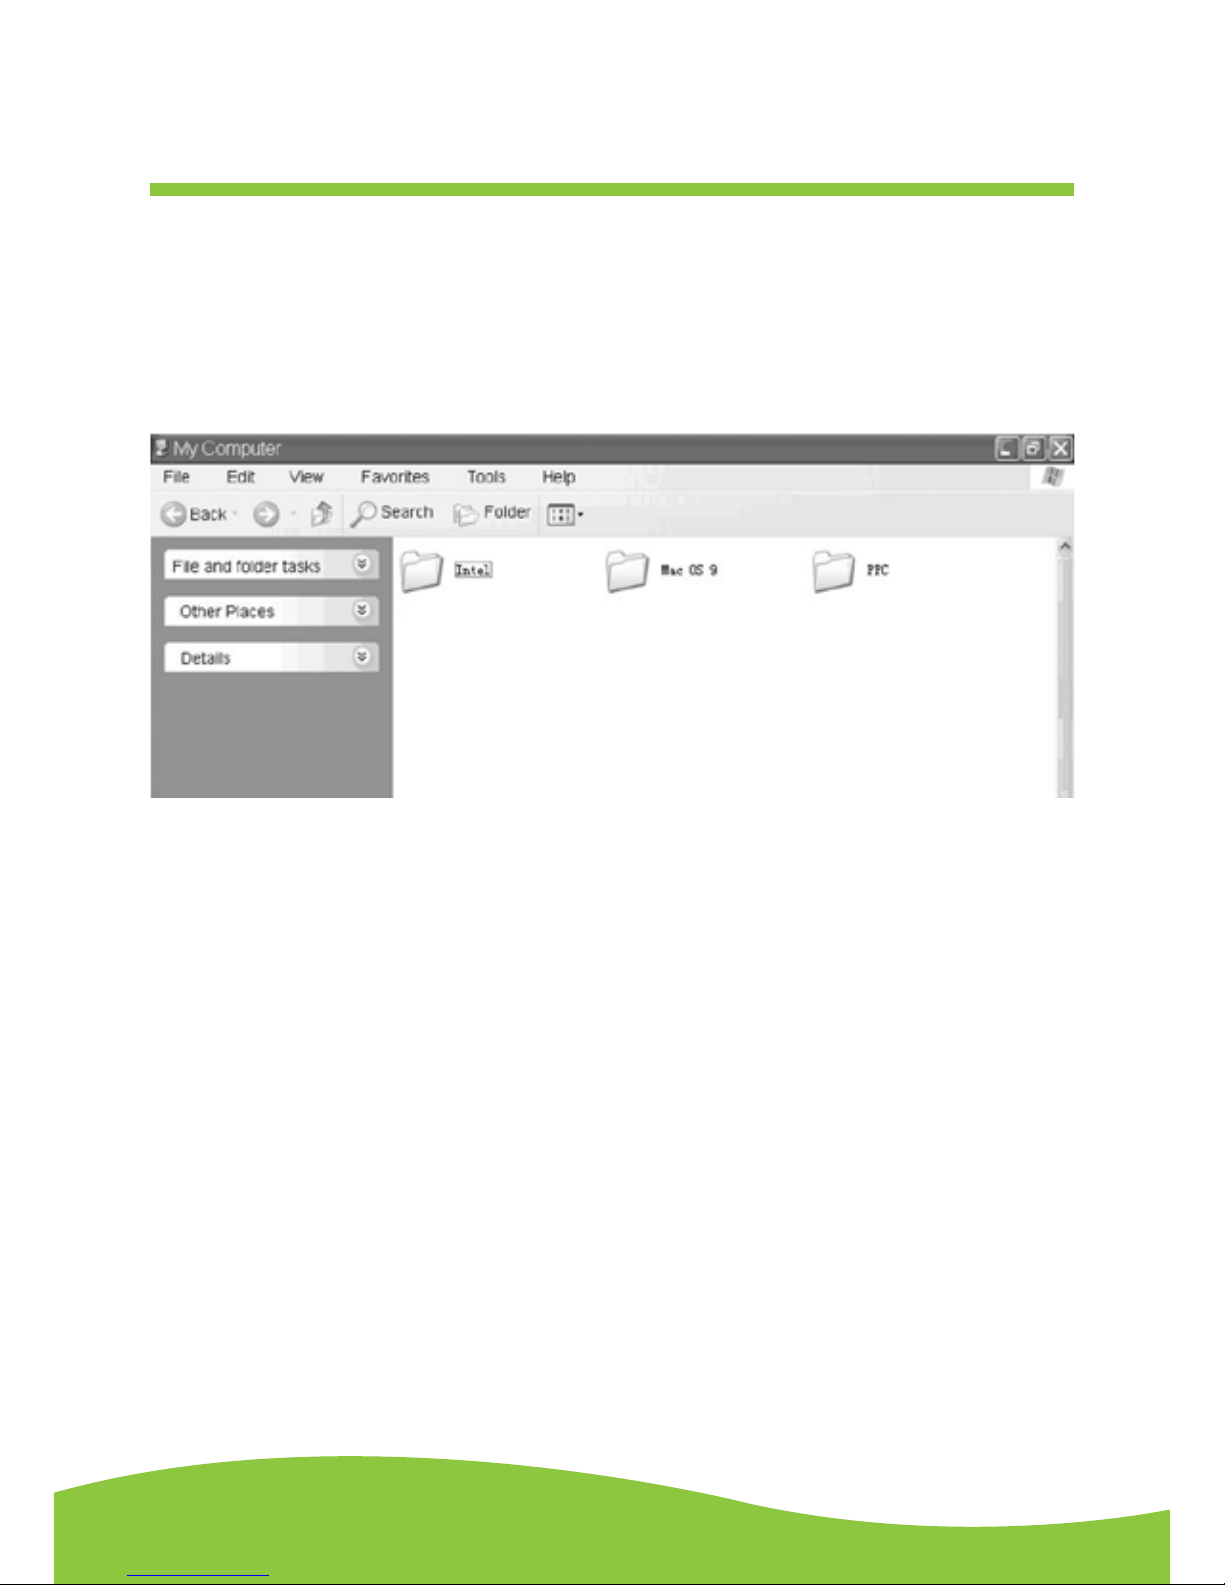
4. Double click theAudacity_for_MAC for Macintosh system.There are three folders that will
appear as shown below. If your computer is Mac OS X system (Intel CPU), please enter the
Intel folder to install the audacity software; If your computer is Mac OS 9 system, please enter
the Mac OS 9 folder to install the audacity software; If your computer is Mac OS X system
(Power PC CPU), please enter the PPC folder to install the audacity software.
After Sales Support TEL: 1300 886 649
14Page
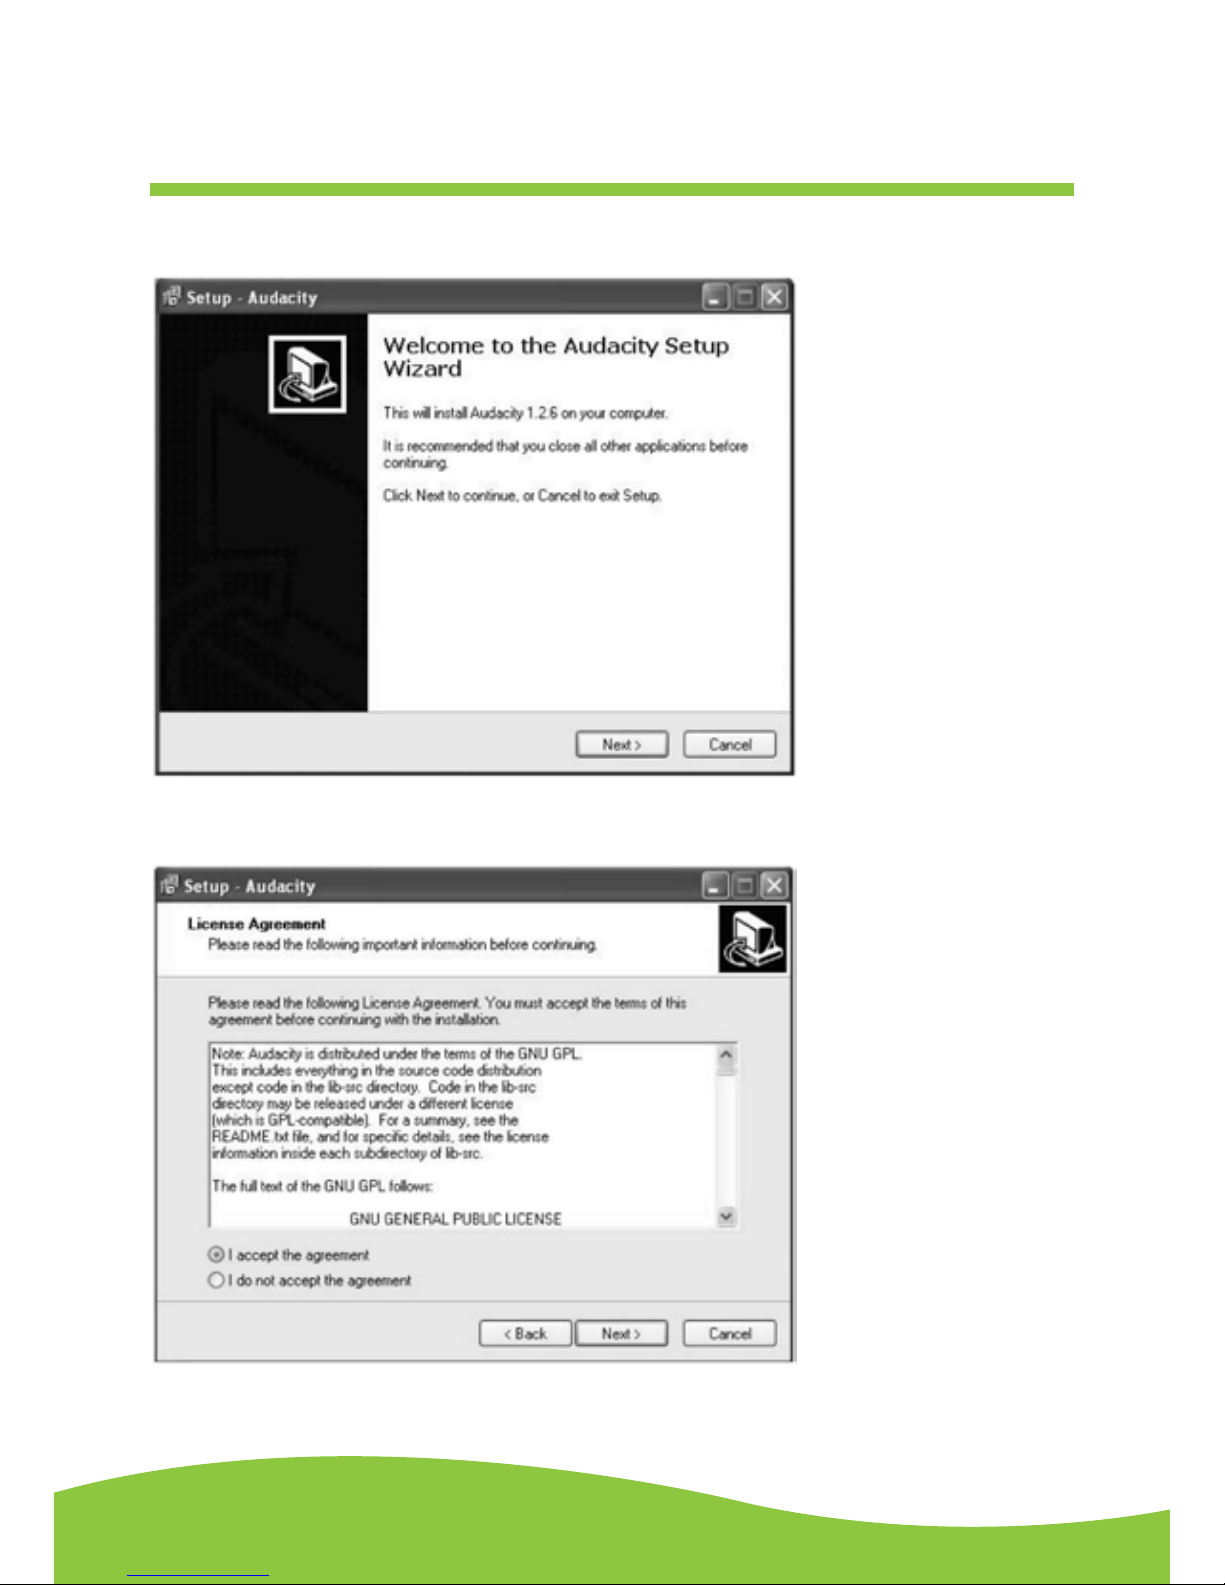
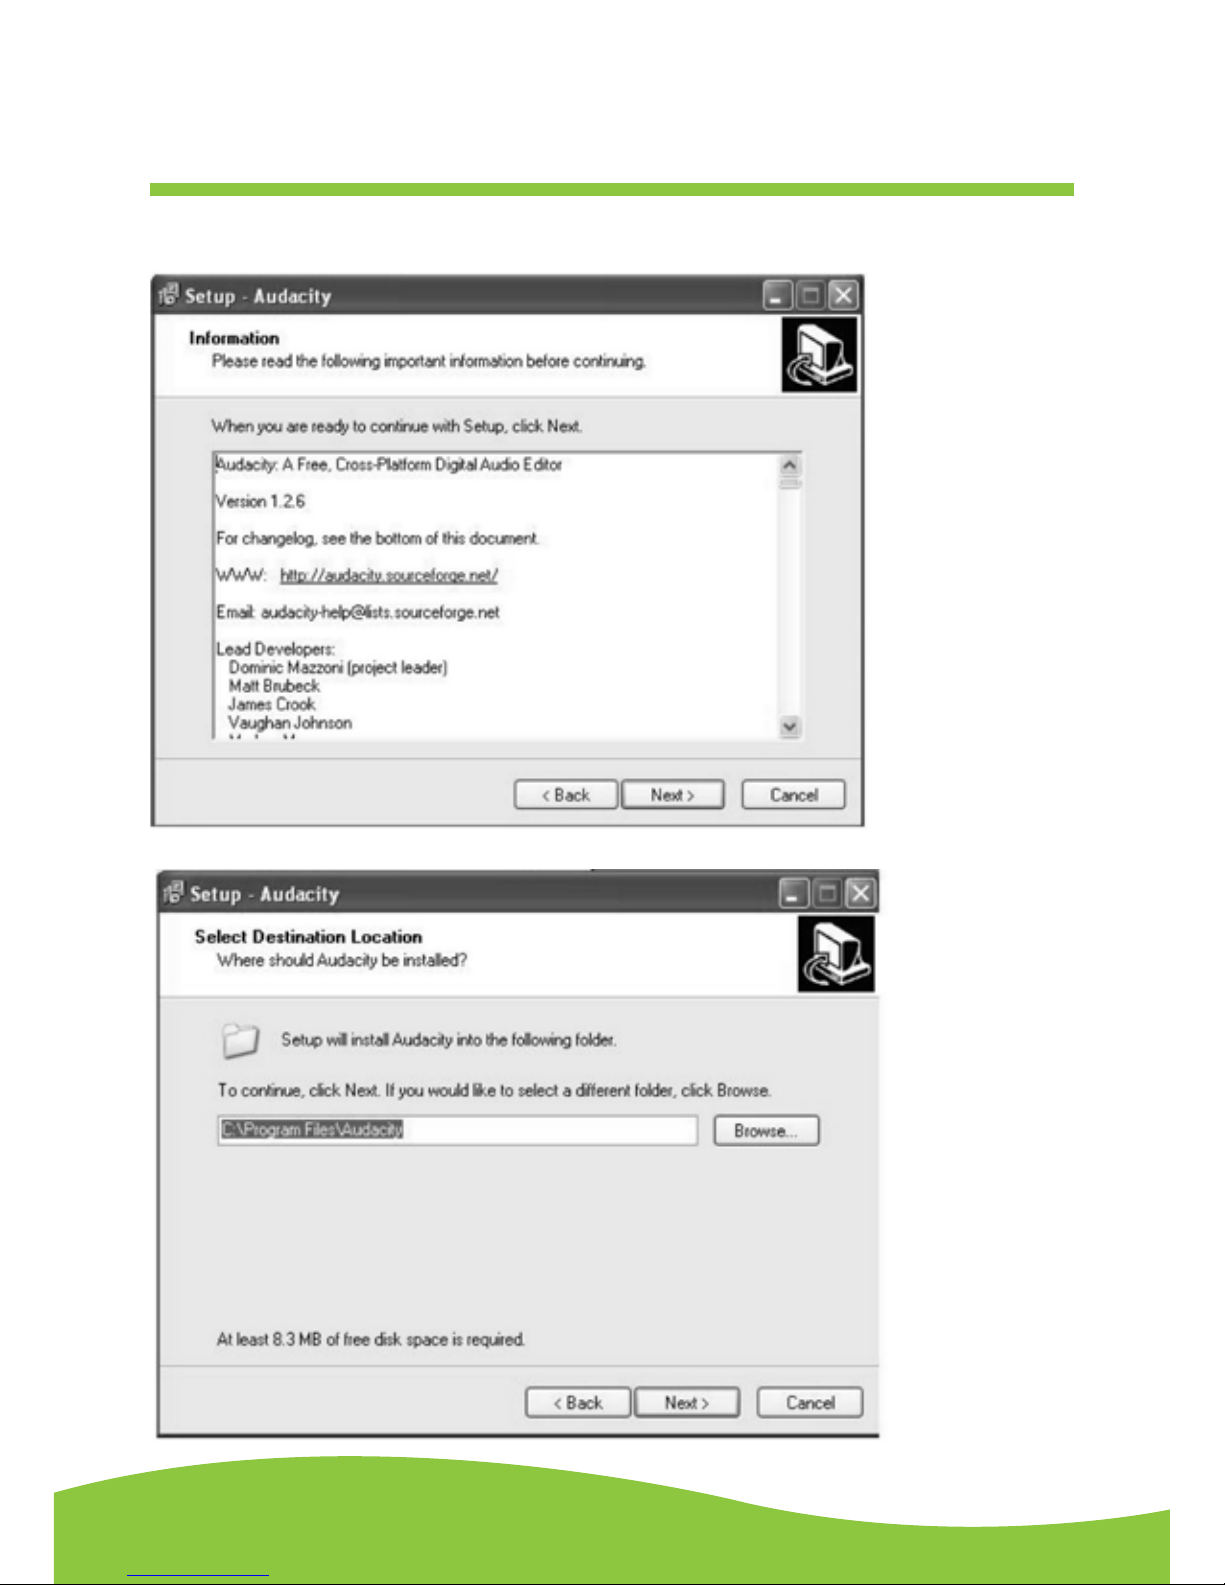
1. TheAudacity Setup Wizard will appear. Click on Next to install the software.
2. Click on “I accept the agreement” and click on Next.
Installing the audacity software
After Sales Support TEL: 1300 886 649
15Page
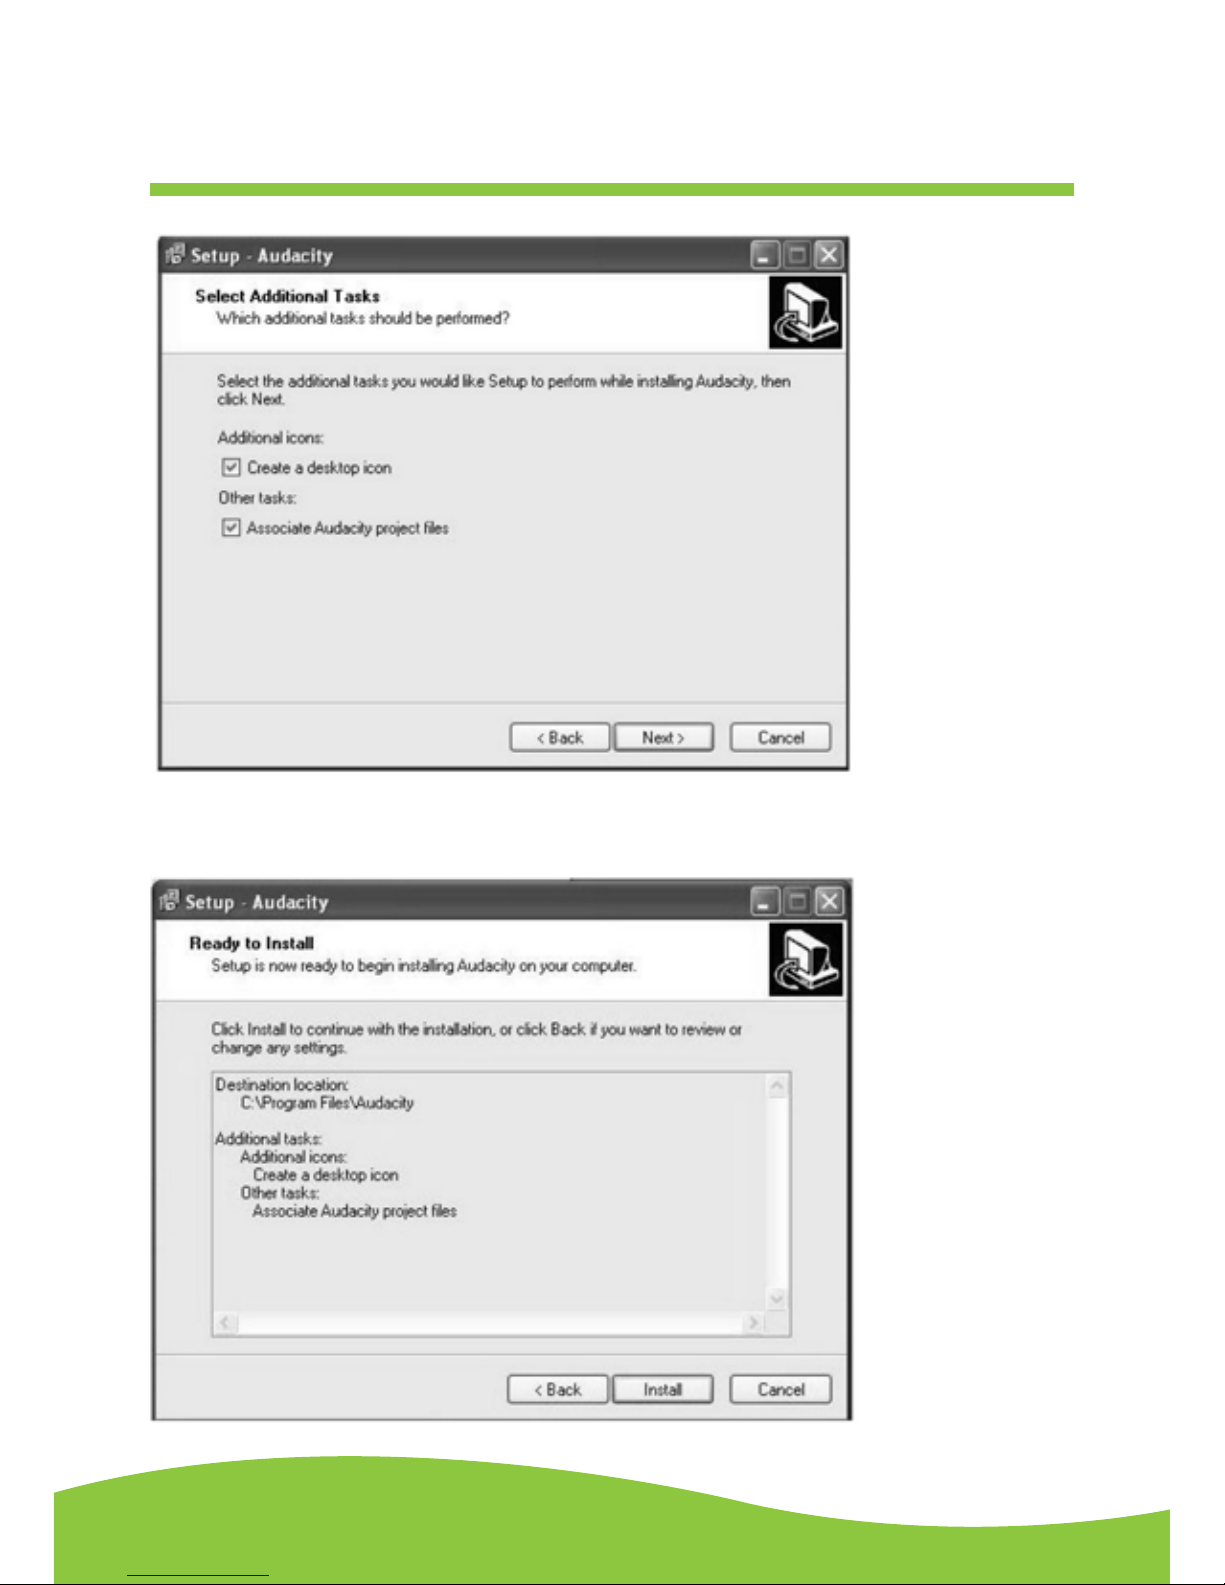
3. Continue to click on the Next button.
After Sales Support TEL: 1300 886 649
16Page
4. Click on the Install button to start installation.
After Sales Support TEL: 1300 886 649
17Page
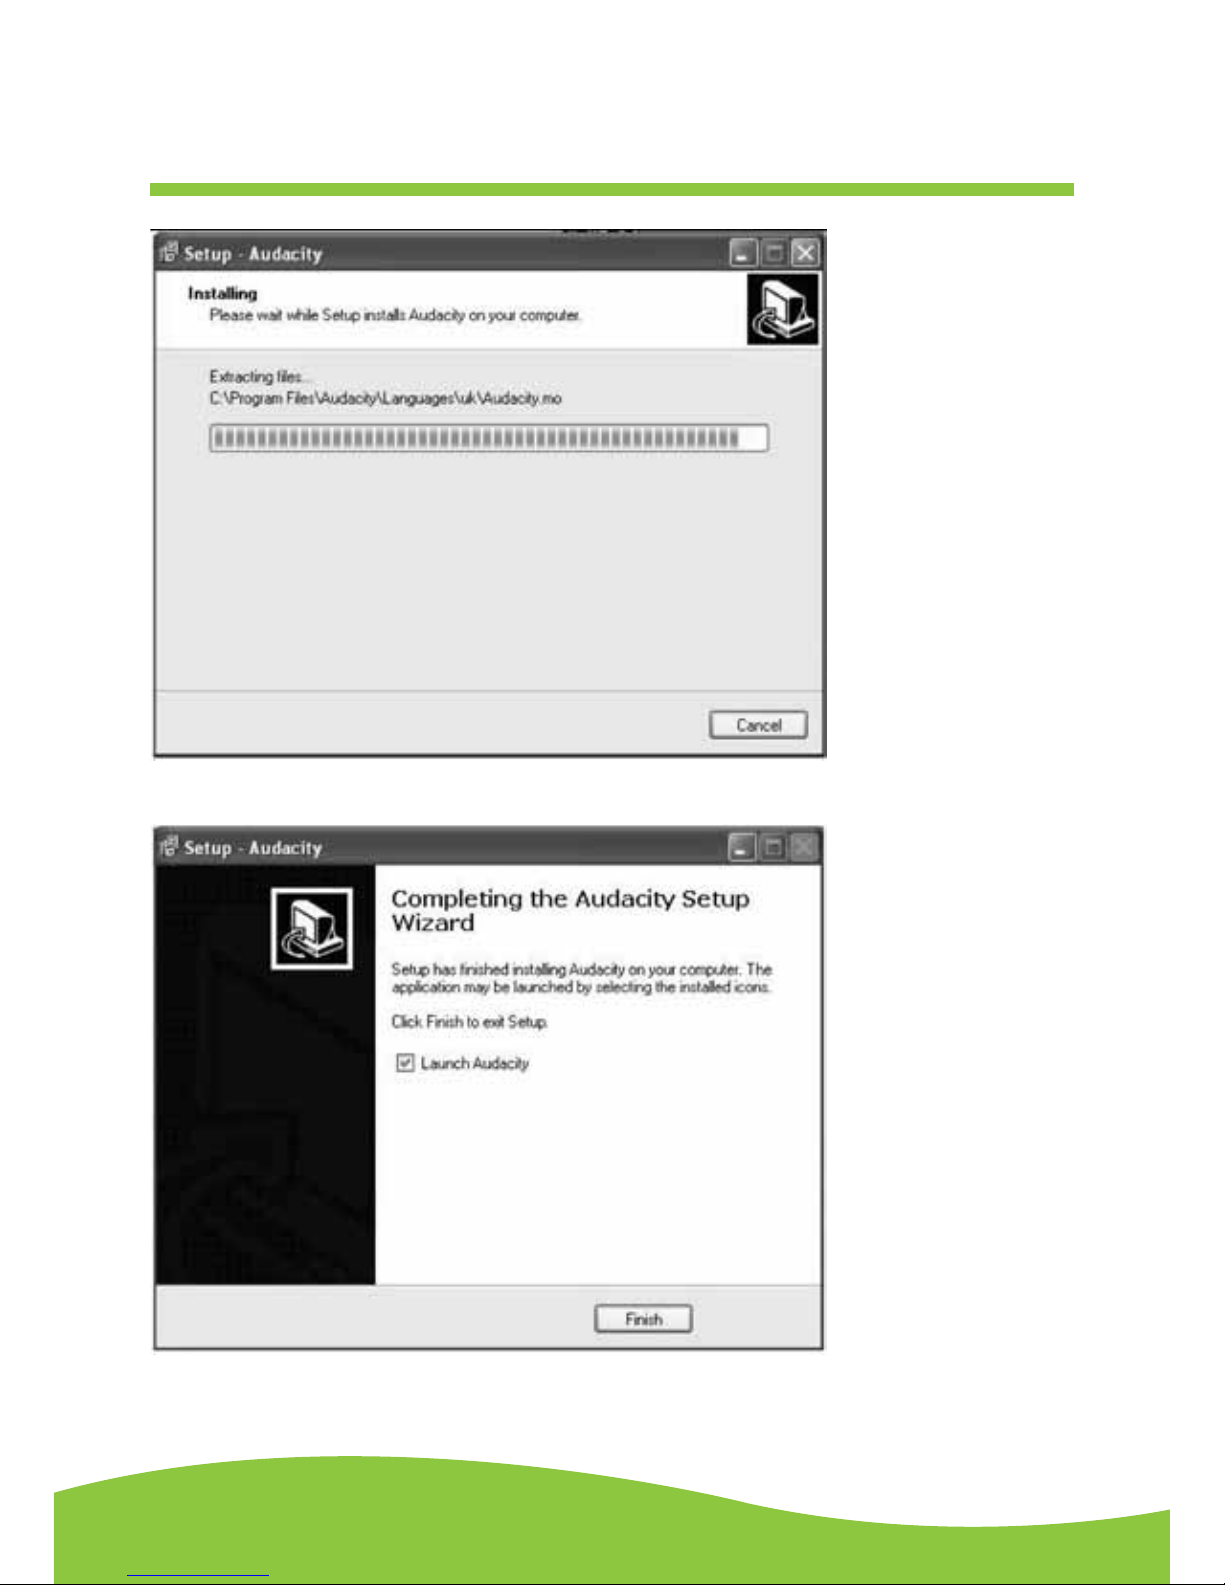
5. Click on Finish to complete installation.
6. You can now open theAudacity software and start recording your files.
(For additional information, visit the Audacity website at http://audacity.sourceforge.net)

After Sales Support TEL: 1300 886 649
18Page
Conguring audacity for Microsoft Windows
Audacity interface
Audacity interface - Settings and controls.

After Sales Support TEL: 1300 886 649
19Page
Audacity control buttons
Using the attribute controls at the top of the screen to go to the beginning, Play, Record, Pause, Stop
and End. Use the File, Edit, View, Project, Generate, Effect andAnalyse menus to Save, Export, and
edit the music.
1. Click the ( ) button to skip to start;
2.Adjust the output volume.
3. Click the ( ) button to play;
4. Click the ( ) button to record;
5. Click the ( ) button to pause the recording;
6. Click the ( ) button to stop the recording;
7.Adjust the input volume.
8. Click the ( ) button to skip to end;
Table of contents


