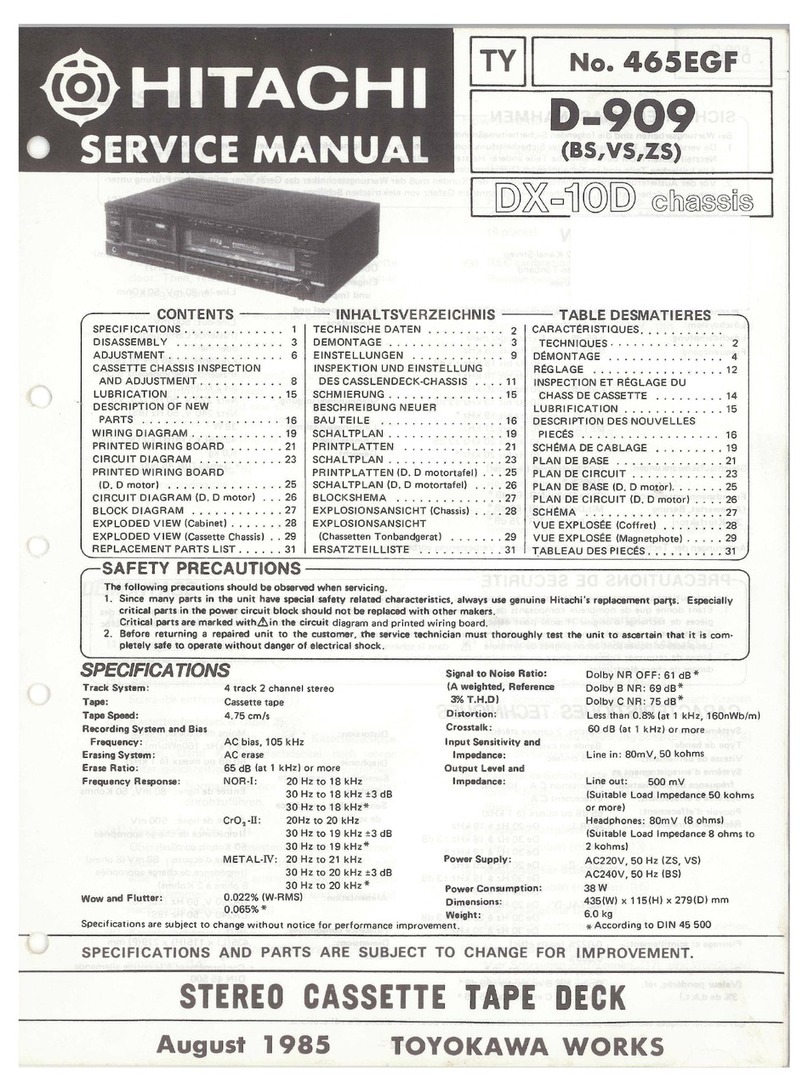
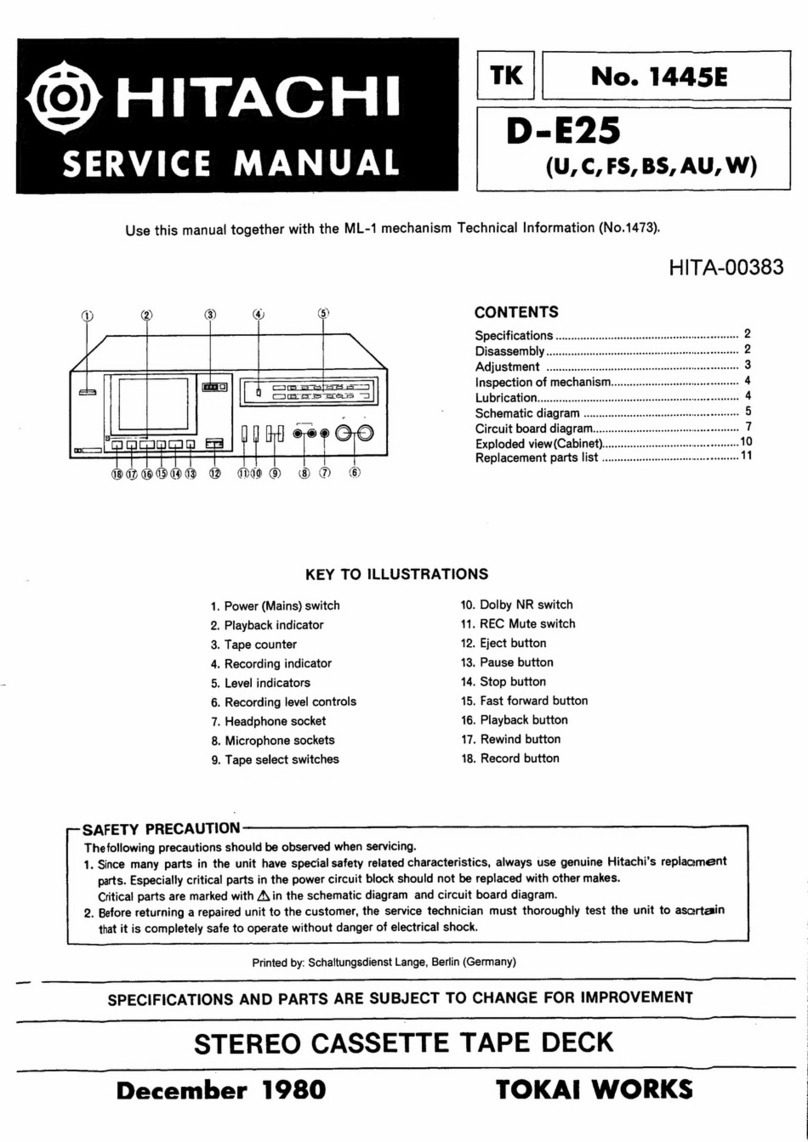
Hitachi D-X10 User manual

STEREO
CASSETTE
TAPE
DECK
i
Model
STEREO-CASSETTEN-TONBANDGERAT
Modell
PLATINE
D’ENREGISTREMENT
A
CASSETTES
STEREO
Modele
PIASTRA
Di
REGISTRAZIONE
A
CASSETTA
STEREO
$=Modello
STEREO
CASSETTEDECK
Model
GRABADORA
DE
CINTA
DE
CASETE
ESTEREOFONICA
)
|
Deutsch
|
English

English
See
pages
80
and
81
for
figures
of
this
unit.
SAFEGUARD
Electrical
energy
can
perform
many
useful
functions.
This
unit
has
been
engineered
and
manufactured
to
assure
your
personal
safety.
Improper
use
can
result
in
potential
electrical
shock
or
fire
hazards.
[In
order
not
to
defeat
the
safeguards,
observe
the
following
instructions
for
its
installation,
use
and
servicing.
FEATURES
¢
Automatic
tape
reversing
for
continuous
with
slim
and
feather
touch
buttons
recording
and
playback
e
Auto/Memory
Rewind
function
Infrared
tape
sensor
detects
the
end
of
the
magnetic
©
A
wide
variety
of
functions
available
for
music
tape
and
the
start
of
the
leader
tape
to
immediately
playing
reverse
tape
running.
The
quick
reversing
mech-
e
Scanaplay
function
(S
&
P)
anism
makes
it
possible
to
continuously
record
or
¢
Digital
Random
Program
Selector
(DRPS)
playback
with
minimum
of
noise
interruption
during
©
Self-program
Search
System
(SPSS)
reversing.
e
Random
Memory
Search
e
ATRS
(Automatic
Tape
Response
Search)
e
Linear
time
counter
system
A
linear
time
counter
which
shows
the
amount
of
The
ATRS
system
in
this
deck
automatically
detects
tape
used
at
a
glance
is
incorporated
so
that
tapes
the
optimum
bias,
equalization
and
recording
level
can
be
used
effectively.
(corresponding
to
the
tape’s
sensitivity)
for
any
tape
e
Manual
equalizer
(REC.
CAL)
in
approximately
10
seconds
using
a
microprocessor
The
deck
can
be
set
to
match
the
characteristics
so
that
every
tape
is
used
in
the
best
possible
con-
of
each
tape
by
manual
operation.
This
makes
it
dition;
this
controls
the
recording
circuit
so
that
fre-
possible
to
obtain
the
desired
tone
quality
as
well
quency
response
is
flat
without
any
unevenness.
as
flat
frequency
response
and
Dolby
NR
cali-
Data
is
held
in
memory
and
can
be
called
up
at
any
bration.
(REC.
CAL:
Record
Calibration)
required
time.
¢
Computer
automatic
recording
mute
function
¢
Record/play
independent
double
Dolby
NR
*
Tape
standby
function
which
automatically
advances
Dolby
NR
circuits
with
independent
record
and
play
the
tape
amplifies
are
provided.
In
addition,
Dolby
C
NR
e
Peak
hold
function
which
can
obtain
an
improved
high-frequency
¢
Tape
counter
automatic
reset
function
response
as
well
as
superb
NR
(noise
reduction)
¢
Full-automatic
stop
function
starting
from
a
low
frequency
is
provided
together
¢
Remaining
scanning
function
with
the
conventional
Dolby-B
NR.
¢
20-segment
wide
range
two-coloured
FL
peak
meter
¢
Remote
control
terminal
{with
an
automatic
peak
holder)
D-X10
can
be
freely
controlled
from
some
distance
away
by
connecting
to
remote
control
unit
RB-100
Noise
reduction
manufactured
under
licence
from
available
separately.
Dolby
Laboratories
Licensing
Corporation.
Two-motor
system
with
uni-torque
DD
motor
“Dolby”
and
the
doubie-D
symbol
are
trademarks
Metal-tape
compatible
3-head
system
of
Dolby
Laboratories
Licensing
Corporation.
4-digit
digital
counter
Light
and
swift
operation
by
computerized
IC
logic
PRECAUTIONS
¢
This
unit
is
designed
so
that
other
units
can
be
stacked
e
When
using
with
other
components,
any
component
on
it,
but
do
not
stack
extremely
heavy
objects
on
it.
which
can
produce
induction
noise
which
can
induce
e
Never
use
any
strong
detergent
or
solvent
for
clean-
hum
should
be
as
far
as
possible
from
this
deck.
ing
the
cabinet
of
this
unit,
because
it
could
lead
to
Bias
leakage
from
this
deck
during
recording
may
damage
of
the
surface
finish.
cause
beats
during
reception
of
AM
broadcasts,
so
¢
Protect
the
unit
against
excessive
heat
(e.g.
direct
be
careful
in
placement
of
this
deck
with
respect
to
sunlight),
dust
and
moisture.
the
tuner;
when
beats
occur,
move
them
away
from
each
other
as
far
as
possible.
There
is
no
problem
in
FM-reception.
Be
sure
not
to
open
the
cabinet.
Be
careful
not
to
damage
the
power
cord.
Be
sure
to
take
hold
of
the
plug
when
pulling
it
out;
do
not
pull
the
cord.
CONNECTIONS
See
diagram
on
page
80.

NAMES
OF
INDIVIDUAL
PARTS
AND
THEIR
FUNCTIONS
See
diagram
@)
on
page
80.
@)
Power
switch
@)
Timer
switch
Be
sure
to
set
the
timer
switch
to
‘‘OFF’
except
when
using
it
to
record
or
play
back.
®
When
power
is
supplied
with
the
switch
set
to
the
REC
or
PLAY
position
before
starting
recording
or
playback,
the
playback
indicator
flashes
a
warning
for
approx.
4
sec.
The
unit
then
enters
the
record
or
playback
mode
automatically,
so
be
careful.
@)
Auto/Memory
rewind
switch
@)
ATRS
button
©)
ATRS
start
button
@)
Manual
button
@
Recording
calibration
test
switch
Recording
calibration
controls
(left/right)
@)
Equalization
control
Equalization
test
switch
(1)
Output
level
control
This
is
used
to
adjust
the
output
levels
of
line
out
jacks
and
headphones
jack.
For
convenience,
use
this
control
to
set
the
output
to
the
same
level
as
that
of
the
tuner,
etc.
(2
Recording
level
control
43)
Monitor
switch
TAPE
(
[1):
Use
this
position
when
playing
back
a
tape
or
monitoring
sound
during
recording
(playback
of
sound
just
recorded).
Be
sure
to
set
the
switch
to
“TAPE”
for
playback;
if it
is
set
to
‘SOURCE’,
no
sound
will
be
heard.
SOURCE
(=):
Use
this
position
to
set
the
recording
level
or
listen
to
the
source
sound
(input
signal
from
the
LINE
IN
(REC)).
44)
Headphones
jack
(5)
Pause
button/Pause
indicator
Record
button/Recording
indicator
q?)
Recording
mute
button
Playback
button
Fast
forward
button
@)
Rewind
button
@i)
Stop
button
@2
Cassette
holder
@3)
Eject
button
@4)
Playback
direction
indicator
@
Operating
Instructions
The
automatic
tape
reversing
mechanism
in
this
deck
can
specify
the
tape
running
direction
as
desired.
Operating
instructions
are
given
below
for
correct
recording
and
playback
operations.
Playback
(¥),
Fast
forward
(
»®)
and
Rewind
(
€4)
in
the
forward
direction
are
explained.
The
above
correspond
to
Playback
(<4),
Fast
forward
(44)
and
Rewind
(
>»)
in
the
reverse
direction.
@5)
Mode
indicator
26
Tape/Time
counter
This
counter
displays
the
tape
transport
amount
or
tape
transport
time.
(This
is
selected
by
the
Counter
display
select
switch
@
.)
Tape
Counter:
Counted
up
in
the
forward
direction
and
counted
down
in
the
reverse
direction.
(It
is
set
to
9999
when
counting
down
from
0000.)
Time
Counter:
The
time
counter
indicator
lights
and
the
transport
time
is
displayed
in
minutes
and
seconds.
In
fast
forward
and
rewind
it
is
converted
to
an
elapsed
time
counter
during
play.
It
is
counted
up
in
the
forward
direc-
tion
and
counted
down
in
the
reverse
direction.
(It
is
set
to
negative
when
it
is
counted
down
from
0000.)
@)
Time
counter
indicator
Pause
indicator
@9
Record
indicator
60
Playback
indicator
6)
Tape
indicator
62
Dolby
NR
indicators
@3
Peak
level
indicator
It
displays
the
recording
level
in
recording
and
the
playback
level
in
playback.
—40
dB
to
+10
dB
is
displayed
in
20
segments.
34)
Monitor
indicator
@5)
Multiplex
switch
Press
this
switch
when
recording
an
FM
stereo
broadcast
using
the
Dolby
NR
circuit.
@6
Peak
hold
switch
When
the
power
is
turned
on
and
this
switch
is
not
in
the
depressed
position,
the
deck
enters
the
peak
hold
auto
reset
state
(the
peak
level
is
held
for
2
seconds
during
recording
and
playback),
and
2
seconds
later,
this
state
is
released.
When
the
peak
hold
switch
is
pressed,
the
deck
enters
the
peak
hold
nonreset
state
(the
peak
level
during
recording
and
playback
is
held
at
maximum),
and
when
the
switch
is
pressed
again,
the
peak
hold
state
is
released.
When
the
peak
hold
switch
is
pressed
again,
the
deck
enters
the
peak
hold
auto
reset
state.
Note:
Peak
hold
occurs
within
the
range
from
—5
dB
to
+10
GB.
6?)
Dolby
NR
B/C
select
switch
Dolby
NR
switch
ON
(8):
Set
to
this
position
when
recording
utilizing
the
Doiby
NR
system
or
playing
back
cassette
tapes
recorded
through
a
Dolby
NR
system.
OFF
(£1):
Set
to
this
position
when
playing
back
cassette
tapes
not
recorded
through
a
Dolby
NR.
system
or
making
a
recording
not
utilizing
the
Dolby
NR
system.
Dolby
encoded
pre-recorded
cassette
releases
are
widely
available,
and
should
be
played
back
with
appropriate
Dolby
noise
reduction
selected.
Cassettes
recorded
with
Dolby
B-type
noise
reduction
are
identified
on
the
box’s
spine
and
the
cassette
label
with
the
D0)
symbol,
and
on
the
liner’s
front
cover
with
the
[]{][potaysysrem]®
sym-
bol.
Cassettes
recorded
with
Dolby
C-type
noise
reduction
are
identified
with
the
OO
and
[()[wateve
na]
symbols.
@9
Tape
select
switches
Set
these
switches,
matching
them
to
the
tape
to
be
recorded
or
played
back.
In
order
to
avoid
faulty
record-
ing,
these
switches
should
be
checked
before
a
recording
is
made.

@
Memory
button
Program
button
@
Scanaplay
button
Counter
display
select
switch
Selects
the
counter
display,
tape
counter
or
time
counter
mode.
Recording
mute
indicator
Counter
reset
button
The
tape
counter
or
time
counter
display
(only
the
current
display)
is
reset
to
‘0000’
when
this
button
is
pressed.
Remaining
scan
indicator
@
Mode
selector
Infrared
sensor
in
the
automatic
tape
reversing
mechanism
detects
the
joint
of
the
magnetic
tape
(recording
part)
and
the
leader
tape
(non-recording
part)
to
automatically
change
the
tape
running
direction
according
to
the
position
of
the
mode
selector.
Set
the
mode
selector
prior
to
oper-
ation
as
desired.
Note:
The
tape
is
not
automatically
reversed
within
about
10
seconds
when
the
Playback
button
is
pressed.
Certain
types
of
cassette-tapes
may
not
be
auto-
matically
reversed.
Becomes
both
way
mode
{[
==")
]
when
power
is
turned
ON.
When
a
tape
with
a
long
leader
is
used,
the
tape
may
reverse
when
the
end
of
the
leader
is
reached.
Caution:
The
automatic
reversing
mechanism
may
malfunc-
tion
in
the
following
cases.
¢
Dust
or
foreign
matter
is
collected
on
the
tape.
*
The
tape
is
wrinkled.
¢
A
mark
or
character
is
printed
on
the
tape.
¢
The
cassette
holder
is
exposed
to
an
intense
light.
*
A
heavy
shock
is
given
to
this
deck.
Some
cassette
tapes
automatically
reverse
at
the
end
of
the
leader
tape.
[7]
One
way
mode
Recording
or
playback
is
made
only
in
the
forward
or
reverse
direction.
The
tape
automatically
stops
at
its
end
when
recording
or
playback
is
completed.
[.—*)]
Both
way
mode
When
recording
or
playback
in
the
forward
direction
is
completed,
it
is
resumed
in
the
reverse
direction.
The
tape
automatically
stops
at
its
end
when
recording
or
playback
is
completed.
Caution:
¢
Be
sure
to
select
Forward
playback
button
(8)
first
for
recording
or
playback
in
the
both
way
mode
[
=_™)].
e
Check
the
“plastic
tab’’
of
the
cassette
tape
(on
the
reverse
side)
is
present
before
recording.
If
the
“plastic
tab’’
is
broken
off,
playback
is
made
in
the
reverse
direction
after
recording
in
the
forward
direction
is
completed.
[c">
]
Endless
mode
Playback
continues
from
the
forward
direction
to
the
reverse
direction
and
vice
versa
until
the
Stop
button
is
pressed.
In
recording,
however,
continuous
playback
is
made
when
recording
in
the
reverse
direction
is
completed.
Reversing
ceases
after
sixteen
repetitions.
Caution:
The
automatic
reversing
mechanism
operates
when
the
selector
is
set
to
either
‘‘both
way
mode’
[
="
)]
or
“endless
mode”
[CZ™)].
Line
in
jacks
Line
out
jacks
60
Remote
control
jack
Accuracy
of
Time
counter
@
The
time
counter
used
in
this
deck
is
not
a
clock,
so
there
will
be
an
error
between
real
tape
running
time
and
counter
indication.
The
error
will
differ
depending
on
the
type
and
length
of
the
tape.
The
table
below
shows
the
error
range
of
the
counter
in-
dication
with
respect
to
the
actual
running
when
one
side
of
a
Hitachi
tape
is
run.
Use
this
table
as
a
standard
when
using
the
counter.
UD
60.90
UD
46
ER
60.90
ER
46
SR
60.90
SR
46
EX
60.90
EX
46
SX
60.90
SX
46
-_,
a
al
ME60
ME
46.90
+--—->
+-——-+>
4——____|
+
+
—+—__--__}
4—___.
—3
min
—2min—1t
min
0
+1
min
+2
min
+3
min
Time
indicated
is
more
than
the
actual
tape
run
time.
Time
indicated
is
tess
than
the
actual!
tape
run
time.
6)
Voltage
Selector
POWER
(MAINS)
REQUIREMENT
To
Set
Power
(Mains)
Voltage:
1.
This
unit
can
be
used
with
a
power
(mains)
voltage
of
100
to
110
V,
115
to
127
V,
200
to
220
V
or
230
to
250
V.
Before
operating,
be
sure
to
check
that
it
is
set
to
your
local
power
(mains)
voltage.
2.
Turn
the
voltage
selector
61)
to
your
local
power
(mains)
voltage
with
a
screwdriver
until
the
selector
clicks.
(See
diagram
on
page
80.)
Notes:
1.
Before
turning
the
selector,
disconnect
the
AC
power
(mains)
lead
from
the
AC
outlet
with
this
unit
in
stop
mode.
2.
Be
sure
not
to
turn
the
selector
with
a
thin
screwdriver,
etc.
by
force.
The
selector
may
be
broken
and
the
deck
will
not
operate.
3.
When
inserting
the
mains
plug
into
the
AC
outlet
supplying
100
—
110/115
—
127
V,
insert
the
plug
with
adaptor
connected
to
it.
CASSETTE
INSERTION
When
the
Eject
button
@
is
pressed
with
the
unit
in
the
STOP
mode,
the
cassette
holder
comes
out
toward
you.
Insert
the
cassette
with
the
exposed
tape
down,
then
close
the
cassette
holder.
For
cassette
removal,
press
the
Eject
button
@3)
with
the
unit
in
the
STOP
mode.

Recording/
playback
of
a
cassette
with
a
long
leader
tape
When
you
record
or
play
back
a
cassette
with
a
long
leader
tape
at
its
start,
the
tape
may
be
reversed
when
the
leader
tape
at
the
start
is
detected.
With such
cassettes,
perform
recording
and
playback
in
the
one
way
mode
[<7]
or
after
feeding
past
the
leader
tape.
It
is
convenient
to
use
the
tape
standby
function
(entered
by
pressing
the
fast
forward
(
»»)
and
rewind
(
44)
buttons
simultaneously)
because
the
leader
tape
is
fed
automatically.
Be
sure
to
do
this
when
making
a
timer
recording.
RECORDING
1.
Supply
power
to
the
amplifier
and
set
the
Function
switch
to
the
source
(broadcast,
disc,
etc.)
to
be
recorded.
2.
Switch
the
Power
switch
(@)
ON
(
=&)
and
insert
the
cassette
tape
in
the
Cassette
holder
@2,
then
close
the
Cassette
holder
@2.
3.
Set
the
Auto/Memory
Rewind
switch
to
the
re-
quired
position.
Generally
set
it
to
‘OFF’.
4.
Set
the
Tape
select
switches
@9
according
to
the
tape
to
be
recorded.
Set
the
Mode
selector
to
desired
position.
Set
the
Dolby
NR
switch
@8
to
desired
position.
Set
the
Dolby
NR
B/C
select
switch
@?)
to
desired
position
and
then
set
the
Monitor
switch
(3
to
“SOURCE”
(
=).
8.
While
holding
the
Pause
button
(
I),
push
either
the
»
or
<
Playback
button
depending
on
the
direction
in
which
you
want
to
record.
(The
Playback
direction
indicator
lights
and
the
Pause
indicator
lights.)
9.
When
Pause
button
45)
is
pressed
while
pressing
-
Record
button
(6,
the
unit
is
set
to
the
recording
standby
mode.
(The
Record
indicator
lights,
and
the
Pause
indicator
lights.)
(Press
the
ATRS
button
when
recording
using
the
tape
character-
istics
data
stored
in
the
ATRS
system.
(Refer
to
pages
10
for
details.)
Press
the
Manual
button
when
recording
without
the
ATRS
system.)
10.
Adjust
the
Recording
level
control
(2
so
that
the
Peak
level
indicator
@3)
does
not
exceed
+3
dB
(Metal:
6
dB)
at
maximum
input.
11.
Press
the
Playback
button
for
the
direction
set
with
8
and
recording
starts.
Caution:
If
the
Playback
button
of
the
Playback
direction
indicator
for
the
direction
not
turned
on
is
pushed,
playback
mode
starts,
inhibiting
recording.
12.
When
it
is
desired
to
stop
recording
temporarily,
press
the
Pause
button
(5).
Press
the
Playback
button
8
to
continue
recording.
13.
To
stop
recording,
press
the
Stop
button
@i).
Caution:
Bias
may
leak
from
this
unit
during
re-
cording;
when
receiving
an
AM
broadcast
in
this
state,
a
whistling
noise
may
occur
due
to
beat
interference.
When
this
oc-
curs,
separate
the
tuner
or
radio
from
this
deck.
(There
is
no
problem
when
receiv-
ing
an
FM
broadcast.)
Oyo)
¢
Record
monitoring
Since
this
unit's
REC
and
PLAY
heads
are
indepen-
dent,
the
original
sound
being
recorded
can
be
monitored
by
switching
the
Monitor
switch
to
‘“SOURCE”
during
recording,
and
the
sound
already
recorded
on
the
tape
can
be
monitored
with
the
Monitor
switch
in
the
“TAPE”
position.
e
AUTOMATIC
RECORDING
MUTE
FUNCTION
When
the
Recording
mute
button
is
pressed
during
recording,
the
unit
enters
into
nonsignal
mode
for
approx.
4
seconds
flashing
the
recording
mute
in-
dicator,
and
then
automatically
enters
the
recording
pause
mode.
Press
Playback
button
(8)
to
continue
recording.
When
Recording
mute
button
(7)
is
pressed
con-
tinuously,
nonsigna!l
mode
continues
for
more
than
4
seconds
then,
when
released,
the
unit
automatically
enters
the
recording
pause
mode.
When
a
non-
recorded
section
of
4
seconds
or
shorter
is
desired,
press
Pause
button
(5)
at
the
position
desired
after
pressing
Recording
mute
button
(7).
This
is
convenient
for
cutting
narrations
or
leaving
gaps
between
tunes.
When
Recording
mute
button
(7)
is
pressed
except
while
recording,
it
functions
the
same
as
the
pro-
gramming
button.
This
function
enables
to
specify
the
number
of
tunes
to
be
skipped
by
DRPS
(Digital
Random
Program
Selector)
with
the
remote
control.
Caution:
The
source
sound
can
be
heard
from
the
headphones
or
speakers
with
the
Monitor
switch
set
to
“SOURCE”
{
=)
in
the
non-
signal
recording
mode.
¢
REMAINING
SCANNING
FUNCTION
C-60
and
C-90
tapes
are
standard
for
remaining
scan.
When
a
new
recording
is
desired
to
be
added
to
the
end
of
a
recorded
tape,
set
the
running
direction
(see
item
8
of
RECORDING),
and
press
the
Counter
display
select
switch
to
obtain
the
time
counter
mode,
then
press
the
record
and
fast
forward
but-
tons
simultaneously.
The
unit
is
automatically
set
to
““one
way
mode”,
fast
forwards
the
tape
to
one
end
and
then
searches
the
nonrecorded
portion
of
the
tape
while
being
rewound.
(The
remaining
scan
in-
dicator.
lights
at
this
time.)
Upon
detecting
the
recorded
portion,
the
tape
advances
for
about
4
seconds
(equivalent
to
replay
status)
and
enters
the
recording
pause
state.
The
tape
remaining
time
(recordable
time)
is
indicated.
Add
a
new
recording
referring
to
this.
When
the
additional
recording
is
completed,
press
the
counter
reset
button
in
the
time
counter
display
mode
to
release
the
remaining
scan
indicator
and
the
tape
remaining
time
indicator.
Note:
The
tape
remaining
time
indicator
is
also
released
in
the
following
cases.
e¢
When
the
tape
running
direction
is
changed.
¢
When
a
tape
without
a
signal
recorded
on
it
is
scanned,
it
is
rewound
up
to
the
start
and
stops,
and
the
remaining
scan
is
released.
English

@
ERASING
When
a
recording
is
being
made,
any
sound
already
on
the
tracks
is
automatically
erased
before
the
new
recording
is
made.
Erasure
is
accomplished
only
when
the
deck
is
in
the
recording
mode.
If
you
wish
to
erase
a
tape
without
making
a
new
recording,
set
the
Record-
ing
level
control
(2
at
minimum
“0”
and
the
Tape
select
switches
@9)
to
the
position
matching
with
each
tape.
Press
the
Playback
button
and
Record
button
simultaneously.
PLAYBACK
1.
Switch
the
Power
switch
()
ON
(=)
and
insert
the
cassette
tape
in
the
Cassette
holder
@2,
then
close
the
Cassette
holder
@
.
.
Set
the
Mode
selector
@)
to
desired
position.
.
Set
the
Tape
select
switches
@9
according
to
the
tape
to
be
played
back.
.
Set
the
Dolby
NR
switch
@8
to
ON
or
OFF
and
the
Dotby
NR
B/C
select
switch
67
to
B-TYPE
or
C-TYPE
depending
on
whether
the
tape
has
been
recorded
with
Dolby
OFF
or
Dolby
B,
Dolby
C
type
NR
system.
Be
sure
to
set
the
Monitor
switch
to
“TAPE”
(11).
Tape
playback
sound
is
not
heard
with
the
switch
in
the
“SOURCE”
(
=)
position.
.
Press
the
Playback
button
(
»
or
4)
to
start
playback.
.
When
a
temporary
halt
is
desired
during
playback,
press
the
Pause
button
(5),
then
press
the
Playback
button
(8)
(
®
or
<)
to
restart
playback.
Wh
£
ao
an
7.
To
stop
playback
at
any
other
time,
press
the
Stop
button
@)).
The
tape
counter
indicates
‘’End’’
when
auto-stop
occurs
at
tape
end.
Note:
During
playback,
the
playback
direction
can
be
changed
by
pressing
the
Playback
button
(8)
(
>
or
<4)
at
any
time.
Caution:
¢
This
unit
cannot
use
endless
tapes.
¢
When
the
Output
level
control
(})
is
set
to
minimum,
no
sound
comes
out.
Playback
direction
indicator
@4
When
the
tape
is
running
in
the
playback
or
record
mode,
Playback
direction
indicator
@4
lights,
acting
as
a
tape
running
direction
indicator.
FAST
FORWARD
AND
REWIND
To
advance
a
tape
rapidly
to
any
desired
point,
press
the
Fast
forward
button
(9.
To
stop
the
tape,
press
the
Stop
button
@j).
Tape
may
be
rewound
rapidly
by
pressing
Rewind
but-
ton
@0.
To
stop
tape
rewind,
press
Stop
button
@)).
M@
TAPE
COUNTER
AUTOMATIC
RESET
FUNC-
TION
Press
Rewind
button
@0
to
rewind
the
tape
to
its
start
and
to
automatically
reset
the
Tape
counter
@6)
to
““0000"’.
When
the
power
is
turned
on,
‘’0000”
is
indicated.
@
TAPE
STANDBY
FUNCTION
Decide
the
direction
of
tape
transport
then
press
both
Fast
forward
button
(9
and
Rewind
button
@0
simul-
taneously.
The
pause
indicator
blinks,
the
tape
will
be
fully
re-
wound
to
in
the
direction
in
which
the
direction
in-
dicator
is
blinking,
it
fast
forwards
the
leader
tape
then
stops.
VARIOUS
TUNE
SELECTIONS
Tune
selection
can
be
either
in
forward
or
reverse
direc-
tion.
Select
the
tune
by
1st
matching
the
Playback
direction
indicator
in
the
desired
direction
(Refer
to
item
8
of
‘‘RECORDING’”).
When
operating
in
reverse,
use
the
Playback
button
{
<4),
Fast
forward
button
(
«4
)
and
the
Rewind
but-
ton
(
be
).
@
SPSS
(Self
Program
Search
System)
Detecting
the
beginning
of
the
tune
played
back
at
present
or
the
next
tune
.
Play
back
the
tape.
-
When
it
is
desired
to
listen
to
the
present
tune
again,
press
the
Rewind
button
@0
while:
pressing
the
Playback
button
(8.
When
it
is
desired
to
listen
to
the
next
tune,
press
the
Fast
forward
button
while
pressing
the
Playback
button
(@.
N—
Note:
While
searching
(through
rewinding
or
fast
forwarding),
the
tape
counter
indication
is
set
to
01".
@
DRPS
(Digital
Random
Program
Selector)
When
it
is
desired
to
skip
some
tunes
in
either
direction
to
listen
to
a
required
tune.
1.
Play
back
the
tape.
2.
Count
the
number
of
tunes
ahead
or
behind
on
the
desired
track,
(See
“How
to
count
the
number
of
tunes.’’)
and
display
that
number
on
the
Tape
counter
@,
using
the
Program
button
@).
3.
Press
the
Rewind
button
@)
when
returning
to
a
previous
tune,
and
press
the
Fast
forward
button
when
skipping
forward.
4.
The
desired
tune
is
automatically
played
back
from
the
beginning.

How
to
count
the
number
of
tunes
When
returning
to
a
previous
tune
Direction
of
tape
transport
ist
une
Yj
2nd
tune
31d
tune
Vf
ath
tune
V7
NY
\SZ4
fi
When
returning
to
a
previous
tune,
count
the
tune
now
being
played
back
as
1st
tune.
(
Tune
played
back
at
present
When
skipping
tunes
Direction
of
tape
transport
mwae®
wy
f&Y
When
skipping
tunes,
count
number
of
tunes
starting
at
the
next
tune
as
1st
tune,
2nd
tune
....
Tune
being
played
back
at
present
Pausing
After
Search
When
the
Pause
button
(5)
is
pushed
during
SPSS
or
DRPS,
the
Pause
indicator
lights
and
the
tape
stops
at
the
beginning
of
the
selected
tune.
When
the
Playback
button
is
pushed,
playback
begins.
Note:
SPSS
and
DRPS
operate
only
in
the
listening
direction
but
not
in
the
reverse
direction.
@
SCANAPLAY
1.
For
listening
to
only
the
desired
tune
Press
the
Scanaplay
button
@2.
‘‘A-00"
is
indicated
on
the
Tape
counter
@6.
The
tape
is
automatically
rewound
and
starts
play
from
the
beginning
of
the
tape.
When
the
tune
is
being
played
back,
‘’A”
flashes
in
the
tape
counter.
.
The
beginning
of
each
tune
is
played
back
for
about
10
sec.
While
‘‘A”’
is
flashing,
the
number
of
tune
on
the
tape
counter
indicates
‘’A-01,
‘‘A-02’',
‘“A-03”
re
sequentially.
.
Press
the
Memory
button
@0
at
that
time
to
memorize
the
tune
you
desire
to
play
back.
When
the
Memory
button
is
pressed,
lighting
“A”
stays
ON
in
the
tape
counter
and
the
tape
fast
forwards
to
the
next
tune.
When
the
10
sec
playback
is
over,
it
automatically
fast
forwards
to
the
next
tune,
and
repeats
the
same
until
the
end
of
the
tape.
When
the
Fast
forward
button
is
pressed
during
the
10
sec
period,
the
tape
playback
stops
auto-
matically
and
it
fast
forwards
to
the
next
tune.
The
range
of
tune
selection
is
from
the
tune
where
the
Memory
button
was
pressed
first
to
the
15th
tune.
If
no
tune
is
memorized
in
the
above
course,
tunes
within
the
range
of
16th
through
30th
can
be
mem-
orized
(display
will
be
‘01
—
‘’15’’).
If
no
tune
is
memorized
but
only
listened
to
introductions,
the
tape
stops
at
its
end.
4.
Press
the
Rewind
button
@0
when
the
last
of
the
desired
tunes
is
completed.
(The
tape
is
automatically
rewound
after
the
15th
tune
from
the
first
selected.)
‘’P’’
on
the
Tape
counter
@@
lights
when
the
tape
starts
to
rewind.
The
tape
is
rewound
to
the
tune
where
the
Memory
button
@
was
pressed
first,
and
starts
playback
automatically.
If
a
tune
is
entered
in
the
memory,
even
if
Rewind
button
@0
is
not
pushed,
automatic
rewinding
begins
when
the
tape
end
is
reached
and
playback
begins
automatically.
.
When
the
Fast
forward
button
is
pressed
during
the
10
sec
period,
the
tape
playback
stops
auto-
matically
and
it
fast
forward
to
the
next
tune.
When
the
Rewind
button
@0
is
pushed,
the
tape
is
transported
to
the
first
tune
recorded
in
the
memory.
.
When
playback
of
memorized
tune
is
completed,
the
tape
is
rewound
until
its
beginning
and
then
stops.
If
the
memory
isn’t
used
(when
only
the
tune’s
in-
troduction
is
heard),
the
tape
stops
at
the
end
of
the
tape.
While
memory
entered
is
automatically
played
if
the
Fast
forward
button
@9
is
pushed
when
memorized
tunes
are
being
played,
the
tape
fast
forwards
to
the
next
tune
entered
in
the
memory
and
this
tune
is
played.
If
the
Rewind
button
@0
is
pushed,
the
tape
returns
to
the
first
tune
entered
in
the
memory
and
begins
playing
it.
Cautions:
Perform
scanaplay
only
on
the
side
of
the
Playback
direction
indicator
@4).
All
memories
are
cleared
by
pressing
the
Stop
button
While
Scanaplay
is
functioning,
the
Pause
button
@§
does
not
work
even
if
pressed.
RANDOM MEMORY
SEARCH
For
listening
to
tunes
in
a
desired
order
.
Starting
Random
Memory
Search
Push
Program
button
@1)
to
display
the
number
of
the
tune
you
want
to
hear
on
the
Tape
counter
@6).
With
each
push
of
the
Program
button,
the
number
displayed
increases
by
one.
For
example,
‘’01
—»
“02”
—»
''03”
etc.
(A
maximum
of
fifteen
tune
numbers
can
be
displayed.)
.
Entering
Tunes
in
the
Memory
Push
the
Memory
button
@0.
After
the
order
of
the
tune
to
be
played
‘‘P-01”
flashes
on
the
Tape
counter
@6,
the
number
of
the
selected
tune
is
indicated.
.
Repeat
selection
(as
described
in
1)
and
memory
entry
(as
described
in
2)
until
the
tune
numbers
and
tune
order
are
entered.
Up
to
fifteen
tunes
can
be
entered
in
the
memory.
When
fifteen
tunes
have
been
entered
in
the
memory,
“’P
End’”’
is
indicated
on
the
Tape
counter
@@.
(If
you
want
to
listen
to
the
same
tune
more
than
once,
push
the
Memory
button
@
(see
2)
as
many
times
as
you
want
to
enter
the
tune
in
the
memory.
‘’P-01’'
will
flash
and
increase
by
one
digit
every
time
the
Memory
button
@
is
pushed.
Continue
pushing
the
button
for
as
many
times
as
you
want
to
hear
the
tune.)
English

4.
When
the
last
tune
is
entered
in
the
memory
(or
when
fifteen
tunes
have
been
entered),
push
either
the
Fast
forward
button
or
the
Rewind
button
After
being
rewound
to
the
beginning,
the
tape
is
fast
forwarded
to
the
memorized
tune
and
play
begins.
Then
the
tape
is
either
fast
forwarded
or
re-
wound
to
automatically
play
the
tunes
in
the
order
they
are
memorized.
5.
When
automatically
play
of
the
selected
tunes
is
over,
the
tape
stops
automatically.
In
case
memories
are
made
up
to
the
15th
tune,
press
the
Stop
button
@)
when
the
automatic
play
is
finished.
While
memory
entered
is
automatically
played
or
operation
the
same
as
“’SCANAPLAY’”
will
be
performed.
¢
Memory
Readout
Push
the
Program
button
and
the
Memory
button
@
at
the
same
time.
On
the
Tape
counter
Q),
the
order
of
the
selected
tune
flashes,
then
the
tune
number
is
indicated.
This
process
repeats
until
the
order
and
number
of
the
last
tune
entered
are
indicated.
¢
Memory
Clear
When
the
Stop
button
@)
is
pushed
once
lightly,
the
last
tune
entered
in
the
memory
is
erased.
The
order
of
the
tune
flashes
quickly
and
the
number
of
tune
preceding
the
tune
erased
lights.
Holding
the
Stop
button
@i)
down
for
more
than
one
second
completely
erases
all
the
tunes
in
the
memory.
The
Tape
counter
indication
@6
also
changes.
Caution:
¢
Random
Search
is
possible
only
in
the
direction
shown
by
the
lighted
Playback
direction
indicator
#
When
Random
Memory
Search
is
operating
(for
replay
during
Fast
forward
or
Rewind)
and
the
Stop
button
@)
is
pushed,
operation
stops
and
the
memory
is
erased.
For
the
Search
function
to
operate
properly,
there
must
be
non-recorded
portions
of
tape
for
the
function
to
detect
and
operate
on.
Comparatively
long
non-recorded
portions
are
needed
for
this
purpose
(longer
than
3
seconds).
The
following
are
examples
of
possible
causes
of
incorrect
operation:
¢
Tapes
on
which
recorded
sections
(conver-
sations,
meetings,
etc.)
are
not
clearly
dis-
tinguishable.
¢
Tapes
where
the
interval
between
tunes
is
short
(less
than
3
seconds).
e
When
the
unit
is
operated
close
to
a
TV
set.
e
When
the
search
operation
has
started
close
to
the
beginning
or
end
of
a
tune.
¢
When
the
Tape
select
switch
@9
is
not
proper-
ly
set
for
the
tape.
When
making
a
tape
to
use
with
the
Search
func-
tion,
use
the
Recording
mute
button
(7)
to
leave
gaps
between
tunes.
AUTO
REWIND/MEMORY
REWIND
*
Set
the
Auto/Memory
rewind
switch
@)
to
“STOP”
or
“PLAY”.
@
Auto
Rewind
Operates
only
when
the
tape
is
running
in
forward
in
the
one
way
mode
[
=—
].
When
the
tape
is
taken
up
to
the
end,
it
can
be
rewound
up
to
the
start
and
then
automatically
stopped
(Auto
Rewind
Stop),
or
it
can
be
rewound
to
the
start
and
then
played
back
(Auto
Re-
wind
Play)
depending
on
the
position
of
the
Auto/Memory
rewind
switch
@).
¢
To
rewind
the
tape
to
its
start
after
recording
(or
playing)
the
tape
to
its
end:
Tape
Tape
start
end
Set
the
|
|
switch
to
Recording,
play
or
fast
forward
Rewind

¢
To
rewind
the
tape
to
its
start
and
play
after
recording
(or
playing)
to
the
end:
(Tape
is
played
back
repeatedly
16
times.)
Recording,
play
or
fast
forward
Set
the
switch
to
Rewind
Auto
rewind
operation
list
(in
the
one
way
mode
[2
))
AUTO/
MEMORY
Pees
REWIND
AT
TAPE
END
.....
SWITCH
SETTING
OFF
Stop
(AUTO
STOP)
Rewind»
Stop
(AUTO
Recording
STOP
|
stop)
*
Rewind»
Play»
Rewind>
PLAY
Play
....
(repeated)
OFF
Stop
(AUTO
STOP)
Rewind»
Stop
(AUTO
Play
STOP
|
stop)
*
Rewind»
Play®
Rewind»
|
PLAY
Play
....
(repeated)
OFF
—
+
Stop
(AUTO
STOP)
STOP
ss
Play»
Rewind
PI
PK
*
Plays
Rewin
jay»
PLAY
Rewind®
Play
....
(repeated)
|
OFF
Stop
(AUTO
STOP)
Rewind»
Stop
(AUTO
Fast
forward
pice
STOP)
PLAY
*
Rewind»
Plays
Rewind®
|
Play
....
(repeated)
*
Tape
is
played
back
repeatedly
16
times.
**
Operates
also
in
the
|
[=)
|
and
[
C=)
|
modes.
@
Memory
Rewind
Operates
when
the
tape
is
running
in
the
forward
or
reverse
direction
only
on
the
side
to
which
the
head
is
facing.
(Does
not
turn
in
reverse.)
Rewinding
to
a
specified
position
(where
the
play
but-
ton
was
pressed)
during
recording
or
play
is
possible.
The
deck
enters
the
stop
or
play
mode
depending
on
the
position
of
the
Auto/Memory
rewind
switch
after
rewinding.
This
function
is
very
convenient
for
check-
ing
the
recording
level
or
when
it
is
desired
to
listen
to
the
same
section
repeatedly.
¢
To
rewind
the
tape
to
the
position
where
re-
cording
or
play
started
and
then
stop:
Tape
end
|
Start
recording
Press
REWIND
|
Set
the
(or
play)
button
switch
to
‘gs
Recording
or
play
Rewind
|
|
4
|
|
|
|
Stop
e
To
rewind
the
tape
to
the
position
where
re-
cording
or
play
started
and
then
play:
Start
recording
Press
REWIND
Set
the
(or
play)
button
switch
to
O
a
i
Record
or
play
Rewind
e
To
play
part
of
the
tape
repeatedly:
Press
PLAY
button
Start
play
again
at
the
desired
Press
REWIND
{or
recording)
position.
button
Set
the
Oo
4
3
switch
to
Record
or
play
Rewind
*
The
desired
start
position
can
be
set
by
pressing
the
play
button
again
wherever
required.
Notes:
e
The
Auto/Memory
rewind
functions
do
not
work
when
the
Auto/Memory
rewind
switch
is
set
to
OFF.
The
auto
rewind
operation
is
not
done
in
the
[—™)
]
and
[C7
]
modes.
(Reverse
has
priority)
e
The
memory
rewind
function
is
not
possible
during
scanaplay
and
automatic
play
using
the
random
program
select
function.
e
When
the
tape
is
taken
up
to
its
end,
the
memory
function
is
released
and
the
deck
starts
the
auto
rewind
operation.
¢
The
memory
rewind
function
is
released
when
a
button
(stop,
fast
forward,
etc.)
other
than
the
rewind
button
is
pressed
after
memory
re-
wind
is
instructed.
=
English

ATRS
(AUTOMATIC
TAPE
RESPONSE
SEARCH)
SYSTEM
=
ATRS
test
(Tape
characteristics
data
input)
ATRS
test
is
also
possible
in
the
reverse
direc-
tion.
1.
Set
the
Power
switch
@)
to
ON
(=)
and
load
a
cassette
tape.
2.
Change
over
the
Tape
select
switches
69)
according
to
the
type
of
tape
to
be
recorded
(tested).
3.
Press
the
Record
button
(6.
4.
Press
the
ATRS
start
button
©).
The
ATRS
start
button
(5)
lamp
and
ATRS
button
@)
lamp
light.
When
the
operation
is
completed
correctly
after
approx.
10
sec,
the
ATRS
start
button
()
lamp
goes
off
and
the
ATRS
button
@)
lamp
remains
lit
to
show
that
data
is
stored
in
the
microprocessor,
the
tape
is
automatically
rewound
to
the
position
where
the
ATRS
start
button
(5)
was
pressed
and
the
deck
enters
the
stop
mode.
Tape
characteristic
data
can
be
stored
for
one
NOR-I,
one
CrO2-II
and
one
METAL-IV
tapes
by
operating
as
shown
in
items
1
—
4
in
each
tape
selection
position.
Notes:
¢
Change
over
the
tape
select
switch
to
match
the
tape.
*
When
a
tape
with
extremely
poor
sensitivity
or
a
non-standard
tape
is
used,
the
optimum
out-
put
cannot
be
obtained,
so
the
ATRS
test
oper-
ation
is
automatically
released
and
the
Manual
button
©)
lamp
lights.
¢
When
the
ATRS
test
operation
is
performed
with
the
leader
tape
at
the
tape
start,
the
deck
automatically
enters
the
fast
forward
mode,
and
enters
the
ATRS
test
mode
again
after
the
leader
tape
is
taken
up.
¢
Be
careful;
the
ATRS
test
mode
is
released
when
an
operation
button,
tape
select
switch,
manual
button
and
power
switch,
etc.
of
the
deck
is
pressed
during
the
ATRS
test
operation.
¢
When
the
ATRS
test
operation
is
performed
at
the
end
of
tape
and
the
tape
ends
before
the
ATRS
test
operation
is
completed,
the
full-auto
stop
mechanism
operates,
the
ATRS
test
oper-
ation
is
released
and
the
deck
automatically
enters
the
stop
mode.
The
ATRS
test
oper-
ation
is
also
released
when
the
tape
is
reversed
during
ATRS
test
operation.
¢
When
the
ATRS
test
operation
is
done
again
after
operation
is
completed,
the
previously
stored
tape
characteristic
data
is
cleared
and
the
new
characteristic
data
is
stored.
¢
Be
careful
in
that
the
previously
recorded
sound
is
erased
because
the
ATRS
test
is
per-
formed
by
recording/
playing
back
a
test
signal.
e
When
the
ATRS
button
@
lamp
is
lit,
it
shows
that
recording
is
possible
in
the
optimum
state
obtained
by
the
ATRS
test.
When
the
Manual
button
©)
lamp
is
lit,
it
shows
that
the
deck
is
set
to
match
a
Hitachi
cassette
tape.
e
The
data
input
via
the
ATRS
test
is
stored
in
the
battery
backed-up
memory
when
the
power
of
this
unit
is
set
OFF,
and
it
returns
to
the
state
before
the
power
was
switched
OFF
when
the
power
is
set
ON
again,
so
the
deck
can
be
used
with
both
ATRS
button
and
Manual
button
set-
ting
in
timer
recording.
@
When
recording
using
ATRS
system
Perform
the
ATRS
test
shown
to
store
the
character-
istics
of
the
tape
to
be
recorded.
Confirm
that
the
ATRS
button
@)
lamp
is
lit
before
performing
the
record
operation
as
shown
on
page
5.
@
When
recording
using
characteristic
data
stored
previously
1.
Change
over
the
tape
select
switch
to
match
the
type
of
tape
to
be
recorded.
2.
Press
the
ATRS
button
@).
Confirm
that
the
ATRS
button
lamp
is
lit.
3.
Perform
the
record
operation
as
shown
on
page
5.
*
When
the
ATRS
button
lamp
does
not
light,
data
is
not
stored,
so
perform
the
ATRS
test
before
re-
cording.
RECORDING
CALIBRATION
CONTROL/EQUALIZATION
CONTROL
The
recording
calibration
control
sets
the
best
cali-
bration
level
for
the
tape
and
matches
the
level
during
recording/
play.
As
a
result,
unevenness
of
the
output
level
of
individual
tapes
is
eliminated
and
recording/
play
with
higher
precision
is
possible
as
well
as
maxi-
mizing
the
effects
of
the
Dolby
NR
system.
The
equalization
contro!
controls
tone
quality
during
recording
by
manually
adjusting
the
frequency
response
of
the
tape
to
be
recorded
without
using
the
micro-
processor.
(The
equalization
control
system
does
not
in-
crease
distortion;
it
is
different
from
the
variable
bias
system.)
e
Perform
recording
calibration
adjustment
and
the
equalization
control
operation
with
the
Manual
but-
ton
lamp
lit.
Operation
is
not
possible
while
the
ATRS
button
lamp
is
lit.
¢
The
level
of
the
test
signal
for
each
adjustment
is
varied
by
the
record
level
control,
so
adjust
it
to
the
desired
position.

@
Recording
Calibration
Adjustment
Perform
operations
of
1
to
11
in
RECORDING.
1.
Press
the
Manual
button
©.
2.
Press
the
Recording
calibration
test
switch
@)
to
set
it
to
ON.
3.
Adjust
the
recording
calibration
level
using
the
Re-
cording
calibration
controls
@).
A
400
Hz
test
signal
is
recorded,
so
change
over
the
monitor
switch
between
SOURCE
(=)
and
TAPE
(01)
and
adjust
so
that
the
sound
volumes
are
equal.
(Adjust
Lch
and
Rch
independently.)
4.
Press
the
Recording
calibration
test
switch
(7)
to
set
it
to
OFF.
*
Do
not
set
the
the
Recording
level
control
(2
to
minimum
during
these
adjustments.
@
Equalization
control
operation
Perform
the
following
operations
after
operating
as
shown
in
items
1
—
4
described
in
‘Recording
Cali-
bration
Adjustment’.
5,
Press
the
Equalization
test
switch
to
set
it
to
ON.
6.
White
noise
is
recorded,
so
change
over
the
monitor
switch
SOURCE
(=
*)
and
TAPE
(1)
and
adjust
using
the
equalization
control
so
that
tone
quality
does
not
differ.
Now,
the
best
calibration
for
Dolby
NR
and
a
flat
fre-
quency
response
have been
obtained.
7.
Press
the
Equalization
test
switch
(Q
to
set
it
to
OFF.
Convenient
use:
When
it
is
desired
to
record
with
a
sharp
tone
em-
phasizing
high
frequencies
or
to
record
with
a
soft
tone
for
different
sources,
adjust
the
equalization
control
as
shown
in
the
figure;
recording
with
the
desired
tone
is
possible.
Sharp
tone
(emphasizes
high
frequencies)
Soft
tone
(lowers
high
frequencies)
The
above
describes
the
recording
calibration
adjust-
ment
and
the
equalizer
contro!
operation.
The
same
results
as
with
the
ATRS
button
lit
can
be
obtained
with
the
Manual
button
lit
and
recording
with
the
desired
tone
quality
is
possible
by
this
operation.
RECORDING
AND
PLAYBACK
USING
EXTERNAL
AUDIO
TIMER
With
this
tape
deck,
recording
and
playback
can
be
done
automatically
at
any
desired
time
by
connecting
to
an
external
audio
timer.
@
Timer
recording
of
radio
broadcasts
1.
Insert
power
cord
of
this
unit into
AC
jack
of
the
amplifier.
(Insert
the
power
cord
of
the
amplifier
into
the
timer’s
AC
jack.)
2.
Turn
power
for
amplifier
and
tuner
ON.
3.
Insert
a
recording
tape,
set
the
Monitor
switch
to
“*SOURCE”
(
=*)
and
then
adjust
the
recording
level.
4.
Press
the
ATRS
button
when
recording
using
the
tape
characteristics
data
stored
in
the
ATRS
system.
Confirm
that
the
ATRS
button
is
lit.
(Press
the
Manual
button
when
recording
without
the
ATRS
system.)
5.
Set
the
timer
to
the
desired
time.
(This
turns
the
power
OFF
until
the
set
time
is
reached.)
6.
Set
the
Timer
switch
@)
to
“REC”.
7.
Recording
starts
automatically
at
the
set
time.
@
Timer
Play
1.
Connect
the
timer
in
the
same
way
as
in
the
‘Timer
recording
of
radio
broadcasts’.
2.
Insert
the
tape
you
desire
to
playback,
adjust
the
volume
knob
of
the
amplifier
to
determine
the
level
and
press
Stop
button
@).
3.
Set
timer
to
desired
time.
(This
turns
the
power
OFF
until
the
set
time
is
reached.)
4.
Set
the
Timer
switch
@
to
“PLAY”.
5.
Play
starts
automatically
at
the
set
time.
Cautions:
¢
Be
sure
to
set
the
Timer
switch
to
OFF
except
for
timer
recording
or
playback.
When
the
power
is
on,
the
unit
is
in
the
Both
Way
mode
[
=].
Timer
recording
or
playback
starts
in
the
forward
mode
and
terminates
with
recording
or
playback
in
the
reverse
direction.
(When
recording
on
only
one
side,
be
sure
that
the
recording
safety
tab
for
the
other
side
is
removed
and
check
the
timer
setting.)
If
a
tape,
of
which
the
reverse
side
is
already
timer
recorded,
is
subsequently
timer
recorded,
the
original
recording
on
its
forward
side
will
be
erased.
When
continuous
timer
recording
is
desired,
pay
at-
tention
to
the
timer
setting.
e
Since
recording
or
playback
cannot
be
started
on
the
reverse
side,when
inserting
a
cassette
tape,
pay
attention
to
its
running
direction.
e
Besure
to
use
a
cassette
without
the
erasure
protec-
tion
tab
broken
off,
for
unattended
recording.
When
a
cassette
with
the
erasure
protection
tab
broken
off
is
used,
the
unit
enters
the
play
mode when
the
timer
operates.
(Refer
to
CASSETTE
TAPES.)
English
17

MAINTENANCE
|
Head
cleaning
(See
diagram
©
on
page
81.)
(1)
Set
the
Power
switch
to
OFF
({11)
and
open
the
head
cover
with
your
finger.
(It
is
also
possible
to
clean
from
above
with
the
cassette
holder
open.)
(2)
Clean
the
heads,
capstan
and-
pressure
roller
periodically
with
a
head
cleaning
stick
moistened
with
alcohol,
or
methylated
spirits.
When
Metal
tapes
are
either
recorded
and
played
for
several
hours,
the
tape
running
surface
must
be
cleaned.
Never
use
a
sharp
or
metallic
instrument
or
tool
for
cleaning
these
parts.
Demagnetization
The
head
inevitably
becomes
magnetized
slightly
after
long
use.
As
a
result,
high-frequency
sound
may
be
lacking
or
noise
may
be
generated.
Perform
head
de-
magnetization
occasionally
with
a
head
eraser.
CASSETTE
TAPES
Recording
protection:
If
the
plastic
tabs
on
the
side
of
the
cassette
are
removed
(using
a
screwdriver
or
similar
tool),
recordings
can
be
protected
against
accidental
erasure.
If
recording
is
to
be
made
again,
cover
the
hole
of
removed
tab
with
adhesive
plastic
tape.
Precautions:
If
a
tape
is
played
several
times
con-
tinuously,
especially
a
thin
tape
(C-90),
it
may
wind
too
tightly
on
the
ree!
and
cause
the
tape
speed
to
fluctuate.
To
avoid
this,
simply
tap
the
cassette
several
times
lightly
on
a
hard
surface
to
loosen
the
tape
on
the
reel.
However,
it
should
not
be
too
loose.
Especially
after
fast
forward
or
rewind
of
a
C-90
cassette,
take
up
slack
by
inserting
a
pencil
or
similar
object
in
the
spindle
hole
and
tighten
the
tape
to
prevent
looping.
(See
diagram
©)
on
page
81.)
DOLBY
NR
(Noise
Reduction)
SYSTEM
This
cassette
deck
is
equipped
with
both
Dolby
C-type
and
B-type
noise
reduction.
The
new
Dolby
C-type
NR
system
provides
noise
reduc-
tion
beginning
at
100
Hz
and
rising
to
20
dB
at
1
kHz
and
above.
The
standard
Dolby
B-type
NR
system,
used
in
virtually
every
high-performance
cassette
deck
for
the
past
several
years,
provides
noise
reduction
beginning
at
about
500
Hz,
rising
to
10
dB
at
4
kHz
and
above.
With
Dolby
C
NR
and
a
good
tape
formulation,
tape
noise
is
below
that
of
just
about
any
program
material
you
might
record,
including
music
with
very
wide
dynamic
range.
Even
when
you
play
Dolby
C
record-
ings
at
very
high
volume
levels,
any
remaining
noise
is
likely
to
be
that
of
the
original
program
material,
not
noise
from
the
tape
or
recorder.
Standard
Dolby
B-type
NR
will
allow
you
to
play
back
cassettes
previously
recorded
with
it,
and
to
make
cassettes
you
know
will
be
played
back
primarily
on
machines
equipped
only
with
Dolby
B.
Both
Dolby
noise
reduction
systems
work
in
a
similar
way.
Neither
system
improves
what
is
being
recorded,
but
rather
prevents
the
addition
of
noise
by
the
tape
recording
process.
When
a
recording
is
made,
the
Dolby
noise
reduction
circuit
makes
higher
frequencies
on
quiet
passages
louder
than
normal.
When
the
encoded
tape
is
then
played
back
with
Dolby
noise
reduction,
the
circuit
lowers
the
previously-boosted
fre-
quencies
to
where
they
were
in
the
original
program
material,
thereby
reducing
the
noise
added
by
the
taping
process.
Dolby
C-type
noise
reduction
achieves
more
noise
reduction
than
Dolby
B
by
boosting
low-level
higher
fre-
quencies,
and
lowering
them
again
in
playback,
by
a
greater
amount
than
Dolby
B.
In
addition,
the
noise
reduction
extends
about
two
octaves
lower,
so
that
the
noise
reduction
effect
is
subjectively
uniform
across
the
audible
spectrum.
Dolby
C
also
incorporates
two
further
features,
called
spectral
skewing
and
_anti-
saturation,
which
permit
more
accurate
recording
of
high-level
high
frequencies,
among
other
benefits.

Deutsch
MERKMALE
SICHERHEITSANLEITUNG
Elektrische
Energie
kann
viele
niitzliche
Funktionen
verrichten.
Die
Abbildungen
des
Gerats
sind
auf
Seiten
80
und
81.
Dieses
Gerat
ist
so
konstruiert
und
hergestellt,
da
Ihre
persénliche
Sicherheit
gewahrleistet
ist.
Unsachgemae
Behandlung
kann
moglicherweise
elektrische
Schlage
oder
Feuergefahr
verursachen.
Um
die
Sicherheitsanleitung
nicht
zu
verletzen,
beachten
Sie
bitte
die
folgenden
Anweisungen
zur
Aufstellung,
Bedienung
und
Wartung
des
Gerates.
Automatische
Bandlaufumkehr
fiir
kontinuier-
liche
Aufnahme
und
Wiedergabe
Ein
Infrarot-Sensor
stellt
anhand
des
auf
beiden
Bandenden
angebrachten
Vorspannbandes
das
Bandende
fest
und
schaltet
die
Bandlaufrichtung
unverziiglich
um.
Dieser
Umschaltvorgang
wird
ohne
jegliche
Verzégerung
ausgefithrt,
so
da
es
auch
bei
kontinuierlichen
Aufnahmen
oder
Wieder-
gaben
nur
zu
einem
Minimum
an
Rauschspannungen
wahrend
der
Bandiaufumkehr
kommt.
Automatisches
Tonband-Respons-Suchlauf-
system
(ATRS)
Das
ATRS-System
stellt
automatisch
die
optimale
Vormagnetisierung,
Entzerrung
und
den
Aufsprech-
pegel
(entspricht
der
Empfindlichkeit
des
Ton-
bandes)
fiir
jede
Tonbandsorte
innerhalb
von
etwa
10
Sekunden
fest,
wobei
mit
Hilfe
eines
Mikroprozes-
sors
fur
jede
Tonbandsorte
die
optimalen
Auf-
nahmebedingungen
_
eingestellt
werden.
Dieses
System
steuert
den
Aufnahmeschaltkreis,
um
ab-
solut
linearen
Frequenzgang
sicherzustellen.
Die
Daten
werden
in
einen
Speicher
eingelesen
und
k6én-
nen
danach
jederzeit
abgerufen
werden.
Duo-Dolby-NR-Rauschunterdriickung
fiir
Auf-
nahme/Wiedergabe
Dieses
Modell
ist
mit
separaten
Dolby-NR-
Schaltkreisen
fir die
Aufnahme-
und
Wieder-
gabeverstarker
ausgeristet.
Neben
der
konven-
tionellen
Dolby-B-Rauschunterdriickung
verfiigt
dieses
Modell
auch
Uber
das
Dolby-C-NR-System,
das
verbessertes
Frequenzgangverhalten
und
hervor-
ragende
Rauschunterdriickung
auch
im
unteren
Fre-
quenzbereich
gewahrleistet.
Fernbedienungsbuchse
Durch
den
Anschluf&&
der
Fernbedienung
RB-100
(Op-
tion)
an
diese
Buchse
kann
das
Modell
D-X10
be-
quem
von
Ihrem
Horstuhl
aus
gesteuert
werden.
Zweimotoren-Laufwerk
mit
direktantriebendem
Uni-
Torque-Motor
Dreikopfbestiickung
mit
Kompatibilitat
voller
Reineisenband-
Vierstelliges
Digital-Bandzahlwerk
Leichtgangige
Tipptasten
mit
Computer-IC-Logik-
steuerung
Auto/Memory-Rickspulfunktion
Vielseitige
Musik-Wiedergabefunktionen
e
Scanaplay-Funktion
(S
&
P)
©
Digital-Random-Program-Selector
(DRPS)
e
Selbstprogrammierendes
Suchlauf-System
(SPSS)
e
Random-Memory-Search
e
Echtzeit-Bandzahlwerk
Das
Echtzeit-Bandzahlwerk
zeigt
die
jeweils
abgelaufende
Bandlange
auf
einen
Blick
an
und
birgt
daher
fir
effiziente
Nutzung
des
Ton-
bandes.
e
Manuelle
Entzerrungskalibrierung
(REC.
CALL)
Dieses
Cassettendeck
kann
auch
manuell
auf
die
Eigenschaften
jeder
Tonbandsorte
eingestellt
werden.
Damit
konnen
die
gewiinschte
Klang-
qualitat,
ein
linearer
Frequenzgang
sowie
optimale
Dolby-NR-Kalibrierung
erhalten
werden.
(REC.
CAL:
Record
Calibration
=
Aufnahme-
kalibrierung)
Computergesteuerte
Aufnahme-Mutingautomatik
Tonband-Bereitschaftsfunktion
mit
Vorspannband-
Vorspulautomatik
Spitzenwert-Hailtefunktion
Bandzahlwerk
mit
automatischer
Risckstellfunktion
Bandenden-Abschaltautomatik
bei
allen
Bandlauf-
funktionen
Restbandsuchlauf
Zweifarbiger
Fluoreszenz-Spitzenwertmesser
mit
20
Segmenten
(und
Spitzenwert-Halteautomatik)
Gerauschunterdriickungssystem
unter
Lizenz
von
Dolby
Laboratories
Licensing
Corporation
herge-
stellt.
Das
Wort
“Dolby”
und
das
symbol
des
doppelten
D
sind
die
Warenzeichen
von
Dolby
Laboratories
Licensing
Corporation.
VORSICHTSMARNAHMEN
e
Niemals
starke
Waschmittel
oder
Lésungen
fir
das
Dieses
Gerat
ist
fur
den
Einbau
in
HiFi-Tirme
ausgelegt,
wobei
jedoch
ibermaRig
schwere
Objekte
nicht
darauf
abgestellt
werden
dirfen.
Reinigen
des
Gehauses
verwenden,
da
sonst
das
Oberflachenfinish
beschadigt
wird.
Deutsch
13

e
UbermaBige
Warme
(z.B.
direkte
Sonnenbe-
strahlung),
Staub
und
Feuchtigkeit
vermeiden.
¢
Niemals
das
Gehduse
selbst
dffnen.
*
Das
Netzkabel
nicht
beschadigen.
Immer
am
Netz-
stecker,
niemals
am
Kabel
selbst
ziehen.
¢
Bei
Verwendung
mit
anderen
HiFi-Bausteinen,
dieses
Cassettendeck
miédglichst
entfernt
von
Geraten
aufstellen,
die
Induktionsrauschen
oder
Brumm
verursachen.
Den
Vormagnetisierungsstrom
dieses
Cassettendecks
kann
wahrend
der
Aufnahme
von
MW-Programmen
zu
Schwebungen
fithren;
in
einem
solchen
Fall
miissen
Cassettendeck
und
Tuner
méglichst
entfernt
voneinander
aufgestellt
werden.
Bei
UKW-Empfang
existiert
dieses
Problem
nicht.
Siehe
Diagramm
auf
Seite
80.
BEDIENUNGSELEMENTE
UND
IHRE
FUNKTIONEN
Siehe
Diagramm
@
auf
Seite
80.
(
Netzschalter
@
Timer-Schalter
Den
Timer-Schalter
immer
auf
Position
OFF
belassen,
wenn
keine
Timer-Aufnahmen/Wiedergaben
durchgefithrt
werden
sollen.
¢
Wenn
vor
Beginn
der
Aufnahme
oder
Wiedergabe
die
Stromversorgung
bei
auf
Position
REC
oder
PLAY
gestelltem
Schalter
eingeschaltet
wird,
dann
blinkt
die
Wiedergabeanzeige
zur
Warnung
fiir
etwa
vier
Sekunden.
Danach
schaltet
das
Deck
automatisch
auf
die
Aufnahme
oder
Wiedergabe,
so
da&
Vorsicht
geboten
ist.
(8)
Auto/Memory-Riicklaufschalter
@
ATRS-Taste
6)
ATRS-Starttaste
(6)
Manuelle
Einstelitaste
@®
Priifschalter
fiir
Aufnahme-Kalibrierung
Aufnahme-Kalibrierregler
fir
linken/rechten
Kanal
@)
Entzerrungsregler
(0
Entzerrungs-Priifschalter
()
Ausgangspegelregler
Mit
diesem
Regler
wird
der
Ausgangspegel
der
Ausgangsbuchsen
und
der
Kopfhérerbuchse
eingestellt.
Dieser
Regler
ist
so
einzustellen,
da
es
beim
Umschalten
von
diesem
Cassettendeck
auf
eine
andere
Programm-
quelle
(Tuner
usw.)
zu
keinen
Lautstarkespriingen
kommt.
(2
Aufnahmepegelregler
(3
Monitor-Schalter
TAPE
([1):
Diese
Position
fiir
die
Tonband-Wiedergabe
oder
fir
das
Mithéren
der
Tonbana-
Aufnahme
(Hinterbandkontrolle)
verwenden.
Fir
Wiedergabe
die
Position
TAPE
verwenden,
da
bei
Position
SOURCE
kein
Ton
vernommen
werden
kann.
SOURCE
(=):
Diese
Position
fiir
die
Aussteuerung
des
Aufsprechpegels
oder
fiir
das
Mithdéren
der
Klangquelle
(Eingangssignale
an
den
LINE
IN
(REC)
Buchsen)
verwenden.
(4
Kopfhérerbuchse
(5
Pausetaste/Pauseanzeige
(®
Aufnahmetaste/Aufnahmeanzeige
@®
Aufnahme-Mutingtaste
(8)
Wiedergabetaste
Schnellvorlauftaste
@
Ricklauftaste
@)
Stoptaste
@)
Cassettenschacht
@
Auswurftaste
@
Wiedergabe-Bandlaufrichtungsanzeige
@
Bedienungsanleitung
Mit
Hilfe
der
automatischen
Bandlaufumkehr
dieses
Cassendecks
kann
die
gewiinschte
Bandlaufrichtung
beliebig
angewahlt
werden.
Fur
richtigen
Aufnahme-
und
Wiedergabebetrieb
sind
nachfol-
gend
die
Bedienungsvorgaénge
_aufgefiihrt.
Wiedergabe
(
®
),
Schnellvorlauf
(
>»
)
und
Ricklauf
(44)
in
Vorlaufrichtung
sind
erlautert.
Sinngema&
entsprechen
dieser
Erlauterung
den
Funktionen
Wiedergabe
(<4
),
Schnelivorlauf
(44)
und
Riicklauf
(b>)
in
der
Riicklaufrichtung.
@)
Betriebsartenanzeige
@6)
Bandzahiwerk/Echtzeitzahlwerk
Dieses
Z&hlwerk
zeigt
die
abgelaufende
Bandlange
oder
die
Bandlaufzeit
an.
(Das
Umschalten
zwischen
diesen
beiden
Anzeigen
erfolgt
mit
Hilfe
des
Bandzadhlwerk/
Echtzeitzaéhlwerk-Anzeigewahischalters
®.)
Bandzahlwerk:
Hochzéhlen
in
der
Vorlauf-
bzw.
Rickz&hlen
in
der
Ritcklaufrichtung.
(Bei
der
Riickzahlung
wird
nach
0000
auf
9999
gewechselt.}
Echtzeitzahlwerk:
Die
Echtzeitzahlwerkanzeige
zeigt
die
abgelaufende
Bandiaufzeit
in
Minuten
und
Sekunden
an.
Wahrend
des
schnellen
Vor-
oder
Riicklaufes
wird
die
der
Wiedergabefunktion
entsprechende
Bandlaufzeit
ange-
zeigt.
(Wird
von
0000
zuriickgespult,
dann
wird
eine
negative
Bandlaufzeit
angezeigt.)
@
Echtzeitzahiwerk-Anzeige
@)
Pauseanzeige
@
Aufnahmeanzeige
@0
Wiedergabeanzeige

61)
Bandsortenanzeige
@2
Dolby-NR-Anzeigen
@3
Spitzenpegelanzeige
Hier
wird
der
Aufsprechpegel
wahrend
der
Aufnahme
bzw.
der
Wiedergabepegel
wahrend
der
Wiedergabe
angezeigt.
Die
20
Segmente
zeichen
den
Pegel
im
Bereich
von
—40
dB
bis
+10
dB
an.
4
Monitoranzeige
$5
Multiplex-Schalter
Diesen
Tasterschalter
einrasten,
wenn
UKW-Stereo-
Programme
uber
den
Dolby-NR-Schaltkreis
auf
Band
mitgeschnitten
werden
sollen.
Spitzenwert-Haltefunktion-Wahlschalter
Wenn
die
Stromersorgung
eingeschaltet
wird
und
dieser
Schalter
ausgerastet
ist,
dann
wird
das
Cassettendeck
auf
die
automatische
Spitzenpegel-Rickstellfunktion
geschal-
tet
(der
Spitzenpegel
wird
dabei
wahrend
der
Aufnahme
oder
Wiedergabe
jeweils
fiir
zwei
Sekunden
angehalten),
wobei
dieser
Status
nach
zwei
Sekunden
freigegeben
wird.
Bei
eingerastetem
Schalter
wird
dagegen
der
maxi-
male
Spitzenpegel
wahrend
der
Aufnahme
oder
Wieder-
gabe
angehalten;
um
diesen
wieder
freizugeben,
den
Tastenschalter
durch
nochmaliges
Driicken
wieder
ausrasten.
Danach
wird
durch
nochmaliges
Driicken
dieses
Tastenschalters
wiederum
auf
die
Spitzenpegel-
Rickstellautomatik
geschaltet.
Hinweis:
Die
Spitzenpegel-Anhaltefunktion
arbeitet
im
Bereich
von
—5
dB
bis
+10
dB.
@?)
Dolby-NR-B/C-Wahlschalter
8)
Dolby-NR-Schalter
ON
(a):
Diese
Position
fir
Aufnahmen
mit
Dolby-NR-
Rauschunterdriickung
bzw.
die
Wiedergabe
von
mit
Dolby-NR-System
bespielten
Cassetten
verwenden.
OFF
(£1):
Diese
Position
fiir
Aufnahmen
ohne
Dolby-NR-
Rauschunterdriickung
bzw.
die
Wiedergabe
von
ohne
Dolby-NR-System
bespielten
Casset-
ten
verwenden.
Im
Fachhandel
sind
mit
Dolby-NR-System_bespielte
Musikcassetten
erhdaltlich,
die
mit
der
entsprechenden
Dolby-NR-Rauschunterdrickung
abgespielt
werden
sollen.
Mit
Dolby-B
bespielte
Cassetten
sind
an
der
Nabe
und
am
Aufkleber
mit
dem
D0
Symbol
sowie
an
der
Gehduse-Frontseite
mit
dem
[){][oousysvstem]®
Symbol
versehen.
Die mit
Dolby-C
bespielten
Cassetten
sind
dagegen
mit
den
OO
und
DO
[eoteyc
wa]
Symbolen
gekennzeichnet.
69
Bandsortenwahler
Diese
Wahlschalter
sind
gemaf&
der
fiir
die
Aufnahme
oder
Wiedergabe
verwendete
Tonbandsorte
einzustellen.
Vor
Aufnahmebeginn
muf§
die
Einstellung
dieser
Wahlschalter
kontrolliert
werden,
um
Aufnahmefehler
zu
vermeiden.
Speichertaste
Programmtaste
@
Scanaplay-Taste
Zahlwerk-Anzeigewahltaste
Mit
diesem
Schalter
kann
zwischen
Bandz&ahiwerk-
und
Echtzeitzahlwerkanzeige
umgeschaltet
werden.
Aufnahme-Mutinganzeige
Zahiwerk-Nullstelitaste
Durch
Driicken
dieser
Taste
wird
die
Anzeige
des
Bandzahiwerkes
oder
Echtzeitzahlwerkes
(nur
derzeitige
Anzeige)
auf
0000
gestellt.
Restsuchlauf-Anzeige
@
Betriebsartenwahler
Der
Infrarot-Sensor
der
automatischen
Bandlaufumkehr
stellt
das
an
beiden
Bandenden
angebrachte
Vorspann-
band
fest
und
schaltet
am
Bandende
automatisch
auf
die
andere
Bandlaufrichtung
um,
und
zwar
in
Abhangigkeit
von
der
Einstellung
dieses
Betriebsartenwahlers.
Der
Betriebsartenwahler
ist
daher
immer
entsprechend
ein-
zustellen.
Hinweis:
Bei
eingerasteter
Wiedergabetaste
werden
fiir
die
automatische
Bandlaufumkehr
etwa
10
Sekunden
bendtigt.
Bei
manchen
Cassetten-
Typen
kann
es
zu
Fehlbetrieb
der
automatischen
Bandlaufumkehr
kommen.
Nach
dem
Einschalten
des
Netzschalters
ist
immer
auf
den
Zweirichtungs-Modus
[32>]
geschaltet.
Vorsicht:
In
den
folgenden
Fallen
kann
es
zu
Fehlbetrieb
der
automatischen
Bandlaufumkehr
kommen:
e
Staub
oder
Fremdpartikel
am
Tonband.
e¢
Tonband
geknittert
oder
mit
Falten.
e
Markierung
oder
Buchstaben
am
_
Tonband
aufgedruckt.
e
Cassettenschacht
unter
starker
Beleuchtung.
e
Starker
Sto&
am
Cassettendeck.
Bei
manchen
Cassetten
kann
es
vorkommen,
dafg
die
Bandlaufumkehr
am
Ende
des
Vorspannbandes
er-
folgt.
[=—"]
Einweg-Modus
Aufnahme
oder
Wiedergabe
erfolgt
nur
in
Vor-
oder
Ricklaufrichtung.
Sobald
das
Bandende
erreicht
ist,
schaltet
das
Bandlaufwerk
automatisch
ab.
[=>]
Zweiweg-Modus
Aufnahme
oder
Wiedergabe
in
Vorlaufrichtung,
worauf
am
Bandende
die
Bandlaufrichtung
umgeschaltet
und
die
Auf-
nahme
oder
Wiedergabe
fortgesetzt
wird.
Nach
dem
Er-
reichen
des
Bandendes
in
der
zweiten
Bandlaufrichtung,
wird
das
Bandlaufwerk
automatisch
abgeschaltet.
Vorsicht:
e
Fur
Aufnahme
oder
Wiedergabe
im
Zweiweg-Modus
[=]
mu
immer
zuerst
die
Wiedergabetaste
(8
fiir
Vorlaufrichtung
betatigt
werden.
¢
Vor
der
Aufnahme
ist
sicherzustellen,
daf&
die
Lamellen
an
der
Cassettenriickseite
intakt
sind.
Bei
ausgebrochener
Lamelle
wird
nach
Aufnahme_
in
Vorlaufrichtung
ggf.
auf
die
Wiedergabe
in
Ricklaufrichtung
umgeschaltet.
[C=]
Endlos-Modus
Bei
auf
die
Wiedergabe
geschaltetem
Gerat
werden
beide
Tonbandhalften
(Vor-
und
Riicklaufrichtung)
immer
wieder
aufeinanderfolgend
abgespielt,
bis
die
Stoptaste
gedritckt
wird.
Wahrend
der
Aufnahme
wird
dagegen
nach
dem
Bespielen
in
Riicklaufrichtung
auf
die
Endlos-Wiedergabe
geschaitet.
Nach
sechzehn
Wiederholungen
wird
die
automatische
Bandlaufumkehr
stillgelegt
und
das
Band-
laufwerk
stoppt.
Vorsicht:
Die
automatische
Bandlaufumkehr
arbeitet,
wenn
der
Wahlschalter
auf
den
Zweiweg-
Modus
[
=)
]
oder
den
Endlos-Modus
[
C{*)
|
eingestellt
ist.
@
Eingangsbuchsen
@
Ausgangsbuchsen
60
Fernbedienungsbuchse
Deutsch
15

Prazises
Echtzeitzdhlwerk
@
Bei
dem
in
diesem
Cassettendeck
verwendeten
Echtzeitzahilwerk
handelt
es
sich
um
keine
Zeituhr,
so
daf&
es
zwischen
der
tatsachlichen
Bandlaufzeit
und
der
Zahlwerkanzeige
zu
einer
gewissen
Abweichung
kommt.
Diese
Abweichung
hangt
von
der
verwendeten
Band-
sorte
und
der
abgelaufenen
Bandlange
ab.
In
der
nachfolgenden
Tabelle
sind
die
Abweichungstole-
ranzen
der
Zahiwerkanzeige
gegeniiber
der
tatsachlichen
Bandlaufzeit
aufgefiihrt,
wenn
Hitachi
Tonband-Casset-
ten
verwendet
werden.
:
Diese
Tabelle
ist
fiir
Referenzzwecke
bei
Verwendung
des
Zahlwerkes
zu
benutzen.
NETZANSCHLUSS
UD
60.90
UD
46
ER
60.90
ER
46
SR
60.90
SR
46
EX
60.90
EX
46
SX
60.90
SX
46
<<,
ME60
ME
46.90
+--->
+--+
—3
min
—2
min—1
min
O
+1
min
+2
min
+3
min
Die
angezeigte
Zeit
ist
mehr
als
die
tatsachliche
Die
angezeigte
Zeit
ist
weniger
als
die
tatsachliche
Bandlaufzeit.
Bandlaufzeit.
61)
Spannungswahler
Einstellung
der
Netzspannung:
1.
Dieses
Geraét
kann
mit
Wechselstrom
mit
einer
Span-
nung
von
100—110V,
115—127V,
200—220V
oder
230—250V
betrieben
werden.
2.
Falls
eine
Einstellung
erforderlich
ist,
den
Span-
nungswahler
61)
mit
einem
Schraubenzieher
auf
die
Ortliche
Netzspannung
drehen,
bis
ein
schwaches
Klickgerausch
vernommen
wird.
(Siehe
Diagramm
@)
auf
Seite
80.)
EINSETZEN
DER
CASSETTE
Achtung:
1.
Netzkabel
von
der
Wand-Steckdose
ab-
ziehen
und
die
Stopptaste
driicken,
bevor
der
Spannungswahler
eingestellt
wird.
2.
Die
Einstellung
vorsichtig,
ohne
Gewaltanwendung
vornehmen,
da
an-
sonsten
der
Spannungswahler
oder
die
entsprechenden
Sicherungen
beschadigt
werden
kénnten.
3.
Wird
das
Netzkabel
an
eine
Wand-
steckdose
mit
100—
110/115—127V
Netz-
spannung
angesteckt,
dann
ist
der
mit
dem
Adapter
versehene
Stecker
anzu-
schlie&en.
Durch
Driicken
der
Auswurftaste
@3)
im
Stopmodus
wird
der
Cassettenschacht
gedffnet.
Die
Cassette
ist
nun
mit der
freiliegenden
Tonbandflache
nach
unten
in
den
Cassettenschacht
einzusetzen,
worauf
der
Cassettenschachtdeckel
zu
schlieBen
ist.
Um
die
Cassette
entfernen
zu
kénnen,
die
Auswurftaste
@
im
Stopmodus
driicken.
Aufnahme/Wiedergabe
bei
Cassetten
mit
langem
Vorspannband
Wird
bei
Aufnahme/Wiedergabe
vom
Start
einer
Cassette
mit
langem
Vorspannband
begonnen,
dann
kann
am
Ende
des
Vorspannbandes
die
automatische
Bandlaufumkehr
erfolgen.
Bei
solchen
Cassetten
sind
Aufnahme/Wiedergabe
im
Einweg-Modus
[
——
]
bzw.
nach
dem
Vorspulen
des
Vorspannbandes
durchzu-
fiihren.
Besonders’
vorteilhaft
ist
dabei
die
Bereitschaftsfunktion
(gleichzeitiges
Driicken
der
Tasten
fiir
schnellen
Vor-
(44)
und
Riicklauf
(
>»),
da
dabei
das
Vorspannband
automatisch
vorgespult
wird.
Fur
Timer-Aufnahmen
sollte
immer
diese
Funktion
verwendet
werden.
1.
Die
Stromversorgung
des
Verstarkers einschalten
und
den
Funktionsw&ahler
auf
die
mitzuschneidende
Programmquelle
(Tuner,
Plattenspieler
usw.)
einstellen.
2.
Den
Netzschalter
@)
einrasten
(2%)
und
eine
Cassette
in
den
Cassettenschacht
@2
einsetzen;
danach
den
Cassettenschachtdeckel
@2
schlieen.
3.
Den
Auto/Memory-Ricklaufschalter
wunschge-
ma
einstellen.
Normalerweise
ist
dieser
Schalter
jedoch
auf
Position
OFF
zu
belassen.
4.
Die
Bandsortenwahler
@9
gema®
der
verwendeten
Bandsorte
einstellen.
5.
Den
Betriebsartenwahler
@)
auf
die
gewiinschte
Position
stellen.

10.
11.
.
Den
Dolby-NR-Schalter
68
wunschgemaf®
einstel-
len.
.
Den
Dolby-B/C-NR-Wahlschalter
67)
wunschgemaR
einstellen
und
den
Monitor-Schalter
(3
auf
Position
SOURCE
(=)
stellen.
.
Die
Pausetaste
(
11)
gedriickt
halten
und
eine
der
Wiedergabetasten
(8
oder
driicken,
um
die
gewunschte
Bandlaufrichtung
fir die
Aufnahme
einzustellen.
(Die
Wiedergabe-Bandlaufrichtungsanzeige
und
die
Pauseanzeige
leuchten
auf.)
.
Wenn
nun
die
Pausetaste
(§
niedergehalten
und
die
Aufnahmetaste
(@
gedriickt
wird,
wird
das
Gerat
auf
die
Aufnahme-Bereitschaftsfunktion
geschaltet.
(Die
Aufnahmeanzeige
und
die
Pause-
anzeige
@8
leuchten
auf.)
(Die
ATRS-Taste
driicken,
wenn
eine
Aufnahme
auf
einem
Band
durchgefiihrt
wird,
dessen Eigenschaften
bereits
im
ATRS-System
gespeichert
sind.
Weitere
Einzel-
heiten
sind
auf
Seite
22
beschrieben.
Fir
die
Auf-
nahme
ohne
ATRS-System
ist
die
manuelle
Ein-
stelltaste
zu
dricken.)
Aufnahmepegelregler
@2
nun
so
aussteuern,
da
der
Spitzenwert-Pegelmesser
@3)
an
den
lautesten
Stellen
nicht
mehr
als
+3
dB
(6
dB)
fir
Reineisen-
band)
anzeigt.
Die
Wiedergabetaste
driicken,
mit
der
in
Punkt
8
die
Bandlaufrichtung
angewahlt
wurde,
um
mit
der
Aufnahme
zu
beginnen.
Vorsicht:
Wird
die
der
aufleuchtenden
Wieder-
gabe-Bandlaufrichtungsanzeige
ent-
gegengesetzte
Wiedergabetaste
betatigt,
dann
wird
nicht
auf
die
Aufnahme
sondern
auf
die
Wiedergabe
geschaltet.
.
Fir
kurzzeitiges
Unterbrechen
der
Aufnahme
ist
die
Pausetaste
45)
zu
driicken.
Sobald
mit
der
Auf-
nahme
wieder
fortgesetzt
werden
soll,
die
Wieder-
gabetaste
(8
betatigen.
.
Um
die
Aufnahme
zu
beenden,
die
Stoptaste
@1
dricken.
Vorsicht:
Bei
Bandmitschnitten
von
MW-Program-
men
kann
es
aufgrund
von
Streuungen
der
Vormagnetisierung
zu
Schwebungen
(Pfeifgerausche)
kommen.
In
einem
solchen
Fall
ist
der
Tuner
oder
der
Receiver
mdglichst
entfernt
von
diesem
Cassettendeck
anzuordnen.
(Dieses
Problem
existiert’
nicht
bei
Band-
mitschnitten
von
UKW-Programmen.)
Mithoren
der
Aufnahme
Da
dieses
Gerat
tuber
separate
Aufnahme
und
Wiedergabeképfe
verfiigt,
kann
der
Ton
wahrend
der
Aufnahme
ab
Band
mitgehért
werden
(Hinter-
bandkontrolle);
fiir
die
Hinterbandkontrolle
(bereits
aufgenommenes
Tonmaterial)
ist
der
Monitor-
Schalter
auf
Position
TAPE,
fiir
die
Vorderbandkon-
trolle
(Programmquelle)
auf
Position
SOURCE
zu
stellen.
Automatische
Aufnahme-Mutingfunktion
Wird
die
Aufnahme-Mutingtaste
wahrend
der
Auf-
nahme
gedriickt,
dann
wird
das
Eingangssignal
fir
etwa
vier
Sekunden
unterbrochen
(das
Bandlauf-
werk
lauft
aber
weiter),
was
durch
ein
Blinken
der
Aufnahme-Mutinganzeige
angezeigt
wird;
danach
schaltet
das
Bandlaufwerk
automatisch
auf
die
Aufnahme-Pausefunktion.
Um
mit
der
Aufnahme
fortzusetzen,
die
Wiedergabe-
taste
(8
betdtigen.
Wird
die
Aufnahme-
Mutingtaste
(?
gedriickt
gehalten,
dann
kénnen
Leerstellen
mit
einer
Spieldauer
von
mehr
als
vier
Sekunden
angefertigt
werden.
Durch
das
Freigeben
der
genannten
Taste
wird
danach
wiederum
auto-
matisch
auf
die
Aufnahme-Pausefunktion
geschal-
tet.
Soll
die
Leerstelle
eine
Spieldauer
von
weniger
als
vier
Sekunden
aufweisen,
dann
ist
nach
dem
Driicken
der
Aufnahme-Mutingtaste
(2
an
der
gewiinschten
Stelle
die
Pausetaste
(3)
zu
betatigen.
Diese
Funktion
wird
vorteilhaft
fiir
das
Uberspringen
von
unerwiinschtem
Tonmaterial
(Werbedurchsagen
usw.)
bzw.
fiir
die
Anfertigung
von
Leerstellen
zwischen
den
einzelnen
Musikstiicken
eingesetzt.
Wird
die
Aufnahme-Mutingfunktion
(2?
bei
einer
anderen
als
der
Aufnahmefunktion
gedriickt,
dann
weist
sie
die
gleiche
Funktion
wie
die
Programmtaste
auf.
Dadurch
kann
die
Anzahl
der
mit
Hilfe
des
DRPS-Wahlschalters
(Digital
Random
Program
Selector)
zu
iberspringenden
Tite!
von
der
Fernbe-
dienung
aus
eingegeben
werden.
Vorsicht:
Auch
wahrend
der
Aufnahme-Muting-
funktion
kann
der
Ton
der
Programm-
quelle
ber
die
Lautsprecher
oder
Kop-
fhérer
mitgehort
werden,
wenn
der
Monitor-Schalter
auf
die
Position
SOURCE
(=)
gestellt
wird.
Restbandsuchlauffunktion
Fur
die
Restbandsuchlauffunktion
sollten
die
Casset-
ten
C-60
oder
C-90
verwendet
werden.
Wenn
eine
Neuaufnahme
im
Anschlu&
an
eine
bereits
getatigte
Aufnahme
gemacht
werden
soll,
die
Bandlaufrich-
tung
(gema&
Punkt
8
unter
‘“AUFNAHME”)
einstellen
die
Zahlwerk-Anzeigewahlitaste
fir
die
Echtzeitanzeige
driicken
und
danach
gleichzeitig
die
Tasten
fiir
Aufnahme
und
schnelien
Vorlauf
betatigen.
Das
Deck
wird
dadurch
automatisch
auf
den
Einweg-Modus
geschaltet,
worauf
das
Tonband
im
schnelle
Vorlauf
bis
zum
Ende
umgespult
wird;
anschlieRend
erfolgt
der
Riicklauf
bis
zum
Ende
der
bereits
getatigten
Aufnahme
automatisch
(dabei
leuchtet
die
Restband-Suchlaufanzeige
auf).
Sobald
das
Ende
der
getatigten
Aufnahme
aufge-
funden
wurde,
wird
das
Band
fir
etwa
vier
Sekunden
(Wiedergabe-Bandlaufdauer)
vorgespult,
worauf
das
Deck
auf
die
Aufnahme-Pausefunktion
schaltet.
Nun
wird
die
noch
zur
Verfiigung
stehende
Restband-Spieldauer
angezeigt.
Nun
kann
die
Neuaufnahme
im
Anschluf
an
die
bereits
getatigte
Aufnmahme
ausgefiihrt
werden.
Sobald
die
Neuaufnahme
beendet
wurde,
die
Zahlwerk-Nullstelltaste
driicken,
um
die
Restband-
Suchlaufanzeige
und
die
Restband-Zeitanzeige
freizugeben.
Hinweis:
Auch
in
den
folgenden
Fallen
wird
die
Restband-Zeitanzeige
freigegeben.
e
Wenn
die
Bandlaufrichtung
umgeschaltet
wird.
e
Wenn
ein
nicht
bespieltes
Band
abgesucht
wird,
dann
wird
dieses
bis
zum
Beginn
zuruckgespult,
worauf
die
Restband-
Suchlauffunktion
freigegeben
wird.
Deutsch
17

®@
Léschen
Mit
jeder
Neuaufnahme
wird
das
auf
diesen
Spuren
befindliche
alte
Tonmterial
automatisch
geléscht.
Ldschen
ist
also
nur
im
Aufnahmemodus
médglich.
Falls
Sie
ein
Tonband
léschen
moéchten,
ohne
eine
Neuaufnahme
durchzufiihren,
den
Aufnahmepegel-
regler
(2
ganz
zudrehen
(Position
‘’0’)
und
den
der
verwendeten
Bandsorte
entsprechenden
Bandsorten-
wahler
@9
betatigen;
danach
gleichzeitig
die
Tasten
fiir
Wiedergabe
(8)
und
Aufnahme
(
driicken.
WIEDERGABE
1.
Den
Netzschalter
@
einrasten
(42),
eine
Cassette
in
den
Cassettenschacht
@2
einsetzen
und den
Cassettenschachtdeckel
schlieen.
2.
Den
Betriebsartenwahler
@
auf
die
gewiinschte
Position
stellen.
3.
Den
der
verwendeten
Bandsorte
entsprechenden
.
Bandsortenwahler
@9
driicken.
4.
Dn
Dolby-NR-Schalter
68
ein-
oder
ausschalten
und
den
Dolby-B/C-NR-Wahlschalter
@?)
auf
Position
B-TYPE
oder
C-TYPE
stellen,
abhangig
davon,
ob
die
Cassette
mit
oder
ohne
Dolby
bzw.
mit
Dolby-B
oder
Dolby-C
bespielt
wurde.
Den
Monitor-Schalter
auf
Position
TAPE
(11)
stellen.
Die
Wiedergabe
kann
nicht
vernommen
werden,
wenn
der
Schalter
auf
Position
SOURCE
(=)
gestellt
ist.
5.
Die
Wiedergabetaste
(8
(®
oder
<)
driicken,
um
mit
der
Wiedergabe
zu
beginnen.
6.
Fur
kurzzeitiges
Unterbrechen
der
Wiedergabe
ist
die
Pausetaste
(5)
zu
verwenden.
Die
Wiedergabetaste
(®
(
»
oder
<)
driicken,
sobald
mit
der
Wiedergabe
wieder
fortgesetzt
werden
soll.
7.
Die
Stoptaste
@)
ist
zu
betatigen,
wenn
die
Wiedergabe
an
beliebiger
Stelle
beendet
werden
soll.
Spricht
die
Bandenden-Abschaltautomatik
an,
dann
wird
dies
durch
den
Schriftzug
‘‘End”
im
Band-
zahlwerk
angezeigt.
Hinweis:
Wahrend
der
Wiedergabe
kann
die
Wiedergabe-Bandlaufrichtung
durch
Driicken
der
Wiedergabetaste
(8
(
»
oder
<4)
beliebig
umgeschaltet
werden.
Vorsicht:
e
Endlos-Cassetten
diirfen
in
diesem
Cassettendeck
nicht
verwendet
werden.
¢
Bei
ganz
zugedrehtem
Ausgangspegelregler
(1)
ist
kein
Ton
vernehmbar.
Wiedergabe-Bandlaufrichtungsanzeige
@
Wahrend
der
Wiedergabe-
oder
Aufnahmefunk-
tion
leuchtet
die
der
Bandlaufrichtung
entspre-
chende
Wiedergabe-Bandlaufrichtungsanzeige
4)
auf.
SCHNELLER
VOR-
UND
RUCKLAUF
Um
das
Tonband
schnell
bis
zu
einer
gewiinschten
Stelle
vorzuspulen,
die
Taste
fiir
schnellen
Vorlauf
drucken.
An
der
gewiinschten
Stelle
ist
dann
das
Bandliaufwerk
durch
Driicken
der
Stoptaste
@1)
anzuhalten.
Fir
das
schnelle
Riickspulen
ist
die
Ruicklauftaste
@0
zu
betatigen.
Auch
hier
wird
der
Bandstop
durch
Driicken
der
Stoptaste
@1)
ausgelést.
@
Bandzahlwerk-Nullstellautomatik
Das
Tonband
durch
Driicken
der
Ricklauftaste
@0
zuriickspulen.
Sobald
der
Beginn
des
Tonbandes
erreicht
ist,
wird
das
Bandzahlwerk
@§
automatisch
auf
‘0000’
gestellt.
Nach
dem
Einschalten
der
Stromversorgung
zeigt
das
Bandzahlwerk
immer
‘‘0000”
an.
@
Tonband-Bereitschaftsfunktion
Die
gewiinschte
Bandlaufrichtung
einstellen
und
danach
die
Tasten
fiir
schnellen
Vor-
und
Rucklauf
@)
gleichzeitig
driicken.
Die
Pauseanzeige
beginnt
zu
blinken
und
das
Tonband
wird
vollstandig
in
die
der
blinkenden
Bandlauf-
richtungsanzeige
entsprechende
Richtung
umgespult,
worauf
bis
zum
Ende
des
Vorspannbandes
vorgespult
wird
und
das
Bandlaufwerk
anhalt.
ANWAHLEN
BESTIMMTER
TITEL
|
Ein
Anwahien
von
bestimmten
Titein
(Musikstiicken)
ist
in
Vor-
und
Ricklaufrichtung
méglich.
Daher
zuerst
die
gewiinschte
Bandlaufrichtung
anwahlen
(siehe
Punkt
8
unter
‘‘Aufnahme’”).
In
Ritcklaufrichtung
sind
sinngema&
die
Tasten
fir
Wiedergabe
(
<
),
schnellen
Vorlauf
(
€4)
und
Riicklauf
{
>»
)
zu
verwenden.
@
SPSS
(Self-Program-Suchlauf-System)
Auffinden
des
Beginns
des
derzeitigen
bzw.
nachfolgenden
Titels
1.
Das
Tonband
abspielen.
2.
Falls
das
derzeitig
wiedergegebene
Musikstiick
nochmals
gehGrt
werden
soll,
die
Riicklauftaste
@
bei
gedriickter
Wiedergabetaste
(8)
dritcken.
Fir
die
Wiedergabe
des
nachfolgenden
Titels
ist
die
Taste
fiir
schnellen
Vorlauf
bei
gedritckter
Wiedergabetaste
(9
zu
betatigen.
Hinweis:
Wahrend
des
Suchlaufes
(schneller
Vor-
oder
Ricklauf)
zeigt
das
Bandzahiwerk
“01”
an.

@
DRPS
(Digital-Random-Program-Selektor)
Uberspringen
von
Titeln
in
beliebiger
Richtung
bis
zu
einem
gewinschten
Musikstick
.
Das
Tonband
abspielen.
2.
Die
Anzah!
der
zu
itiberspringenden
Musikstiicke
bestimmen
(siehe
unter
“Zahlen
der
Anzahl
von
Musikstiicken’’)
und
diese
Zahl
mit
Hilfe
der
Pro-
grammtaste
im
Bandzahlwerk
@6
anzeigen.
3.
Die
Taste
fiir
schnellen
Vor-
(9
oder
Riicklauf
@0
driicken,
um_
die
eingestellte
Anzahl!
von
Musikstiicken
in
Vor-
bzw.
Ricklaufrichtung
zu
iiberspringen.
4.
Der
angew&ahlite
Titel
wird
danach
automatisch
ab
Beginn
wiedergegeben.
~
Zahlen
der
Anzahl
von
Musiksticken
Riickspulen
zu
einem
vorhergehenden
Titel
Qt
Ne
Nt
Fir
das
Ruckspulen
zu
einem
vorhergehenden
Derzeitig
wiedergegebener
Titel
ist
das
derzeitige
Titel
Musikstiick
als
erster
Titel
zu
z&hlen.
Vorspulen
zu
einem
nachfolgenden
Titel
Y
Se
an
eae
Lad
Fir
des
Vorspulen
zu
einem
nachfolgenden
Titel,
ist
das
nachste
Musikstitck
als
Derzeitig
wiedergegebener
erster
Titel
zu
zahlen
....
Titel
Pause
nach
dem
Suchlauf
Wird
die
Pausetaste
(5
wa&hrend
der
SPSS-
oder
DRPS-Funktion
gedriickt,
dann
leuchtet
die
Pause-
anzeige
@8
auf
und
das
Band
halt
am
Beginn
des
angewéahiten
Titels
an.
Durch
Driicken
der
Wieder-
gabetaste
(8
wird
mit der
Wiedergabe
begonnen.
Hinweis:
Die
SPSS-
und
DRPS-Funktionen
funk-
tionieren
nur
in
der
angezeigten,
nicht
aber
in
der
entgegengesetzten
Bandlaufrichtung.
@
Scanaplay
Wiedergabe
nur
bestimmter
Titel
1.
Die
Scanaplay-Taste
@
driicken.
Im
Bandzahlwerk
@
wird
“A-00"
angezeigt.
Das
Band
wird
automatisch
zuriickgespult,
worauf
die
Wiedergabe
am
Tonbandbeginn
einsetzt.
Wenn
der
Titel
wieder-
gegeben
wird,
blinkt
das
‘‘A’’
im
Bandzahlwerk.
2.
Nun
werden
jeweils
die
ersten
10
Sekunden
jedes
Titels
abgespielt,
wobei
mit
blinkendem
“A”
die
jeweils
abgespielten
Titel
sequentielll
mit
‘‘A-01",
““A-02",
““A-03”"
usw.
angezeigt
werden.
3.
Bei
den
fiir
die
Wiedergabe
abzuspeichernden
Titel
ist
die
Speichertaste
zu
driicken.
Mit
dem
Driicken
der
Speichertaste
@0
leuchtet
das
“‘A’”’
kon-
tinuierlich
im
Bandzahiwerk,
worauf
den
Beginn
des
nachsten
Musikstiickes
im
schnelle
Vorlauf
ange-
fahren
wird.
Nach
Wiedergabe
fiir
10
Sekunden
erfolgt
auto-
matisch
der
schnelle
Vorlauf
bis
zum
nachsten
Titel,
worauf
der
gleiche
Vorgang
bis
zum
Ende
des
Ton-
bandes
wiederholt
wird.
Wird
die
Schnellvorlauftaste
wahrend
der
genannten
10
Sekunden
gedriickt,
dann
wird
die
Wiedergabe
unterbrochen,
worauf
das
Band
bis
zum
Beginn
des
nachsten
Titels
vorgespult
wird.
Der
anzuwahlende
Bereich
erstreckt
sich
dabei
von
dem
Musikstiick,
an
dem
die
Speichertaste
@0
das
erste
Mal
gedritckt
wurde,
Uber
15
weitere
Titel.
Falls
in
diesem
Bereich
kein
Musikstiick
abgespei-
chert
wird,
dann
kénnen
Titel
im
Bereich
vom
16.
bis
zum
30.
Musikstiick
programmiert
werden
(Anzeige
“01”
bis
‘“’15’).
Wird
bei
der
Wiedergabe
nur
des
Beginns
der
einzelnen
Musikstiicke
keiner
der
Titel
abgespeichert,
dann
wird
am
Tonbandende
das
Bandlaufwerk
automatisch
abgeschaltet.
4.
Sobald
der
letzte
der
gewiinschten
Titel
beendet
ist,
die
Ricklauftaste
@0
driicken.
(Wenn
15
Titel
nach
dem
ersten
Musikstiick
programmiert
wurden,
er-
folgt
das
Riickspulen
automatisch.)
Im
Bandzahl-
werk
@6)
erscheint
“P’’
und
das
Riickspulen
beginnt.
Das
Band
wird
nun
bis
zu
jenem
Musik-
stiick
zuriickgespult,
bei
dem
erstmalig
die
Speicher-
taste
gedriickt
wurde,
worauf
automatisch
die
Wiedergabe
einsetzt.
Wurde
ein
Titel
in
den
Speicher
eingegeben,
dann
wird
am
Tonbandende
auch
ohne
Driicken
der
Ricklauftaste
@
das
Tonband
zuriickgespult,
worauf
automatisch
die
Wiedergabe
einsetzt.
5.
Wird
die
Schnellvorlauftaste
wahrend
der
genannten
10
Sekunden
betatigt,
dann
wird
dadurch
die
Wiedergabe
unterbrochen
und
das
Tonband
zum
Begin
des
nachsten
Titels
vorgespult.
Durch
Driicken
der
Riickiauftaste
@0
wird
das
Ton-
band
bis
zum
Beginn
des
ersten
in
den
Speicher
eingegebenen
Titel
zuruckgespult.
6.
Nach
der
Wiedergabe
der
in
den
Speicher
eingegebenen
Titel
erfolgt
automatisch
das
Riickspulen,
worauf
das
Bandlaufwerk
am
Tonband-
beginn
selbsttatig
anhalt.
Wird
kein
Titel
in
den
Speicher
eingegeben
(wenn
jeweils
nur
der
Beginn
jedes
Musikstiickes
wiedergegeben
wird),
dann
er-
folgt
die
automatische
Abschaltung
des
Bandlauf-
werkes
am
Bandende.
Wird
die
Schnellvorlauftaste
wahrend
der
automatischen
Wiedergabe
der
in
den
Speicher
eingegebenen
Titel
gedriickt,
dann
wird
das
Ton-
band
schnell
bis
zum
Beginn
des
nachsten
in
den
Speicher
eingegebenen
Musikstiick
vorgespult,
worauf
wiederum
die
Wiedergabe
einsetzt.
Durch
Driicken
der
Ricklauftaste
@0
wird
dagegen
das
Band
bis
zum
Beginn
des
ersten
in
den
Speicher
eingegebenen
Titel
zuriickgespult,
worauf
ebenfalls
wieder
die
Wiedergabe
einsetzt.
Deutsch
19

Vorsicht:
e
Die
Scanaplay-Funktion
kann
jeweils
nur
in
der
Richtung
durchgeftihrt
werden,
die
von
der
Wieder-
gabe-Bandlaufrichtungsanzeige
@4
angezeigt
wird.
¢
Durch
das
Driicken
der
Stoptaste
@1)
werden
alle
Speichereingaben
geldscht.
e
Wéahrend
der
Scanaplay-Funktion
ist
die
Funktion
der
Pausetaste
(5)
aufgehoben.
@
Random-Memory-Suchlauf
Abspielen
der
Titel
in
einer
gewiinschte
Reihen-
folge
1.
Start
des
Random-Memory-Suchlaufes
Um
mit
dem
Random-Memory-Suchlauf
zu
begin-
nen,
die
Programmtaste
driicken,
so
da&
die
Nummer
des
gewinschten
Titels
im
Bandzahiwerk
@6)
angezeigt
wird.
Zum
Beispiel
“01
—»
"02"
—»
“03”
usw.
(Bis
zu
maximal
fiinfzehn
Titel-Nummern
k6énnen
angezeigt
werden.)
2.
Abspeichern
der
Titel
Um
die
Titel
in
den
Speicher
(Memory)
einzugeben,
die
Speichertaste
@
driicken.
Nachdem
die
Reihenfolge
des
zu
spielenden
Titels
mit
‘’P-01"
im
Bandzahlwerk
@6
blinkt,
wird
die
Nummer
des
angewéahiten
Titels
angezeigt.
3.
Die
Titelwahl
(gem&a&
obigem
Punkt
1)
und
die
Speichereingabe
(gem4&
obigem
Punkt
2)
fiir
alle
gewinschten
Titel
fortsetzen.
Bis
zu
15
Titel
k6én-
nen
in
den
Speicher
eingegeben
werden.
Nachdem
15
Titel
in
den
Speicher
eingegeben
wurden,
erscheint
‘“’P
End’’
im
Bandzahlwerk
@@.
(Soll
der
gleiche
Titel
mehrmals
gespielt
werden,
dann
ist
die
Speichertaste
(siehe
obigen
Punkt
2)
mehrmals
zu
driicken,
um
die
gewiinschte
Anzahl
der
Wieder-
holungen
in
den
Speicher
einzugeben.
‘‘P-01"
blinkt
dabei
im
Bandzahlwerk
und
wird
mit
jeder
Betatigung
der
Speichertaste
um
jeweils
eine
Stelle
erhoht.)
4.
Wenn
der
letzte
gewiinschte
Titel
(oder
15
Titel)
in
den
Speicher
eingegeben
wurde,
die
Taste
fir
schnellen
Vor-
oder
Riicklauf
@0
driicken.
Nachdem
das
Band
bis
zum
Beginn
zuriickgespult
wurde,
erfolgt
der
schnelle
Vorlauf
bis
zum
gespeicherten
Titel,
der
dann
wiedergegeben
wird.
Danach
erfolgt
automatisch
das
Vor-
oder
Riick-
spulen,
um
die
Titel
in
der
vorprogrammierten
Reihenfolge
wiederzugeben.
5.
Nach
der
automatischen
Wiedergabe
der
abgespei-
cherten
Musikstiicke
wird
das
Bandlaufwerk
automatisch
abgeschaltet.
Falls
bis
zu
15
Titel
in
den
Speicher
eingegeben
wurden,
die
Stoptaste
@1)
nach
Beendigung
der
automatischen
Wiedergabe
driicken.
Bei
der
automatischen
Wiedergabe
der
in
den
Speicher
eingegebenen
Titel,
werden
die
gleichen
Operationen
wie
wahrend_
der
Scanaplay-Funktion
ausgefiihrt.
e
Abruf
des
Speicherinhaits
Gleichzeitig
die
Programmtaste
und
die
Speichertaste
@0
driicken.
Im
Bandzahiwerk
@
wird
nun
die
Reihenfolge
(durch
Blinken)
der
angewéahlten
Titel
mit
der
darauffolgenden
Titel-
Nummer
angezeigt,
bis
alle
in
den
Speicher
einge-
gebenen
Titel
angezeigt
wurden.
e
Léschen
des
Speichers
Durch
leichtes
Antippen
der
Stoptaste
@)
wird
der
letzte
in
den
Speicher
eingegebene
Titel
geléscht.
Die
Titel-Reihenfolge
beginnt
rasch
zu
blinken,
worauf
die
Nummer
des
dem
geléschten
Titel
vorhergehenden
Musikstiickes
aufleuchtet.
Wird
die
Stoptaste
Qi)
fiir
anger
als
eine
Sekunde
gedriickt
gehaltet,
dann
werden
alle
in
den
Speicher
eingegebenen
Titel-Daten
geldéscht.
Natiirlich
wechselt
dabei
auch
die
Anzeige
des
Bandzahiwerkes
@).
Vorsicht:
e
Der
Random-Suchlauf
ist
nur
in
der
Richtung
médglich,
die
von
der
Wiedergabe-Bandlaufrich-
tungsanzeige
@4)
angezeigt
wird.
e
Wird
wahrend
des
Random-Memory-Suchlaufes
die
Stoptaste
@i)
gedriickt,
dann
wird
das
Bandlaufwerk
abgeschaitet,
wobei
ein
Léschen
des
Speicherinhaits
eintritt.
Damit
die
Suchlauffunktion
richtig
arbeiten
kann,
missen
Leerstellen
mit
relativ
langer
Spieldauer
(langer
als
3
Sekunden)
zwischen
den
einzelinen
Musiksticken
vorhanden
sein.
In
den
folgenden
Fallen
kann
es
zu
fehierhaftem
Betrieb
der
Such-
lauffunktion
kommen:
¢
Bei
Aufnahmen
von
Gesprachen,
Konferenzen
usw.,
wenn
haufig
Stilleintervalle
vorhanden
sind.
¢
Bei
Tonbandern
mit
zu
kurzen
Leerstellen
(weniger
als
3
Sekunden)
zwischen
den
einzelnen
Musikstiicken.
e
Wenn
das
Cassettendeck
in
der
Nahe
eines
Fernsehapparates
betrieben
wird.
©
Wenn
mit
der
Suchlauffunktion
in
der
Nahe
des
Beginns
oder
Endes
eines
Musikstiickes
begon-
nen
wird.
e
Wenn
der
Bandsortenwahler
@9
nicht
gemaR
—
verwendeter
Bandsorte
eingestellt
ist.
Beim
Bespielen
der
mit
der
Suchlauffunktion
zu
verwendenden’
Tonband-Cassetten,
die
Auf-
nahme-Mutingtaste
(7
fir
das
Erstellen
der
Leerstellen
zwischen.
den
-
einzelnen_
Titeln
verwenden.
Table of contents
Languages:
Other Hitachi Tape Deck manuals

Hitachi
Hitachi D-E25 User manual

Hitachi
Hitachi D-E10U User manual
Hitachi
Hitachi D-980U User manual

Hitachi
Hitachi VT-M230EUK User manual

Hitachi
Hitachi D-M1 MKII User manual

Hitachi
Hitachi D-900BS User manual

Hitachi
Hitachi ShowView VT-M331E(CT) User manual

Hitachi
Hitachi D-3300M User manual

Hitachi
Hitachi VT-M112EUK User manual

Hitachi
Hitachi D-909 User manual