FitNord SPRINT 1000 User manual

OWNER’S MANUAL
FITNORD SPRINT 1000 TREADMILL

1
WARNING
- Attach the safety key string to your clothes when using this treadmill.
- Keep your hands to your sides, your eyes staring forward, and never look down at your feet.
- Increase the speed gradually when running.
- In case of emergency, pull the safety key out immediately.
- Exit the treadmill only after the belt has come to a full stop.
Caution: Follow the instructions carefully when assembling the treadmill.
ATTENTION
01- Before starting any exercise program, consult with your physician or health professional.
02- Check that all parts are securely attached.
03- Keep the treadmill away from moisture.
04- We take no responsibility for accidents caused by the above reasons.
05- Dress in proper exercise clothing and footwear.
06- Do not do exercise for 40 minutes after a meal.
07- Warm up before exercising to prevent accidents.
08- Consult with your doctor before exercising if you have high blood pressure.
09- The treadmill is designed for adults.
10- Do not plug anything into any parts of the treadmill, it may cause damage.
11- Do not modify or make additional connections to the cable; do not put anything heavy on the cable;
do not expose the cable to heat; plug directly to a wall socket.
12- Switch off power when the equipment is not in use. Unplug the treadmill carefully, and only when the
power is off.
13. Maximum user weight 170KGS.
14. Pulse data cannot be used for medical purposes. Over-exercise may cause injury and even death. If
you feel dizziness, sickness or other abnormal symptoms, stop training and consult a doctor
immediately. IMPORTANT SAFETY PRECAUTIONS
1. Plug the treadmill’s power cord directly into a dedicated grounded circuit. This product must be
grounded. Grounding provides a path of least resistance for electric current to reduce the risk of electric
shock.
2. Position the treadmill on a clear, level surface. Do not place the treadmill on thick carpet as it may
interfere with proper ventilation. Do not place the treadmill near water, or outdoors.
3. Position the treadmill so that the wall plug is visible and accessible.
4. Never start the treadmill while you are standing on the walking belt. After turning the power on and
adjusting the speed control, there may be a pause before the walking belt begins to move. Always stand
PLEASE READ THE INSTRUCTIONS CAREFULLY BEFORE
ASSEMBLING AND USING THE TREADMILL
KEEP THE MANUAL FOR FUTURE REFERENCE.

2
on the foot rails on the sides of the frame until the belt is moving.
5. Wear appropriate clothing when exercising on the treadmill. Do not wear long, loose clothing that may
get caught in the treadmill. Always wear running or aerobic shoes with rubber soles.
6. Make sure the power supply is connected and the safety pin is effective before using the treadmill.
Attach one side of the safety pin to the treadmill and clip the other side to your clothes or belt. This will
enable you to pull off the safety pin promptly in an emergency.
7. Always unplug the power cord before removing the treadmill motor cover.
8. Make sure there is at least 2*1m space behind the treadmill.
9. Keep small children away from the treadmill during use.
10.Always hold the handrails when initially walking or running on the treadmill, until you are comfortable
using the treadmill.
11. Always attach the safety pull pin string to your clothing when using the treadmill. If the treadmill
should suddenly increase in speed due to an electronics failure, or the speed being inadvertently
increased, the treadmill will come to a sudden stop when the pull pin is disengaged from the console.
12. In case of any abnormality during use, remove the safety pin immediately, grasp the handlebars and
jump onto the two footrails. Get off the treadmill after it stops.
13. When the treadmill is not in use, the power cord should be unplugged, and the safety pull pin
removed.
14. Put the safety key away where it cannot be reached by children. Minors must be accompanied by an
adult when using the treadmill.
15. Before starting any exercise program, consult with your physician or health professional. They can
help establish the exercise frequency, intensity (target heart zone) and time appropriate for your
particular age and condition. If you feel any pain or tightness in your chest, an irregular heartbeat,
shortness of breath, feel faintness, or have any discomfort while you exercise, STOP! Consult your
physician before continuing.
16. If you observe any damage or wear on the main plug or on any section of the main cable, have these
replaced immediately by a qualified electrician –do not attempt to change or repair these yourself.
17. If the supply cord is damaged, it must be replaced by the manufacturer, its service agent, or a
similarly qualified person.
18. Put your feet on the siderails before using the treadmill, and always attach the safety pull pin string to
your clothing. Hold the handlebar until the running belt is moving (feel the running speed with your foot
before using it). To avoid loss of balance, slow down the speed, or take off the safety pin. Hold the
handlebars to jump to the siderails in case of emergency or sudden stop.
19. Make sure the treadmill has stopped before folding. Do not operate after folding the treadmill.

3
ASSEMBLY STEPS..........................................................................................4
GROUNDING METHODS.................................................................................7
TECHNICAL PARAMETERS............................................................................7
OPERATION INSTRUCTIONS.........................................................................8
1.1. Start............................................................................................................................................................. 9
1.2. Programs..................................................................................................................................................... 9
1.3. Safety Key function.................................................................................................................................... 9
1.4. Key functions.............................................................................................................................................. 9
1.5. Display function........................................................................................................................................ 10
1.6. Preset programs .........................................................................................................................................11
1.7. Body fat test.............................................................................................................................................. 13
1.8. Parameters for 3 modes ............................................................................................................................ 14
1.9. Customized program................................................................................................................................. 14
1.10. Others...................................................................................................................................................... 15
ERROR MESSAGES......................................................................................16
EXERCISE INSTRUCTIONS..........................................................................17
MAINTENANCE INSTRUCTIONS..................................................................19
EXPLODED DRAWING..................................................................................22
PARTS LIST....................................................................................................23

4
ASSEMBLY STEPS
STEP 1:
1.Open the package, take out all parts and place the Main frame on flat ground.
2. Connect the Controller wire (83) with the Lower extension wire (82).
3. Lock the Left and Right upright tubes (2L/R) to the Main frame (1) with Hex socket screws (53) and
Lock washers (72). NOTE: Do not tighten the Hex socket screws (53) yet.

5
STEP 2:
1. Connect the Upper extension wire (81) with the Lower extension wire (82).
2. Attach the Computer frame (3) to the Left and Right upright tubes (2L/R) with Hex socket screws (53)
and Lock washers (72).
Tighten all screws from steps 1 and 2.
3. Attach the Outer upright tube covers (36L/R) and Inner upright tube covers (37L/R) onto the Left
and Right upright tubes (2L/R) by inserting the point A of both Outer and Inner upright tube covers
(36L/R & 37L/R) to point B of the Computer frame (3), as shown in picture. Tighten with Cross
tapping screws (99).

6
STEP 3:
1. Attach the Motor cover (17) to the Main frame (1) tightly with Cross screws (60).
2. Plug the Power cord (87) into the power socket on the Main frame (1).
7
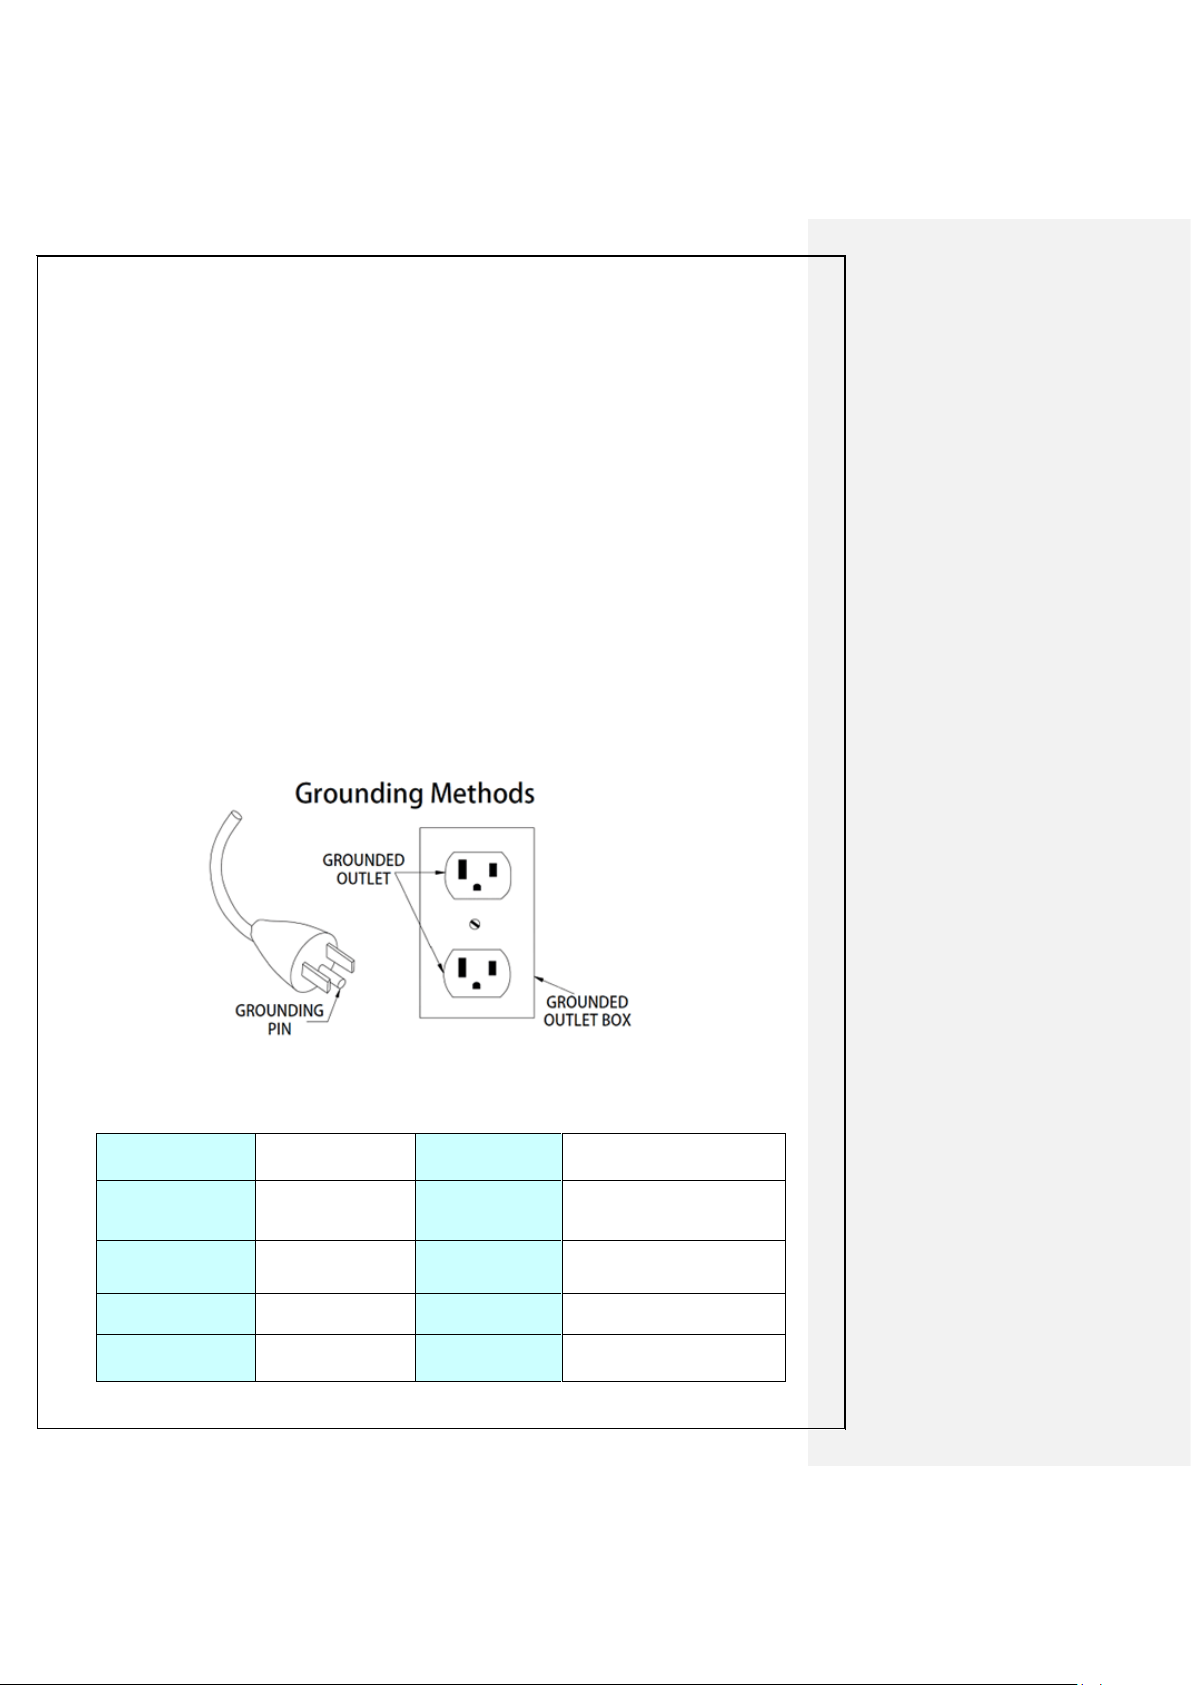
GROUNDING METHODS
This product must be grounded. If it should malfunction or break down, grounding provides
a path of least resistance for electric current to reduce the risk of electric shock.
This product is equipped with a cord that has an equipment-grounding conductor and a
grounding plug. The plug must be plugged into an appropriate outlet that is properly
installed and grounded in accordance with all local codes and ordinances.
DANGER –Improper connection of the equipment-grounding conductor can result in risk
of electric shock. Check with a qualified electrician or serviceman if you have doubts whether
the product is properly grounded.
Do not modify the plug provided with the product –if it does not fit the outlet, have a proper
outlet installed by a qualified electrician.
This product is for use on a nominal 220-volt circuit and has a grounding plug that is in
accordance with VDE.
Make sure the product is connected to an outlet that has the same configuration as the plug. Do
not use an adapter with this product.
Pay attention to the voltage of power and the power plug. Wrong voltage and plug will cause
damage to the product. Refer to the picture below.
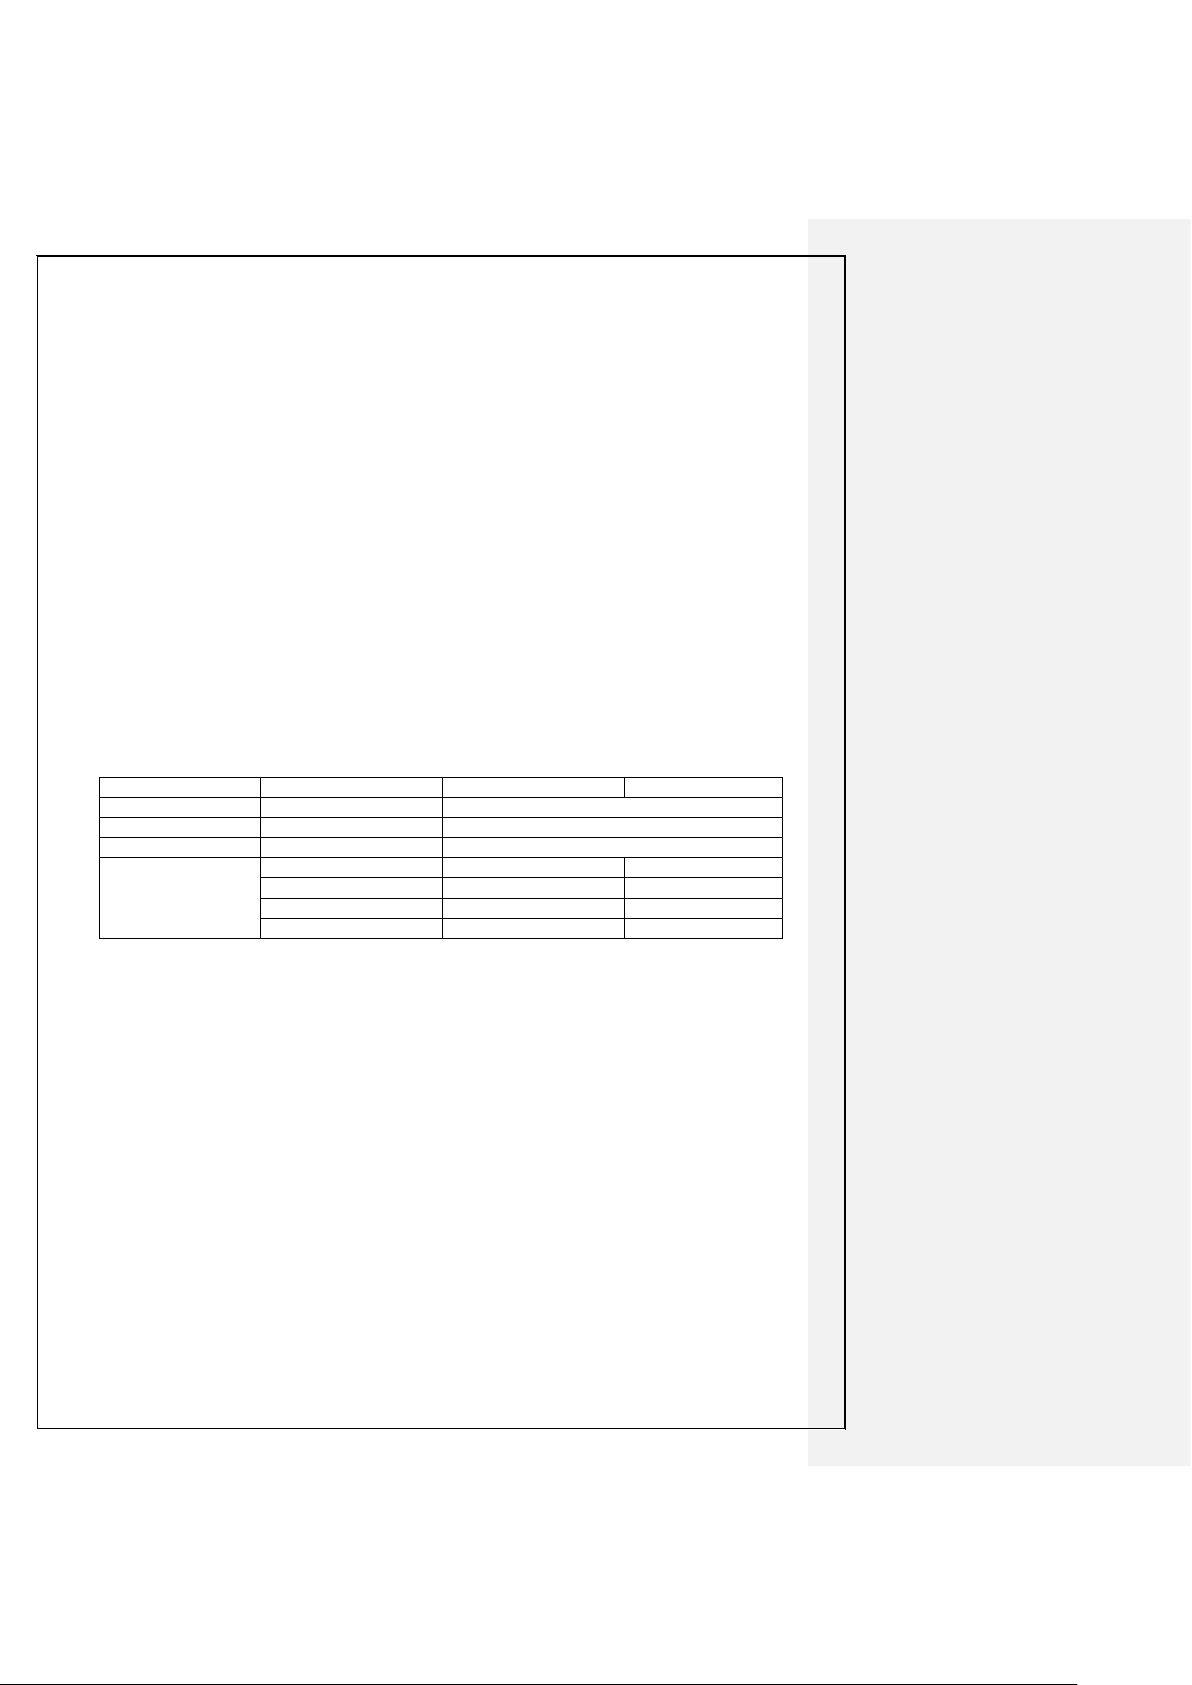
TECHNICAL PARAMETERS
ASSEMBLY SIZE
(mm)
2073x890x1565
POWER
AS ORDER
RUNNING
SURFACE (mm)
550x1550
MAX OUTPUT
POWER
AS ORDER
NET WEIGHT
160KG
INPUT VOLTAGE
AS ORDER
GROSS WEIGHT
190KG
SPEED RANGE
1.0-22 KM/H
MAX
USER WEIGHT
170KG
INCLINE
0-15%

8
OPERATION INSTRUCTIONS
Speed: Displays speed data. (Default speed 1.0 km/h, max speed 22km/h)
Time: Displays time.
Dis.: Displays distance.
INC.: Displays incline.
Prog/cal: Displays program and calories.
PUL.: Displays heart rate.
Middle dot matrix: Displays the exercise segments. 400m per segment.
LCD 大视窗

9
1.1. Start
Hold 3s for a normal start.
1.2. Programs
18 Preset programs, 3 USER setting programs, 4 exercise modes, Body Fat Test
program.
1.3. Safety Key function
Pull out the Safety key pin: The treadmill will stop immediately and the screen will
display “ ---”.
Put the safety key back: The window will display for 2s and all data will be cleared.
The treadmill will then go into standby mode.
1.4. Key functions
START, STOP, PROG, MODE, SPEED/+/-, INCLINE/+/-.
Speed shortcuts: 3km/h, 6 km/h, 9 km/h, 12 km/h & 15 km/h
Incline shortcuts: 2%, 4%, 6%, 8% & 12%.
1. “START”: The treadmill will start at min. speed.
2. “STOP”: The treadmill will stop.
3. PROGRAM KEY: On standby, select between programs “P1-P18, FAT, U1-U3”
from Manual Mode; Manual mode is set for default; the default speed is 1.0 km/h.
4. MODE KEY: On standby, select between three different countdown modes (H-1 to
H-3).
a. H-1: Time countdown mode
b. H-2: Distance countdown mode
c. H-3: Cal. Countdown mode
d. SPEED/+/-: Setup all the countdown modes. Press START to start the
treadmill.
5. SPEED+/-: Increase or decrease the speed 0.1km per press (holding the button for
0.5s will increase or decrease the speed rapidly). Buttons can also be used to set
parameters in the menu.
6. INCLINE+/-: Adjust the slope of the running belt 1 level per press (holding the
button for 0.5s will increase or decrease the incline rapidly).

10
7. SPEED shortcuts: 3km/h, 6km/h, 9km/h, 12km/h & 15km/h can be set when
exercising.
8. INCLINE shortcuts: 2%, 4%, 6%, 8% & 12% can be set when exercising.
9. VOLUME: adjust the music volume.
10.UP/NEXT: select next track.
11.Switching between km/h and mph:take off the safety key and simultaneously
hold PROGRAM and MODE for 3s.
12.Incline studying: Press the INCLINE+ and INCLINE-, two buttons for 3 seconds
in the condition of taking away the safety key, you could study the incline. Please
don’t do other operation during incline study as far as possible, otherwise you will
be failure.
1.5. Display function
When the treadmill is on, hold the heart rate handles for 5s, your heart rate will be
displayed. The initial value is the actual heart rate, range 50-200 beats per minute.
Kommenterad [MP1]: Mitä tämä tarkoittaa?

11
1.6. Preset programs
Each program is divided into 20 sections; the operation time will be evenly distributed
to each program section. Below is an 18-section program running diagram.
No.
Setup time /20 = Each segment of the running time
1
2
3
4
5
6
7
8
9
10
11
12
13
14
15
16
17
18
19
20
P01
SPEED
2
3
3
4
5
3
4
5
5
3
4
5
4
4
4
2
3
3
5
3
INCLINE
1
1
2
2
2
3
3
3
2
2
1
2
2
1
1
3
3
2
2
2
P02
SPEED
2
4
4
5
6
4
6
6
6
4
5
6
4
4
4
2
2
5
4
2
INCLINE
1
2
2
2
2
3
3
2
2
2
2
2
3
3
3
4
4
3
2
2
P03
SPEED
1
3
3
5
5
3
6
6
6
3
6
6
3
3
3
1
3
4
2
1
INCLINE
1
2
2
1
1
2
2
2
1
1
1
1
3
3
3
5
5
2
1
1
P04
SPEED
3
5
5
6
7
7
5
7
7
8
8
5
9
5
5
6
6
4
4
3
INCLINE
2
3
3
2
2
3
3
3
2
2
2
2
4
4
4
6
6
3
2
2
P05
SPEED
2
4
4
5
6
7
7
5
6
7
8
8
5
4
3
3
6
5
4
2
INCLINE
3
3
3
4
4
5
5
5
4
4
4
4
5
5
3
3
3
2
2
2
P06
SPEED
2
4
4
4
5
6
8
8
6
7
8
8
6
4
4
2
5
4
3
2
INCLINE
3
5
5
5
4
4
4
3
3
3
3
4
4
4
3
3
3
4
3
2
P07
SPEED
2
3
3
3
4
5
3
4
5
3
4
5
3
3
3
6
6
5
3
3
INCLINE
4
4
4
4
3
3
6
6
6
7
7
8
8
9
9
6
6
5
4
4
P08
SPEED
2
3
3
6
7
7
4
6
7
4
6
7
4
4
4
2
3
4
4
2
INCLINE
4
5
5
5
6
6
6
7
8
9
9
9
10
10
10
12
12
8
6
3
P09
SPEED
2
4
4
7
7
4
7
8
4
8
9
9
4
4
4
5
6
3
3
2
INCLINE
5
5
5
6
6
6
4
4
6
6
5
5
8
8
9
9
9
7
4
2
P10
SPEED
2
4
5
6
7
5
4
6
8
8
6
6
5
4
4
2
4
4
3
3
INCLINE
5
6
6
6
7
5
8
8
4
4
4
5
5
8
8
10
10
8
6
3
P11
SPEED
2
5
8
10
7
7
10
10
7
7
10
10
5
5
9
9
5
5
4
3
INCLINE
4
5
3
2
6
6
2
2
2
2
2
4
5
6
3
2
5
5
2
0

12
P12
SPEED
3
4
9
9
5
9
5
8
5
9
7
5
5
7
9
9
5
7
6
3
INCLINE
1
2
3
2
3
5
5
0
0
2
3
5
7
3
3
5
6
5
3
3
P13
SPEED
3
3
4
4
5
5
6
6
7
7
8
8
9
6
5
5
4
4
3
3
INCLINE
1
1
3
3
5
5
7
7
9
9
11
11
9
3
5
5
3
3
1
1
P14
SPEED
3
4
5
6
7
6
5
4
7
9
9
7
6
9
8
7
6
5
4
3
INCLINE
0
3
3
5
5
7
7
9
9
7
7
5
5
7
7
5
5
3
3
0
P15
SPEED
9
9
9
8
8
8
7
7
7
6
6
6
5
7
8
8
8
9
9
9
INCLINE
0
1
2
1
2
3
3
2
1
2
2
2
0
2
3
2
3
3
2
0
P16
SPEED
8
8
9
9
10
10
12
12
12
12
12
12
11
12
10
10
9
9
8
8
INCLINE
0
0
0
0
1
1
0
0
0
1
1
0
0
0
1
1
0
0
0
0
P17
SPEED
1
2
3
4
5
6
7
8
9
10
11
12
11
2
3
4
5
6
5
4
INCLINE
0
0
0
0
3
3
0
0
0
3
3
0
0
0
3
3
0
0
0
0
P18
SPEED
6
6
6
4
4
4
8
8
8
10
10
10
8
6
8
8
8
6
6
6
INCLINE
0
1
1
2
2
2
0
0
0
1
1
1
0
0
1
1
1
0
0
0
13
1.7. Body fat test
1. On standby, press MODE to navigate to the Body Fat Test-program (FAT).
2. Press MODE to select parameters F1 (gender), F2 (age), F3 (height), F4
(weight).
3. Press SPEED +/ SPEED - to set the parameters of F1-F4 (see below detailed
table). The window will display F5 after setting.
4. Hold the heart rate handles for 5-6 seconds until FAT is displayed (make sure
your height and weight are correct).
FAT measures the relevance between height and weight, not body proportion.
FAT is suitable for everyone. The perfect FAT is between 20-25. ≦19 is too
thin, between 25-29 is overweight, and ≧30 is obese as shown in the below
chart. (The parameter is only for reference, it cannot be used for medical
purposes)
F--1
Gender
01(man)
02(woman)
F--2
Age
10------------99
F--3
Height
100----------200
F--4
Weight
20------------150
F--5
FAT
≦19
Underweight
FAT
=(20--25)
Normal weight
FAT
=(25--29)
Overweight
FAT
≧30
Obesity

14
1.8. Parameters for 3 modes
1. Time Countdown mode:
a. Set time: 30:00min.
b. Range: 5:00-99:00min.
c. Add step: 1:00min.
2. Countdown cal.:
a. Set calories: 50 Kcal.
b. Set range: 20-990 Kcal.
c. Add step: 10 Kcal.
3. Countdown distance:
a. Set distance: 1.0 Km.
b. Set range: 1.0-99.0 Km.
c. Add step: 1.0 Km.
The menu cycles through Manual →Time →Distance →Calorie.
1.9. Customized program
In addition to 18 built-in programs, the treadmill also has 3 customized programs to
support the customized setting based on the user’s specific needs: U01, U02 and
U03.
1.9.1. Setting customized programs:
On standby, press PROGRAM to navigate to the wanted program (U01- U03):
1. “TIME” window is flashing: Displays the pre-set time.
2. Press “INCLINE+”/ “INCLINE-”, “SPEED+/-” to set the running time.
3. Press MODE to confirm.
4. Set up parameters in the first time section:
a. Set speed by pressing SPEED +/ SPEED - or speed shortcuts.
b. Set incline by pressing INCLINE +/ INCLINE - or incline shortcuts.
c. Press MODE to complete the first time section setting and continue to
set up parameters for the second time section, until all the 20 time
sections have been set.
Set parameters will be permanently saved until rewritten. These parameters will not
be lost due to power disconnection.
1.9.2. Start a customized program:

15
On standby, press PROGRAM to navigate to the required customized program
(U01-U03). Set operation time and press START.
1.10. Others
•When countdown parameters are completed, the screen will display END. The alarm
sounds for 0.5s every 2s until the treadmill is fully stopped. The treadmill is set back to
manual mode.
•When setting parameters, you can cycle through the full range of 5:00-99:00. When set
at 99:00, press INCLINE+ to reset it back to 5:00.
•Countdown time, Countdown cal, Countdown distance: Only one parameter can be set.
In Countdown time time is counted down. In Countdown cal. and Countdown distance
time is counted up until set parameter is reached.
•Cal. Standard value is 70.3Kcal/Km.
•When testing body fat, hold the heart rate handles for 5s to display body fat.
•Switching between kilometers and miles: On standby, or when the safety key is
removed, hold PROG and MODE for 3 seconds at the same time. You will hear an
alarm sound, and your fastest speed will be showed.
Kommenterad [MP2]: Tätät en ymmärrä? Ehkä käsitin
väärin tuon km/h ja mph vaihdon? Sana fastest ei oikein käy
järkeen tässä.

16
ERROR MESSAGES
Error code
Description
Failure reason
Solutions
E01
Communication
abnormality: Inverter
did not receive the
computer’s signal
A. The computer signal wire was
not connected well.
Reconnect the signal wire.
B. The computer signal wire was
connected to a short circuit. or open
circuit.
Replace the signal wire.
E15
Communication
abnormality: Computer
did not receive the
inverter’s signal
C. The computer signal circuit
breakdown.
Replace the computer.
D. The inverter signal circuit
breakdown.
Replace the inverter.
E04
The external AC
voltage under voltage.
AC voltage under voltage: external
AC voltage was too low, check
whether the 220V AC voltage is
normal.
Stop using it and consult an electrician.
E05
The external AC
voltage over-voltage.
AC voltage under voltage: external
AC voltage was too high, check
whether the 220V AC voltage is
normal.
Stop using it and consult an electrician.
E06
Over-current protection
A. Overloaded
System protection, reset the computer.
B. Transmission parts stuck or
blocked.
Adjust the transmission parts or apply lubricating oil.
C. The motor internal short circuit.
Replace the motor.
D. The inverter burned out.
Replace the inverter.
E07
Over-load protection
A. Overloaded
System protection, reset the computer.
B. Transmission parts stuck or
blocked.
Adjust the transmission parts or apply lubricating oil.
C. The motor internal short circuit.
Replace the motor.
E08
Over-temperature
protection
A. Overload causes the inverter to
overheat.
Stop using and wait for it to cool down.
B. Inverter breakdown
Replace the inverter.
E09
Incline learning error
A. The incline motor wire or
computer signal wire was not
connected well.
Examine the wire connection and reconnect if needed.
B. Incline motor defect.
Replace incline motor.
C. Inverter defect.
Replace the inverter.
E10
External AT24C02 error
A. IC memory breakdown, or
relative wire defect.
Replace IC memory or replace driver.

17
EXERCISE INSTRUCTIONS
1. The Warm-Up Phase
It is advisable to do a few stretch exercises before warming up on the treadmill. Each stretch
should be held for approximately 30 seconds. Do not force or jerk your muscles into a stretch - if it
hurts, STOP. When ready, warm-up by running at a slow pace for about 5 minutes. This stage helps
get the blood flowing and muscles working properly. It will also reduce the risk of cramps and
muscle injuries.
2. The Exercise Phase
It is important to maintain a steady tempo throughout the exercise. Your pace should be enough
to raise your heart beat into the target zone shown on the graph below. After regular use, the
muscles in your legs will become stronger.
This stage should last for a minimum of 12 minutes, though most people start at about 15-20
minutes.
3. The Cooldown Phase
This stage is to let your cardio-vascular system and muscles wind down and relax. This is a
repeat of the warm up exercise e.g. reduce your tempo, continue for approximately 5 minutes. The
stretching exercises should now be repeated, again taking care not to force or jerk your muscles
into the stretch.
As you get fitter you may need to train longer and harder. It is advisable to train at least three
times a week, and if possible, space your workouts evenly throughout the week.

18
To tone muscle while on the treadmill you will need to have the resistance set quite high. This
will put more strain on our leg muscles and may mean you cannot train for as long as you would like.
If you are also trying to improve your fitness you need to alter your training program. You should
train as normal during the warm-up and cooldown phases but increase resistance towards the end
of the exercise phase, making your legs work harder than normal. You may have to reduce your
speed to keep your heart rate in the target zone.
The amount of effort you put in is important. The harder and longer you work the more calories
you will burn. Effectively this is the same as if you were training to improve your fitness, the
difference is the goal.

19
MAINTENANCE INSTRUCTIONS
WALKING BELT CENTERING AND TENSION ADJUSTMENT
DO NOT OVERTIGHTEN the walking belt. This may cause reduced motor performance and excessive
roller wear.
CENTERING THE WALKING BELT:
1. Place treadmill on a level surface
2. Run treadmill at approximately 5.5km/h, or 3.5 mp/h.
3. If the belt veers off the track to the right, screw the right adjusting bolt clockwise slowly to move
the belt to the center. (Attention: there is a gap between the belt and the right/left edgings. The
gap should be no more than 5mm.)
4. If the belt veers off the track to the left, screw the left adjusting bolt clockwise slowly to move the
belt to the center.
Picture A: If the belt has drifted to the RIGHT Picture B: If the belt has drifted to the LEFT
WARNING: ALWAYS UNPLUG THE TREADMILL FROM THE ELECTRICAL OUTLET BEFORE
CLEANING OR SERVICING THE UNIT.
PIC B
PIC A
Table of contents
Other FitNord Treadmill manuals


