Flagstone LSWFPKS User manual

Assembly Instructions:
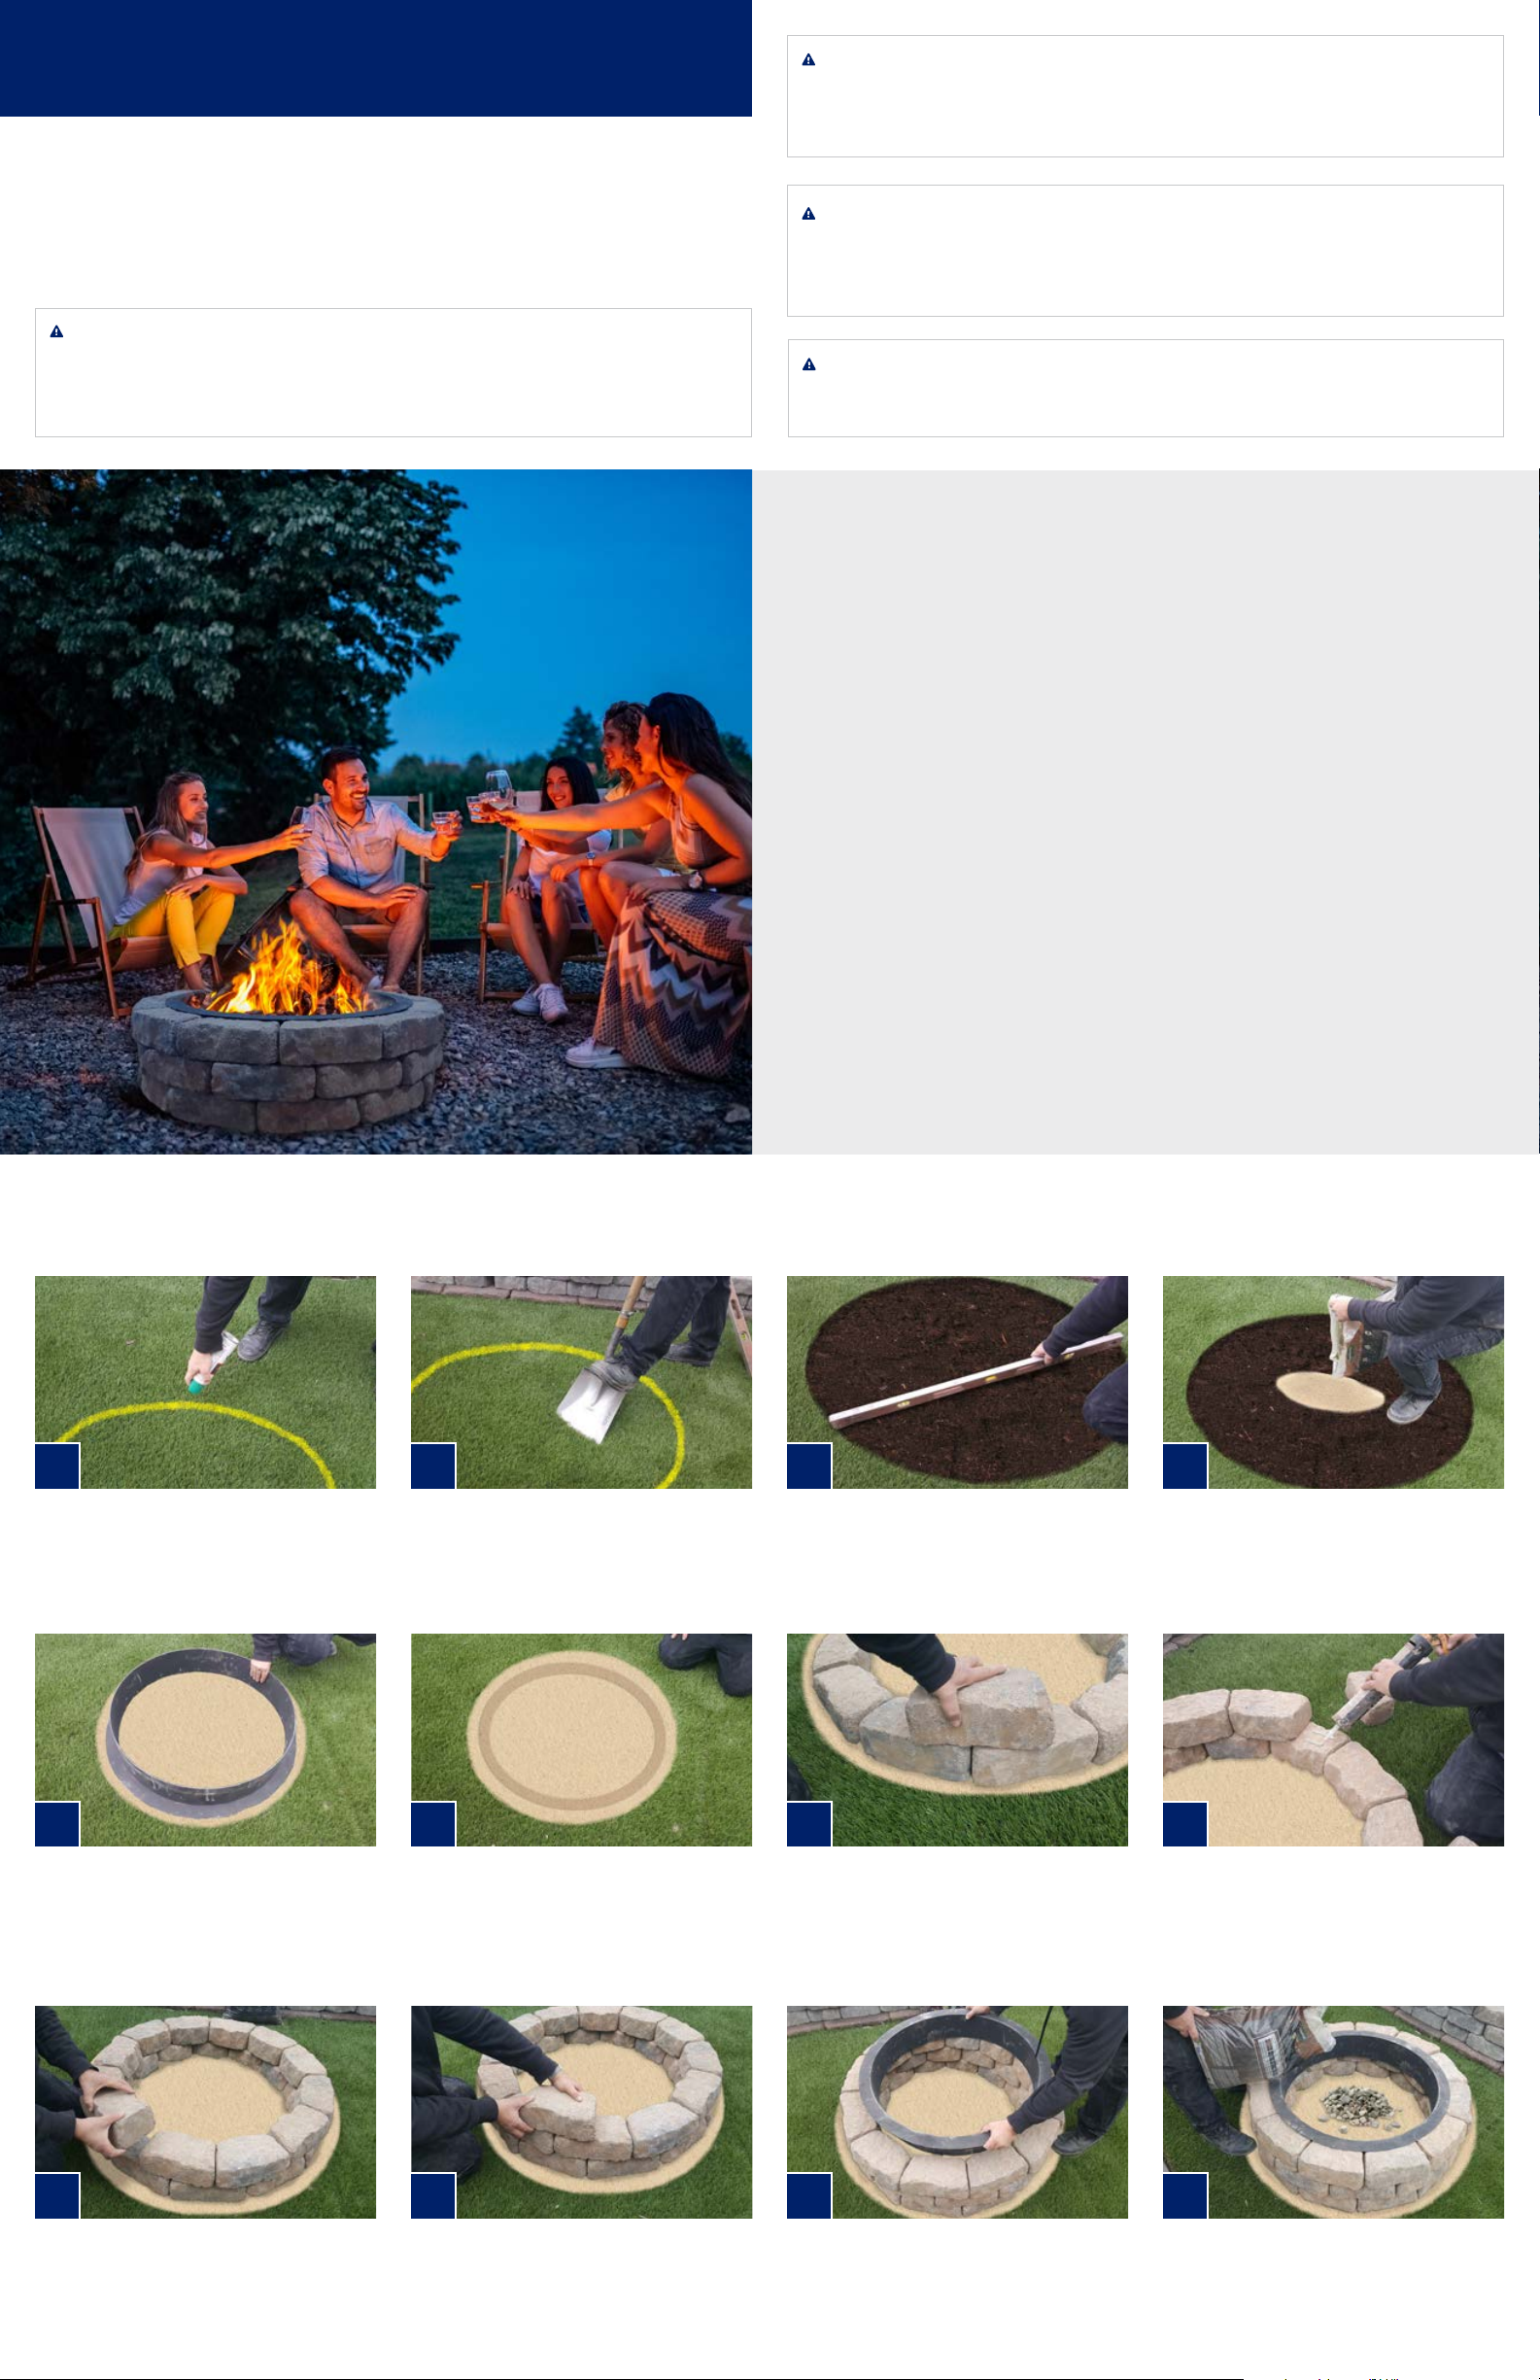
Flagstone Wall Firepit Kit
When installing Firepit Kit on a grass area or lawn, mark out a 49”
(125cm) diameter circle using marking paint and proceed to Step 2.
If installing on a suitable patio area, use chalk rather than paint to
draw a 49” (125cm) diameter circle and proceed to Step 5.
Carefully place steel fire ring, flange side down into the paver base/
sand creating an indention. Carefully lift the fire ring straight up,
trying to disturb as little paver base/sand as possible. This step will
create a circular mark, or guide for you to begin placing the block for
your Firepit Kit.
Pour 1 ½” to 2” of paver base/coarse sand inside the excavated area,
ensuring that the height of the sand is even and level. Mist the sand
with water and use a hand tamper to evenly compact the entire area
inside the circle. Pour an additional ½” to 1” of paver base/sand into
circular area and level. Do not compact.
Using a shovel, remove all sod, dirt, roots and any other organic
material, digging to an even depth of 2” within the area of the circle.
Place wall blocks on top of sand around the inner rim of the
indention in the paver base. Wall blocks should be placed long face
out, against each other to create a complete circle. Level each unit
from front to back and side to side as the circle is completed. Slight
adjustments to wall blocks may be necessary to minimize any gaps
between the units.
Create an even, level area using your shovel to remove any high
spots. Ensure that the surface area inside the circle is level using
a standard household level.
This step is called “dry fitting” to ensure positioning of block before
adhering in place in step 8. When laying the second course of blocks,
be sure to follow a “one over two” pattern, aligning middle of the
each block over the joint made between two blocks under it. Ensure
blocks are level front to back and side to side as you complete ring
of second course.
Dry fit third course of blocks with the joints at the ends aligning with
the joints on first course. Apply adhesive as previously instructed in
Step 8. After all blocks are in place, and while adhesive is still fresh,
slide the steel fire ring into the center of the project. Block may
move slightly or need to be slid outward to allow fire ring to drop
into place.
Lift one block at a time from its position on the second course and
apply two thick beads of concrete adhesive, near the center of stone
and 2” inches apart. The beads should run parallel with the wall
face (end to end not front to back). Replace stone in original position
pressing down firmly while twisting slightly.
The outside lip of the steel fire ring will rest on the inside edge of the
wall block. Ensure that the ring is completely embedded and the lip
of the ring is in contact with top surface of block around third course.
Re-align block if necessary by tapping them back against steel insert
and evening out any large gaps between block ends.
Repeat the process for all blocks on second course. After the concrete adhesive has dried, fill the bottom of the fire pit
with gravel/lava rock, leveling the material as you fill. Gravel/lava
rock should fill up to the bottom edge of the steel fire ring.
Warning: DO NOT USE ANY COMBUSTIBLE MATERIALS ON, IN OR AROUND THIS FIREPIT KIT SUCH AS
LIGHTER FLUID, GASOLINE, KEROSENE, ALCOHOL, ETC. USING THESE, OR SIMILAR, MATERIALS IN ANY WAY
MAY RESULT IN A FIRE OR EXPLOSION CAUSING SERIOUS BODILY INJURY OR DEATH AS WELL AS DAMAGE
TO PROPERTY.
• Steel insert must be used with wall blocks to avoid risk of serious injury or property damage. Do not
assemble, place or use fire pit on any combustible surface (including wood or plastic composite decks).
• This Firepit Kit should not be placed within 20 feet of any walls, trees and/or structures.
• DO NOT use the unit indoors due to hazard of carbon monoxide fumes. Lack of ventilation can cause death.
• DO NOT use under any unprotected combustible structure. Keep combustible surfaces at least one yard (3
feet) away from all sides of the fire pit.
• Children must be carefully supervised when they are near the firepit area!
• Use with extreme care and at your own risk!
• This fire pit must be attended at all times!
• DO NOT build fire pit on wooden or plastic composite decks or on any other combustible surface.
• USE CAUTION. Fire ring will remain very hot for a period of time after using.
• Keep any electrical supply cords away from any heated surfaces.
• For best results allow firepit to cool naturally. Using water to douse flames can cause premature
breakdown of both the steel ring insert and blocks due to rapid temperature shift. To increase the life
of your firepit first let the fire finish burning the wood (which is the “fuel” in the firepit) all the way down
to coals. Then, using a shovel (or similar long handled tool), begin placing dirt and/or sand onto the hot
embers. Occasionally stir the hot coals together with the dirt/sand. Never leave a burning or smoldering
firepit unattended!
Warning: Fuels used in wood or charcoal burning appliances, and the products of combustion of
such fuels, contain chemicals known to the State of California to cause cancer and birth defects or
other reproductive harm.
Firepit Kit Includes:
• 40 Flagstone Blocks
• 1 Steel Fire Ring
• Instruction Sheet
Required Tools:
• Shovel
• Tamper
• Caulk Gun
• Household Level
Additional Materials Needed:
• 5 to 7 Bags Gravel/Lava Rock
• 3 Bags of Leveling Sand
• 4 to 5 Tubes of Concrete
Adhesive
Time To Complete:
1 1/2 to 2 Hours
Level Of Diculty:
Beginner
Warning: Failure to follow these instructions and adhere to the warnings and cautions contained
may result in a fire or explosion causing serious bodily injury or death as well as damage to property.
Please review and have a thorough understanding of this entire guide before attempting to prepare
your site, construct and operate firepit.
Warning: Serious injury and/or property damage can occur if steel insert is not used with concrete wall blocks.
Under no circumstances should firepit be assembled, placed or used on any combustible surface (i.e. wood or plastic
composite decks). When deciding on a location to build your firepit, be sure to maintain a minimum distance of 20
feet between your firepit and any walls, trees and/or structures. An operational hose should be kept nearby and easily
accessible as a safety precaution.
Warning: THIS FIREPIT KIT IS INTENDED FOR OUTDOOR USE ONLY! KEEP A MINIMUM OF 20
FEET BETWEEN THIS FIREPIT AND ANY WALLS, TREES AND/OR STRUCTURES. Only use this firepit
outdoors in a well-ventilated space. Do not use in any enclosed area. Do not use inside any building,
shed, garage, etc. Do not use under any overhangs, carports, pole barns, etc..
1
5
9
2
6
10
3
7
11
4
8
12
Instrucciones De Montaje:
Flagstone Kit De Pozo De Fuego
Cuando instale el Kit Firepit en un área de césped o césped, marque
un círculo de 49 “(125 cm) de diámetro con pintura para marcar y
continúe con el Paso 2. Si lo instala en un área de patio adecuada,
use tiza en lugar de pintura para dibujar un 49” (125 cm) ) círculo de
diámetro y continúe con el Paso 5.
Coloque cuidadosamente el anillo de fuego de acero, con el lado de
la brida hacia abajo en la base / arena de la pavimentadora, creando
una muesca. Con cuidado, levante el anillo de fuego hacia arriba,
tratando de perturbar la menor base de pavimentadora / arena
posible. Este paso creará una marca circular o una guía para que
comiences a colocar el bloque para tu Kit Firepit.
Vierta 1 ½ “a 2” de la base de la pavimentadora / arena gruesa
dentro del área excavada, asegurando que la altura de la arena sea
uniforme y nivelada. Rocía la arena con agua y usa un pisón manual
para compactar uniformemente toda el área dentro del círculo.
Vierta ½ “a 1” adicional de la base / arena de la pavimentadora en
el área circular y nivelada. No compactar.
Con una pala, elimine todo el césped, la suciedad, las raíces y
cualquier otro material orgánico, cavando a una profundidad
uniforme de 2 “dentro del área del círculo.
Coloque bloques de pared sobre la arena alrededor del borde interior
de la muesca en la base de la pavimentadora. Los bloques de pared
deben colocarse boca arriba, uno contra el otro para crear un círculo
completo. Nivele cada unidad de adelante hacia atrás y de lado a
lado a medida que se completa el círculo. Pueden ser necesarios
pequeños ajustes en los bloques de pared para minimizar cualquier
espacio entre las unidades.
Cree un área nivelada y uniforme con su pala para eliminar los
puntos altos. Asegúrese de que el área de la superficie dentro del
círculo esté nivelada utilizando un nivel de hogar estándar.
Este paso se denomina “ajuste en seco” para garantizar la
colocación del bloque antes de adherirse en su lugar en el paso 8. Al
colocar el segundo curso de bloques, asegúrese de seguir un patrón
de “uno sobre dos”, alineando el centro de cada bloque sobre la junta
hecho entre dos bloques debajo de él. Asegúrese de que los bloques
estén nivelados de adelante hacia atrás y de lado a lado a medida
que completa el anillo del segundo curso.
Ajuste en seco el tercer curso de los bloques con las juntas en los
extremos alineadas con las juntas en el primer curso. Aplique el
adhesivo como se indicó anteriormente en el Paso 8. Después de
que todos los bloques estén en su lugar y mientras el adhesivo aún
esté fresco, deslice el anillo de fuego de acero hacia el centro del
proyecto. El bloque puede moverse ligeramente o debe deslizarse
hacia afuera para permitir que el anillo de fuego caiga en su lugar.
Levante un bloque a la vez desde su posición en el segundo curso
y aplique dos gruesas cuentas de adhesivo de concreto, cerca del
centro de la piedra y a 2 pulgadas de distancia. Las cuentas deben
correr paralelas a la cara de la pared (de extremo a extremo, no
de adelante hacia atrás). Vuelva a colocar la piedra en su posición
original presionando firmemente mientras gira ligeramente.
El borde exterior del anillo de fuego de acero descansará en el
borde interior del bloque de pared. Asegúrese de que el anillo esté
completamente incrustado y que el borde del anillo esté en contacto
con la superficie superior del bloque alrededor del tercer curso.
Vuelva a alinear el bloque si es necesario golpeándolos contra
el inserto de acero y igualar cualquier espacio grande entre los
extremos del bloque.
Repita el proceso para todos los bloques en el segundo curso. Después de que el adhesivo de concreto se haya secado, llene
el fondo del pozo de fuego con grava / roca de lava, nivelando el
material a medida que lo llena. La grava / roca de lava debe llenarse
hasta el borde inferior del anillo de fuego de acero.
Advertencia: NO UTILICE NINGÚN MATERIAL COMBUSTIBLE EN, O ALREDEDOR DE ESTE KIT DE CHIMENEA, COMO
LÍQUIDO, GASOLINA, QUEROSENO, ALCOHOL, ETC. EL USO DE ESTOS, O SIMILARES, MATERIALES DE CUALQUIER
FORMA PUEDE RESULTAR EN INCENDIO O EXPLOSIÓN, CAUSANDO LESIONES CORPORALES GRAVES O LA MUERTE,
ASÍ COMO DAÑOS A LA PROPIEDAD.
• El inserto de acero debe usarse con bloques de pared para evitar el riesgo de lesiones graves o daños a la
propiedad. No ensamble, coloque ni use fogatas en ninguna superficie combustible (incluidas las cubiertas de
madera o plástico compuesto).
• Este kit Firepit no debe colocarse a menos de 20 pies de paredes, árboles y / o estructuras.
• NO use la unidad en interiores debido al peligro de vapores de monóxido de carbono. La falta de ventilación puede
causar la muerte.
• NO lo use debajo de ninguna estructura combustible sin protección. Mantenga las superficies combustibles al
menos a una yarda (3 pies) de todos los lados del pozo de fuego.
• ¡Los niños deben ser supervisados cuidadosamente cuando estén cerca del área de la hoguera!
• ¡Utilícelo con extremo cuidado y bajo su propio riesgo!
• ¡Este pozo de fuego debe ser atendido en todo momento!
• NO construya fogatas en cubiertas de material compuesto de madera o plástico ni en ninguna otra superficie
combustible.
• CON PRECAUCIÓN. El anillo de fuego permanecerá muy caliente durante un período de tiempo después de usarlo.
• Mantenga los cables de suministro eléctrico lejos de superficies calientes.
• Para mejores resultados, permita que la chimenea se enfríe naturalmente. El uso de agua para apagar las llamas
puede causar la ruptura prematura tanto del inserto del anillo de acero como de los bloques debido al rápido
cambio de temperatura. Para aumentar la vida útil de su hoguera, primero deje que el fuego termine de quemar
la madera (que es el “combustible” en la hoguera) hasta las brasas. Luego, usando una pala (o una herramienta
similar de mango largo), comience a colocar tierra y / o arena sobre las brasas calientes. Ocasionalmente
revuelva las brasas junto con la tierra / arena. ¡Nunca deje una hoguera ardiendo o ardiendo sin vigilancia!
Advertencia: Los combustibles usados en aparatos de leña o carbón, y los productos de la
combustión de dichos combustibles, contienen sustancias químicas que el Estado de California sabe
que causan cáncer y defectos de nacimiento u otros daños reproductivos.
Kit de pozo de fuego incluye:
• 40 Flagstone Bloques
• Anillo de fuego de acero
• Hoja de instrucciones
Herramientas
requeridas:
• Pala
• Manosear
• Pistola para
calafatear
• Nivel de hogar
Materiales adicionales necesarios:
• 5 a 7 bolsas de grava/roca de lava
• 3 bolsas de arena niveladora
• 4 a 5 tubos de adhesivo para
concreto
Hora de completar:
1 1/2 a 2 horas
Nivel de dificultad:
Principiante
Advertencia: Si no se siguen estas instrucciones y no se adhieren a las advertencias y precauciones
contenidas, se puede producir un incendio o una explosión que ocasione lesiones corporales graves
o la muerte, así como daños a la propiedad. Revise y comprenda a fondo toda esta guía antes de
intentar preparar su sitio, construir y operar la hoguera.
Advertencia: Se pueden producir lesiones graves y / o daños a la propiedad si no se usa un inserto de acero con
bloques de pared de concreto. Bajo ninguna circunstancia se debe ensamblar, colocar o usar la hoguera sobre una
superficie combustible (es decir, cubiertas de compuesto de madera o plástico). Cuando decida una ubicación para
construir su hoguera, asegúrese de mantener una distancia mínima de 20 pies entre su hoguera y cualquier pared,
árbol y / o estructura. Una manguera operativa debe mantenerse cerca y de fácil acceso como medida de seguridad.
Advertencia: ¡ESTE KIT DE FUEGO ESTÁ DISEÑADO PARA USO EXTERIOR SOLAMENTE! MANTENGA
UN MÍNIMO DE 20 PIES ENTRE ESTA CHIMENEA Y CUALQUIER PARED, ÁRBOL Y / O ESTRUCTURA.
Solo use esta hoguera al aire libre en un espacio bien ventilado. No lo use en ningún área cerrada. No lo use
dentro de ningún edificio, cobertizo, garaje, etc. No lo use debajo de voladizos, cocheras, graneros, etc.
1
5
9
2
6
10
3
7
11
4
8
12
Table of contents
Languages:
Popular Outdoor Fireplace manuals by other brands

Firegear
Firegear OFP-L36TFS-N Installation and operating instructions

Pacific Living
Pacific Living 22.001.xx Assembly instructions

Chicago Electric
Chicago Electric 96923 Owner's manual & safety instructions

IKEA
IKEA BROKO manual

Emilyrose
Emilyrose OVATION SERIES Assembly instructions

Uniflame
Uniflame WAF1060SP owner's manual

Extreme Fire
Extreme Fire 50003 Installation and operating instructions

Teamson
Teamson HF28201AA manual

Fireside Outdoor
Fireside Outdoor POP-UP PIT Customer's manual

AJ Enjoy
AJ Enjoy AJ1195 Owner's instruction manual

Endless Summer
Endless Summer GAD15255SP owner's manual

Balkene Home
Balkene Home Fire Sense James 63698 manual


