flamco Prescor BFP EA User manual
Prescor BFP EA
MC01095/V1.0/08-2015
www.amcogroup.com/manuals
ENG
1. General
Application
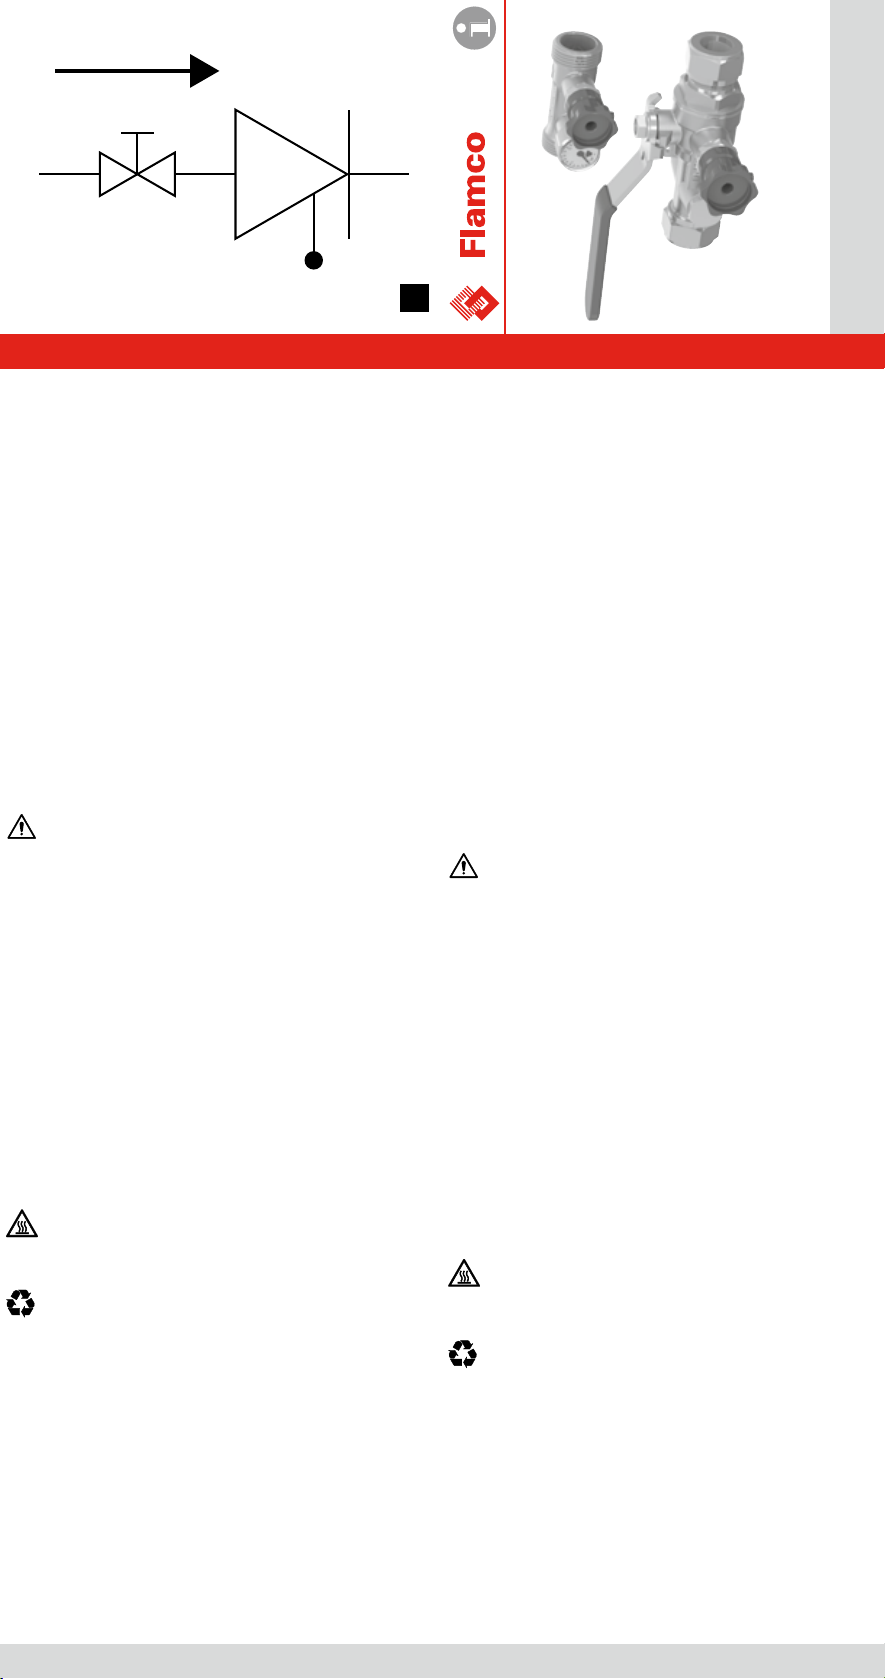
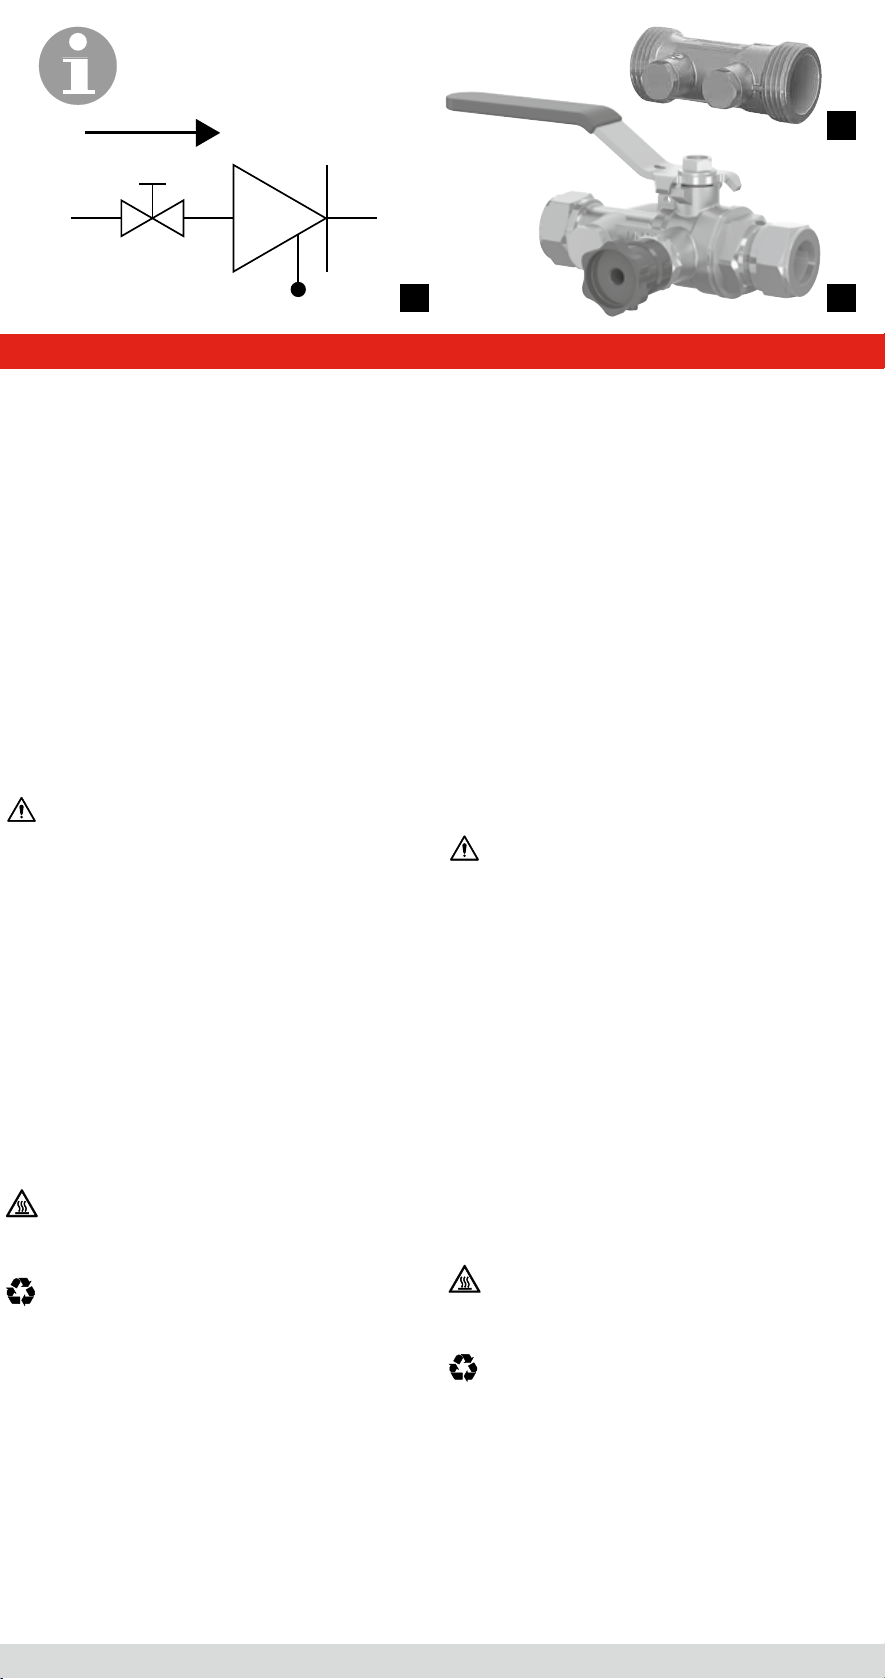
The Prescor BFP EA back-ow preventer (EN13959) protects installations
of potable water against the back-ow of contaminated potable water up
to water class 2 (EN1717). The device consists of a non-return valve,
measurement ports (sealed at both sides) and an integrated isolation valve*.
Nominal diameter: DN15 / DN20 / DN25 / DN32** / DN40** /
DN50**
Nominal pressure: PN10
Temperature range: min. 1 °C / max. 65 °C
Safety
• Protect from damage, dirt and condensation during transport and
storage.
• Consult the local guidelines for potable water installations.
• Install the back-ow preventer in an easily accessible area,
which is protected from frost and extreme temperatures.
• Use appropriate tools to prevent damage during installation and
operation.
2. Installation
The following points are important for the proper operation of the
back-ow preventer:
• Assemble using the schematic shown in Figure 1.
• Install the valve only after the pipework is thoroughly ushed and
cleaned.
• Install the backow preventer with isolation valve 1 closed (g. 1).
• The back-ow preventer must be connected to the water mains
according to the indicated ow direction.
3. Commissioning
Open the isolation valve slowly.
4. Inspection and maintenance
Inspection and maintenance according to EN 806 and local regulations
by a certied company. See www.amcogroup.com/prescor-bfp for
troubleshooting.
5. Dismantling
Release the pressure from the system. Close isolation valve 1 (g. 1)
and depressurise the installation upstream. Remove the product.
Environment
Abide by local regulations when disposing of the product.
* Applicable only to the Prescor BFP EA Unit.
** Applicable only to the Prescor BFP EA.
DEU
1. Allgemein
Verwendung
Der Prescor BFP EA Rückussverhinderer (EN13959) sichert
Trinkwasserinstallationen gegen ein Rückießen verunreinigter Flüssigkeiten
bis Flüssigkeitskategorie 2. (EN1717). Der Rückussverhinderer besteht aus
einem Rückschlagventil mit beidseitigen Revisionkappen und einem
integrierten eingangsseitigen Absperrventil*.
Nenndurchmesser: DN15 / DN20 / DN25 / DN32** / DN40** /
DN50**
Nenndruck: PN10
Temperaturbeständigkeit: min. 1 °C / max. 65 °C
Sicherheit
• Bei Transport und Lagerung sind Schäden durch Verunreinigungen oder
Kondensatbildung zu vermeiden.
• Installation, Inbetriebnahme und Wartung entsprechend den gültigen
länderspezischen Vorschriften.
• Den Rückussverhinderer in einer gut zugänglichen Stelle zu installieren,
die gegen Frost und extreme Temperaturen geschützt ist.
• Um Beschädigungen zu vermeiden ist geeignetes Werkzeug zu
verwenden.
2. Montage
Folgende Punkte sind zu beachten, damit der Rückussverhinderer
einwandfrei funktioniert:
• Die Montage erfolgt, wie in Abbildung 1 schematisch dargestellt.
• Den Rückussverhinderer erst montieren, nachdem die
Anschlussleitungen gründlich durchgespült und abgedrückt wurden.
• Installieren Sie den Rückussverhinderer bei geschlossenem
Absperrventil 1 (Abb. 1).
• Bei der Montage des Rückussverhinderers in der Trinkwasserleitung
ist die angegebene Strömungsrichtung zu beachten.
3. Inbetriebnahme
Absperrventil langsam öffnen.
4. Inspektion und Wartung
Die Inspektion (und Wartung) ist entsprechend EN 806 und lokalen
Regelwerken von zertiziertem Betrieb auszuführen. Siehe auch unter
www.amcogroup.com/prescor-bfp für Fehlebehebung.
5. Demontage
Das System drucklos machen. Absperrventil 1 (Abb. 1) schließen und
Installation strömungsseitig drucklos machen. Das Produkt entfernen.
Umwelt
Bei der Entsorgung des Produkts die örtlichen Vorschriften beachten.
* Nur beim Prescor BFP EA Unit.
** Nur beim Prescor BFP EA.
1
1
www.amcogroup.com/manuals
NLD
1. Algemeen
Toepassing
De Prescor BFP EA terugstroombeveiliger (EN13959) beschermt
drinkwaterinstallaties tegen terugstroming van verontreinigd drinkwater
tot en met waterklasse 2 (EN1717). Het toestel bestaat uit een keerklep
met aan weerszden afgedopte controlepluggen en een geïntegreerde
bovenstroomse afsluiter*.
Nominale diameter: DN15 / DN20 / DN25 / DN32** / DN40** /
DN50**
Nominale druk: PN10
Temperatuurbestendigheid: min. 1 °C / max. 65 °C
Veiligheid
• Voorkom schade, vuil en condensvorming b transport en opslag.
• Raadpleeg lokaal geldende richtlnen voor drinkwaterinstallaties.
• Installeer de terugstroombeveiliger in een goed toegankelke ruimte,
beschermt tegen vorst en extreme temperaturen.
• Gebruik geschikt gereedschap om beschadigingen te voorkomen.
2. Installatie
De volgende punten zn van belang voor een correcte werking van
de terugstroombeveiliger:
• Bouw de schematisch weergegeven samenstelling in afbeelding 1.
• Installeer de terugstroombeveiliger pas nadat de aansluitleidingen
grondig zn doorgespoeld en afgeperst.
• Installeer de terugstroombeveiliger met gesloten afsluiter 1 (zie afb. 1).
• Installeer de terugstroombeveiliger in de juiste stroomrichting in de
drinkwaterleiding.
3. Inbedrfstelling
Open de afsluiter langzaam.
4. Inspectie en controle
Inspectie en controle volgens EN 806 en lokaal geldende richtlnen door
een gecerticeerd bedrf. Kk op www.amcogroup.com/prescor-bfp voor
de probleemoplosser.
5. Demontage
Maak het systeem drukloos. Sluit afsluiter 1 (zie afb. 1) en maak de
bovenstroomse installatie drukloos. Verwder het product.
Milieu
Houdt u zich aan de lokale wetgeving wanneer het product wordt
afgevoerd.
* Alleen van toepassing op de Prescor BFP EA Unit.
** Alleen van toepassing op de Prescor BFP EA.
FRA
1. Généralités
Application
Le disconnecteur Prescor BFP EA (EN13959) protège les installations
d’eau potable contre le reux d’eau potable contaminée jusqu’à et y
compris la classe d’eau 2 (EN1717). L’appareil se compose d’un clapet
anti-retour avec aux deux extrémités des bouchons de contrôle et d’une
vanne d’isolement* intégrée en amont.
Diamètre nominal: DN15 / DN20 / DN25 / DN32** / DN40** /
DN50**
Pression nominale: PN10
Résistance à la température: min. 1 °C / max. 65 °C
Sécurité
• Évite les dommages, l’encrassement et la formation de condensation
lors du transport et de l’entreposage.
• Consulter les directives locales en vigueur pour les installations
d’eau potable.
• Monter le disconnecteur dans un local aisément accessible, à l’abri
du gel et des températures extrêmes.
• Utiliser des outils appropriés an d’éviter tout endommagement.
2. Montage
Les points suivants sont importants pour un fonctionnement correct
du disconnecteur:
• Assembler le dispositif indiqué schématiquement dans la gure 1.
• Monter le disconnecteur uniquement après avoir procédé à un rinçage
et à un contrôle d’étanchéité minutieux des conduites.
• Installer le disconnecteur avec la vanne d’isolement 1 en position
fermée (g. 1).
• Le disconnecteur doit être raccordé à la conduite d’eau potable
conformément à la direction de ux indiquée.
3. Mise en service
Ouvrir lentement la vanne d’isolement.
4. Inspection et entretien
L’inspection (et l’entretien) doivent être effectués par une société agréée,
en conformité avec la norme EN 806 et les réglementations locales en
vigueur. Consulter www.amcogroup.com/prescor-bfp pour la résolution
des problèmes.
5. Démontage
Dépressuriser l’installation. Fermer la vanne d’isolement 1 (g. 1)
et dépressuriser l’installation en amont. Déposer le produit.
Environnement
Respecter la législation locale lors de la mise au rebut du produit.
* Uniquement d’application pour le disconnecteur Prescor BFP EA Unit.
** Uniquement d’application pour le disconnecteur Prescor BFP EA.
1
1 3
2
Other flamco Plumbing Product manuals


Popular Plumbing Product manuals by other brands

Presto
Presto ALPA installation guide

Wostman
Wostman EcoVac BASE manual

SILFRA
SILFRA QUIKTRONIC Series installation instructions

Glacier bay
Glacier bay HD67112W-8004 Installation and care guide

American Standard
American Standard 634 installation instructions

Blanco
Blanco Equal Double Bowl Drop-In 511-747 Specifications


PEERLESS
PEERLESS P299232 installation instructions

Galaxy
Galaxy 3000M Installation and user guide

Oras
Oras Medipro Installation and maintenance guide

Moen
Moen Brushed Nickel 84389BN Illustrated parts list

Hans Grohe
Hans Grohe Verso 220 Showerpipe Series Instructions for use/assembly instructions

Wolff Finnhaus
Wolff Finnhaus Melina 40 Building instructions