Flaming Star Trail Boss User manual

Flaming Star
Trail Boss
Instruction Manual
V 1.3

2
Flaming Star packs began in 1992 with a mission to make a comfortable, functional,
durable pack. The founder, Sid Lilienthal, worked diligently to design, manufacture, and
make available a pack that would, first and foremost, be safe and comfortable for the
llama, and be built in a way to meet the specific structural needs of llamas, i.e.
designing and building a saddle that did not put any pressure on a llama’s spine.
Llamas differ from equines in that prolonged, direct pressure on the vertebrae can
cause injury or even paralysis. Flaming Star saddles are built to evenly distribute the
weight on either side of the spine along the upper portion of the rib cage. A two-cinch
system is employed to keep the saddle firmly in place, and to avoid shifting that may
lead to soreness.
Through the years, Sid has used the suggestions from pack owners to improve the
system and made several models to meet specialized needs. In 2005, Barb Brady
purchased Flaming Star from Sid and continues to offer quality craftsmanship and
customized products.
Disclaimer
Although every effort has been made to insure the information within this manual is
accurate, Llama Hardware and its sales representatives cannot be held responsible for
any injury or property damage that occurs in the course of using this equipment.
Please read this manual thoroughly before saddling your llama. If you have any
questions, please contact your authorized sales representative, or contact the
manufacturer directly at 1-406-890-0109, or info@llamahardware.com.
Recommended Care: Panniers can be turned inside out and washed with mild
detergent in cold water on the gentle cycle. Do not use bleach. Air dry thoroughly
before storing. Do not allow contact with alcohol-based products. Apply spray-on water
repellent as needed to maintain water repellent characteristics and to help prevent
stains. Store in plastic tubs or hang on wall to prevent damage by rodents.

3
Parts of the Flaming Star Trail Boss Pack
Your Trail Boss Pack
includes the following:
A saddle with two
mohair blend cinches,
and two panniers
each with two open
side pockets and a
drawstring weather
guard over the main
compartment
The Trail Boss is
designed to pack 40
pounds or less and is
perfect for day hikes,
obstacle courses, and
training young llamas.
The pack will also fit
ponies, miniature
donkeys, and large
goats. A rumpstrap
may be necessary
with goats and
equines, and a chest
plate is recommended
when stringing animals
together.
Note: The string along
loop differs from the
photo. It is now a 1 ½”
nickel-plated D-ring.
4
Saddling Your Llama
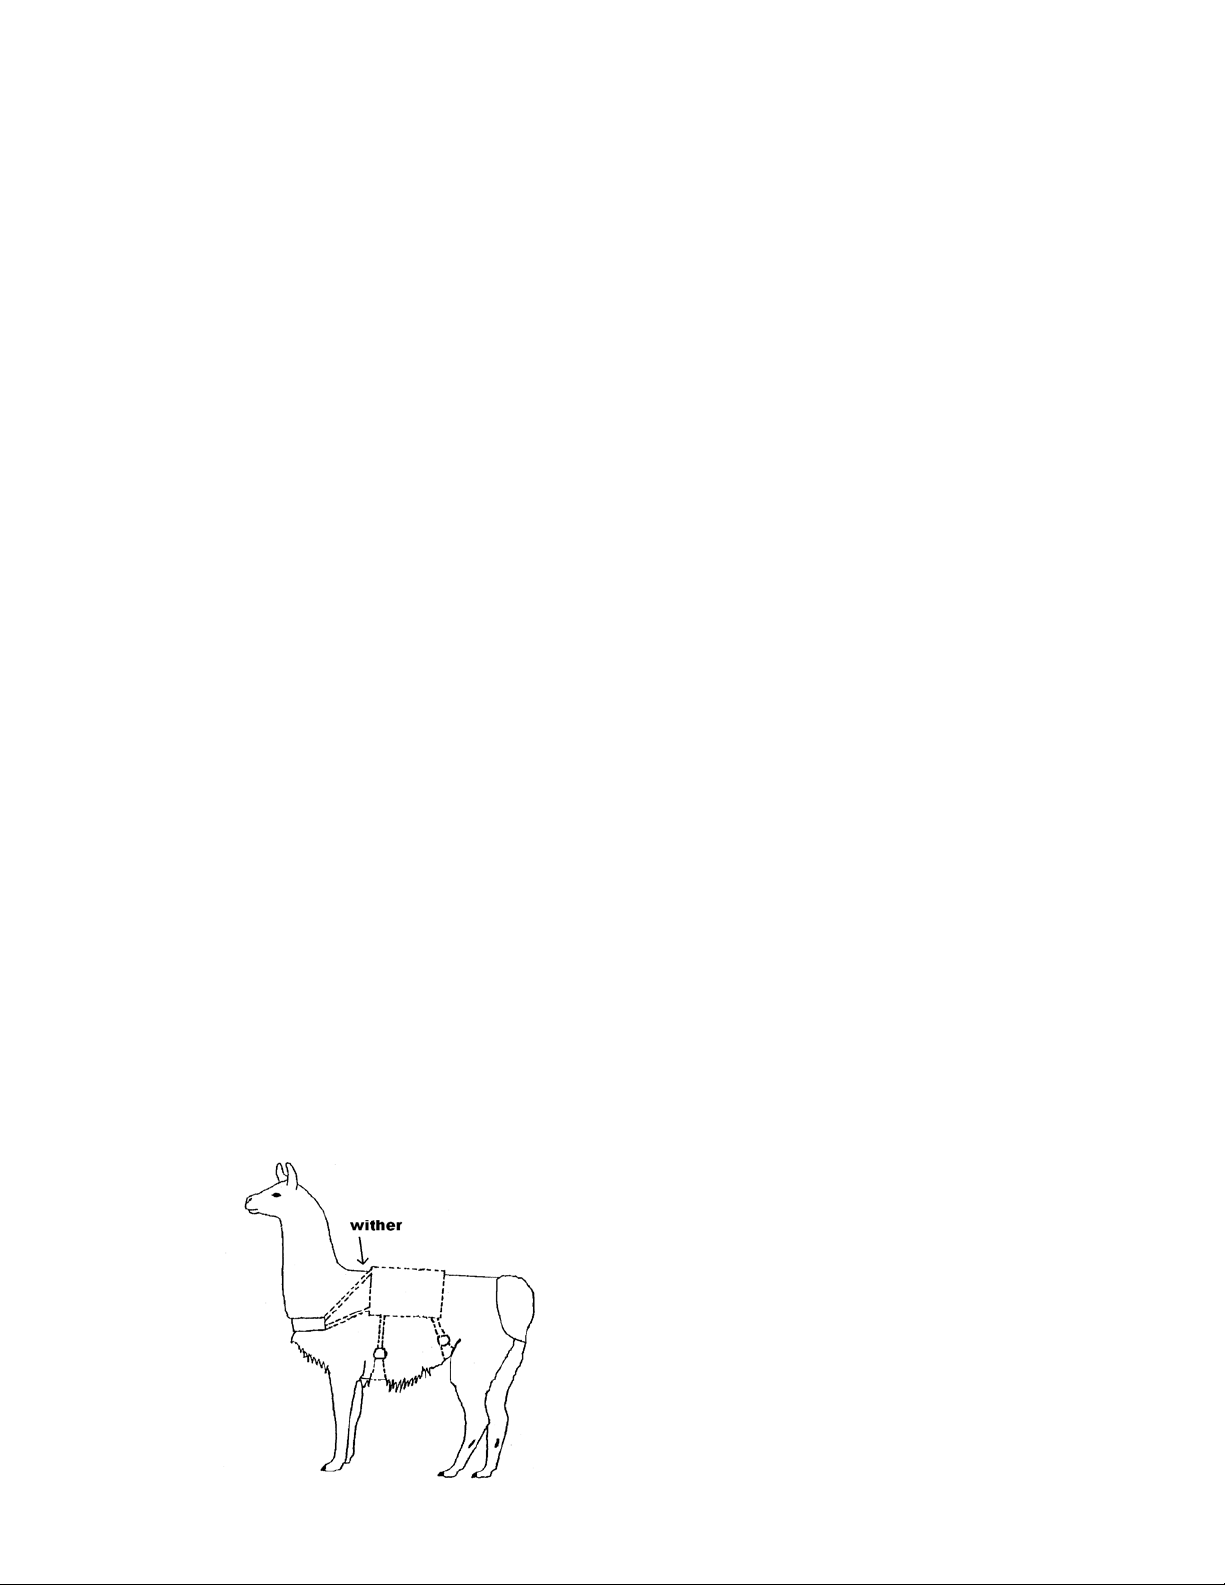
The saddle is designed to be placed behind the withers and put on tightly. Place the
leading edge of the front cinch along the edge of the hairless area of the armpit. Do not
place the cinch in the armpit as it can cause sores. The front cinch should be as tight
as possible. The back edge of the rear cinch should be placed in front of a male llama’s
penal sheath, or in front of a female llama’s udder. Angle the rear cinch adjustment
strap to come off the back corner of the saddle to take advantage of the natural slope of
the abdomen. The rear cinch should be very snug. If the saddle moves forward onto
the withers, the rear cinch is not tight enough and the saddle should be remounted to
prevent the front cinch from entering the armpit area.
The cinches provide comfort for the llama and stability for the saddle. The cinch rings
should be at an equal distance from the saddle on each side of the llama. The front
cinch rings should be located behind and above the armpit of the llama. The rear cinch
ring should be exposed to your sight and fairly close to the saddle.If the cinch ring
touches the saddle and the saddle is not tight, you will need to get shorter cinches. If
you have cinches of two different lengths, the shorter cinch will usually be placed in the
rear position. The cinch connector strap is designed to keep the rear cinch from sliding
too far back. It can be adjusted after the two cinches are tightened.
The chest plate is an option and is only needed if stringing two or more llamas
together. The chest plate keeps the trailing llama from pulling the saddle too far back
on the leading llama.Place the chest plate according to the diagram below and adjust
the straps so the llama can still graze in comfort. It should be loose enough to slip your
hand between it and the llama.
Familiarize yourself with the parts of the saddle. Put the saddle in front on you with left
side facing you. Note: the string along loop is on the back of the saddle and the longer
cinch is in the front.
1. Disconnect the two side release buckles on the chest plate from the left side of the
saddle.
2. Pinch the two side release buckles on the left side of the saddle and release the
cinches.
3. Press the cam buckle to allow a lot of slack in the cinch adjustment strap. This
makes it easier to fit to the llama on the first try.
4. Place the front edge of the saddle at the rear edge of the llama’s wither. See below.

5
5. From the left side of the llama, reach under and grab the front cinch. You may
need someone to hand it to you from the other side if your llama is
uncooperative. Run the side release/cam buckle strap through the larger cinch
ring and snap the side release into place. If you have given the cinch adjustment
strap plenty of slack, this should be easy to do.
6. With your left hand behind the cinch ring, tighten the cinch by using a ratcheting
motion with your right hand. See below. For first-time fitting, both sides may
need to be adjusted to keep the cinch centered. After the front cinch has been
tightened, repeat the process with the rear cinch. Keep in mind that the rear
cinch is placed directly in front of the penal sheath on males and in front of the
udder on females. This placement is critical in keeping the pack from sliding
forward. If placed in the proper position and cinched tightly, use of a rump strap
or breeching is not necessary.
A. With the end of the cinch adjustment strap in hand, raise your hand away from
the saddle. With steady tension on the strap, lower your hand and take up slack
through the cam buckle. Do this in a smooth ratcheting motion. Keep your free
hand behind the cinch ring to keep the fiber from being pulled. Pulling fiber into
the cinch ring is the main cause of llamas being hard to saddle, so please take
care to avoid it at all costs. At this point, the saddle may be tight enough. If you
feel it is not, and you have the secondary cinch ring on your cinch, see paragraph B.
B. Place the end of the cinch adjustment strap through the secondary cinch ring
(see illustration). Tighten the cinch some more by pulling and lifting. Usually, you
can tighten the cinch adjustment strap another inch or so. The cinch will be tight at
this point, and you may need to pull straight away from the llama.
C. To remove the saddle, depress the cam buckles (on your working side only) and
give enough slack to be ready for next time. The cam buckles are used to loosen
and tighten only and are generally not disengaged from the cinch adjustment strap.
Squeeze the side release buckles and release the cinch adjustment straps from the
cinches.

6
How tight should the cinches be?
Properly placed, cinched, and loaded, the saddle is very stable and will stay in
place during pack trips no matter what the terrain. If this is your first Flaming Star
saddle, you may be surprised at how tight the cinches must be. Remember, this is a
soft saddle and more compression occurs as the saddle conforms to the back of the
llama than it would if a rigid saw buck type saddle was used. Additionally, the more
fiber your llama has under the saddle, the more compression will occur. Llamas will
also inflate themselves (like their equine counterparts) during saddling. Here is a good
regimen to adopt when saddling:
First, be certain that there is no debris in the fiber or sores on the llama that will cause
discomfort by placing a saddle or cinches on top of it. It is a good idea after brushing, to
rub the belly area with your hand to ensure there are no sticks or burrs attached to the
fiber. Saddle your llama using the above instructions and diagrams. Connect the front
cinch and tighten enough so the saddle doesn’t move before connecting the rear cinch
and optional chest plate. This is a safety issue in case the llama acts up, he won’t end
up with a saddle hanging around his neck or under his belly. The cinches and chest
plate are removed in the reverse order that they were connected.
Adjust the cinch adjustment straps on both sides of the llama so that the cinches evenly
straddle the belly area. Tighten the cinches so that you can barely get a finger or two
under the edge of the cinch. Now, tighten the cinch connector strap to keep the rear
cinch from moving any farther towards the back of the llama.
Load your panniers and weigh them. They should be within one pound of each other to
prevent the saddle from listing to one side. If your saddle gets off center and the load is
balanced, your front cinch is likely too loose. If the load rides up on the withers, your
rear cinch is too loose.
Before you load the panniers onto the saddle, check the cinches and tighten if
necessary. If your llama has expanded his belly prior to saddling, your cinches may not
be tight enough. Once the panniers are loaded, check the cinches again, as
compression of the fiber and saddle foam will occur especially when the load is heavy.
Once down the trail twenty minutes or so, check and tighten the cinches again. This
may seem like a lot of checking, but an ounce of prevention (keeping the saddle in
place) is worth a pound of cure (remounting the saddle). Remounting a saddle on the
trail can be dangerous to you, the llama, and any traffic that you may encounter.
As you gain experience in how tight the saddle needs to be, you will be able to
tighten well enough at the trailhead to avoid most adjustments on the trail.
Table of contents
Other Flaming Star Pet Care Product manuals


