Flaming Star Llama Harness User manual
Features of the Flaming Star Harness
This harness has been constructed to correct problems that have surfaced with other harnesses, i.e., saddles that
create sore spots on the spine, loose straps that dangle and flop around, inadequate padding, and limited
adjustability.
The Saddle is designed to provide the same spinal clearance as has existed on the Flaming Star pack saddles since
1992. A separate pad is not needed nor recommended for the saddle. Inside the saddle is closed cell foam and poly
felt that conforms to the shape of your llama’s back, and will compress as you tighten the cinch. Therefore, you may
need to snug the cinch a little tighter than you’re used to.
The Shaft Loops are available in two lengths and are lined in poly felt to protect the finish on the shafts.
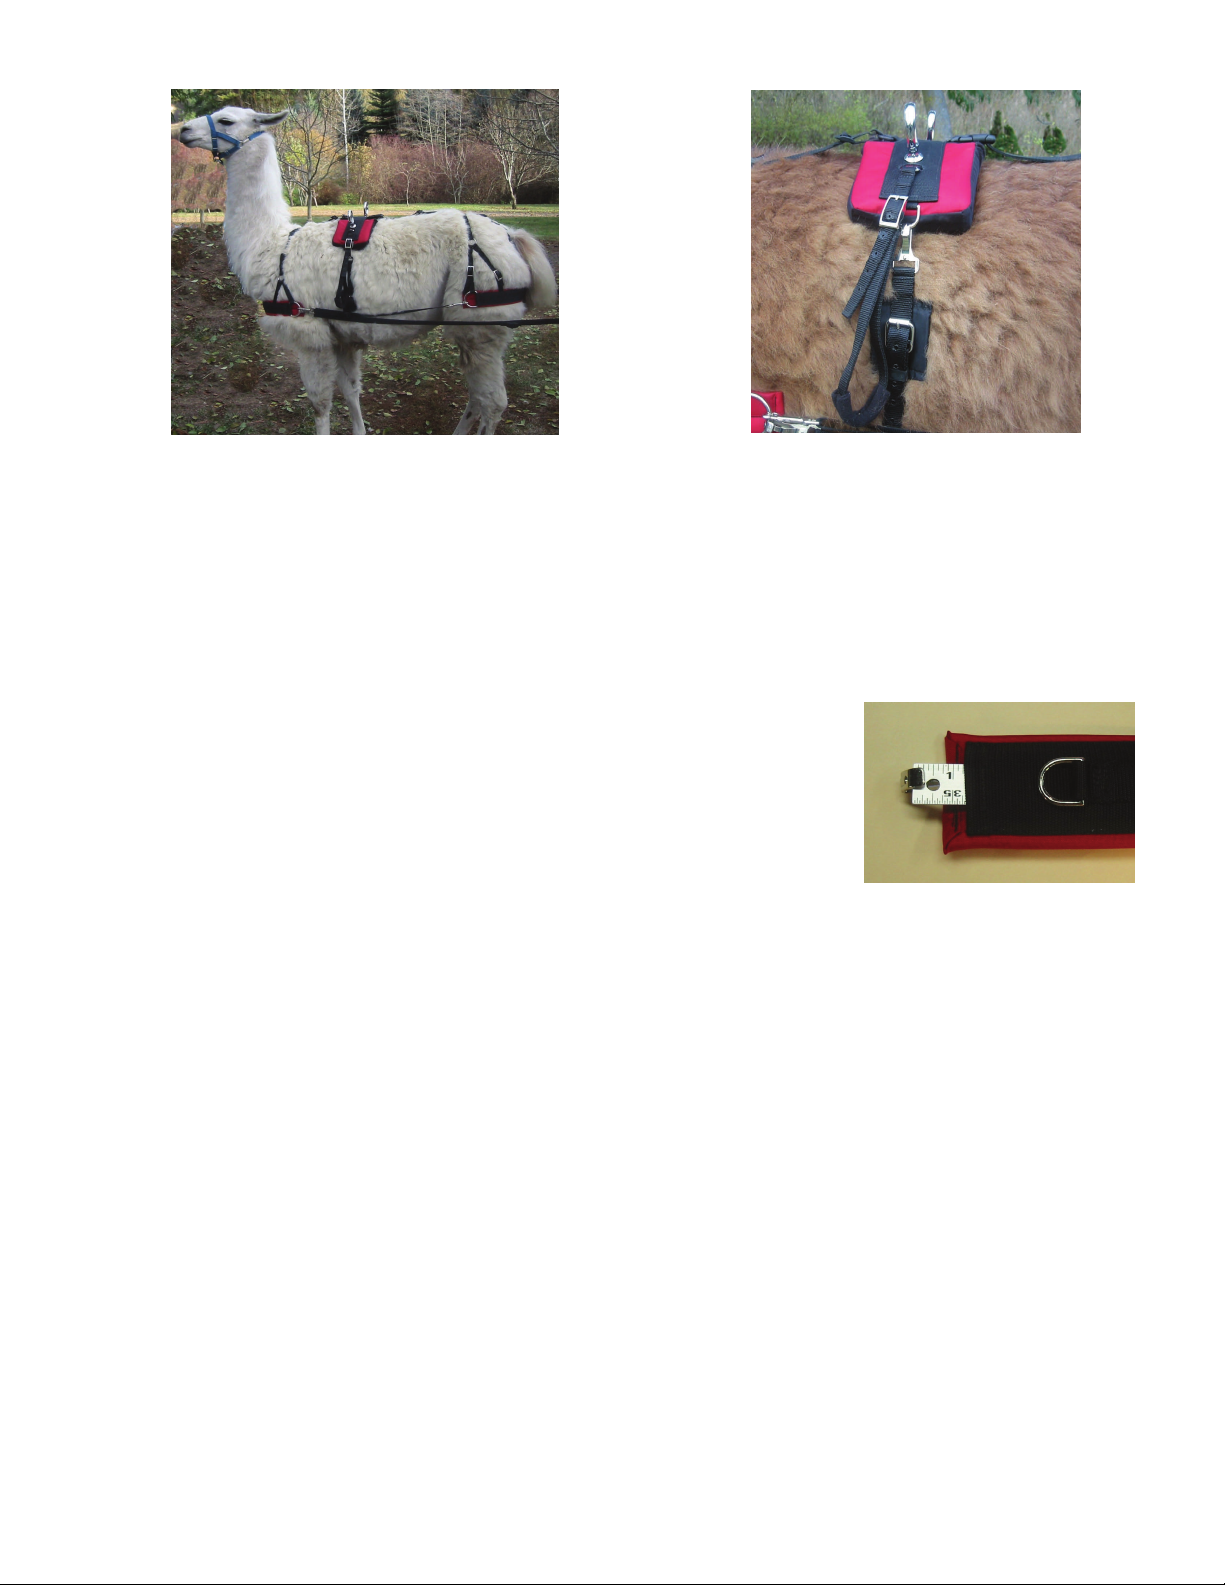
The Cinch is adjustable over a wide range. It is fastened at the left side with a 1”
nickel-plated steel roller buckle (with single tongue). A slip lock adjustment on the right
side will lengthen or shorten the cinch. Both ends of the cinch attach to the saddle with
a heavy duty spring clip. The belly pad slides on the cinch for easy centering and is
removable to facilitate shortening the cinch. If the belly pad needs to be removed, a
ruler can be pushed under the clip to aid in re-threading onto the cinch (see photo at the
right). The belly pad features four D-rings (one on the right and left for attaching the
hold down straps, and one in front and rear for team driving). When team driving, the
front D-ring connects to the draft collar with an adjustable strap, and the hold back
straps connect to the rear D-ring.
The Breast Strap is padded with 1/2” of felt for extra comfort for your llama. The neck strap has a sliding pad for
cushioning the strap over the spine. It also features a side release buckle and is adjustable with a slip lock for a neat
appearance.
Colors - All felt padding is ¼” thick and covered with fabric in your choice of color. This prevents the felt from picking
up debris which is more comfortable for your llama and keeps the harness cleaner. The 420d pack cloth is smooth
and lustrous, the 1000d nylon is textured and more durable. Check website for available colors. Free color samples
are available upon request.
All parts except the saddle are machine washable in mild detergent. Place in a pillow case and close with a rubber
band. Do not use bleach. Remove from washer immediately and hang up to dry. The saddle has steel plates under
the terrets, and therefore, submersion in water is not recommended.
The Traces are detachable from the breast strap for ease in changing lengths and laundering the breast strap. The
type of cart you have will determine how long your traces need to be. Typically, the Eagle Cart takes 60” traces, and
four-wheel carts take up to 84” traces. The oblong holes in the traces are four inches apart, and there is a Micro-
Adjuster in front of the first hole for more precise fitting if needed.
The Back Strap is adjustable with a slip lock and connects to the saddle with a streamline side release buckle. The
Crupper is removable from the back strap by a streamline side release adjustable buckle and has an additional side
release buckle to aid in getting it around the tail.
The hold back straps are long enough to thread through the “D” on the shaft and double back to clip both ends to the
breeching. This eliminates a jangle noise at the shaft.

The Flaming Star Llama Harness
Parts, Function, and Adjustment
1. Breast Strap - is attached to the traces which are attached to the cart at the single tree. This is
what pulls the cart along. The breast strap should not be so low that it interferes with the
movement of the front legs, and yet not so high that it pushes against the trachea making it
difficult for the llama to breathe. The height can be adjusted with the neck strap.
2. Neck Strap - holds the breast strap at the appropriate height (see #1). The neck strap pad is
centered on the top of the back to cushion the neck strap against the spine.
3. Surcingle - Sometimes called the saddle, this is the foundation of the harness. The buckle on
the left side is used to tighten snugly, with the slider on the right side used to adjust to
approximate length. The buckle is also padded for the llama’s comfort. The belly band slides
on the cinch for easy centering. The foam in the saddle will compress and adapt to the shape of
your llama as you tighten, so the tighter you get the cinch, the better it will stay in place.
4. Terrets - are the chrome rings on the surcingle that are the guide for the driving lines. Terret
extensions are the 1” webbing with side release buckle and O-ring that are attached to the
terrets. These can be used when training a new llama until he gets used to the angle of the
lines as they are threaded through the terrets. Once the llama drives well without the
extensions, they can be removed.
5. Shaft Loops - are attached to the surcingle and hold the shafts of the cart up. As the cart is
wheeled up behind the llama, place the ends of the shafts through this loop on each side and
adjust up or down so that the shafts are parallel to the ground. The shafts should never point
downwards.
6. Belly Pad - contains 2 D-rings. The right and left D-rings are used to secure the hold down
straps to the shafts.
7. Hold Down Straps - are located on the belly band to keep the shafts from tipping upward. They
should be adjusted somewhat snugly by wrapping twice around each shaft in front of and behind
the shaft loop and buckling back onto itself.
Terret Extensions can be used in training a new llama.

Disclaimer
Although every effort has been made to ensure the information within this manual is
accurate, Llama Hardware cannot be held responsible for any injury or property
damage that occurs in the course of using this equipment.
8. Back Strap - is attached to the surcingle and keeps the hip strap/breeching unit in
place. Adjust the length of the back strap so that the hip strap crosses directly over
the pelvic bone.
9. Hip Straps - are attached to the back strap to adjust the height of the breeching.
10.Crupper - is attached to the back strap and keeps it centered on the back bone
and prevents the back strap from moving forward. The crupper can be loose under
the tail as it is not used to stop the cart. That is the job of the breeching. The
crupper is detachable if your llama really objects to it.
11.Breeching - is attached to the hip straps and keeps the cart from running into the
llama. The height of the breeching can be adjusted by the buckles on the hip
straps. The breeching should be parallel to the ground and be placed over the area
where the testicles once were on a gelding. For intact males, the breeching must
be placed just below the testicles. For females, the breeching should go below the
genitals. The breeching strap should not be so low as to interfere with leg action.
12.Hold Back Straps - are attached between the D-rings on the breeching and the D-
rings on the shafts. For most llamas, the straps are long enough to loop through
the shaft ring and back onto the breeching with both snaps. This eliminates one
source of jangle noise when moving out. For larger llamas, the hold back straps
can be used without doubling over. When adjusted properly, the straps keep the
cart from running into the llama. Adjustment of the hold back straps and the traces
determine how much “play” the cart will have. The cart should be able to roll about
3 inches between the tightening of the two straps.
13.Traces - are attached to the breast strap “D” on one end and the single tree on the
cart at the other end. The traces should be adjusted so that the llama is neither too
far forward or too far back in the shafts. Ideally, the end of the shafts should be just
in front of the llama’s shoulders so that the shaft end won’t poke the llama when he
turns sharply. You also want the llama far enough forward in the shafts to prevent
the llama’s back legs from hitting the cart at a trot or lope. The proper traces length
will be determined by the type of cart you have. A micro-adjuster in front of the first
If unfamiliar with fitting the harness or training your llama to drive, the training DVD
“Harness the Fun” by Jim & Amy Logan is highly recommended. It covers training
the llama, fitting the harness to the llama, and the cart to the harness, how to select
llamas and equipment, and much more.

Quick Start
Place the harness on the llama. Tighten the surcingle making sure the belly band is centered on
the animal. Adjust the height of the breast strap. Adjust the length of the back strap. Adjust the
height of the breeching. To get the llama used to the harness before connecting to the cart, the
hold back straps can be clipped to the shaft loops, and the traces can be woven through the
terrets to keep them from dragging the ground.
Once the llama is ready for the cart, insert the shafts through the shaft loops, attach the traces to
the single tree, and attach the hold back straps to the metal loop on the underside of the shafts.
The hold back straps should be adjusted so that when the cart is rolled backwards and puts
pressure on the breast strap, there should be about three inches of play between the breeching
and the llama’s back legs. Make sure that the llama is standing squarely between the shafts to
perform this adjustment. Fasten the hold down straps to the shafts.
If you have any questions, please call:
Richard Galloway @ Llama Hardware.
Your satisfaction is important to me. I can
be reached by calling 1-406-890-0106 or
Copyright 2014 Llama Hardware
Table of contents
Other Flaming Star Pet Care Product manuals


