Flash-e-Vapor V4.5 User manual

V4.5/V4.5L
Instruction manual
english

Flash-e-Vapor V4.5/V4.5L — Instruction
manual
english
2
The Flash-e-Vapor V4.5/V4.5L is a fiber evaporator where the user has
to wind his own coils.
Both rebuildable atomizers come with a precision ground connecting
piece made from borosilicate 3.3 glass. The scope of delivery also includes
a connecting piece made from stainless steel and polycarbonate. The
service kit with O-rings, screws and winding material makes the set
complete.
The evaporator consists of stainless steel and is manufactured and
assembled entirely in Germany. All parts will be cleaned prior to the delivery
without leaving any residues. The development of the Flash-e-Vapor focused
on the functionality and the handling. Its design is characterised by
functional gripping aids such as knurls and grooves. The tank is filled without
the help of tools and without special vials or needles. Since the design of the
Flash-e-Vapor allows it to create an unusually good flash, we recommend
using e-liquids with a moderate nicotine content.
IMPORTANT!
Please carefully read this instructions manual before using your
Flash-e-Vapor V4.5/V4.5L rebuildable atomizer.

Flash-e-Vapor V4.5/V4.5L — Instruction
manual
english
3
The Flash-e-Vapor V4.5/V4.5L is a rebuildable atomizer, which has been
designed exclusively for the use with e-liquids.
Before use, it is necessary to wind a coil from suitable resistance wire
(e.g. Kanthal A or NiCr heating wire as well as a suitable wick
( Ortmann-Schnur, organic cotton (e.g. muji), silicate fiber) and to attach it
according to the instruction manual (p.6) .
For the liquid supply from the tank, you must attach two wicks from the
included cotton cord and cut them according to the instruction manual
(p.7).
Once a new coil has been attached, it is important to measure the
resistance of the coil, which should be between 1.0 —2.5 Ohm. For this
purpose use a multimeter, a suitable battery mount with resistance
measurement or an especially designed resistance meter from a specialist
store for e-vaporizers.
Should you detect a short circuit, do not operate the evaporator under any
circumstances. Short circuits may damage the battery mounts and/or
batteries. Correct the coil in this case or create a new coil!
IMPORTANT!
Use only liquids (e-Liquids) that are intended exclusively for the use in
e-cigarettes.
IMPORTANT!
Use only suitable battery mounts from specialist e-evaporator stores for your
Flash-e-Vapor V4.5/V4.5L.
You should use only electronically controlled devices.

Flash-e-Vapor V4.5/V4.5L — Instruction
manual
english
4
Scope of delivery Flash-e-Vapor V4.5/V4.5L
1x socket
1x evaporation chamber (airscrew 1.2 mm mounted)
1x mounted tank with borosilicate 3.3 glass (precision ground)
1x connecting piece polycarbonate (not suitable for liquids containing menthol and triacetin)
1x connecting piece stainless steel
2x airscrews (each 1x 1.4 mm, 2.1 mm)
1x original drip tip
1x accessories (0.5 m Ortmann fiber, 0.5 m 0.32 mm Kanthal A wire , 0.25 m cotton wick, 1x needle)
1x screw-in tool for air duct (1 cent)
1x Service Kit V4.5-V4.5L
Content:
3x O-ring 18x1 chamber, socket
2x O-ring 19x1.5 tank parts
1x O-ring 10.5x1 air duct top
2x O-ring 6x1 air duct bottom, drip tip
2x screws M2x3 heating wire fastener
Unpack with care!
There are small parts in the packaging!
V4.5
V4.5L
V4.5L
V4.5

Flash-e-Vapor V4.5/V4.5L — Instruction
manual
english
5
Technical data V4.5/V4.5L
Diameter: 23mm
Length (without drip tip): 60mm / 76mm
Weight (empty): 95g / 100g
Capacity: approx. 6ml / 9ml
elecr. threaded connection: 510 (adjustable)
Material: Stainless steel
Borosilicate 3.3 glass
POM
(Polyoxymethylen)
PC (Polycarbonate)
PEEK (Polyetheretherketone)
Cleaning - Flash-e-Vapor V4.5/V4.5L
The tank parts and the evaporation chamber of your Flash-e-Vapor
V4.5/V4.5L can be cleaned in an ultrasound bath.
The socket is tightly screwed in place but should not be put into the
ultrasound bath in order to retain its tightness.
It is usually sufficient to clean the parts of the Flash-e-Vapor V4.5/V4.5L under
warm running water using a brush (e.g. toothbrush) and some detergent.
Afterwards, rinse well under running water and dry all parts well.
In order to make the assembly easier and to increase the life of the O-rings,
we would recommend moistening them with a little bit of liquid.
Flash-e-Vapor V4.5/V4.5L — Instruction
manual
english
6
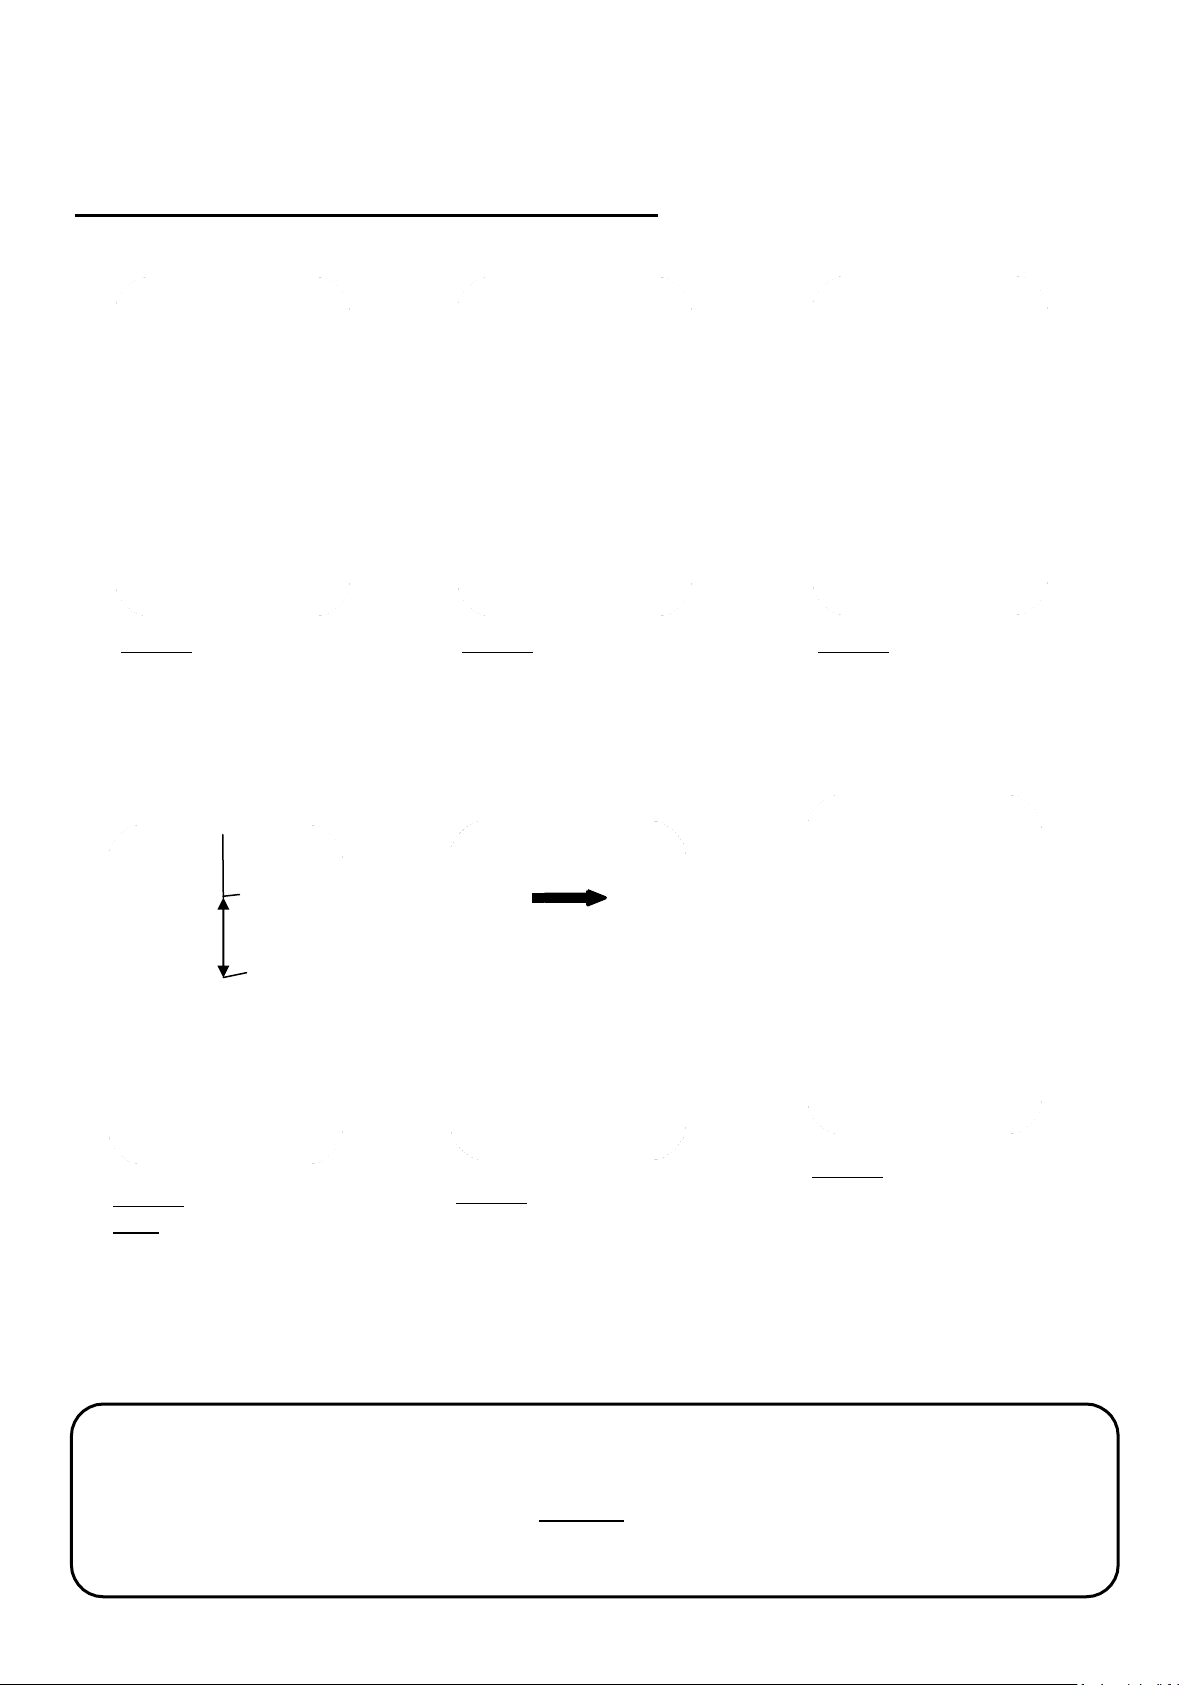
Creating and attaching a coil (example)
Picture 1:
Coil up 6 windings with 0.32
Kanthal A wire using a winding
tool with a 2.5mm diameter.
Picture 4:
Note: The gap between the upper
edge of the coil and the bottom of
the socket may not exceed 8.5mm
as it would otherwise come into
contact with the chamber
bottom, which might result in a
short circuit.
Picture 2:
Place the wire as shown
underneath the two pole
screws. Then carefully tighten
them and remove the winding
tool.
Picture 5:
Use a wire loop to pull a
double Ortmann cord
through the coil.
Picture 3:
Use a wire cutter or any other
suitable tool to cut the
projecting wire ends flush with
the screw heads.
Picture 6:
Now cut the Ortmann cord flush with
the outer edge of the socket bottom
and moisten well with liquid.
In order to absorb any excessive liquid
from the socket bottom, we
recommend placing one strand of the
cord on the socket bottom to act as a
wick.
The mentioned materials and wire thicknesses are only examples; other heating wires, different
numbers of windings as well as larger/smaller diameters are also possible.
Caution!
The coils get very hot during the operation!
Risk of burns when the coil is exposed!!

Flash-e-Vapor V4.5/V4.5L — Instruction
manual
english
7
Cutting and inserting wicks (cotton cord)
Wind the socket of your Flash-e-Vapor V4.5/V4.5L.
Cut two wicks of approx 10mm from the included
cotton cord.
Attach the evaporator chamber to the socket.
Make sure that the guide pin of the socket is inserted
into the groove of the evaporator chamber. Now insert
the two wicks into the wick holes of the evaporator
chamber and slightly press down until they rest on the
wick.
Now cut the projecting part of your wicks flush with
the evaporator chamber using scissors or a wire cutter.
Moisten the wicks with a little bit of liquid to ensure
the immediate functioning of the wicks. Screw the
socket with the evaporator chamber to the filled tank.

Flash-e-Vapor V4.5/V4.5L — Instruction
manual
english
8
Filling e-liquid
For the filling of the tank, the tank has to be
turned upside down.
Maximum quantities for an empty tank:
-
Flash-e-Vapor V4.5: 6 ml
-
Flash-e-Vapor V4.5L: 9 ml
Make sure that the liquid is not above
the upper edge of the arched / circular
recesses in the tank bottom cap. Now
unscrew the tank while it is upside
down.
Airscrews—draft resistance
By screwing in airscrews of different sizes,
the draft resistance or the air volume will
be adjusted individually. The scope of
delivery includes the following airscrews:
Bore 1.2mm - strong draft resistance
Bore 1.4mm - medium draft resistance
Bore 2.1mm - light draft resistance
Our online-shop also sells airscrews with the
bores 1.6mm and 1.8mm.
max.
fill

Flash-e-Vapor V4.5/V4.5L — Instruction
manual
english
9
Changing the connecting pieces
In order to change the connecting piece,
unscrew the air duct from the tank top cap
using a 1 cent coin.
Remove the tank bottom cap together with the
air duct. Now remove the connecting piece from
the tank to cap.
Insert the new connecting piece part into the
tank to the top cap, attach the tank bottom cap
together with the air duct and fasten.
Make sure that the connecting piece is introduced
into the grooves of the top or bottom cap.
In the delivery state, the tank is completely
assembled with a connecting piece made from
borosilicate 3.3 glass. Optionally, you can install
the included connecting pieces made from
stainless steel or polycarbonate.

Flash-e-Vapor V4.5/V4.5L — Instruction
manual
english
10
Adjusting the plus pole
Some battery mounts may require you to adjust
the plus pole to fit the evaporator connection.
Use a suitable screwdriver to unscrew or screw
in the plus pole screw in the 510 connection
with a maximum of 1-2 rotations.
IMPORTANT!
During the operation of tempertature-controlled Mods, the
adjustable plus pole must be completely screwed into the 510
connection.
Otherwise, it might lead to a malfunction.

This manual suits for next models
1
Table of contents


