manuals.online logo
Brands
  1. Home
  2. •
  3. Brands
  4. •
  5. Flexco
  6. •
  7. Tools
  8. •
  9. Flexco AMIGO-1000-RETURN-SIDE-KIT User manual

Flexco AMIGO-1000-RETURN-SIDE-KIT User manual

–1–
Novitool®Amigo™Splice Press
Return Side Splicing
Instructions
Heat Shield Guard Adapter Kit contents.
1. Magnet/Extention Plate
2. 2 mm, 2.5 mm, 3 mm hex keys
3. Tooth lock washers
4. M3 button head screws
5. Pivot pin adapters w/ M3 Flush Head screws and
pre-installed Set Screws
e Amigo™ is designed to cut and splice, thermoplastic homogeneous (monolithic) conveyor belts. Belt ends are
prepared for splicing using the integrated belt cutter. Interchangeable templates ensure accurate cut length and pitch of
positive drive belts. Preheating belt ends inside enclosed guarded heat zone ensures quality repeatable splices at a wide
range of ambient temperatures. e integrated contactless heating allows for controlled melt depth of belt ends.
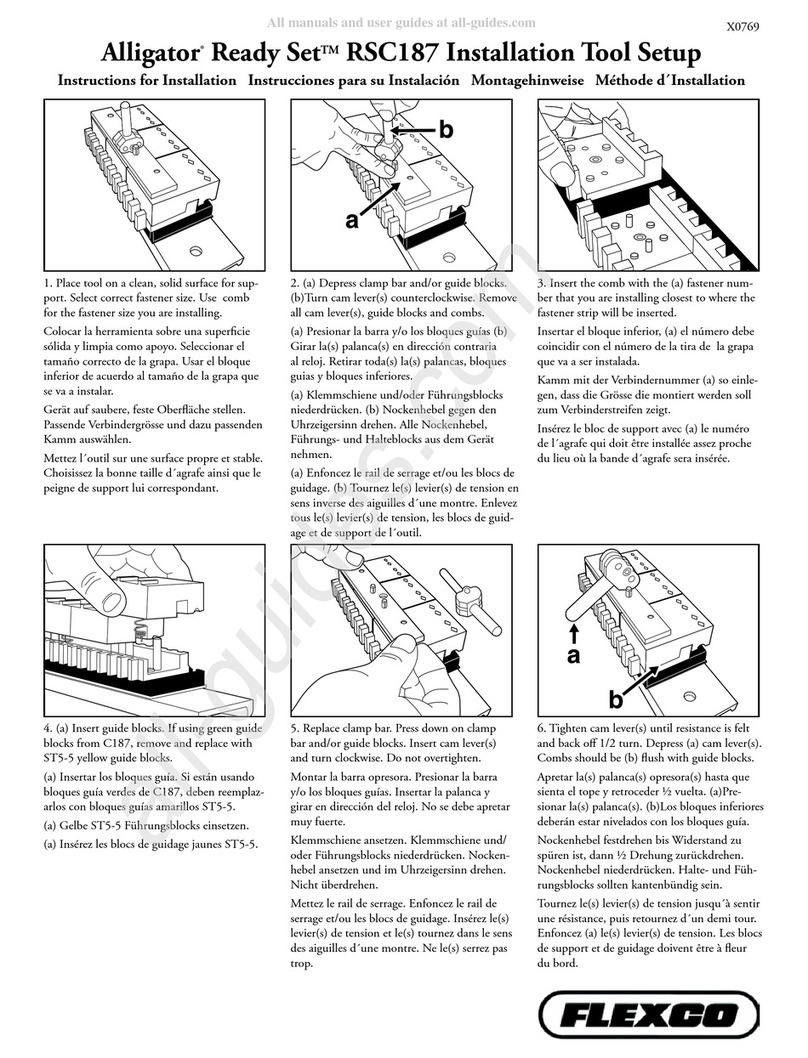
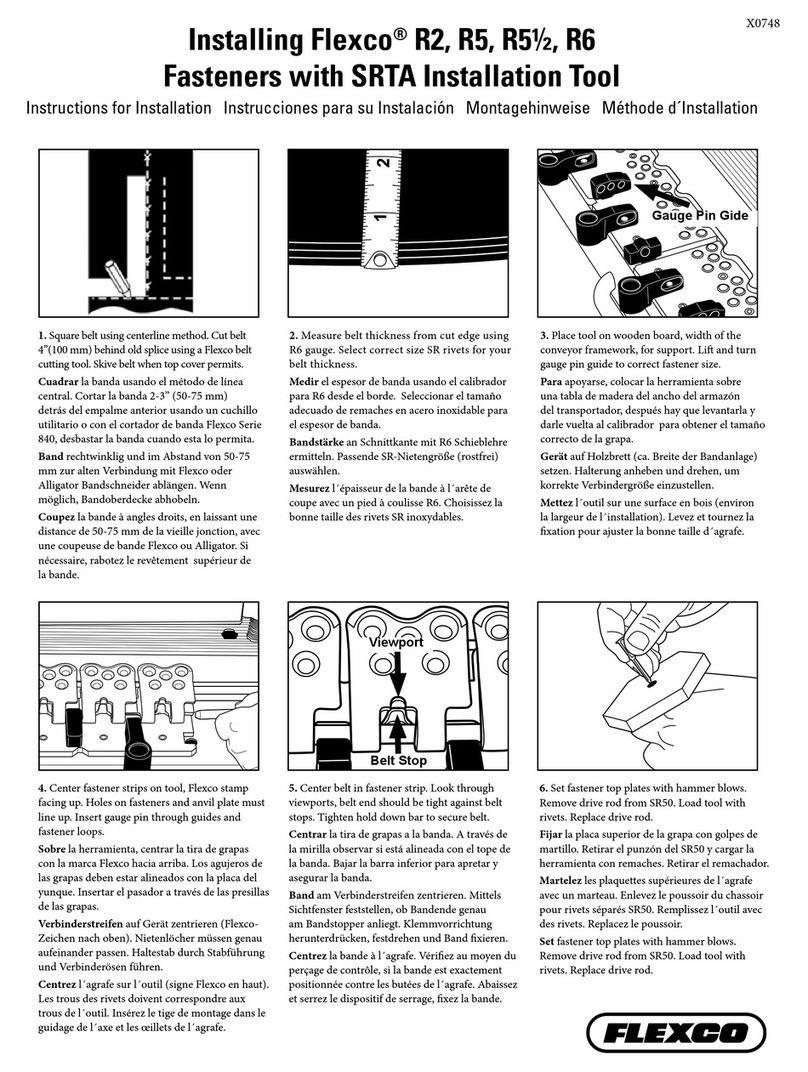
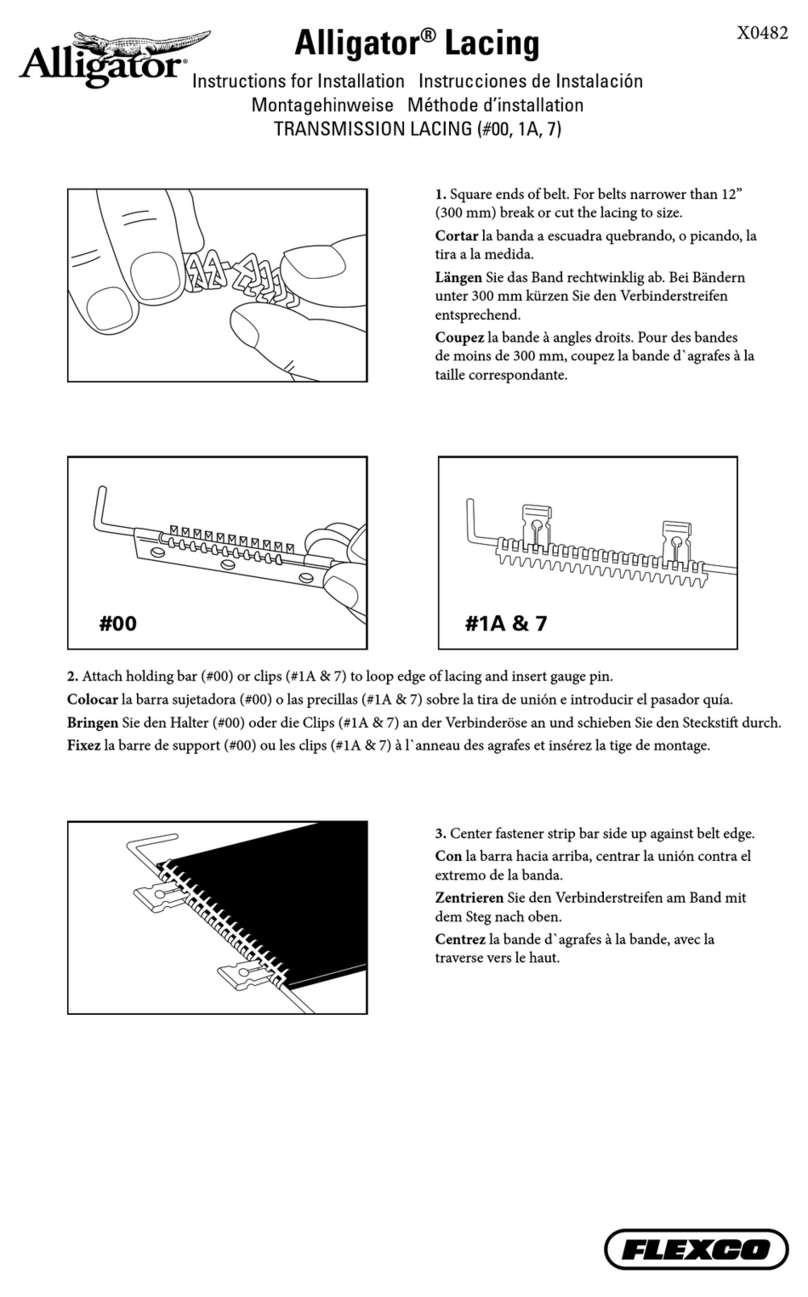
e Return Side splicing kit includes components to enable splicing with the Amigo splice press on the return side
of a conveyor.
If your Amigo Guard presently possess the magnet extension shown in the Heat Shield Guard Adapter Kit 1,
proceed to “ Return Side Operation Instructions”, no guard modication is required.
IMPORTANT
Initial Setup - Heat Shield Guard Adapter & Magnet Installation
(107321AMIGO-RS-GUARD-ADAPTER-KIT)
Amigo™ Return Side Kits
ITEM CODE ORDERING NUMBER
107322 AMIGO-1000-RETURN-SIDE-KIT
107323 AMIGO-625-RETURN-SIDE-KIT
107321 AMIGO-RS-GUARD-ADAPTER-KIT*
*Contact Flexco Customer Service with your Amigo Serial Number
to determine if this kit is required.
Amigo Return Side is not compatible with the following belt templates:
08710, 08776, 08847, 09736, 09737, 09739
Replacement Kits
ITEM CODE ORDERING NUMBER
107324 AMIGO-1000-RS-FLAT-TMPLT
107325 AMIGO-625-RS-FLAT-TMPLT
107164 AMIGO-625-RS-CLAMPBAR
107183 AMIGO-1000-RS-CLAMPBAR
12
34
5
1a. First, replace the magnet. Using the 2 mm hex key, remove the two
fasteners that secure the magnet to rear of the heat shield guard.
Discard the magnet and fasteners.
www.flexco.com –2–
Novitool®Amigo™Splice Press Return Side Splicing
3a. On new pivot pin adapter, using the included 2.5 mm hex key,
remove the single ush head screw from the adapter. Slide adaptor
onto guard edge securing the ush head fastener.
3b. On the inner side of the adapter using the 2 mm hex key, and with
the adapter post still oriented at the highest (12 o’clock) position,
tighten the two set screws (set screws are supplied installed in
the adapter).
3c. Repeat this process on the opposite end of the heat shield guard.
1b. From the Heat Shield Guard Adapter Kit, install the
magnet/extension plate subassembly using the 2 M3 button
head screws and 2 internal tooth lock washers as shown.
Tighten with the 2mm hex key.
2. Using the included 3 mm hex key, remove the current pivot pins on
both sides of heat shield guard and discard fastener and pivot pin.
Note: If pin spins, hold in place with pliers.
–3–
Novitool®Amigo™Splice Press Return Side Splicing
Note: ere should be a slight gap between the heat shield guard and the belt.
e RST indication on the timer will remain lit unless the heat shield guard is correctly installed and emitter is in the raised position.
If the RST indicator is still lit aer the heat shield guard is correctly installed and the emitter is in the raised position, adjust the fasteners
on the magnetic extension plate on the heat shield guard.
4. Install the heat shield guard and ensure the magnetic engagements are secure and seated.
Rotate the actuator lever to move the emitter to the raised position.
e Amigo™ is designed to be easily used by your on-site personnel.
Return Side Operation Instructions
1. Insert both of the RS-FLAT-TMPLTs into platens (flat wide
templates with dowel pins at each end).
Note: Friction tape is applied to keep the belt in position.
2a. Rotate actuating lever to the cut/load position and rotate locking
pin into locked position.
2b. Engage the cutter crank and drive cutter blade to opposite end of
press from controls.
2c. Position the belt with the positive drive lugs facing up.
For full instructions refer to the Amigo (TM)
Safety and Operation Manual x3412.
For additional questions, please contact Flexco.com.
Novitool®Amigo™Splice Press Return Side Splicing
3. Position the belt template inverted to cover the positive drive lugs.
e splice arrow label points inwards, towards the action being
executed (cutting or splicing).
Note: Ensure the proper template drive lug grooves are engaged
with the belt lugs.
4a. Position the return side clamp bar over the belt template with
the splice arrow decals pointing towards direction of action to be
executed (cutting or splicing) and tighten clamp thumb nuts.
For operator safety during cutting process, engage the second clamp
bar and loosely tighten clamp thumb nuts.
4b. Using the cutter crank, draw the cutting blade towards the blade
housing, to create a straight belt edge at the proper pitch position.
5a. Repeat the process of cutting the opposite belt edge to achieve
another straight belt edge and leave this belt clamped in position
aer cutting.
5b. Load the other prepared belt with the positive drive lugs facing up.
5c. Position the belt template inverted covering, and properly engaging,
the positive drive lugs. e splice arrow label should point inwards
towards the action being executed (cutting or splicing).
6a. Position the clamp bar over the belt template with the splice arrow
decals pointing towards the direction of the action to be executed
(cutting or splicing) and tighten the clamp thumb nuts.
6b. As per the standard splicing process, pull out and rotate the cutter
locking pin to release it from the locked position and rotate the
actuating lever to ensure the belt edges are uniformly engaged.
6c. Use the 2mm ball driver to determine by feel that both edges are
aligned vertically.
6d. Follow standard Amigo splice press procedures for remaining steps.
2525 Wisconsin Avenue • Downers Grove, IL 60515-4200 • USA
Tel: (630) 971-0150 • Fax: (630) 971-1180 • E-mail: info@flexco.com
Visit www.flexco.com for other Flexco locations and products.
©2023 Flexible Steel Lacing Company. 05/05/23. For reorder: 104045

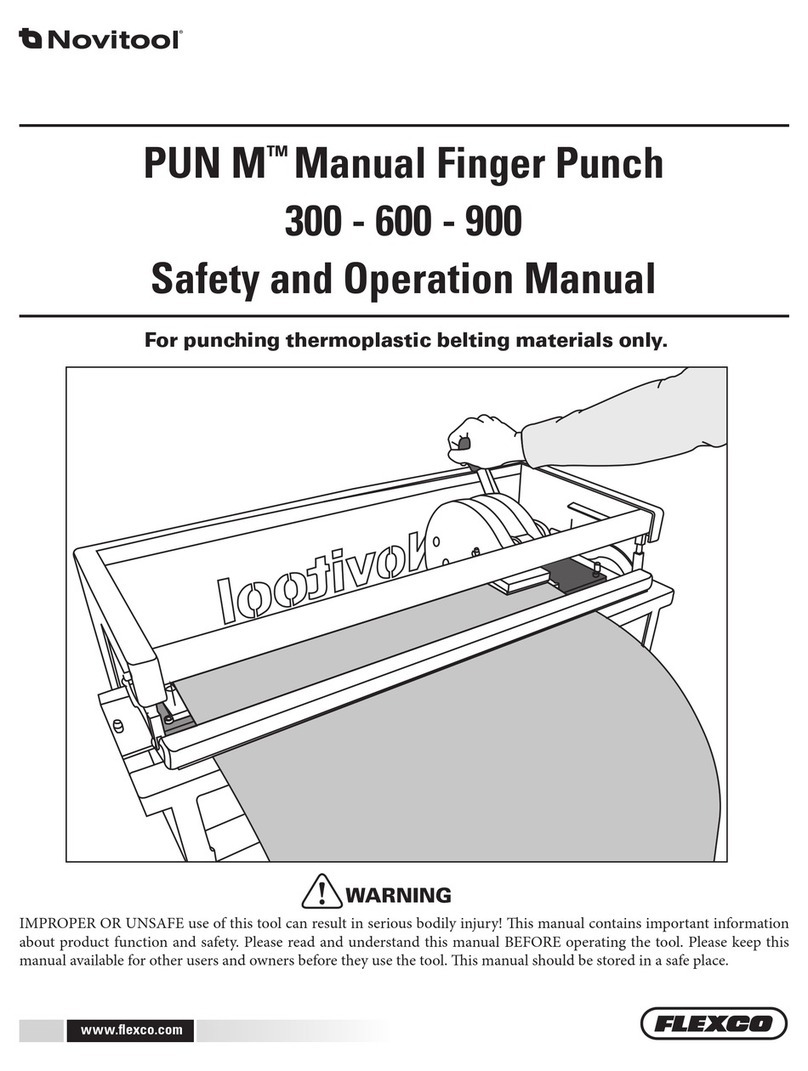
This manual suits for next models

5

Other Flexco Tools manuals

Flexco FSK2–XL User manual

Flexco

Flexco FSK2–XL User manual

Flexco MSRT Guide

Flexco

Flexco MSRT Guide

Flexco Roller Lacer User manual

Flexco

Flexco Roller Lacer User manual

Flexco Alligator Series Guide

Flexco

Flexco Alligator Series Guide

Flexco Novitool PUN M NDX Series Guide

Flexco

Flexco Novitool PUN M NDX Series Guide

Flexco R2T Guide

Flexco

Flexco R2T Guide

Flexco Alligator Lacing Guide

Flexco

Flexco Alligator Lacing Guide

Flexco Alligator Ready Set RSC187 Guide

Flexco

Flexco Alligator Ready Set RSC187 Guide

Flexco SRTA Guide

Flexco

Flexco SRTA Guide

Flexco Novitool PUN M 300 Guide

Flexco

Flexco Novitool PUN M 300 Guide

Flexco MSRT User manual

Flexco

Flexco MSRT User manual

Flexco FSK2 User manual

Flexco

Flexco FSK2 User manual

Flexco Alligator Ready Set RSC187 Guide

Flexco

Flexco Alligator Ready Set RSC187 Guide

Flexco Alligator Staple Gold Class Programming manual

Flexco

Flexco Alligator Staple Gold Class Programming manual

Flexco FSK2MP Installation manual

Flexco

Flexco FSK2MP Installation manual

Popular Tools manuals by other brands

U.S. General 47520 Assemble and operating instructions

U.S. General

U.S. General 47520 Assemble and operating instructions

Power Tec 71685 instruction sheet

Power Tec

Power Tec 71685 instruction sheet

Master cool 71700 operating instructions

Master cool

Master cool 71700 operating instructions

Welbilt 483700 owner's manual

Welbilt

Welbilt 483700 owner's manual

Blue Line FLATBOX HANDLE Series quick start guide

Blue Line

Blue Line FLATBOX HANDLE Series quick start guide

parktool HTR-1 instructions

parktool

parktool HTR-1 instructions

Makita DGP180 instruction manual

Makita

Makita DGP180 instruction manual

MAULE Vintage M-4-180V Maintenance manual

MAULE

MAULE Vintage M-4-180V Maintenance manual

Novatek VSE Series operation & maintenance

Novatek

Novatek VSE Series operation & maintenance

Gage Bilt GB745SH-12 Original instructions

Gage Bilt

Gage Bilt GB745SH-12 Original instructions

Hitachi SV12SF - 4-3/8" Palm Grip Orbitalsander 1.4Amp 28... manual

Hitachi

Hitachi SV12SF - 4-3/8" Palm Grip Orbitalsander 1.4Amp 28... manual

Textron Greenlee 441 Series instruction manual

Textron

Textron Greenlee 441 Series instruction manual

WAGNER PAINTMATE PLUS manual

WAGNER

WAGNER PAINTMATE PLUS manual

Berner BACAGXB 18V Original instructions

Berner

Berner BACAGXB 18V Original instructions

Sealey TC970 manual

Sealey

Sealey TC970 manual

Falltech For Tools User instruction manual

Falltech

Falltech For Tools User instruction manual

Makita HR3540C instruction manual

Makita

Makita HR3540C instruction manual

Sunsight AAT30 quick start guide

Sunsight

Sunsight AAT30 quick start guide

manuals.online logo
manuals.online logoBrands
  • About & Mission
  • Contact us
  • Privacy Policy
  • Terms and Conditions

Copyright 2025 Manuals.Online. All Rights Reserved.